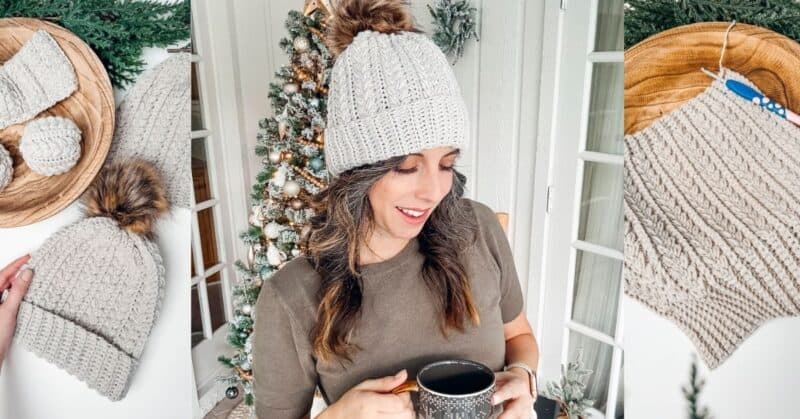
Snowy Puff Crochet Hat Pattern
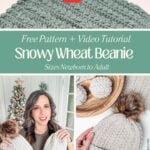


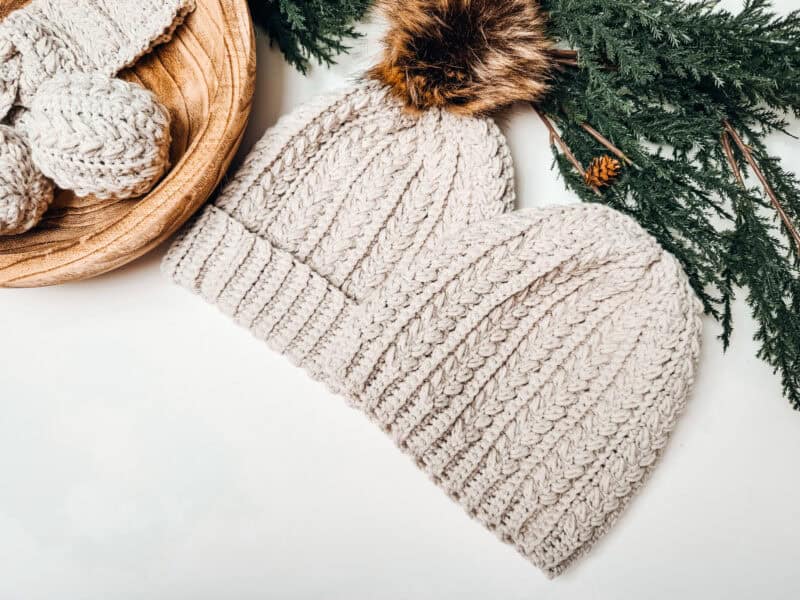
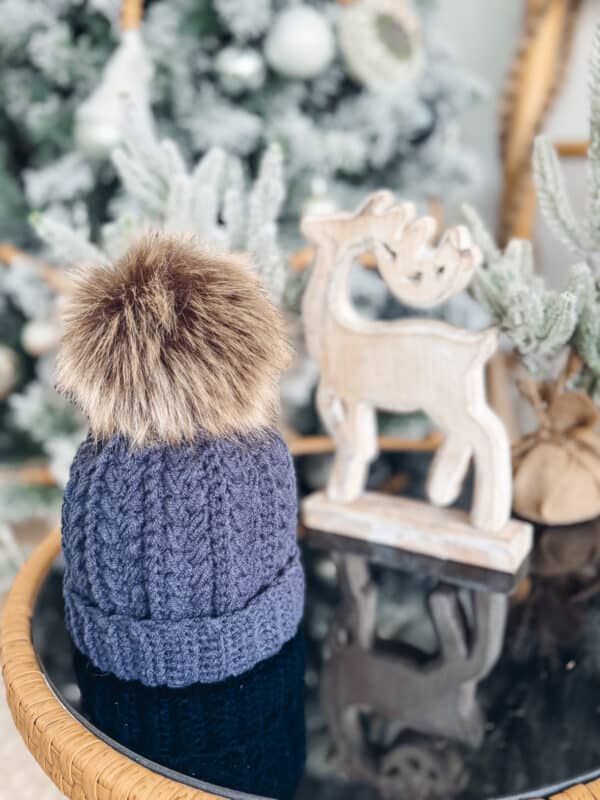
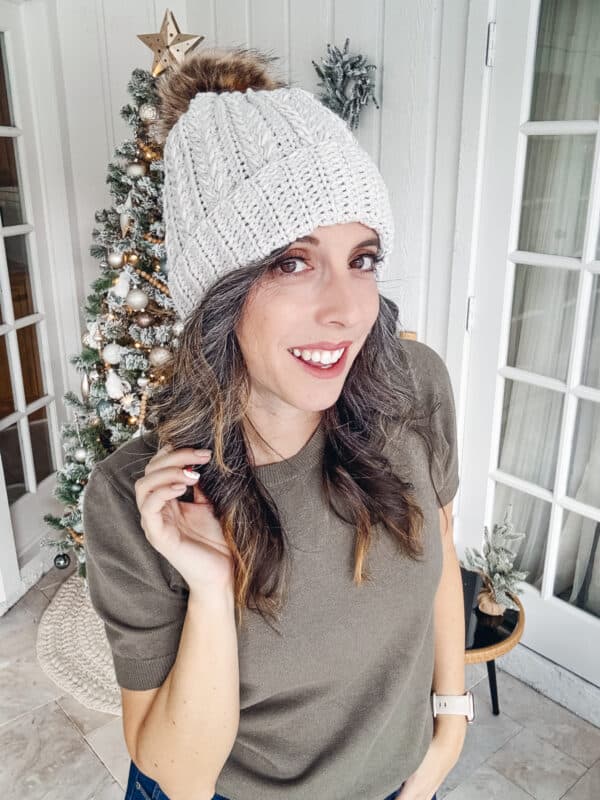
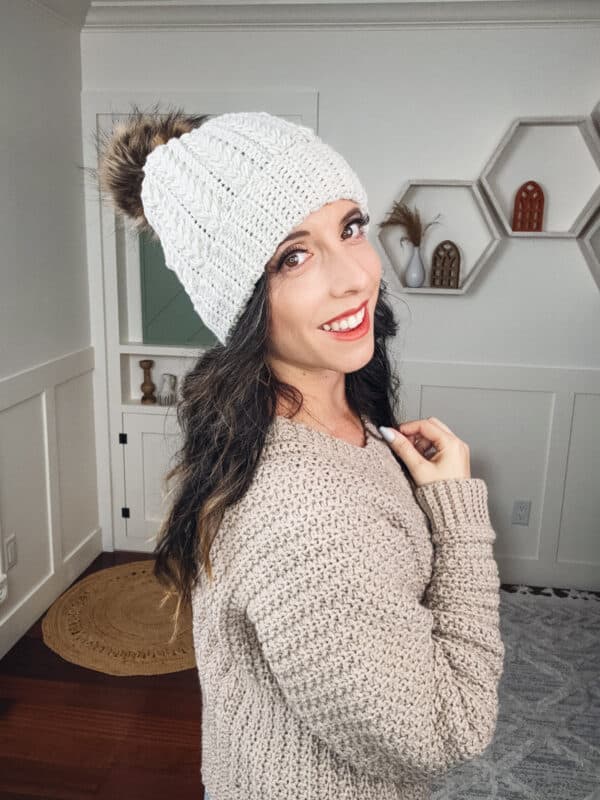
The Snowy Puff Crochet Hat is a charming accessory perfect for keeping warm during chilly days! This beautifully crafted hat is crocheted flat and then seamed, creating a stunningly textured look that adds flair to any winter outfit. For a cozy set perfect for gifting or keeping, make a pair of Winter Wheat Flat Mittens to match your hat!
Disclosure: This post contains affiliate links. Please read my disclosure for more info.
The pattern includes sizes from Newborn to Adult Large, making it an ideal gift for the whole family. Whether you’re a seasoned crocheter or a beginner, this easy-to-follow pattern will guide you in creating a cozy, stylish hat that showcases your crochet skills. And there’s a step-by-step tutorial for this gorgeous Wheat Stitch, too! For more gorgeous textured hat styles, check out the Mellow Textured Hat and the Macchiato Beanie! (And if you want to make a cozy snowy set, whip up a pair of Snowdrift Slipper Socks!)
Crochet Supplies
Yarn
Lion Brand Color Theory
100% Acrylic, 246yds/100g
Colorway Shown: Moonbeam
Yarn Quantities
70 (105, 115, 135, 160) (180, 195, 205) yds – without brim
1 ball for each size
95 (140, 155, 180, 215) (240, 260, 275) yds with brim
1 ball for sizes newborn to child
2 balls for fold-up brim for sizes teen to large adult
Yarn Substitutions
Brava Worsted
100% Premium Acrylic, 218yds/100g
Mighty Stitch
80% Acrylic/20% Superwash Wool 208yds/100g
Swish DK
100% Fine Superwash Merino Wool 110yds/50g
Heatherly Sport
80% Acrylic, 20% Merino Wool, 328yds/100g
Remember always to check the gauge and drape when substituting yarns.
Crochet Hook
Size US H (5.0mm) Crochet Hook or hook to obtain gauge.
Notions
Scissors
Yarn Needle
Removable Stitch Marker
Pompom
Skill Level
Advanced Beginner
What you’ll love about this pattern.
🩶 Worked Flat – This crochet hat is made as one flat rectangle, then seamed to finish.
🩶 Simple Stitch Repeat – The gorgeous texture of this hat is made with delightful puff stitches and single crochets in a simple repeat, so it’s perfect for an evening of Netflix and Crochet!
🩶 Lots of Sizes – The pattern is available in sizes from Newborn to Adult Large, making it perfect for everyone you know! This hat is perfect for gifting (or keeping), donating, and craft fairs.
Sizes
Newborn (Baby, Toddler, Child, Teen) (Adult Small, Medium, Large)
To fit Head Circumference:
12-14″ (14-16″, 16-18″, 18-20″, 20-22″) (21-22″, 22-23″, 23-24″)
Abbreviations
blo – back loop only
ch – chain
RS – right side
sc – single crochet
sl st – slip stitch
st(s) – stitch(es)
WS – wrong side
Gauge
17 sts and 12 rows = 4″ by 4″ in st pattern.
How to Crochet A Gauge Swatch
Working a gauge swatch will let you know if you will have the correct sizing for this pattern. It will also help you practice the stitches used in this project and improve your stitch work for a flawless look.
Are you struggling to match the gauge? Check out the blog post on What is Crochet Gauge and How To Fix It
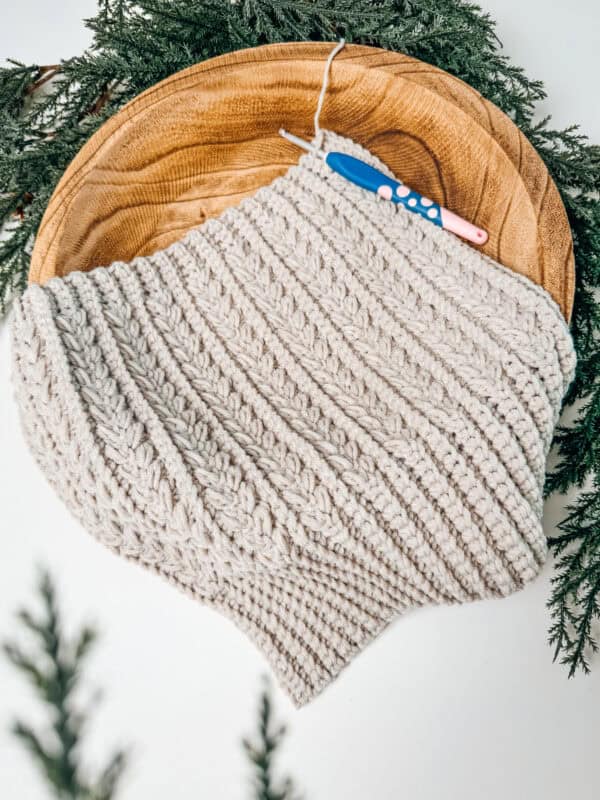
Construction
Ready for an easy-peasy project? If you can make a rectangle, you can make this hat! The Snowy Puff Hat is worked flat in rows from the side across. And the best part about this design is that the decreases of the crown and the ribbing will be worked at the same time! Once we’ve made the rectangle, we’ll join the edges, and use the starting tail to close up the top of the hat. The Autumn Wheat Hat and matching Mittens are constructed in a similar fashion!
Special Stitches
Puff Stitch: Yarn over and insert your hook into the stitch/space. Yarn over again and pull up a long loop. Yarn over and insert your hook into the same stitch/space. Yarn over again and pull up a long loop (5 loops on the hook). Yarn over and pull through the first 4 loops, yarn over and pull through remaining loops.
Pattern Notes
📌 The chain 1 at the beginning of the row does not count as a stitch.
📌 Using a stitch marker at the beginning of each row is recommended.
📌 Work the first row in the back bumps of the chains.
📌 Keep the blo sc sts loose for the ribbing. Making them too tight will result in a hat that doesn’t fit well.
📌 The instructions and stitch counts are given for regular brim, with the fold-up brim in brackets ( ).
Brim & Body Colors
Want to mix up the brim and body colors? Simply use one color for the amount of brim sts, and another color for the body. Since this is worked in rows it’s easy to switch back and forth between the colors without needing to fasten off.
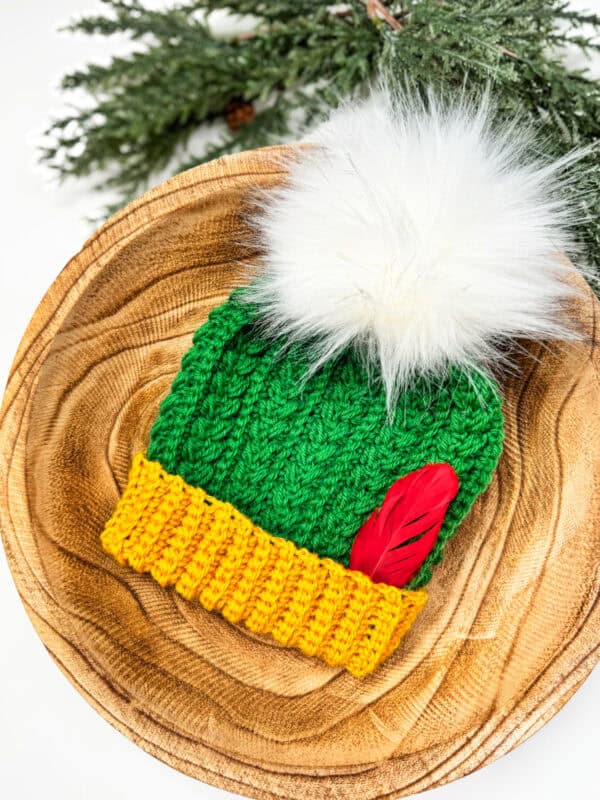
I had a fun time making this hat for my nephew in the Wool of the Andes Superwash colorways Grass and Semolina. And topped it off with a Red Crafting Feather and White Pompom.
Subscribe & Like
With Subtitles
Video Tutorial for the Snowy Puff Hat
Relax & Crochet
Upgrade to the Printable PDF
Beautifully formatted to print and relax while crocheting. The paid pattern includes:
The Ad-Free PDF can be purchased on Etsy or Ravelry.
Click the box below to unlock this exclusive subscriber content for free. Add your email and create a password. If you are having trouble, reset your password or login to the Grow Portal.
I’m thrilled to share this amazing crochet pattern with you! Please don’t copy, paste, or distribute this pattern. Prefer an ad-free experience? Purchase a digital PDF file for a small fee from one of my online stores. I appreciate your support and readership. You are why I can keep doing what I love and sharing it with others. Thank you from the bottom of my heart.
Written Crochet Pattern Instructions
Join The Kindest Community
Join our vibrant community of crafters on Facebook today. Whether you enjoy crafting with others or simply have burning questions, we’ve got you covered – join us now!
Baby
Row 1 (WS):
Ch 25 (35), sc in the 2nd ch from the hook and in each st across, turn. | 24 (34) sts
Row 2 (RS):
Ch 1 (turning ch does not count as a st throughout), blo sc in each st across, turn.
Row 3:
Ch 1, blo sc 4, [skip the next st, sc in next, work a puff st into the skipped st] work until the last 4 (10) sts, blo sc in last 4 (10) sts, turn.
Row 4:
Ch 1, blo sc in first 4 (10) sts, [skip the next st, sc in next, work a puff st into the skipped st] work until the last 4 sts, blo sc in last 4 sts, turn.
Rows 5-6:
Ch 1, blo sc in each st across, turn.
Row 7:
Ch 1, blo sc 4, [skip the next st, sc in next, work a puff st into the skipped st] work until the last 4 (10) sts, blo sc in last 4 (10) sts, turn.
Row 8:
Ch 1, blo sc in first 4 (10) sts, [skip the next st, sc in next, work a puff st into the skipped st] work until the last 4 sts, blo sc in last 4 sts, turn.
Rows 9-36:
Repeat Rows 5-8 seven more times.
Check the final width measurement of the hat and add more/fewer rows, in an even rows count, if needed (ending on a Row 5 or Row 8 keeps the pattern even). Then go to seaming.

Quick Tip!
Want a tighter or looser-fitting hat? Feel free to add fewer or more rows as desired! If hats aren’t your preferred cold-weather piece, why not try making a cozy ear warmer instead? The Autumn Wheat Earwarmer and the Twisted Wheat Earwarmer are simple and quick to make!
Toddler
Row 1 (WS):
Ch 25 (35), sc in the 2nd ch from the hook and in each st across, turn. | 24 (34) sts
Row 2 (RS):
Ch 1 (turning ch does not count as a st throughout), blo sc in each st across, turn.
Row 3:
Ch 1, blo sc 4, [skip the next st, sc in next, work a puff st into the skipped st] work until the last 4 (10) sts, blo sc in last 4 (10) sts, turn.
Row 4:
Ch 1, blo sc in first 4 (10) sts, [skip the next st, sc in next, work a puff st into the skipped st] work until the last 4 sts, blo sc in last 4 sts, turn.
Rows 5-6:
Ch 1, blo sc in each st across, turn.
Row 7:
Ch 1, blo sc 4, [skip the next st, sc in next, work a puff st into the skipped st] work until the last 4 (10) sts, blo sc in last 4 (10) sts, turn.
Row 8:
Ch 1, blo sc in first 4 (10) sts, [skip the next st, sc in next, work a puff st into the skipped st] work until the last 4 sts, blo sc in last 4 sts, turn.
Rows 9-40:
Repeat Rows 5-8 eight more times.
Check the final width measurement of the hat and add more/fewer rows, in an even rows count, if needed (ending on a Row 5 or Row 8 keeps the pattern even). Then go to seaming.
Child
Row 1 (WS):
Ch 29 (39), sc in the 2nd ch from the hook and in each st across, turn. |28 (38) sts
Row 2 (RS):
Ch 1 (turning ch does not count as a st throughout), blo sc in each st across, turn.
Row 3:
Ch 1, blo sc 4, [skip the next st, sc in next, work a puff st into the skipped st] work until the last 4 (10) sts, blo sc in last 4 (10) sts, turn.
Row 4:
Ch 1, blo sc in first 4 (10) sts, [skip the next st, sc in next, work a puff st into the skipped st] work until the last 4 sts, blo sc in last 4 sts, turn.
Rows 5-6:
Ch 1, blo sc in each st across, turn.
Row 7:
Ch 1, blo sc 4, [skip the next st, sc in next, work a puff st into the skipped st] work until the last 4 (10) sts, blo sc in last 4 (10) sts, turn.
Row 8:
Ch 1, blo sc in first 4 (10) sts, [skip the next st, sc in next, work a puff st into the skipped st] work until the last 4 sts, blo sc in last 4 sts, turn.
Rows 9-44:
Repeat Rows 5-8 nine more times.
Check the final width measurement of the hat and add more/fewer rows, in an even rows count, if needed (ending on a Row 5 or Row 8 keeps the pattern even). Then go to seaming.
Teen
Row 1 (WS):
Ch 32 (43), sc in the 2nd ch from the hook and in each st across, turn. | 31 (42) sts
Row 2 (RS):
Ch 1 (turning ch does not count as a st throughout), blo sc in each st across, turn.
Row 3:
Ch 1, blo sc 4, [skip the next st, sc in next, work a puff st into the skipped st] work until the last 5 (12) sts, blo sc in last 5 (12) sts, turn.
Row 4:
Ch 1, blo sc in first 5 (12) sts, [skip the next st, sc in next, work a puff st into the skipped st] work until the last 4 sts, blo sc in last 4 sts, turn.
Rows 5-6:
Ch 1, blo sc in each st across, turn.
Row 7:
Ch 1, blo sc 4, [skip the next st, sc in next, work a puff st into the skipped st] work until the last 5 (12) sts, blo sc in last 5 (12) sts, turn.
Row 8:
Ch 1, blo sc in first 5 (12) sts, [skip the next st, sc in next, work a puff st into the skipped st] work until the last 4 sts, blo sc in last 4 sts, turn.
Rows 9-48:
Repeat Rows 5-8 ten more times.
Check the final width measurement of the hat and add more/fewer rows, in an even rows count, if needed (ending on a Row 5 or Row 8 keeps the pattern even). Then go to seaming.
Adult Small
Row 1 (WS):
Ch 35 (49), sc in the 2nd ch from the hook and in each st across, turn. | 34 (48) sts
Row 2 (RS):
Ch 1 (turning ch does not count as a st throughout), blo sc in each st across, turn.
Row 3:
Ch 1, blo sc 4, [skip the next st, sc in next, work a puff st into the skipped st] work until the last 6 (14) sts, blo sc in last 6 (14) sts, turn.
Row 4:
Ch 1, blo sc in first 6 (14) sts, [skip the next st, sc in next, work a puff st into the skipped st] work until the last 4 sts, blo sc in last 4 sts, turn.
Rows 5-6:
Ch 1, blo sc in each st across, turn.
Row 7:
Ch 1, blo sc 4, [skip the next st, sc in next, work a puff st into the skipped st] work until the last 6 (14) sts, blo sc in last 6 (14) sts, turn.
Row 8:
Ch 1, blo sc in first 6 (14) sts, [skip the next st, sc in next, work a puff st into the skipped st] work until the last 4 sts, blo sc in last 4 sts, turn.
Rows 9-52:
Repeat Rows 5-8 eleven more times.
Check the final width measurement of the hat and add more/fewer rows, in an even rows count, if needed (ending on a Row 5 or Row 8 keeps the pattern even). Then go to seaming.
Adult Medium
Row 1 (WS):
Ch 37 (51), sc in the 2nd ch from the hook and in each st across, turn. | 36 (50) sts
Row 2 (RS):
Ch 1 (turning ch does not count as a st throughout), blo sc in each st across, turn.
Row 3:
Ch 1, blo sc 4, [skip the next st, sc in next, work a puff st into the skipped st] work until the last 6 (14) sts, blo sc in last 6 (14) sts, turn.
Row 4:
Ch 1, blo sc in first 6 (14) sts, [skip the next st, sc in next, work a puff st into the skipped st] work until the last 4 sts, blo sc in last 4 sts, turn.
Rows 5-6:
Ch 1 (turning ch does not count as a st throughout), blo sc in each st across, turn.
Row 7:
Ch 1, blo sc 4, [skip the next st, sc in next, work a puff st into the skipped st] work until the last 6 (14) sts, blo sc in last 6 (14) sts, turn.
Row 8:
Ch 1, blo sc in first 6 (14) sts, [skip the next st, sc in next, work a puff st into the skipped st] work until the last 4 sts, blo sc in last 4 sts, turn.
Rows 9-56:
Repeat Rows 5-8 twelve more times.
Check the final width measurement of the hat and add more/fewer rows, in an even rows count, if needed (ending on a Row 5 or Row 8 keeps the pattern even). Then go to seaming.
Subscribe to my youtube channel
Adult Large
Row 1 (WS):
Ch 39 (53), sc in the 2nd ch from the hook and in each st across, turn. | 38 (52) sts
Row 2 (RS):
Ch 1 (turning ch does not count as a st throughout), blo sc in each st across, turn.
Row 3:
Ch 1, blo sc 4, [skip the next st, sc in next, work a puff st into the skipped st] work until the last 6 (14) sts, blo sc in last 6 (14) sts, turn.
Row 4:
Ch 1, blo sc in first 6 (14) sts, [skip the next st, sc in next, work a puff st into the skipped st] work until the last 4 sts, blo sc in last 4 sts, turn.
Rows 5-6:
Ch 1 (turning ch does not count as a st throughout), blo sc in each st across, turn.
Row 7:
Ch 1, blo sc 4, [skip the next st, sc in next, work a puff st into the skipped st] work until the last 6 (14) sts, blo sc in last 6 (14) sts, turn.
Row 8:
Ch 1, blo sc in first 6 (14) sts, [skip the next st, sc in next, work a puff st into the skipped st] work until the last 4 sts, blo sc in last 4 sts, turn.
Rows 9-60:
Repeat Rows 5-8 thirteen more times.
Check the final width measurement of the hat and add more/fewer rows, in an even rows count, if needed. Then go to seaming.
Seaming
Fold the hat to meet the seam (the first row with the last row worked) with the WS facing out.
Insert your hook through the first stitch closest to you, and then in the stitch of the side farthest from you. Yarn over and sl st to join.
Continue working all the stitches down the row until they are all joined.
Now flip your hat to the RS facing out.
Finishing
Using a long piece of yarn (or yarn tail) and your yarn needle, loop through each point (every two rows) of the hat all the way around. Pull closed and weave in end. Place a pompom on hat if desired, and wear! To learn how to make your own faux fur pompom, click HERE!
Crocheting your own hats and winter wearables is a rewarding and creative way to stay warm while adding a personal touch to your style! Not only do handmade items showcase your unique flair, but they also make heartfelt gifts for friends and family.
Plus, crocheting allows you to create cozy pieces to donate, spreading warmth and kindness to those in need. Whether you’re crafting for yourself or sharing with others, each stitch brings joy and connection, making your winter crafting even more special. The Diamond Granny Hat, Juniper Hat, and Crochet Knit-Purl Hat are also perfect for gifting and donating!
Cheers, and happy crocheting!
Well That Was Fun! What’s Next?
📌 PIN THIS POST – Don’t lose this project; save it to your Pinterest crochet board so you can quickly come back to it again.
💌 SHARE – Share your yarn choice, in-progress, or finished projects on Facebook or Instagram and use the hashtag #brianakdesigns
🥂 JOIN – Join the kindest crafters in the Briana K Designs Community Group on Facebook. We love yarny friends!
🔗 RAVELRY LINK -Link and share your project on Ravelry. Having inspirational photos can help crafters.