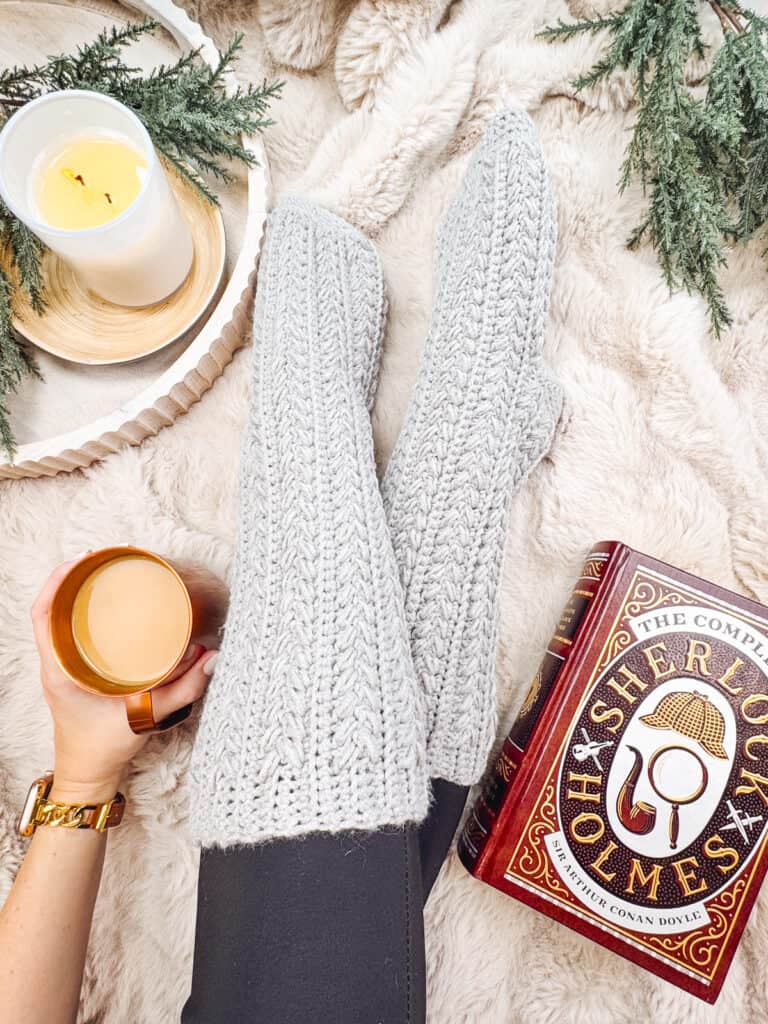
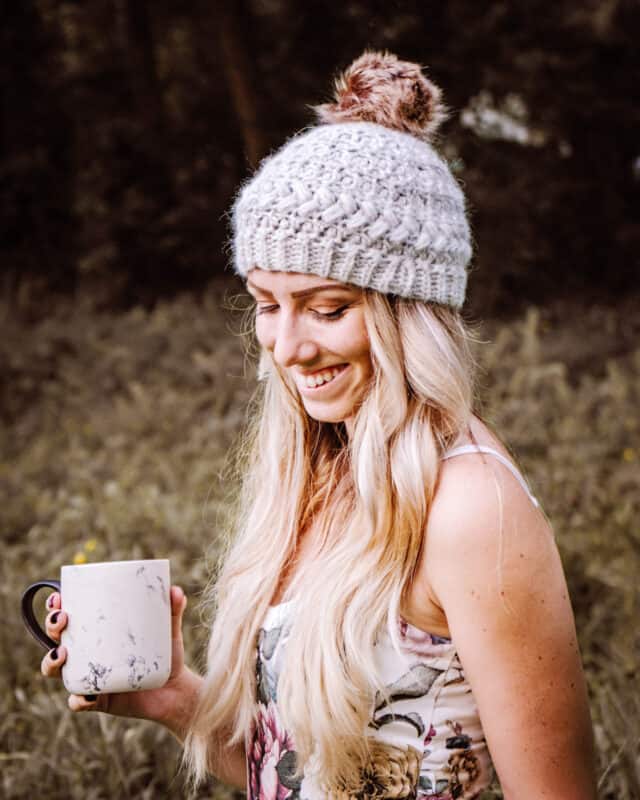
When your yarn feels like a warm cup of coffee in your hands — you know you’ve found the right project.
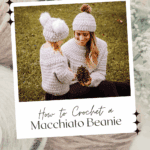
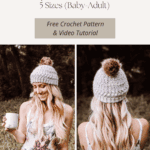
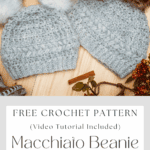
The Macchiato Crochet Beanie Free Pattern is a quick, cozy, and stylish crochet hat that’s as satisfying to make as your favorite latte. Worked top-down in the round, this beanie eliminates seams for a smooth, professional finish. It’s soft, squishy, and perfect for chilly mornings or gifting season.

Disclosure: This post contains affiliate links. Please read my disclosure for more info.
Using Wonderfluff Bulky Weight Yarn, this hat works up fast and delivers that dreamy cloud-soft texture that makes every stitch a joy. Whether you’re a beginner ready to level up or a seasoned crocheter in need of an instant-gratification project — this one’s for you!
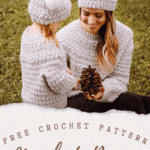
Once you’ve finished your beanie, try pairing it with other favorites from the Macchiato Collection — the Child Macchiato Crochet Sweater, Adult Macchiato Crochet Sweater, or Macchiato Crochet Poncho for a beautifully coordinated handmade set.
What you’ll love about this beanie pattern.
- Quick & Rewarding: Bulky yarn means fast results — perfect for weekend projects or last-minute gifts.
- Seamless Design: Worked from the top down, so no seaming needed!
- Custom Fit: Try it on as you go for the perfect head-hugging shape.
- 5 Sizes: From Baby to Adult, this crochet hat is for all ages.
Why Crochet A Top-Down Beanie?
Crocheting your beanie from the top down gives you full control over fit and finish. Here’s why this method is so loved:
- Custom Fit: Adjust size and length as you go for a perfect fit.
- No Seams: Enjoy a smooth, seamless finish every time.
- Continuous Stitch Pattern: Keep your texture uninterrupted for a professional look.
- Beginner Friendly: Easy to follow and perfect for learning crochet in the round.
- Try-On Ready: You can test the fit as you work — no surprises at the end!

How To Get The Right Fit For Your Beanie
To ensure a perfect fit, aim for a hat circumference 1–2 inches smaller than your head measurement. This is called negative ease, and it helps the beanie stay snug and comfortable without slipping.
If your head measures 22 inches around, crochet your beanie to about 20–21 inches. The stretch of the ribbing will make it fit perfectly!
The Macchiato Collection can be purchased on Etsy or Ravelry.

Supplies To Crochet The Macchiato Beanie
Yarn
WeCrochet Wonderfluff Bulky (5 Weight) in Finnley Heather, 70% Baby Alpaca, 23% Nylon, 7% Merino Wool; 142 yds/50g.
If luxury had a yarn equivalent, it would be Wonderfluff Bulky. This yarn is unbelievably soft — a blend of baby alpaca, merino wool, and nylon that’s light yet insulating. It’s the kind of yarn that makes you want to cozy up and crochet all day long.
Why it’s perfect for the Macchiato Beanie:
- Dreamy soft halo and drape
- Bulky weight = super quick progress
- Great stitch definition for texture lovers
- Comes in beautiful, neutral, and cozy hues
✨ Tip: Stock up — one skein is never enough once you’ve felt it!
Color Inspiration For Your Beanie
Yarn Quantities
Baby: 80 yds (73 m)
Toddler: 90 yds (82 m)
Child: 100 yds (91 m)
Teen: 115 yds (105 m)
Adult: 125 yds (114 m)
Yarn Substitutions
Brava Bulky
100% Premium Acrylic
136yds/100g
Swish Bulky
100% Fine Superwash Merino Wool 137yds/100g
Remember to always check gauge and drape when substituting yarns.
Crochet Hook
Size J (6.0mm) Crochet Hook, or hook to obtain gauge.
Notions
Scissors
Yarn Needle
Removable Stitch Marker
Skill Level
Advanced Beginner
Sizing
Baby (Toddler, Child, Teen, Adult)
To fit head circumference: 14-16 (16-18, 18-20, 20-22, 21-23)
More measurements are in schematic.
Finished measurements: 12 (14.5, 17, 19.5, 21)
Abbreviations
Alt –Alternatively
BLO -back loop only
Ch -chain
FLO -front loop only
Hdc -half double crochet
Hdc2tog -half double crochet two stitches together
Inc. – increase
Gauge
13 sts by 8.5 rows = 4” square
How to Crochet A Gauge Swatch
Working a gauge swatch will let you know if you will have the correct sizing for this pattern. A gauge swatch helps you practice the stitches used in this project and improve your stitch work for a flawless look.
Are you struggling to match gauge? Check out the blog post on What is Crochet Gauge and How To Fix It
Gauge Swatch Instructions:
Stitch pattern for gauge swatch: Ch 17, in second chain from hook hdc 1 in blo, hdc 1 in flo; repeat from * to * across, turn. Repeat these steps to make the gauge swatch with a ch 1 at the beginning of the row.
Construction
Ready to get started? Here’s the construction overview:
- Start from the Top (Crown):
Begin with a magic circle and increase in joined rounds. After each round, turn your work — this creates the unique texture pattern. - Shape the Body:
Once the crown reaches your desired width, continue working even rounds to build the length of the hat. - Add Texture:
Crochet a beautiful round of puff stitches for that extra touch of charm and squish. - Finish with Ribbing:
Work a join-as-you-go ribbing along the edge for a stretchy, polished fit. - Add a Pom-Pom (Optional):
Finish your beanie with a fluffy yarn or faux fur pom-pom — or leave it sleek and simple for everyday wear.
? Pro Tip: Because it works up so quickly, this pattern is a perfect last-minute handmade gift. You’ll want to make one in every color!
Special Stitches
Puff Stitch: Yarn over and insert your hook into the stitch/space. Yarn over again and pull up a long loop. (Yarn over and insert your hook into the same stitch/space. Yarn over again and pull up a long loop) two more times (7 loops on the hook). Yarn over and pull through the first 6 loops, yarn over and pull through remaining loops.
Established stitch pattern (est st pattern): hdc 1 in blo, hdc 1 in flo; repeat from * to * around increasing by placing two stitches in indicated stitch.
Magic Circle: Start by creating a loop with your yarn. The tail of the working yarn will be over the working end. Insert your hook into the loop from behind. Yarn over and pull through the loop. Ch 1, Work all of your indicated stitches into the loop. Pull the tail end of your yarn to close the loop. Pull firmly to fasten the loop closed, this end will be weaved in and fastened off.
Notes
- A ch 1 at the beginning of a row is not counted as a stitch. Using a stitch marker at the beginning of each round is recommended.
- This beanie is worked from the top down with a ribbed edge. We will crochet in the round, turning at the beginning of each new round; place a stitch marker in the last stitch of the round to help keep track of first and last stitches.
- Before you dive into your project, take a moment to identify the stitch and row counts that match the size you’re making. By highlighting or marking them, you’ll save time and effort later on. Trust us, this small step will make a big difference in your crochet journey!
This Pattern Uses Standard US Terminology
FAQs About the Macchiato Crochet Beanie
Q: What skill level is this pattern?
A: This pattern is great for advanced beginners — if you can work in rounds and increase stitches, you’re good to go!
Q: What yarn is used?
A: The pattern calls for Wonderfluff Bulky by WeCrochet, known for its lightweight warmth and ultra-soft feel.
Q: Can I adjust the size?
A: Yes! The top-down construction makes it easy to adjust fit and length as you go.
Q: Do I have to add the puff stitch row?
A: It’s optional — but it adds such lovely texture, you’ll probably want to keep it in!
Q: Is this beanie unisex?
A: Absolutely! Just adjust color and pom-pom choices to match your style.
Video Tutorial for the Free Crochet Beanie
Watch how easy and beginner-friendly it is to work up this crochet piece with a tutorial.

Click the box below to unlock this exclusive subscriber content for free. Add your email and create a password. If you are having trouble, reset your password or log in to the Grow Portal.
I’m thrilled to share this amazing crochet pattern with you! Please don’t copy, paste, or distribute this pattern. Prefer an ad-free experience? Purchase a digital PDF file for a small fee from one of my online stores. I appreciate your support and readership. You are why I can keep doing what I love and sharing it with others. Thank you from the bottom of my heart.
How to Crochet A Bulky Crochet Beanie
Join The Kindest Community
Join our vibrant community of crafters on Facebook today. Whether you enjoy crafting with others or simply have burning questions, we’ve got you covered – join us now!
Beanie Length
Rnd 1: Turn and ch 1, work in established stitch pattern without increasing, join. | 40 (48, 56, 64, 68) sts
Repeats: Repeat Round 1 for 1 (2, 3, 3, 2)more rounds. At this point, including the set up, round totals are: 6 (8, 10, 11, 12)

Puff Section
Rnd 1: Turn and ch 1, skip the first st, hdc in the next, work a puff st into the skipped st around the hdc; repeat from * to * around, join.| 40 (48, 56, 64, 68) sts
Rnd 2: Repeat Rnd 1 (Puff Round).
Rnd 3: Turn and ch 1, work in established stitch pattern without increasing, join.
Total rounds at this point, including set up round: 9 (11, 13, 14, 15)
Beanie Ribbing
The ribbing will be worked in rows and perpendicular to the hat body.
Row 1: Ch 5 (5, 6, 6, 7), in blo slip st in second chain from hook and across to body, sl st 2 sts on the body (these do not count as sts), turn. | 4 (4, 5, 5, 6) sts
Row 2: Skip the two sts from the body, in blo sl st in each st across, turn.
Row 3: Ch 1, in blo sl st in each st across, sl st 2 sts on the body, turn.
Repeats: Repeat Rows 2-3 around the bottom of the beanie body.
Join last row to beginning row by slip stitching through blo of first and last row at the same time with the WS facing.
Handy Blocking Tip
Blocking hats can feel tricky due to the shape, but don’t over think it. Either lay flat to dry or find a sports ball similar to the shape of a head. The key is to not stretch the hat, we want negative ease.
Finishing
Fasten off and weave in all ends.
Attach a pompom to the top of the hat if desired. For a dual pompom, add between rows 4 & 5.
Want to make your own faux fur pompom? Check out this quick Faux Fur Pompom Tutorial.
Lightly block and wear.
The Macchiato Crochet Beanie Free Pattern is everything you want in a handmade project — quick, soft, and effortlessly stylish. With its seamless top-down construction and plush Wonderfluff yarn, it’s a cozy essential for chilly days, gift giving, or just treating yourself to something beautiful.
So pour a cup of your favorite coffee, grab your hook, and enjoy the calm rhythm of crochet — one deliciously soft stitch at a time.
If you love the softness of this yarn, then you can create and cuddle up with the Be My Bunny Crochet Ami, which also uses Wonderfluff Yarn! Happy crocheting during these chilly months.
Well, That Was Fun! What’s Next?