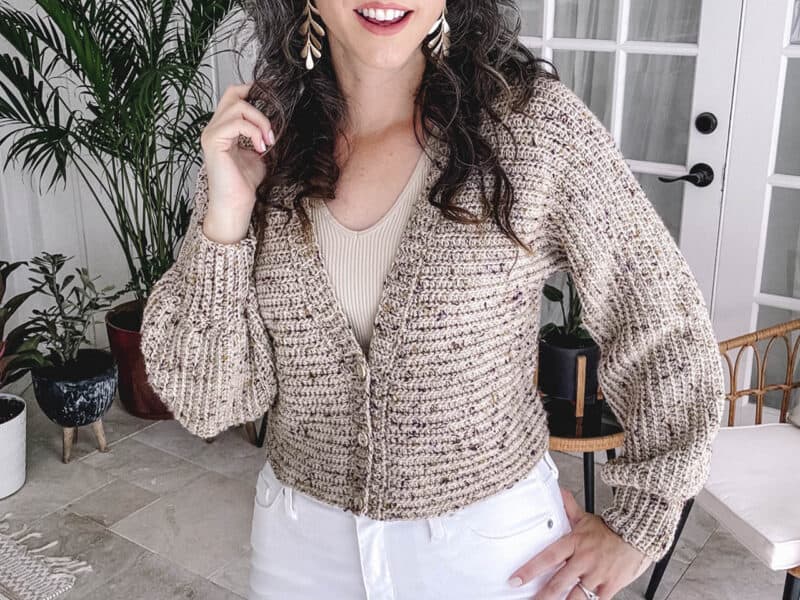
Finch V-Neck Crochet Cardi Pattern


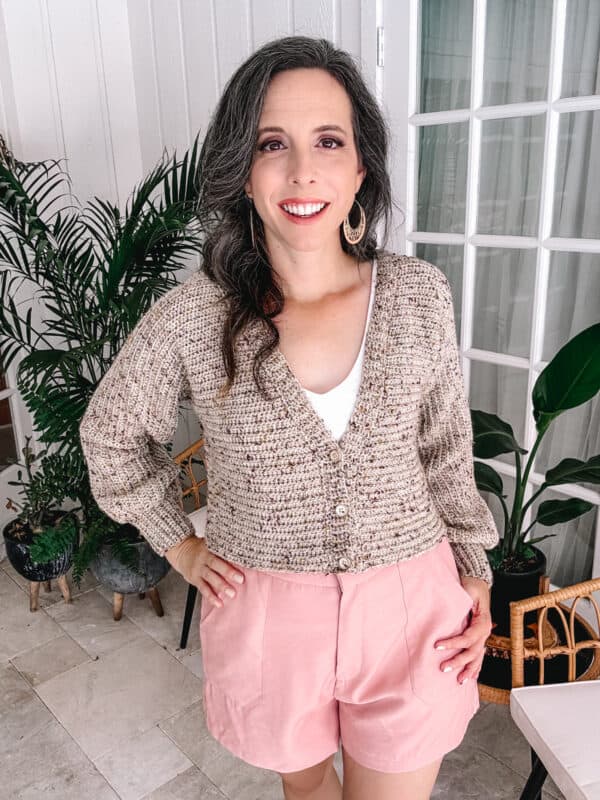
This crochet cardi uses simple stitches to create a classic cardigan. The best part is the Finch Crochet Cardi Pattern is a one piece construction with only two seams and the length can be easily adjusted. The v-neck front is perfect for layering during any season. Love two seam garments? Also check out the Seabird Crochet Cardigan or the Autumn Wheat Beginner Crochet Cardigan.
Disclosure: This post contains affiliate links, meaning I get a commission if you decide to make a purchase through my links, at no cost to you.
What you'll love about this adult sweater pattern.
How To Style A V-Neck Cardigan
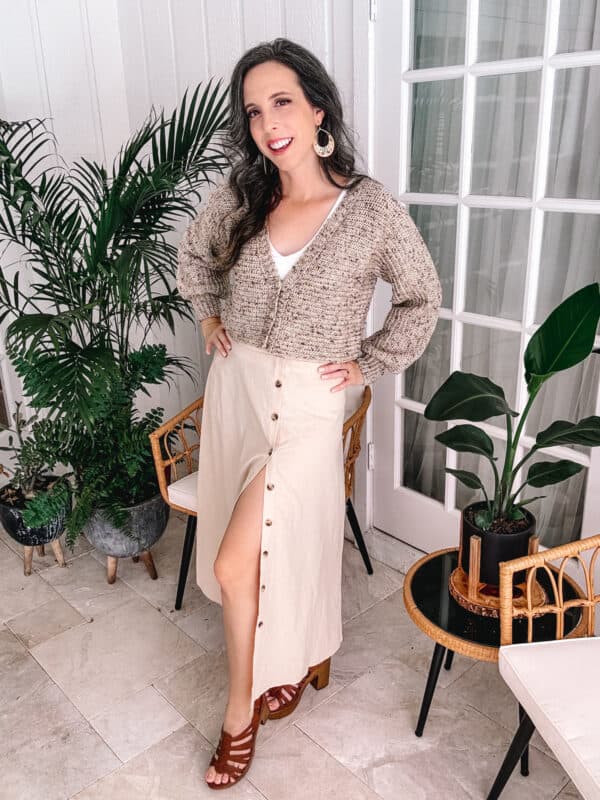
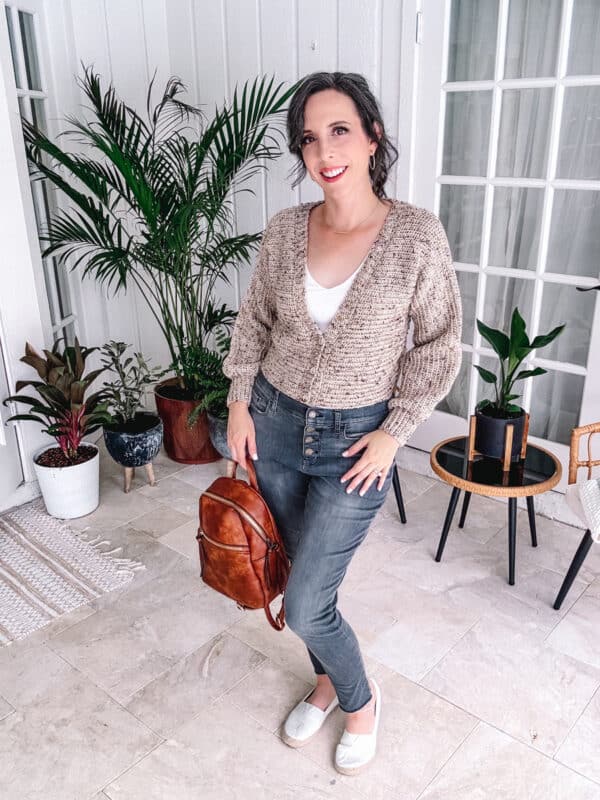
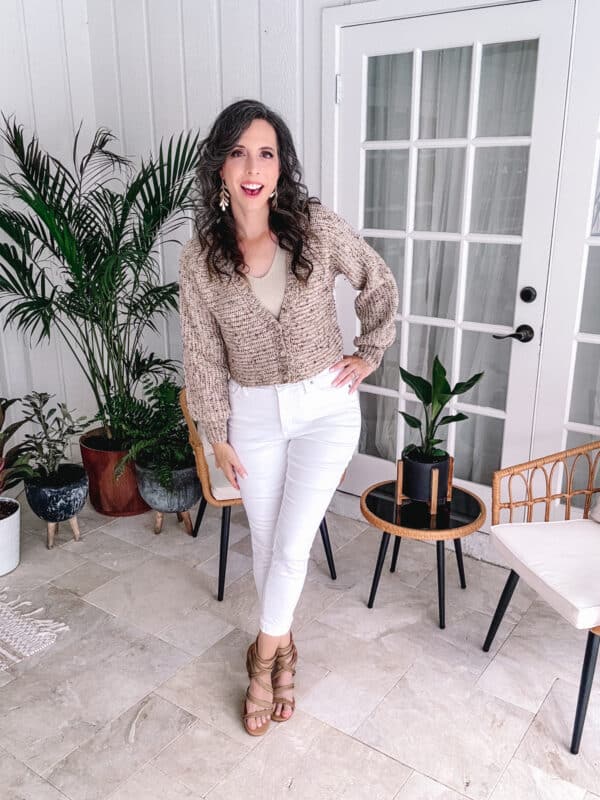
Casual Chic: Pair the crochet V-neck cardigan with a basic white or neutral-colored t-shirt and your favorite pair of distressed jeans. Add some comfortable sneakers or ankle boots for a laid-back yet stylish vibe.
Boho Vibes: Opt for a flowy maxi dress in a floral or bohemian print to create a boho-inspired look. Layer the crochet cardigan over the dress, and complete the ensemble with suede ankle boots, a wide-brimmed hat, and some layered bracelets.
Office Elegance: Dress up the crochet V-neck cardigan for the office by wearing it over a crisp button-down shirt or a silk blouse. Pair it with tailored trousers or a pencil skirt and finish the look with classic pumps for a sophisticated and professional appearance.
Weekend Comfort: Keep it cozy for the weekend by styling the cardigan with a simple tank top or camisole and a pair of comfortable leggings or joggers. Slip into some stylish sneakers or ankle boots for a laid-back and comfortable outfit.
Date Night Glam: For a romantic evening, wear the crochet V-neck cardigan over a lacy camisole or a silky slip dress. Choose a statement belt to cinch the waist, and complete the look with strappy heels and delicate jewelry for an effortlessly elegant and feminine ensemble.
When it comes to style, it's great to have several options in your wardrobe, so also check out the Easy Crochet Sweater Pattern or the Valencia Infinity Cable Crochet Sweater.
Crochet Supplies for the Cardi
Yarn
WeCrochet Provincial Tweed
80% Fine Superwash Highland Wool, 20% Donegal Tweed (made of 70% acrylic, 30% viscose). Colorway: Cream
Yarn Quantities
1,015 (1,150, 1,175, 1,225, 1300) (1450, 1600, 1,750, 1800) yds for the crop length
5 (5, 5, 5, 6) (6, 6, 7, 7) hanks for the crop length cardigan
……
1,225 (1,300, 1,450, 1750, 1900) (2000, 2250, 2,500, 2750) yds for the hip length cardigan
5 (6, 6, 7, 8) (8, 9, 10, 11) hanks for the hip length cardigan
Yarn Substitutions
Heatherly Worsted
80% Acrylic, 20% Merino Wool, 218yds/100g
Brava Worsted
100% Premium Acrylic, 218yds/100g
Swish Worsted
100% Fine Superwash Merino Wool, 110yds/50g
Remember to always check gauge and drape when substituting yarns.
Crochet Hook
Size US 7 (4.5mm) Crochet Hook, or hook to obtain gauge.
Notions
Scissors
Yarn Needle
Removable Stitch Marker
0.5” Buttons (x3)
Skill Level
Intermediate
Sizing
XS (S, M, L, 1X) (2X, 3X, 4X, 5X)
To fit chest: 33 (39, 42, 48, 50) (55, 58, 64, 66)” finished bust measurement; garment is meant to be worn with 4-6” of positive ease
Abbreviations
blp - back loop only
ch - chain
hdc - half double crochet
RS - Right Side
sl st - slip stitch
st(s) - stitch(es)
Stsc - stacked single crochet
WS - Wrong Side
Gauge
18 sts and 18 rows = 4” over Etched Half Double Crochet, unblocked
How to Crochet A Gauge Swatch
Working a gauge swatch will let you know if you will have the correct sizing for this pattern. A gauge swatch helps you practice the stitches used in this project and improve your stitch work for a flawless look.
Are you struggling to match gauge? Check out the blog post on What is Crochet Gauge and How To Fix It
Gauge Swatch Instructions:
Ch 26, work 24 rows of Etched HDC St Patt.
Etched Half Double Crochet Pattern (Etched HDC Patt):
Row 1 (RS): Stsc in first ch from hook, HDC across, turn.
Note: Alternatively work 26 FHDC.
Row 2 (WS): Ch 1 (does not count as a st here and throughout), sl st Blp across, turn.
Row 3: Stsc in first st, HDC across, turn.
Rep Rows 2-3 for Etched HDC Patt.
Construction
This easy V-neck cardigan is crocheted flat for a super simple approach. The Etched Half Doubles Crochet Stitch, creates a delightful texture like knitting but cozier! The easy to memorize row repeat and the stunning Provincial Tweed yarn, make for a fabric easy to make with a softness you’ll love stitching. Perfect for every skill level, this cardigan will become a wardrobe staple.
Special Stitches
Stacked Single Crochet (Stsc): Do NOT chain, insert hook into next stitch, yo, pull up a loop, yo and pull through both loops, insert hook in the vertical bar below, yo, pull up a loop, yo and pull through both loops on the hook.
Foundation Half Double Crochet (FHDC): Ch 2, YO, insert hook in 2nd ch from hook, YO, pull up lp, YO and pull through 1 lp (ch made), YO and pull through 3 lps (FHDC made), *YO insert hook in ch made at base of previous st, YO, pull up lp, YO and pull through 1 lp (ch made), YO and pull through 3 lps (FHDC made); rep from * for desired number of FHDC.
Notes
- This pattern substitutes a traditional chain 2 on the edges for a Stacked Single Crochet.
- A ch 1 on the beginning of a single crochet row is not necessary.
- Beginning Ch 1 does not count as a stitch.
- Using a stitch marker at the beginning of each row is recommended.
- The instructions and stitch counts are given for the smallest size, with the larger sizes in brackets ( ).
- Before you dive into your project, take a moment to identify the stitch and row counts that match the size you're making. By highlighting or marking them, you'll save time and effort later on. Trust us, this small step will make a big difference in your crochet journey!
Cardi Video Tutorial
Relax & Crochet
Upgrade to the Printable PDF
Beautifully formatted to print and relax while crocheting. The paid pattern includes:
The Ad-Free Crochet Pattern can be purchased on Etsy or Ravelry.
To Unlock Exclusive Subscriber Content click the Box below and join for free by simply adding your email and creating a password! If you are having troubles, reset your password or login to the Grow Publisher Portal.
I'm thrilled to share this amazing crochet pattern with you, many patterns on my blog are absolutely free! I kindly request that you don't copy and paste or distribute this pattern. Prefer an ad-free experience? Buy a digital PDF pattern for a small fee from one of my online stores for a seamless crafting journey. I appreciate your support and readership. You are the reason I can keep doing what I love and sharing it with others. So, thank you from the bottom of my yarn-loving heart!
Disclosure: This post contains affiliate links, meaning I get a commission if you decide to make a purchase through my links at no cost to you.Finch Crochet Cardigan Written Instructions
Rows 2-18 (20, 20, 22, 22) (26, 26, 30, 30): Stsc in first st, HDC across, turn. | Back is approximately 6 (6.75, 6.75, 7.25, 7.25) (8.75, 8.75, 10, 10)” after Row 18 (20, 20, 22, 22) (26, 26, 30, 30).
Join The Kindest Community
Join our vibrant community of crafters on Facebook today. Whether you enjoy crafting with others or simply have burning questions, we've got you covered - join us now!
Right Shoulder and Sleeve
Row 1 (RS): Work in Etched HDC Patt for 86 (88, 94, 98, 102) (104, 110, 112, 116) sts, leave rem sts unworked, turn. | 86 (88, 94, 98, 102) (104, 110, 112, 116) sts.
Rows 2-6: Work in Etched HDC Patt over 86 (88, 94, 98, 102) (104, 110, 112, 116) sts.
Note: PM in 6th row to mark Shoulder and end of Back.

Right Front Shaping
Inc at Neck edge for Fronts as follows:
Etched HDC Patt rows:
Rows Beg at Neck Edge: Stsc in first, HDC in the first st again.
Rows Ending at Neck Edge: 2 HDC in the last st.
Sl St Rows:
Rows Beg at Neck Edge: Sl st through both lps in the first st, sl st Blp in the same first st.
Rows Ending at Neck Edge: Sl st Blp in the last st, sl st in the same last st through both lps.
Sizes XS, S, M, L, 1X Only
Inc 1 st at neck edge every 2 rows,
8 times. Then inc 1 st at neck edge every 3 rows, 10 times.
Sizes 2X, 3X, 4X, 5X Only
Inc 1 st at neck edge every 2 rows,
14 times. Then inc 1 st at neck edge every 3 rows, 6 times.
Right Front and Sleeve
Note: Incs continue for Front after Sleeves are complete for sizes XS, S, M, L, XL, 1X, 2X only.
Rows 1-32 (34, 36, 38, 40) (42, 46, 48, 50): Work in Etched HDC Patt, with inc as necessary. | 99 (102, 108, 113, 118) (122, 130, 132, 136) sts.
Fasten off.
Complete Right Sleeve
Note: Incs continue on Fronts for sizes XS, S, M, L, 1X, 2X only, for sizes 3X, 4X, 5X, Front incs are complete on Row 46.
Row 33 (35, 37, 39, 41) (43, 47, 49, 51): Sk the first 64 sts in the row and join yarn with sl st, work in Etched HDC Patt with inc as necessary. | 35 (38, 45, 49, 54) (59, 66, 68, 72) sts.
The total rows for the entire sleeve are 58 (62, 66, 70, 74) (78, 86, 90, 94)
Right Front
Note: Incs are complete on Row 14, 12, 10, 8, 6, 4 of Front for sizes XS, S, M, L, 1X, 2X.
All Lengths
Sizes XS, S, M, L, 1X, 2X Only
Rows 1-14 (12, 10, 8, 6) (4, -, -, -): Work in Etched HDC Patt with incs as necessary. | 40 (42, 48, 52, 56) (60, 66, 68, 72) sts.
Complete Right Front - All Sizes
Cropped Length
Rows 15-34 (13-34, 11-34, 9-34, 7-34) (5-34, 1-34, 1-34, 1-34): Work in Etched HDC Patt. | 40 (42, 48, 52, 56) (60, 66, 68, 72) sts.
Fasten off.
Hip Length
Rows 15-68 (13-68, 11-68, 9-68, 7-68) (5-68, 1-68, 1-68, 1-68): Work in Etched HDC Patt. | 40 (42, 48, 52, 56) (60, 66, 68, 72) sts.
Fasten off.
Left Shoulder and Sleeve
Row 1 (RS): Working to the left of the first section, sk 36 (36, 36, 36, 36) (40, 40, 40, 40) sts, join with sl st in st. Work rem 86 (88, 94, 98, 102) (104, 110, 112, 116) sts in Etched HDC Patt, turn. | 86 (88, 94, 98, 102) (104, 110, 112, 116) sts.
Rows 2-6: Work in Etched HDC Patt.
Note: PM in 6th row to markShoulder and end of Back.
Left Front Shaping and Sleeve
Rows 1-32 (34, 36, 38, 40) (42, 46, 48, 50): Follow instructions for Right Front Shaping and Sleeve. | 99 (102, 108, 113, 118) (122, 130, 132, 136) sts.
Complete Left Sleeve
Row 33 (35, 37, 39, 41) (43, 47, 49, 51): Work 35 (38, 45, 49, 54) (59, 66, 68, 72) sts in Etched HDC Patt with inc as necessary, leave rem 64 sts unworked, turn. | 35 (38, 45, 49, 54)
(59, 66, 68, 72) sts.
The total rows for the entire sleeve are 58 (62, 66, 70, 74) (78, 86, 90, 94)
Left Front
Note: Incs are complete on Row 14, 12, 10, 8, 6, 4 of Front for sizes XS, S, M, L, 1X, 2X only, for sizes 3X, 4X, 5X, incs are complete.
Cropped Length
Rows 15-34 (13-34, 11-34, 9-34, 7-34) (5-34, 1-34, 1-34, 1-34): Work in Etched HDC Patt with inc as necessary. | 40 (42, 48, 52, 56) (60, 66, 68, 72) sts.
Hip Length
Rows 15-68 (13-68, 11-68, 9-68, 7-68) (5-68, 1-68, 1-68, 1-68): Work in Etched HDC Patt. | 40 (42, 48, 52, 56) (60, 66, 68, 72) sts.
Fasten off.
Seaming
Block to measurements. Fold sweater in half with RS facing out and WS together. With preferred seaming method, sew front to back at side seam, beg at bottom hem, working to underarm, then seam across sleeve in one continuous seam. Rep for other side.
Button Bands
Setup: With the RS facing, join yarn at the side of the bottom front and sl st loosely around the neckline opening, turn.
Note: For sl sts around the neck, sl st 1 st per every sl st or HDC row.
Place St Markers: Use 3-5 st markers depending on how many buttonholes you would like. Place the st markers along the side of the front opening along the edge where you would like the buttons evenly placed. Trying the sweater on is helpful in determining placement.
Working A Buttonhole Row: When you get to a st marker, work that row as follows to create the buttonhole. Sk the 2 edge sl sts, SC Blp 1, ch 2, sk 2, SC Blp 1, SC the last st through both lps, turn.
Row 1: Ch 6, SC in the 2nd ch from hook and each ch across back towards Body opening edge, sl st in next 2 sts along the Body edge, turn. | 5 sts.
Row 2: Sk the 2 edge sl sts, SC Blp 4, SC the last st through both lps, turn.
Row 3: Ch 1, SC the first st through both lps, SC Blp 4, sl st in next 2 sts along the Body edge, turn.
Rep Rows 2-3 ribbing around the front opening and neck edge, creating buttonholes where st markers are placed. Fasten off and weave in ends.
Handy Tip: Button Trick!
Have you noticed that when using yarn to sew on buttons, it tends to stretch over time? While yarn adds a charming touch, it can lead to buttons becoming loose and less secure. To prevent this issue, I recommend sewing a small button on the backside of the button placement. This technique helps prevent the stretching or pulling of fibers, ensuring a more stable closure over time.
Cuff Ribbing
Row 1: Join the yarn at the seam under the end of the sleeve and ch 16, SC
in the 2nd ch from hook and each ch across back towards sleeve edge, sl st in next 2 sts (1 st per hdc edge row on the sleeve), turn. | 15 sts.
Row 2: Sk the 2 sleeve edge sl sts, SC Blp 15, turn.
Row 3: Ch 1, SC Blp 15, sl st in next 2 sts (1 st per hdc edge row on the sleeve), turn.
Rep Rows 2-3 around the sleeve edge. To join the edges together either fasten off and seam the beg edge to the ending edge with a tapestry needle, or SC through the Blp from the ending edge and the st from the beg edge at the same time.
Finishing
Weave in any ends and block again if necessary.
How to sew buttons to the opposite edge of buttonholes:
Thread your needle with a length of yarn, and weave in the end near where the button will go.
Position the button where you want it on your fabric, and push the needle through from the back of the fabric to the front through one of the buttonholes. Reminder: To make it extra secure but a small button on the back of the fabric and work through both buttons.
Bring the needle back down through another buttonhole, creating a diagonal stitch.
Repeat this process several times, creating a secure "X" pattern on the back of the button.
Once the button feels secure, finish by bringing the needle to the back of the fabric and weave in end, then cut yarn.
And now you have a beautiful v-neck cardigan to wear as an extra layer for any season. And I also want to give you a tip on caring for Fine Superwash Highland Wool. To keep your crochet cardi looking its best, we recommend hand washing in cool water with a gentle detergent, followed by laying flat to dry to avoid stretching or distortion.
Looking for more crochet cardigan inspiration? Check out our Crochet Granny Square Cardigan for a snuggly and stylish layering piece, or explore the Diamond Crochet Cardigan for a lightweight and breezy option perfect for warmer weather.
Enjoy handmade fashion and crochet your way to a wardrobe filled with handmade treasures you'll love for years to come. Happy Crocheting!
Well That Was Fun! What's Next?