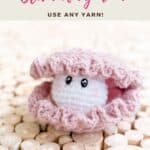

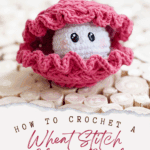
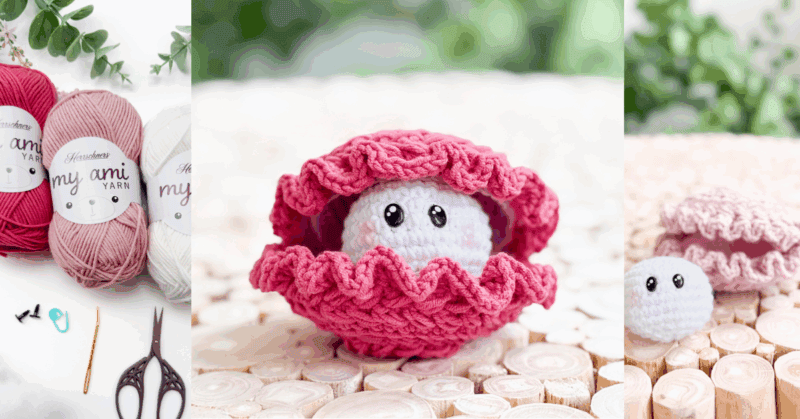
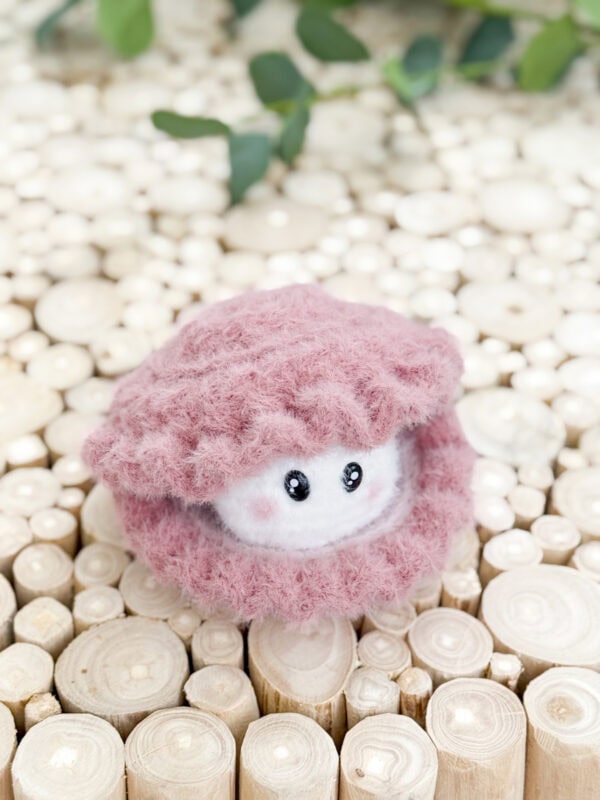
Looking for a quick, no-sew crochet amigurumi that’s cute, textured, and full of personality? Meet the Wheat Stitch Clam — a free crochet pattern perfect for beginners and experienced makers alike. Using the textured wheat stitch to mimic soft ocean ripples, this little clam is a whimsical addition to your handmade sea life collection. You’ll work it in the round, add a ruffled shell edge, and top it off with a sweet little pearl tucked inside.
Disclosure: This post contains affiliate links. Please read my disclosure for more info.
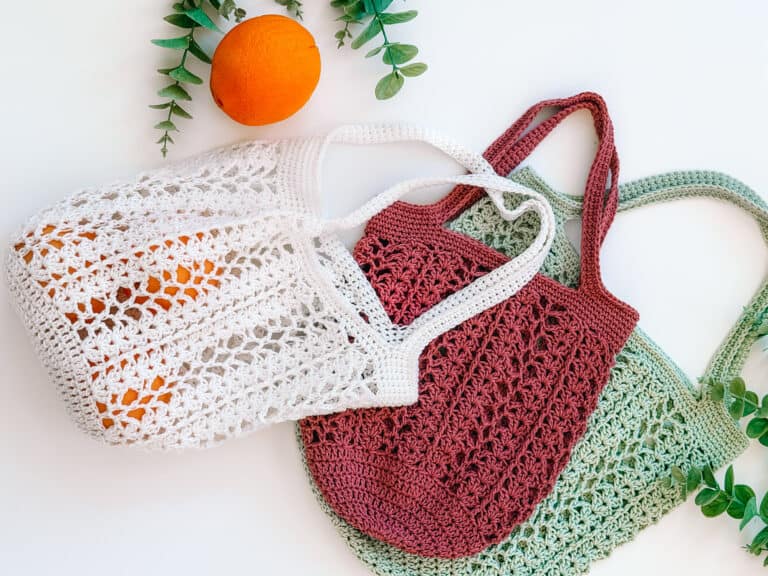
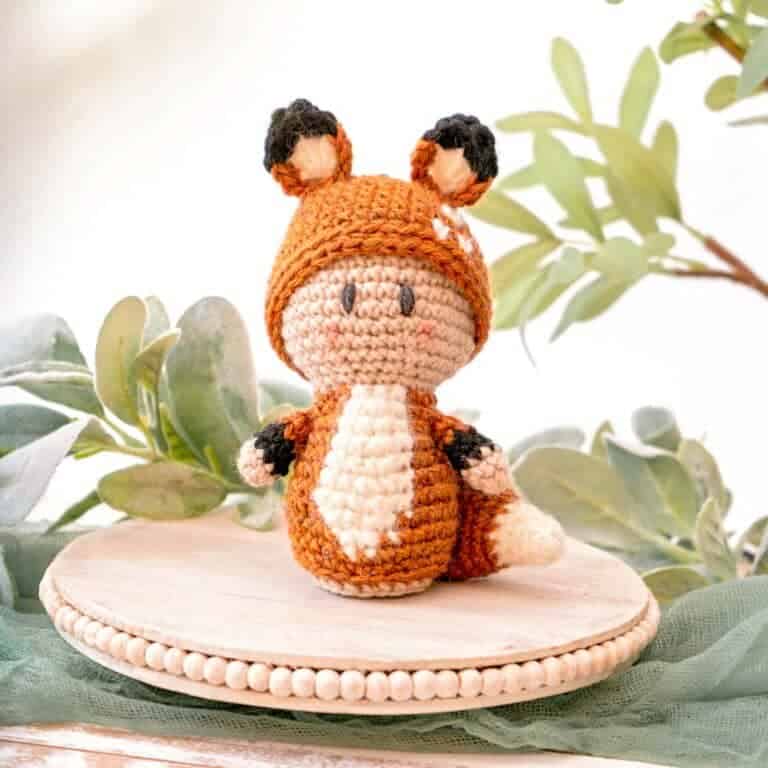
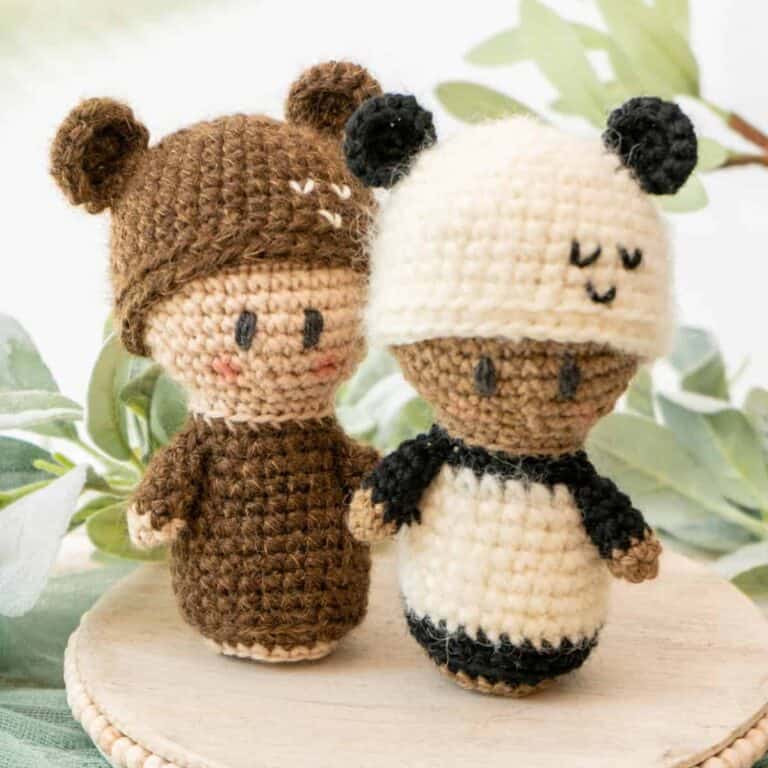
This stash-busting project is great for gifting, craft fairs, or pairing with other favorites from the Hooked on the Sea amigurumi series, including the Octopus, Jellyfish, Turtle, Whale, and Pufferfish! And when you’re done making all of your new friends, whip up a Circle Leaf Market Bag or Wheat Stitch Rectangle Bag to carry them in!
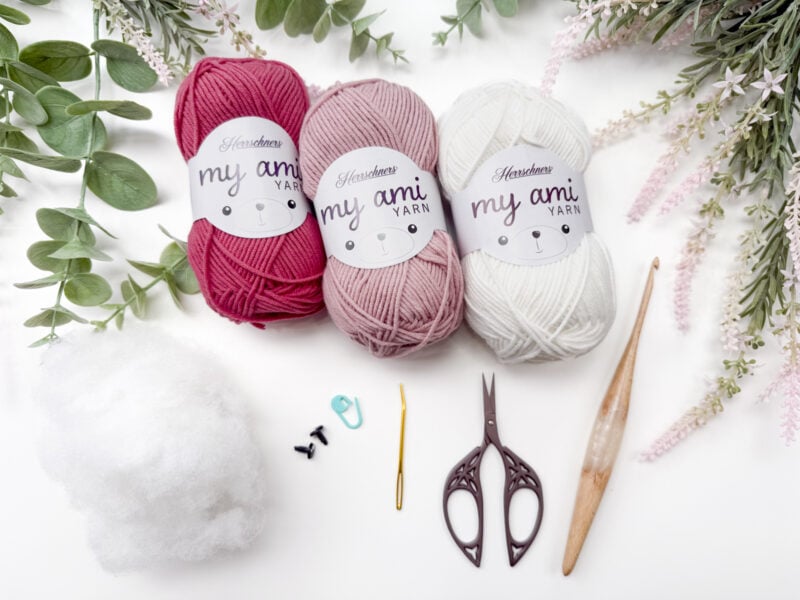
Crochet Supplies for the No-Sew Clam Amigurumi
Yarn
Herrschners My Ami
55% Acrylic/45% Cotton Blend
120yds/50g
Yarn Quantities
Rosy (dark pink): 75 yds
Ballerina (light pink): 40 yds
White: 12 yds
Yarn Substitutions
Brava Worsted – 100% Premium Acrylic; 218yds/100g
Herrschners Worsted 8 – 100% Acrylic; 489yds/226g
Dishie – 100% Cotton; 190yds/100g
Remember always to check the gauge and drape when substituting yarns.
Crochet Hook
Size US G (4.0mm) Crochet Hook or hook to obtain gauge.
Notions
Scissors
Yarn Needle
Removable Stitch Marker
Fiberfill
Safety Eyes
Skill Level
Advanced Beginner
What you’ll love about this pattern.
? Gorgeous Texture: The wheat stitch creates a soft, shell-like texture that adds depth and charm to the outer layer.
? No-Sew Construction: Slip stitch the shell pieces together — no whip stitching or seaming required!
? Beginner-Friendly: A great pattern to practice working in the round, changing colors, and adding texture.
One Size
Using recommended yarn. c;eam is approximately 3 inches x 5 inches.
Abbreviations
blo – back loop only
ch – chain
flo – front loop only
RS – right side
sc – single crochet
sc2tog – single crochet two together
sl st – slip stitch
st(s) – stitch(es)
WS – wrong side
Gauge
Not critical for this pattern.
How to Crochet A Gauge Swatch
Working a gauge swatch will let you know if you will have the correct sizing for this pattern. It will also help you practice the stitches used in this project and improve your stitch work for a flawless look.
Are you struggling to match the gauge? Check out the blog post on What is Crochet Gauge and How To Fix It
Construction
The free Wheat Stitch Clam crochet amigurumi pattern comes together in a few simple steps that are perfect for a relaxing afternoon of crochet. First, we’ll crochet the outer shell in the round using the wheat stitch for soft ripple-like texture. Then we’ll switch to a lighter yarn to work up the inner shell. Next, we’ll slip stitch the shell pieces together (no sewing required!) and add a ruffled edge for a frilly, ocean-inspired finish. The final touch is a tiny pearl!
I love rosy pink, summery colors like th eones used in this project, the Circle Leaf Lace Summer Top, and the Easy Envelope Clutch!

Special Stitches
Puff Stitch: Yarn over and insert your hook into the stitch/space. Yarn over again and pull up a long loop. Yarn over and insert your hook into the same stitch/space. Yarn over again and pull up a long loop (5 loops on the hook). Yarn over and pull through the first 4 loops, yarn over and pull through remaining loops.
Invisible sc2tog: Insert your hook into the front loop of the first st, and then insert into the front loop of the second st (3 loops on the hook). Yarn over and pull through both front loops (2 loops on the hook), yarn over and pull through the remaining loops on the hook.
Pattern Notes
- Warning: Safety eyes are not suitable for children under three years old, as they can pose a choking hazard if they become detached. Adult supervision is recommended. Feel free to embroider the eyes.
- A ch 1 at the beginning of a row is not counted as a stitch.
- Using a stitch marker at the beginning (or end) of the round is recommended.
- Invisible Join: Cut the yarn, leaving a 6-8 inch tail. Using your yarn needle, insert the needle under both loops of the second stitch of the round. Pull the yarn through gently, then insert the needle back into the center of the last stitch you made, going straight down through the middle (where the yarn exited).
- This Pattern Uses Standard US Terminology. I use affiliate links and follow GPSR Compliance: privacy & disclosure policy here.
Subscribe & Like
? Frequently Asked Questions (FAQ)
What skill level is needed to crochet the Wheat Stitch Clam?
This pattern is beginner-friendly! If you’re comfortable with basic stitches like single crochet and working in the round, you’ll do great. The wheat stitch adds texture without making the project complicated.
Is the Wheat Stitch Clam a no-sew amigurumi pattern?
Yes! There’s no separate stitching of parts. The clam is worked in two halves and joined with slip stitches — perfect for crocheters who don’t love sewing pieces together.
How long does it take to crochet this clam amigurumi?
Most crocheters can finish this project in 1–2 hours. It’s a quick and satisfying make — ideal for gifting, markets, or just a fun afternoon stitch session.
Do you offer a video tutorial for this pattern?
Yes! A full step-by-step video tutorial is included to walk you through each section of the pattern — perfect for visual learners and crochet newbies.
Video Tutorial for the No-Sew Clam Ami
Relax & Crochet
Upgrade to the Printable PDF
Beautifully formatted to print and relax while crocheting. The paid pattern includes:
The Ad-Free PDF can be purchased on Etsy or Ravelry.
Hooked on the Sea
GET THE COLLECTION
Make a splash with the Hooked on the Sea Crochet Collection—6 adorable no-sew sea creature patterns perfect for gifting, decorating, or selling at markets!
Click the box below to unlock this exclusive subscriber content for free. Add your email and create a password. If you are having trouble, reset your password or log in to the Grow Portal.
I’m thrilled to share this amazing crochet pattern with you! Please don’t copy, paste, or distribute this pattern. Prefer an ad-free experience? Purchase a digital PDF file for a small fee from one of my online stores. I appreciate your support and readership. You are why I can keep doing what I love and sharing it with others. Thank you from the bottom of my heart.
How to Crochet a Clam – Step-by-Step
1. Work the Clam Outer Shell (Make 2)
With Rosy (Dark Pink)
Rnd 1:
Rnd 5:
Ch 1, blo 2 sc in first, blo sc in next, *blo 2 sc in next, blo sc in next; repeat from * around, join and turn. | 36 sts
Rnd 6:
Ch 1, blo 2 sc in first, blo sc in the next 2 sts, *blo 2 sc in next, blo sc in the next 2 sts; repeat from * around, join and turn. | 48 sts
Rnds 7-8:
Ch 1, skip the first st, sc in next, work a puff st into the skipped st, *skip the next st, sc in next, work a puff st into the skipped st; repeat from * around, join and turn.
Fasten off the first Outer Shell with an invisible join.
Do NOT fasten off after second Outer Shell. Set both aside.
How to Crochet A Clam and Pearl Part 2
2. Work the Clam Inner Shell (Make 2)
With Ballerina (Light Pink)
Rnd 1:
Inside a Magic Ring, sc 6, do not join and work continuously, using a stitch marker to keep track of rnds. | 6 sts
Rnd 2:
2sc in each st around. | 12 sts
Rnd 3:
*2 sc in next, sc in next; repeat from * around. | 18 sts
Rnd 4:
*2 sc in next, sc in the next 2 sts; repeat from * around. | 24 sts
Rnd 5:
*2 sc in next, sc in the next 3 sts; repeat from * around. | 30 sts
Rnd 6:
*2 sc in next, sc in the next 4 sts; repeat from * around. | 36 sts
Rnd 7:
*2 sc in next, sc in the next 5 sts; repeat from * around. | 42 sts
Rnd 8:
*2 sc in next, sc in the next 6 sts; repeat from * around. | 48 sts
Do not fasten off.
3. Join the Inner and Outer Clam Shells
Place the Inner Shell inside/on top of the wrong side of the Outer Shell, and sl st through the blo of the Inner Shell and the flo of the Outer Shell to join all the way around. Fasten off the Inner Shell with an invisible join.
Repeat for the second Outer and Inner Shells, leaving the Outer Shell yarn attached for joining the top and bottom Shells in next step.
Join The Kindest Community
Join our vibrant community of crafters on Facebook today. Whether you enjoy crafting with others or simply have burning questions, we’ve got you covered – join us now!
4. Joining the Clam Shells
With the open edges facing each other, align the Shells and slip stitch through the unworked loops on both Shells for 14 stitches to create the hinge. Continue to Ruffles.
5. Clam Front Ruffles
Working into the unused loops around the front opening, begin at the bottom half of the Shell. Work 3 double crochets into each stitch across the bottom. Once complete, rotate your work and continue along the top half, working 3 double crochets into each remaining stitch around the opening. Fasten off with an invisible join.

6. Make the Pearl
With White
Rnd 1:
Inside a Magic Ring, sc 6, do not join and work continuously, using a stitch marker to keep track of rnds. | 6 sts
Rnd 2:
2sc in each st around. | 12 sts
Rnd 3:
*2 sc in next, sc in next; repeat from * around. | 18 sts
Rnd 4:
*2 sc in next, sc in the next 2 sts; repeat from * around. | 24 sts
Rnd 5:
*2 sc in next, sc in the next 3 sts; repeat from * around. | 30 sts
Rnds 6-9:
Sc in each st around.
Rnd 10:
*sc2tog in next, sc in the next 3 sts; repeat from * around. | 24 sts
Rnd 11:
*sc2tog in next, sc in the next 2 sts; repeat from * around. | 18 sts
Place safety eyes between rounds 6-7, and begin stuffing. Create optional smile if desired; the instructions are at the end of the pattern.
Rnd 12:
*sc2tog in next, sc in the next st; repeat from * around. | 12 sts
Rnd 13:
*sc2tog around. | 6 sts
Fasten off, then use the yarn tail and a yarn needle to weave through the front loops of the remaining stitches. Gently pull to close the opening.
If desired, use the tail end to sew the Pearl into the Clam Shell.
Yarn Tip
One of the great things about crocheting amigurumi is the freedom to experiment with any yarn you love — from fingering weight to bulky! Simply adjust your hook size to match your yarn choice, and have fun creating all kinds of clams!
Love the fuzzy yarn shown in this photo? Check out Lion Brand Feels Like Bliss! (We also have the yarn linked in our YouTube video! Visit YouTube and click on the product below the video.
Subscribe to my youtube channel
7. Finishing Your Sweet Shellfish
Weave in all ends and shellabrate your newest finished project!
Whether you’re crocheting a beach-themed set, adding a playful accent to a child’s toy collection, or simply looking for a fun weekend project, the Wheat Stitch Clam is a perfect fit. Its clever construction, textured stitch work, and adorable pearl detail make it a standout in any amigurumi lineup.
Ready to dive deeper into the sea of crochet? Check out the Key Largo Top, the Sanibel Blanket, and the Cabled Up in Sunshine Socks!
Cheers, and happy crocheting!
Well, That Was Fun! What’s Next?