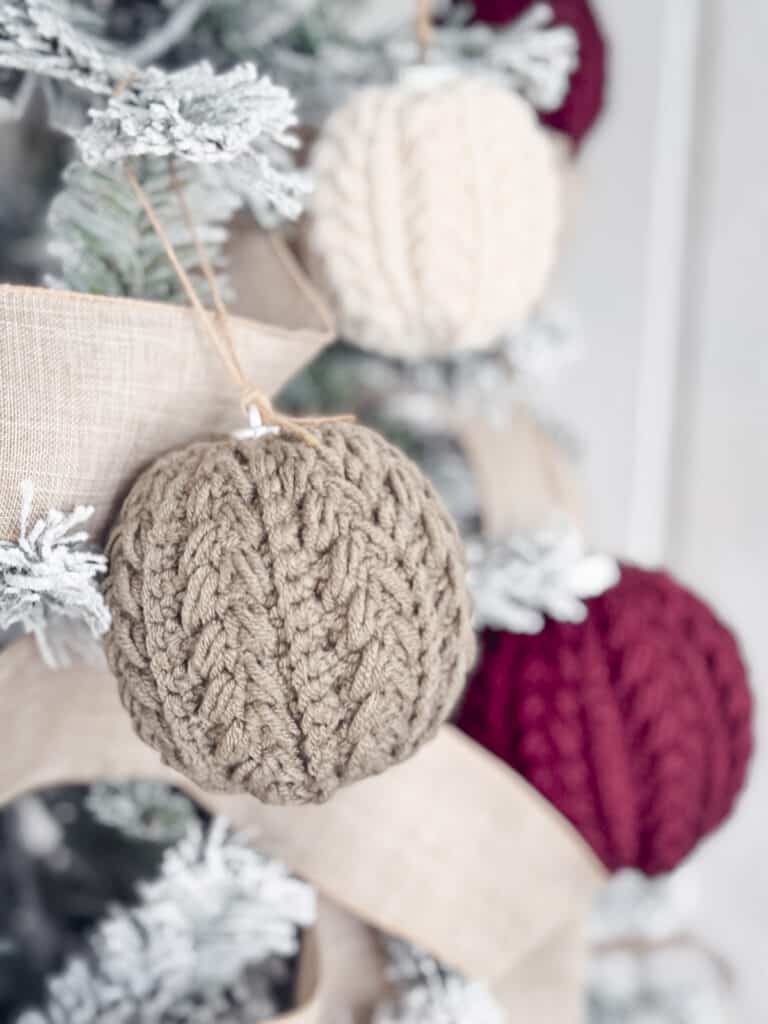
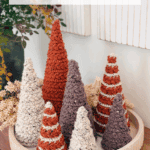
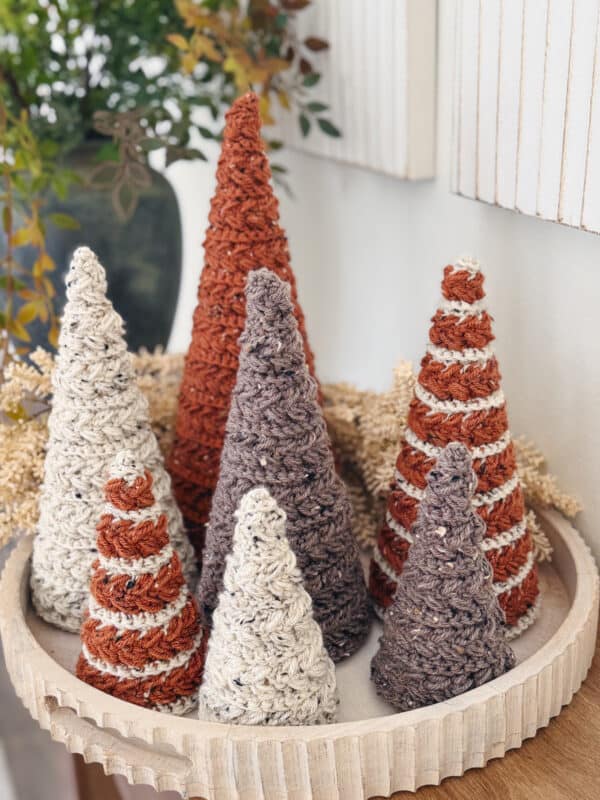
If you’re looking for a crochet project that’s festive, fun, and fabulously versatile, the Wheat Stitch™ Crochet Trees are here to sleigh your seasonal décor! Worked in the round with my signature wheat stitch™, these textured trees are simple to make and stunning to display.
Disclosure: This post contains affiliate links. Please read my disclosure for more info.
Whether you’re decking out your mantel, creating a handmade centerpiece, or crocheting thoughtful gifts, these trees bring cheer to every corner of your home. And the best part? They aren’t just for Christmas — with a quick color change, they transform into year-round decorations for any celebration. They also pair beautifully with any of the wheat stitch home décor projects, such as the Braided Wheat Stitch Blanket and the Wheat Stitch Nesting Baskets.
Wheat Stitch Tree Supplies
Yarn
Brava Tweed
97% Premium Acrylic, 3% Viscose 218yds/100g
Yarn Quantities
Small: 50 yds
Medium: 120 yds
Large: 205 yds
Yarn Substitutions
Brava Worsted – 100% Premium Acrylic, 218yds/100g
Herrschners Worsted 8 – 100% Acrylic, 489yds/226g
Herrschners Worsted 3 – 100% Acrylic, 183yds/85g
Red Heart Super Saver Flecks – 96% Acrylic/4% Other Fibers, 236yds/141g
Malabrigo Rios – 100% Superwash Merino Wool, 210yds/100g
Remember always to check the gauge and drape when substituting yarns.
Crochet Hook
Size US H (5.0mm) Crochet Hook or hook to obtain gauge.
Notions
Scissors
Yarn Needle
Removable Stitch Marker
Paper Mache Cones
Skill Level
Advanced Beginner
What you’ll love about this pattern.
? Seasonal versatility – Autumn, Halloween, Spring, or Christmas with just a color change.
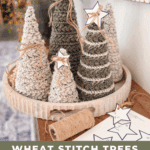
? Textured & unique – the wheat stitch makes these trees extra eye-catching.
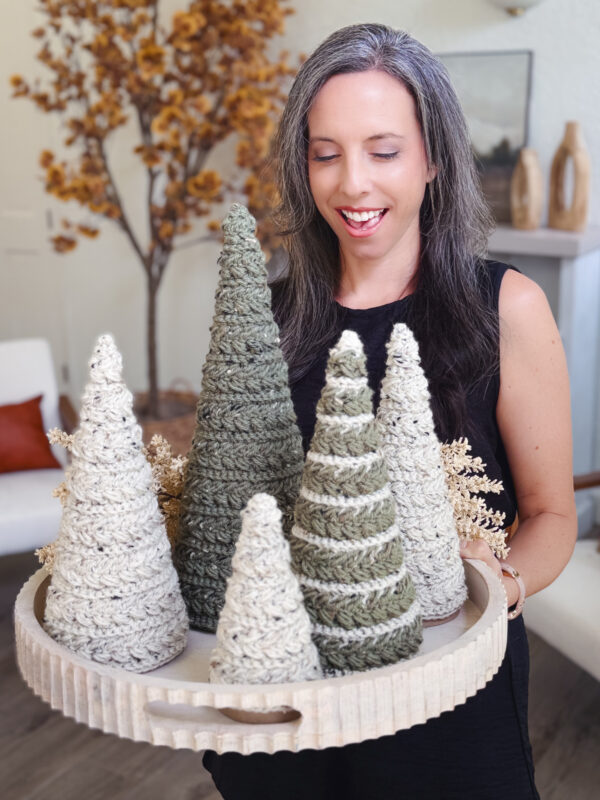
? Three sizes are included – small, medium, and large for a tiered look.
Three Sizes
Small (Medium, Large)
Height: 6 (10, 14)”
Width: 3 (4, 5)”
Abbreviations
blo – back loop only
ch – chain
flo – front loop only
RS – right side
sc – single crochet
sl st – slip stitch
st(s) – stitch(es)
WS – wrong side
Gauge
Gauge is not critical for this project.
How to Crochet A Gauge Swatch
Working a gauge swatch will let you know if you will have the correct sizing for this pattern. It will also help you practice the stitches used in this project and improve your stitch work for a flawless look.
Are you struggling to match the gauge? Check out the blog post on What is Crochet Gauge and How To Fix It
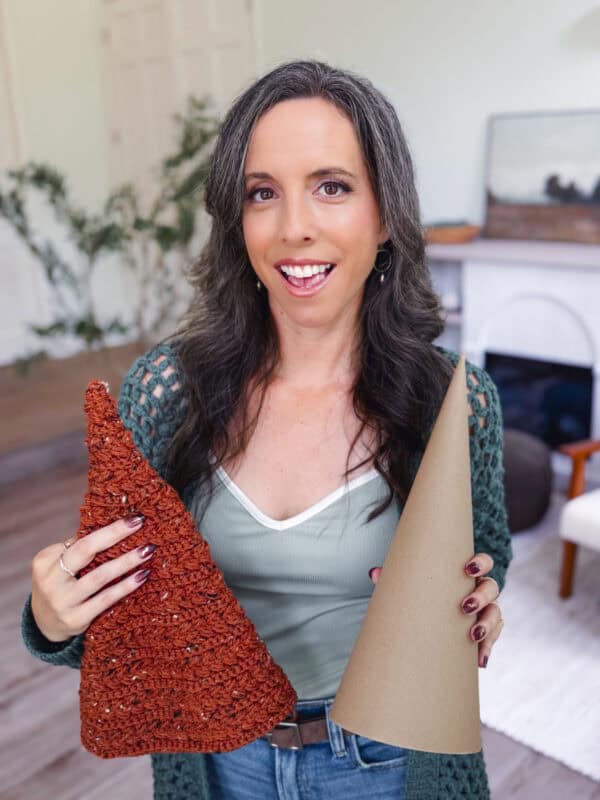
Construction
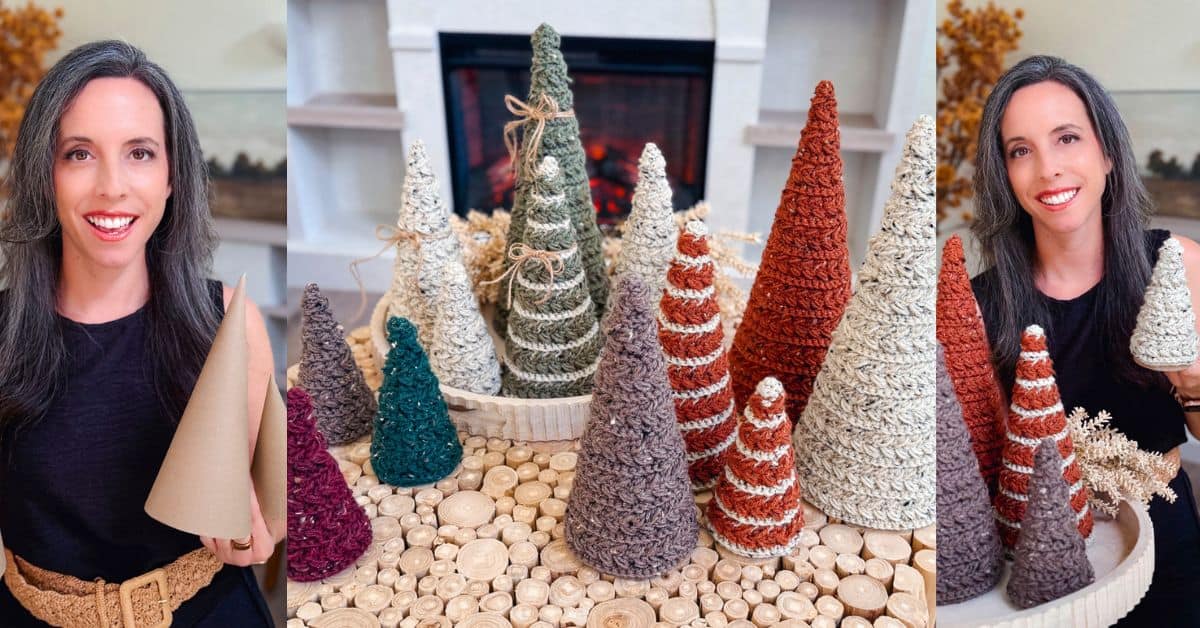
The Wheat Stitch Crochet Trees are worked from the top down in the round, starting at the very tip and growing larger with simple increases.
You can keep things classic with evergreen yarns, go modern with frosty silvers and whites, or even lean whimsical with candy-colored brights. These trees are fast, fun, and fabulous — perfect for beginners and experienced crocheters alike.
Add some extra wheat stitch flair to your holiday decorations with the Snowy Wheat Stitch Ornaments and the Festive Wheat Stitch Stockings!
Special Stitches
Puff Stitch: Yarn over and insert your hook into the stitch/space. Yarn over again and pull up a long loop. Yarn over and insert your hook into the same stitch/space. Yarn over again and pull up a long loop (5 loops on the hook). Yarn over and pull through the first 4 loops, yarn over and pull through remaining loops.
Pattern Notes
- A ch 1 at the beginning of a row is not counted as a stitch.
- Using a stitch marker at the beginning (or end) of the round is recommended.
- Invisible Join: Cut the yarn, leaving a 6-8 inch tail. Using your yarn needle, insert the needle under both loops of the second stitch of the round. Pull the yarn through gently, then insert the needle back into the center of the last stitch you made, going straight down through the middle (where the yarn exited).
- Weave in your ends neatly on the wrong side.
? FAQs About the Wheat Stitch Crochet Trees ?
Q: What skill level is this pattern?
A: Confident beginner! If you know how to crochet in the round and work increases, you can make these trees.
Q: Do I need to know the wheat stitch before starting?
A: Not at all — the pattern includes instructions for the wheat stitch, which is rhythmic and straightforward once you get the hang of it. But if you want to get a head start on learning the stitch, here’s a step-by-step tutorial: https://brianakdesigns.com/how-to-crochet-the-wheat-stitch/
Q: What yarn works best for this pattern?
A: Worsted-weight yarns work beautifully, but you can experiment! Try chunky yarn for oversized trees or thinner yarn for delicate miniatures. (Please remember that you may need more or less yarn if you decide to change weights. We aren’t able to help with the math involved to figure out yardage – or the sizing of the pattern.)
Q: How do I display the trees?
A: You can stretch them over foam cones, lightly stuff them with polyfill, or even stand them over the neck of a wine bottle for a festive gift wrap!
Q: How long does it take to make one tree?
A: Most crocheters can finish a small tree in under 2 hours, making this a perfect quick project.
Subscribe & Like
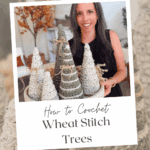
Video Tutorial for Wheat Stitch Trees
Relax & Crochet
Upgrade to the Printable PDF
Beautifully formatted for printing and relaxing while crocheting. The paid pattern includes:
The Ad-Free PDF can be purchased on Etsy or Ravelry.
Click the box below to unlock this exclusive subscriber content for free. Add your email and create a password. If you are having trouble, reset your password or log in to the Grow Portal.
I’m thrilled to share this amazing crochet pattern with you! Please don’t copy, paste, or distribute this pattern. Prefer an ad-free experience? Purchase a digital PDF file for a small fee from one of my online stores. I appreciate your support and readership. You are why I can keep doing what I love and sharing it with others. Thank you from the bottom of my heart.
Written Crochet Pattern Instructions
Tree
Rnd 10:
Ch 1, 2 blo sc in first, blo sc in next 3 sts, *blo 2 sc in next, blo sc in next 3 sts; repeat from * around, join and turn. | 20 sts
Rnds 11-12:
Repeat Rnds 3-4.
Rnd 13:
Ch 1, 2 blo sc in first, blo sc in next 4 sts, *blo 2 sc in next, blo sc in next 4 sts; repeat from * around, join and turn. | 24 sts
Rnd 14:
Ch 1, 2 blo sc in first, blo sc in the next 11 sts, 2 blo sc in next, blo sc in the next 11 sts, join and turn. | 26 sts
Rnds 15-16:
Repeat Rnds 3-4.
Rnd 17:
Ch 1, 2 blo sc in first, blo sc in the next 12 sts, 2 blo sc in next, blo sc in the next 12 sts, join and turn. | 28 sts
Rnd 18:
Ch 1, 2 blo sc in first, blo sc in next 6 sts, *blo 2 sc in next, blo sc in next 6 sts; repeat from * around, join and turn. | 32 sts
Rnds 19-20:
Repeat Rnds 3-4.
Rnd 21:
Ch 1, 2 blo sc in first, blo sc in next 7 sts, *blo 2 sc in next, blo sc in next 7 sts; repeat from * around, join and turn. | 36 sts
Rnd 22:
Ch 1, 2 blo sc in first, blo sc in the next 17 sts, 2 blo sc in next, blo sc in the next 17 sts, join and turn. | 38 sts
Stop here for Size Small and go to Finishing.
Join The Kindest Community
Join our vibrant community of crafters on Facebook today. Whether you enjoy crafting with others or simply have burning questions, we’ve got you covered – join us now!
Rnds 23-24:
Repeat Rnds 3-4.
Rnd 25:
Ch 1, 2 blo sc in first, blo sc in the next 18 sts, 2 blo sc in next, blo sc in the next 18 sts, join and turn. | 40 sts
Rnd 26:
Ch 1, 2 blo sc in first, blo sc in next 9 sts, *blo 2 sc in next, blo sc in next 9 sts; repeat from * around, join and turn. | 44 sts
Rnds 27-28:
Repeat Rnds 3-4.
Rnd 29:
Ch 1, 2 blo sc in first, blo sc in next 10 sts, *blo 2 sc in next, blo sc in next 10 sts; repeat from * around, join and turn. | 48 sts
Rnd 30:
Ch 1, 2 blo sc in first, blo sc in the next 23 sts, 2 blo sc in next, blo sc in the next 23 sts, join and turn. | 50 sts
Rnds 31-32:
Repeat Rnds 3-4.
Rnd 33:
Ch 1, 2 blo sc in first, blo sc in the next 24 sts, 2 blo sc in next, blo sc in the next 24 sts, join and turn. | 52 sts
Rnd 34:
Ch 1, 2 blo sc in first, blo sc in next 12 sts, *blo 2 sc in next, blo sc in next 12 sts; repeat from * around, join and turn. | 56 sts
Stop here for Size Medium and go to Finishing.
Rnds 35-36:
Repeat Rnds 3-4.
Rnd 37:
Ch 1, 2 blo sc in first, blo sc in next 13 sts, *blo 2 sc in next, blo sc in next 13 sts; repeat from * around, join and turn. | 60 sts
Rnd 38:
Ch 1, 2 blo sc in first, blo sc in the next 29 sts, 2 blo sc in next, blo sc in the next 29 sts, join and turn. | 62 sts
Rnds 39-40:
Repeat Rnds 3-4.
Rnd 41:
Ch 1, 2 blo sc in first, blo sc in the next 30 sts, 2 blo sc in next, blo sc in the next 30 sts, join and turn. | 64 sts
Rnd 42:
Ch 1, 2 blo sc in first, blo sc in next 15 sts, *blo 2 sc in next, blo sc in next 15 sts; repeat from * around, join and turn. | 68 sts
Rnds 43-44:
Repeat Rnds 3-4.
Rnd 45:
Ch 1, 2 blo sc in first, blo sc in next 16 sts, *blo 2 sc in next, blo sc in next 16 sts; repeat from * around, join and turn. | 72 sts
Rnd 46:
Ch 1, 2 blo sc in first, blo sc in the next 35 sts, 2 blo sc in next, blo sc in the next 35 sts, join and turn. | 74 sts
Finishing
Subscribe to my youtube channel
Fasten off and weave in all ends so your tree is neat and tidy, and get ready to deck the halls! Carefully stretch the crochet piece over the coordinating cone, and secure with double-sided tape or a few dabs of glue, if desired. You can also stuff your tree piece with polyfil for a squishy stand-alone decoration. For an optional festive twist, perch the crocheted piece over the neck of a wine bottle to create the cutest handmade gift at the party!
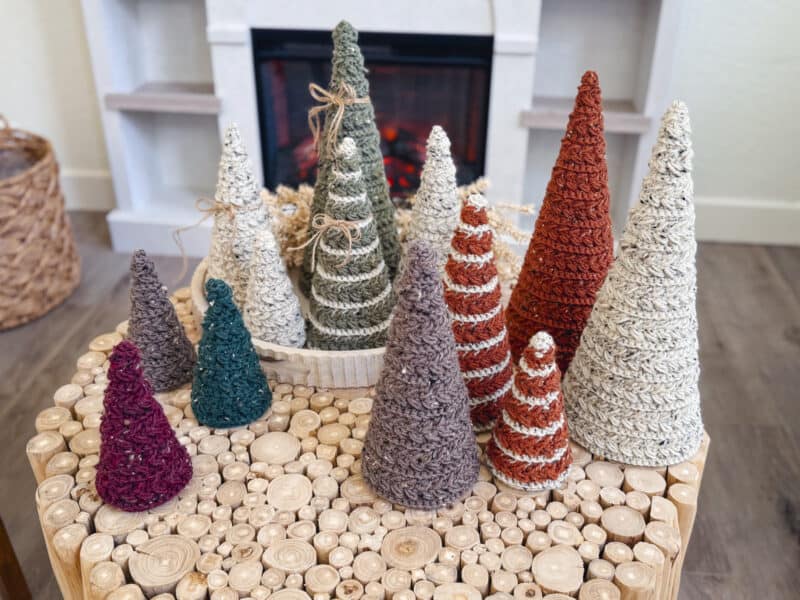
The Wheat Stitch™ Crochet Trees are the perfect way to bring warmth, texture, and handmade charm into your holiday (and everyday!) décor. With three sizes and endless color options, you can stitch up a forest that fits any season — from frosty Christmas mornings to cozy autumn evenings.
Whether you’re making them for yourself, gifting them to loved ones, or prepping inventory for holiday markets, these trees are a project you’ll come back to year after year.
Cheers, and happy crocheting!
And here are more festive patterns you’ll love!
☕Wheat Stitch Pumpkin Cup Cozy – let your coffee enjoy sweater weather too!
? Hexagon Granny Stocking – use one color or multiple to create your own perfect stocking!
? Prancing Deer Blanket – works up quickly with bulky-weight yarn!
? Autumn Wheat Bauble – super quick, super simple, super festive!
Well, That Was Fun! What’s Next?