


Disclosure: This post contains affiliate links. Please read my disclosure for more info.
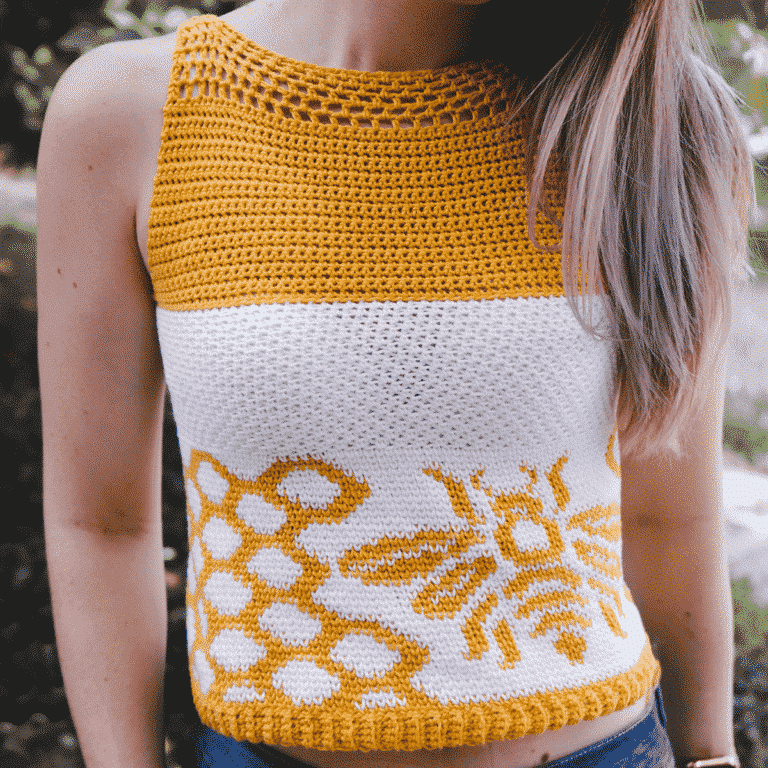
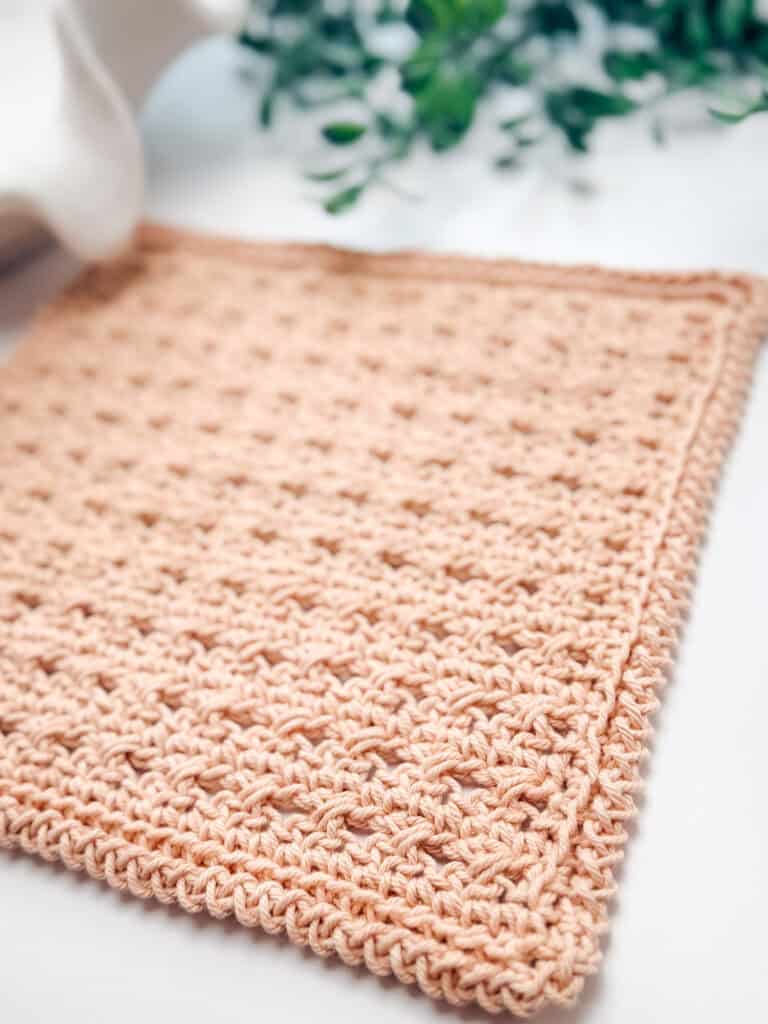
The crochet filet diamond pattern allows just enough peak through to add a mature look with the perfect amount of whimsy. After you make your first one, I know you are going to want to make one in all the colors, or check out a similar filet top like the Honeycomb Crochet Tank Top Pattern.
The Shine Like A Diamond Crochet Tank Top is so versatile, you can dress it down or dress it up easily with your bottom and accessory choices.

For instance, I would pair the Shine Like A Diamond Tank Top with a fun flare skirt with flip-flops and a long necklace for the perfect outfit for a summer BBQ.
For a classic look, I would pair the Shine Like A Diamond Crochet Tank Top with nice pair of capris with a wedge heel and a cardigan.
Crochet Pattern Supplies
Crochet Hook
Notions
Removable stitch marker
Yarn needle to weave in ends
Scissors
6-9 buttons (3/8 to 1/2 inch)
Yarn & Yarndage
WeCrochet Comfy Fingering 55% Pima Cotton, 25% Acrylic, 218 yds/50g
OR
WeCrochet Stroll Fingering Weight 75% Fine Superwash Merino Wool, 25% Nylon, 231yds/50g
Extra Small: 540 yard (494 m) – 3 Balls
Small: 560 yards (512 m) – 3 Balls
Medium: 680 yards (621 m) – 3 Balls
Large: 830 yards (759 m) – 4 Balls
1X: 950 yards (869 m) – 5 Balls
2X: 1150 yards (1052 m) – 5 Balls
3X: 1300 yards (1189 m) – 6 Balls
26 double crochet stitches by 13 double crochet rows = 4×4” (10 cm)

What you’ll love about this tank top pattern.
?No Seaming – The top is crocheted in one piece and seamless, similar to the Lollipop Summer Cardigan Crochet Pattern
?Gorgeous Yet Easy Stitches – It’s easy to create the diamond look because it’s all done in double crochet stitches and chains. But if you want a more lacy design, check out the The Lacy Key Largo Top.
?Perfect for Warm Months – Since we are using a lightweight yarn, this is comfortable to wear during the summer. And if you want a lightweight lacy sweater for spring, try the Muse Crochet Summer Top Pattern .
? Size Inclusive – The Adult size crochet pattern is available in size x-small to plus size 3x.
Abbreviations
ch – chain
dc – double crochet
dc3tog – double crochet three together
RS – right side
sc – single crochet
sl st – slip stitch
st(s) – stitch(es)
Stsc – stacked single crochet
Stsc-dc3tog – Stacked single crochet 3 together
WS – wrong side
yo- yarn over
Measurements:
This is the finished bust measurement of the garment:
Extra Small: 28.5” (72 cm)
Small: 31” (79 cm)
Medium: 36” (92 cm)
Large: 41” (104 cm)
1X: 47” (119 cm)
2X: 52.5” (133 cm)
3X: 58” (147 cm)
Diamond Crochet Tank Video Tutorial

Important Pattern Notes
The Shine Like A Diamond Top works as one piece, from the bottom up, and in rows. If a longer length is desired, add one more repeat on the body portion. Trim is added, and at the same time, buttonholes are created for the front.
Sizes are written as Extra Small (Small, Medium, Large) (1X, 2X, 3X). This is a fitted garment; the bust sizes are the actual measurements.
A crochet i-cord can be used as an alternative strap.
When the pattern says dc 3, this means to double crochet in the next 3 sts.
Special Stitches:
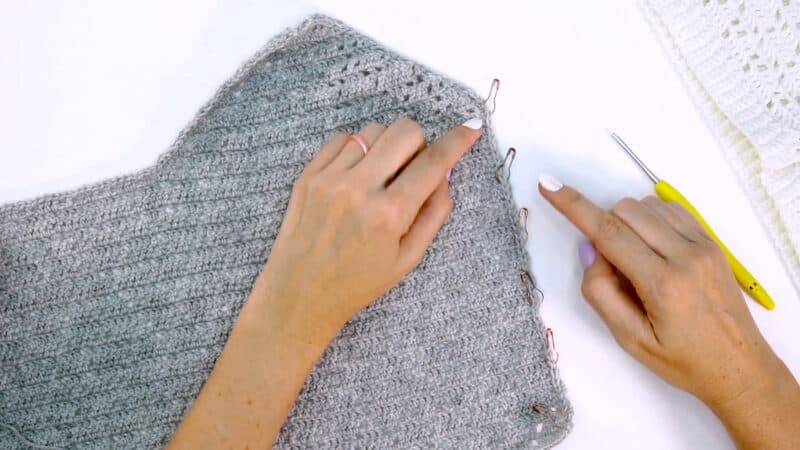
Stacked single crochet (stsc): this is crocheted at the beginning of each row instead of chaining. The stacked single crochet counts as a double crochet stitch. The same stitch is modified for the decreases. Replacing the beginning chain with this method creates cleaner lines along the garment. It is helpful to place a marker at the beginning of each row to mark the first stitch.
Double crochet decreasing: for this pattern, a dc3tog is used as a decrease on each edge when shaping the top. The method used for this incorporates the stacked single crochet.
Join The Kindest Community
Join our vibrant community of crafters on Facebook today. Whether you enjoy crafting with others or simply have burning questions, we’ve got you covered – join us now!

Relax & Crochet
Upgrade to the Printable PDF
Beautifully formatted to print and relax while crocheting. The paid pattern includes:
This pattern can be purchased on Ravelry or Etsy or Ribblr
When you purchase the premium pattern it also includes the chart repeat for all sizes, plus the chart for the front top of the tank top. And it has a schematic and easy print options.
Diamond Tank Top Bottom Body (All Sizes)
Click the box below to unlock this exclusive subscriber content for free. Add your email and create a password. If you are having trouble, reset your password or log in to the Grow Portal.
I’m thrilled to share this amazing crochet pattern with you! Please don’t copy, paste, or distribute this pattern. Prefer an ad-free experience? Purchase a digital PDF file for a small fee from one of my online stores. I appreciate your support and readership. You are why I can keep doing what I love and sharing it with others. Thank you from the bottom of my heart.
Join The Kindest Community
Join our vibrant community of crafters on Facebook today. Whether you enjoy crafting with others or simply have burning questions, we’ve got you covered – join us now!
Extra Small – Right & Left Fronts
With the RS facing, mark the 47th stitch in the row. This section will only be worked to the stitch marker.
Row 1 (RS):
Stsc-dc3tog, *dc 3, ch 1, skip 1, dc 2*; repeat from * to * until the last 8 sts, dc 3, (ch 1, skip 1), dc 1, dc3tog, turn. 43 sts
Row 2:
Stsc-dc3tog, *ch 1, skip 1, dc 3, ch 1, skip 1, dc 1*; repeat from * to * until the last 4 sts, ch 1, skip 1, dc3tog, turn. 39 sts
Row 3:
Stsc-dc3tog, *(dc 1, ch 1, skip 1) twice, dc 2*; repeat from * to * until the last 6 sts, dc 1, ch 1, skip 1, dc 1, dc3tog, turn. 35 sts
Row 4:
Stsc-dc3tog, *dc 4, ch 1, skip 1, dc 1*; repeat from * to * until the last 8 sts, dc 4, ch 1, skip 1, dc3tog, turn. 31 sts
Row 5:
Stsc-dc3tog, *dc 3, ch 1, skip 1, dc 1, ch 1, skip 1*; repeat from * to * until the last 4 sts, dc 1, dc3tog, turn. 27 sts
Row 6:
Stsc-dc3tog, *dc 2, (ch 1, skip 1, dc 1) twice*; repeat from * to * until the last 6 sts, dc 2, ch 1, skip 1, dc3tog, turn. 23 sts
Row 7:
Stsc-dc3tog, *dc 3, ch 1, skip 1, dc 2*; repeat until the last 8 sts, dc 3, ch 1, skip 1, dc 1, dc3tog, turn. 19 sts
Row 8:
Stsc-dc3tog, *ch 1, skip 1, dc 3, ch 1, skip 1, dc 1*; repeat from * to * until the last 4 sts, ch 1, skip 1, dc3tog, turn. 15 sts
Row 9:
Stsc-dc3tog, *(dc 1, ch 1, skip 1) twice, dc 3, ch 1, skip 1, dc 1, dc3tog, turn. 11 sts
Row 10:
Stsc-dc3tog, dc 4, ch 1, skip 1, dc3tog, turn. 7 sts
Row 11:
Stsc-dc3tog, dc 3, dc 1, dc3tog. 3 sts Fasten off.
For the second side, have the RS facing and count in 47 sts from the opposite side and attach the yarn, then repeat the instructions above.
Small & Medium – Right & Left Fronts
With the RS facing, mark the 53rd stitch in the row. This section will only be worked to the stitch marker.
Row 1 (RS):
Stsc-dc3tog, *dc 3, ch 1, skip 1, dc 2*; repeat from * to * until the last 8 sts, dc 3, (ch 1, skip 1), dc 1, dc3tog, turn. 49 sts
Row 2:
Stsc-dc3tog, *ch 1, skip 1, dc 3, ch 1, skip 1, dc 1*; repeat from * to * until the last 4 sts, ch 1, skip 1, dc3tog, turn. 45 sts
Row 3:
Stsc-dc3tog, *(dc 1, ch 1, skip 1) twice, dc 2*; repeat from * to * until the last 6 sts, dc 1, ch 1, skip 1, dc 1, dc3tog, turn. 41 sts
Row 4:
Stsc-dc3tog, *dc 4, ch 1, skip 1, dc 1*; repeat from * to * until the last 8 sts, dc 4, ch 1, skip 1, dc3tog, turn. 37 sts
Row 5:
Stsc-dc3tog, *dc 3, ch 1, skip 1, dc 1, ch 1, skip 1*; repeat from * to * until the last 4 sts, dc 1, dc3tog, turn. 33 sts
Row 6:
Stsc-dc3tog, *dc 2, (ch 1, skip 1, dc 1) twice*; repeat from * to * until the last 6 sts, dc 2, ch 1, skip 1, dc3tog, turn. 29 sts
Row 7:
Stsc-dc3tog, *dc 3, ch 1, skip 1, dc 2*; repeat until the last 8 sts, dc 3, ch 1, skip 1, dc 1, dc3tog, turn. 25 sts
Row 8:
Stsc-dc3tog, *ch 1, skip 1, dc 3, ch 1, skip 1, dc 1*; repeat from * to * until the last 4 sts, ch 1, skip 1, dc3tog, turn. 21 sts
Row 9:
Stsc-dc3tog, *(dc 1, ch 1, skip 1) twice, dc 2*; repeat from * to * until the last 6 sts, dc 1, ch 1, skip 1, dc 1, dc3tog, turn. 17 sts
Row 10:
Stsc-dc3tog, dc 4, ch 1, skip 1, dc 5, ch 1, skip 1, dc3tog, turn. 13 sts
Row 11:
Stsc-dc3tog, dc 3, (ch 1, skip 1, dc 1) twice, dc3tog, turn. 9 sts
Row 12:
Stsc-dc3tog, dc 2, ch 1, skip 1, dc3tog, turn. 5 sts
Row 13:
Stsc in first, dc3tog, dc in last. 3 sts
Fasten off.
For the second side, have the RS facing and count in 53 sts from the opposite side and attach the yarn, then repeat the instructions above.

Large – Right & Left Fronts
With the RS facing, mark the 65th stitch in the row. This section will only be worked to the stitch marker.
Row 1 (RS):
Stsc-dc3tog, *dc 3, ch 1, skip 1, dc 2*; repeat from * to * until the last 8 sts, dc 3, (ch 1, skip 1), dc 1, dc3tog, turn. 61 sts
Row 2:
Stsc-dc3tog, *ch 1, skip 1, dc 3, ch 1, skip 1, dc 1*; repeat from * to * until the last 4 sts, ch 1, skip 1, dc3tog, turn. 57 sts
Row 3:
Stsc-dc3tog, *(dc 1, ch 1, skip 1) twice, dc 2*; repeat from * to * until the last 6 sts, dc 1, ch 1, skip 1, dc 1, dc3tog, turn. 53 sts
Row 4:
Stsc-dc3tog, *dc 4, ch 1, skip 1, dc 1*; repeat from * to * until the last 8 sts, dc 4, ch 1, skip 1, dc3tog, turn. 49 sts
Row 5:
Stsc-dc3tog, *dc 3, ch 1, skip 1, dc 1, ch 1, skip 1*; repeat from * to * until the last 4 sts, dc 1, dc3tog, turn. 45 sts
Row 6:
Stsc-dc3tog, *dc 2, (ch 1, skip 1, dc 1) twice*; repeat from * to * until the last 6 sts, dc 2, ch 1, skip 1, dc3tog, turn. 41 sts
Row 7:
Stsc-dc3tog, *dc 3, ch 1, skip 1, dc 2*; repeat until the last 8 sts, dc 3, ch 1, skip 1, dc 1, dc3tog, turn. 37 sts
Row 8:
Stsc-dc3tog, *ch 1, skip 1, dc 3, ch 1, skip 1, dc 1*; repeat from * to * until the last 4 sts, ch 1, skip 1, dc3tog, turn. 33 sts
Row 9:
Stsc-dc3tog, *(dc 1, ch 1, skip 1) twice, dc 2*; repeat from * to * until the last 6 sts, dc 1, ch 1, skip 1, dc 1, dc3tog, turn. 29 sts
Row 10:
Stsc-dc3tog, *dc 4, ch 1, skip 1, dc 1*; repeat from * to * until the last 8 sts, dc 4, ch 1, skip 1, dc3tog, turn. 25 sts
Row 11:
Stsc-dc3tog, *dc 3, ch 1, skip 1, dc 1, ch 1, skip 1*; repeat from * to * until the last 4 sts, dc 1, dc3tog, turn. 21 sts
Row 12:
Stsc-dc3tog, *dc 2, (ch 1, skip 1, dc 1) twice*; repeat from * to * until the last 6 sts, dc 2, ch 1, skip 1, dc3tog, turn. 17 sts
Row 13:
Stsc-dc3tog, dc 3, ch 1, skip 1, dc 5, ch 1, skip 1, dc 1, dc3tog, turn. 13 sts
Row 14:
Stsc-dc3tog, ch 1, skip 1, dc 3, ch 1, skip 1, dc 1, ch 1, skip 1, dc3tog, turn. 9 sts
Row 15:
Stsc-dc3tog, dc 1, ch 1, skip 1, dc 1, dc3tog, turn. 5 sts
Row 16:
Stsc-dc3tog, dc 4, ch 1, skip 1, dc 5, ch 1, skip 1, dc3tog. 3 sts
Fasten off.
For the second side, have the RS facing and count in 65 sts from the opposite side and attach the yarn, then repeat the instructions above.
1X – Right & Left Fronts
With the RS facing, mark the 77th stitch in the row. This section will only be worked to the stitch marker.
Row 1 (RS):
Stsc-dc3tog, *dc 3, ch 1, skip 1, dc 2*; repeat from * to * until the last 8 sts, dc 3, (ch 1, skip 1), dc 1, dc3tog, turn. 73 sts
Row 2:
Stsc-dc3tog, ch 1, skip 1, dc 3, ch 1, skip 1, dc 1; r epeat from * to * until the
last 4 sts, ch 1, skip 1, dc3tog, turn. 69 sts
Row 3:
Stsc-dc3tog, (dc 1, ch 1, skip 1 ) twice, dc 2; repeat from * to * until the last 6
sts, dc 1, ch 1, skip 1, dc 1, dc3tog, turn. 65 sts
Row 4:
Stsc-dc3tog, dc 4, ch 1, skip 1, dc 1; repeat from * to * until the last 8 sts, dc 4,
ch 1, skip 1, dc3tog, turn. 61 sts
Row 5:
Stsc-dc3tog, dc 3, ch 1, skip 1, dc 1, ch 1, skip 1; repeat from * to * until the
last 4 sts, dc 1, dc3tog, turn. 57 sts
Row 6:
Stsc-dc3tog, dc 2, ( ch 1, skip 1, dc 1 ) twice; repeat from * to * until the last 6
sts, dc 2, ch 1, skip 1, dc3tog, turn. 53 sts
Row 7:
Stsc-dc3tog, dc 3, ch 1, skip 1, dc 2; repeat until the last 8 sts, dc 3, ch 1, skip
1, dc 1, dc3tog, turn. 49 sts
Row 8:
Stsc-dc3tog, ch 1, skip 1, dc 3, ch 1, skip 1, dc 1; repeat from * to * until the
last 4 sts, ch 1, skip 1, dc3tog, turn. 45 sts
Row 9:
Stsc-dc3tog, (dc 1, ch 1, skip 1 ) twice, dc 2; repeat from * to * until the last 6
sts, dc 1, ch 1, skip 1, dc 1, dc3tog, turn. 41 sts
Row 10:
Stsc-dc3tog, dc 4, ch 1, skip 1, dc 1; repeat from * to * until the last 8 sts, dc
4, ch 1, skip 1, dc3tog, turn. 37 sts
Row 11:
Stsc-dc3tog, dc 3, ch 1, skip 1, dc 1, ch 1, skip 1; repeat from * to * until the
last 4 sts, dc 1, dc3tog, turn. 33 sts
Row 12:
Stsc-dc3tog, dc 2, ( ch 1, skip 1, dc 1 ) twice; repeat from * to * until the last 6
sts, dc 2, ch 1, skip 1, dc3tog, turn. 29 sts
Row 13:
Stsc-dc3tog, dc 3, ch 1, skip 1, dc 2; r epeat from * to * until the last 8 sts, dc
3, (ch 1, skip 1), dc 1, dc3tog, turn. 25 sts
Row 14:
Stsc-dc3tog, ch 1, skip 1, dc 3, ch 1, skip 1, dc 1; r epeat from * to * until the
last 3 sts, ch 1, skip 1, dc3tog, turn. 21 sts
Row 15:
Stsc-dc3tog, (dc 1, ch 1, skip 1 ) twice, dc 2; r epeat from * to * until the last 6
sts, dc 1, ch 1, skip 1, dc 1, dc3tog, turn. 17 sts
Row 16:
Stsc-dc3tog, dc 4, ch 1, skip 1, dc 5, ch 1, skip 1, dc3tog, turn. 13 sts
Row 17:
Stsc-dc3tog, dc 3, (ch 1, skip 1, dc 1) twice, dc3tog, turn. 9 sts
Row 18:
Stsc-dc3tog, dc 2, ch 1, skip 1, dc3tog, turn. 5 sts
Row 19:
Stsc in first, dc3tog, dc in last. 3 sts
Fasten off.
For the second side, have the RS facing and count in 77 sts from the opposite side and attach the yarn, then repeat the instructions above.
2X – Right & Left Fronts
With the RS facing, mark the 83rd stitch in the row. This section will only be worked to the stitch marker.
Row 1 (RS):
Stsc-dc3tog, *dc 3, ch 1, skip 1, dc 2*; repeat from * to * until the last 8 sts, dc 3, (ch 1, skip 1), dc 1, dc3tog, turn. 79 sts
Row 2:
Stsc-dc3tog, *ch 1, skip 1, dc 3, ch 1, skip 1, dc 1*; repeat from * to * until the last 4 sts, ch 1, skip 1, dc3tog, turn. 75 sts
Row 3:
Stsc-dc3tog, *(dc 1, ch 1, skip 1) twice, dc 2*; repeat from * to * until the last 6 sts, dc 1, ch 1, skip 1, dc 1, dc3tog, turn. 71 sts
Row 4:
Stsc-dc3tog, *dc 4, ch 1, skip 1, dc 1*; repeat from * to * until the last 8 sts, dc 4, ch 1, skip 1, dc3tog, turn. 67 sts
Row 5:
Stsc-dc3tog, *dc 3, ch 1, skip 1, dc 1, ch 1, skip 1*; repeat from * to * until the last 4 sts, dc 1, dc3tog, turn. 63 sts
Row 6:
Stsc-dc3tog, *dc 2, (ch 1, skip 1, dc 1) twice*; repeat from * to * until the last 6 sts, dc 2, ch 1, skip 1, dc3tog, turn. 59 sts
Row 7:
Stsc-dc3tog, *dc 3, ch 1, skip 1, dc 2*; repeat until the last 8 sts, dc 3, ch 1, skip 1, dc 1, dc3tog, turn. 55 sts
Row 8:
Stsc-dc3tog, *ch 1, skip 1, dc 3, ch 1, skip 1, dc 1*; repeat from * to * until the last 4 sts, ch 1, skip 1, dc3tog, turn. 51 sts
Row 9:
Stsc-dc3tog, *(dc 1, ch 1, skip 1) twice, dc 2*; repeat from * to * until the last 6 sts, dc 1, ch 1, skip 1, dc 1, dc3tog, turn. 47 sts
Row 10:
Stsc-dc3tog, *dc 4, ch 1, skip 1, dc 1*; repeat from * to * until the last 8 sts, dc 4, ch 1, skip 1, dc3tog, turn. 43 sts
Row 11:
Stsc-dc3tog, *dc 3, ch 1, skip 1, dc 1, ch 1, skip 1*; repeat from * to * until the last 4 sts, dc 1, dc3tog, turn. 39 sts
Row 12:
Stsc-dc3tog, *dc 2, (ch 1, skip 1, dc 1) twice*; repeat from * to * until the last 6 sts, dc 2, ch 1, skip 1, dc3tog, turn. 35 sts
Row 13:
Stsc-dc3tog, *dc 3, ch 1, skip 1, dc 2*; repeat from * to * until the last 8 sts, dc 3, (ch 1, skip 1), dc 1, dc3tog, turn. 31 sts
Row 14:
Stsc-dc3tog, *ch 1, skip 1, dc 3, ch 1, skip 1, dc 1*; repeat from * to * until the last 3 sts, ch 1, skip 1, dc3tog, turn. 27 sts
Row 15:
Stsc-dc3tog, *(dc 1, ch 1, skip 1) twice, dc 2*; repeat from * to * until the last 6 sts, dc 1, ch 1, skip 1, dc 1, dc3tog, turn. 23 sts
Row 16:
Stsc-dc3tog, *dc 4, ch 1, skip 1, dc 1*; repeat from * to * until the last 8 sts, dc 4, ch 1, skip 1, dc3tog, turn. 19 sts
Row 17:
Stsc-dc3tog, *dc 3, ch 1, skip 1, dc 1, ch 1, skip 1*; repeat from * to * until the last 4 sts, dc 1, dc3tog, turn. 15 sts
Row 18:
Stsc-dc3tog, dc 2, ch 1, skip 1, dc 1, ch 1, skip 1, dc 3, ch 1, skip 1, dc3tog, turn. 11 sts
Row 19:
Stsc-dc3tog, dc 3, ch 1, skip 1, dc 1, dc3tog, turn. 7 sts
Row 20:
Stsc-dc3tog, dc 1, dc3tog. 3 sts
Fasten off.
For the second side, have the RS facing and count in 83 sts from the opposite side and attach the yarn, then repeat the instructions above.

3X – Right & Left Fronts
With the RS facing, mark the 89th stitch in the row. This section will only be worked to the stitch marker.
Row 1 (RS):
Stsc-dc3tog, *dc 3, ch 1, skip 1, dc 2*; repeat from * to * until the last 8 sts, dc 3, (ch 1, skip 1), dc 1, dc3tog, turn. 85 sts
Row 2:
Stsc-dc3tog, *ch 1, skip 1, dc 3, ch 1, skip 1, dc 1*; repeat from * to * until the last 4 sts, ch 1, skip 1, dc3tog, turn. 81 sts
Row 3:
Stsc-dc3tog, *(dc 1, ch 1, skip 1) twice, dc 2*; repeat from * to * until the last 6 sts, dc 1, ch 1, skip 1, dc 1, dc3tog, turn. 77 sts
Row 4:
Stsc-dc3tog, *dc 4, ch 1, skip 1, dc 1*; repeat from * to * until the last 8 sts, dc 4, ch 1, skip 1, dc3tog, turn. 73 sts
Row 5:
Stsc-dc3tog, *dc 3, ch 1, skip 1, dc 1, ch 1, skip 1*; repeat from * to * until the last 4 sts, dc 1, dc3tog, turn. 69 sts
Row 6:
Stsc-dc3tog, *dc 2, (ch 1, skip 1, dc 1) twice*; repeat from * to * until the last 6 sts, dc 2, ch 1, skip 1, dc3tog, turn. 65 sts
Row 7:
Stsc-dc3tog, *dc 3, ch 1, skip 1, dc 2*; repeat until the last 8 sts, dc 3, ch 1, skip 1, dc 1, dc3tog, turn. 61 sts
Row 8:
Stsc-dc3tog, *ch 1, skip 1, dc 3, ch 1, skip 1, dc 1*; repeat from * to * until the last 4 sts, ch 1, skip 1, dc3tog, turn. 57 sts
Row 9:
Stsc-dc3tog, *(dc 1, ch 1, skip 1) twice, dc 2*; repeat from * to * until the last 6 sts, dc 1, ch 1, skip 1, dc 1, dc3tog, turn. 53 sts
Row 10:
Stsc-dc3tog, *dc 4, ch 1, skip 1, dc 1*; repeat from * to * until the last 8 sts, dc 4, ch 1, skip 1, dc3tog, turn. 49 sts
Row 11:
Stsc-dc3tog, *dc 3, ch 1, skip 1, dc 1, ch 1, skip 1*; repeat from * to * until the last 4 sts, dc 1, dc3tog, turn. 45 sts
Row 12:
Stsc-dc3tog, *dc 2, (ch 1, skip 1, dc 1) twice*; repeat from * to * until the last 6 sts, dc 2, ch 1, skip 1, dc3tog, turn. 41 sts
Row 13:
Stsc-dc3tog, *dc 3, ch 1, skip 1, dc 2*; repeat from * to * until the last 8 sts, dc 3, (ch 1, skip 1), dc 1, dc3tog, turn. 37 sts
Row 14:
Stsc-dc3tog, *ch 1, skip 1, dc 3, ch 1, skip 1, dc 1*; repeat from * to * until the last 3 sts, ch 1, skip 1, dc3tog, turn. 33 sts
Row 15:
Stsc-dc3tog, *(dc 1, ch 1, skip 1) twice, dc 2*; repeat from * to * until the last 6 sts, dc 1, ch 1, skip 1, dc 1, dc3tog, turn. 29 sts
Row 16:
Stsc-dc3tog, *dc 4, ch 1, skip 1, dc 1*; repeat from * to * until the last 8 sts, dc 4, ch 1, skip 1, dc3tog, turn. 25 sts
Row 17:
Stsc-dc3tog, *dc 3, ch 1, skip 1, dc 1, ch 1, skip 1*; repeat from * to * until the last 4 sts, dc 1, dc3tog, turn. 21 sts
Row 18:
Stsc-dc3tog, *dc 2, (ch 1, skip 1, dc 1) twice*; repeat from * to * until the last 6 sts, dc 2, ch 1, skip 1, dc3tog, turn. 17 sts
Row 19:
Stsc-dc3tog, dc 3, ch 1, skip 1, dc 5, ch 1, skip 1, dc 1, dc3tog, turn. 13 sts
Row 20:
Stsc-dc3tog, ch 1, skip 1, dc 3, ch 1, skip 1, dc 1, ch 1, skip 1, dc3tog, turn. 9 sts
Row 21:
Stsc-dc3tog, dc 1, ch 1, skip 1, dc 1, dc3tog, turn. 5 sts
Row 22:
Stsc in first, dc3tog, dc in last. 3 sts
Fasten off.
For the second side, have the RS facing and count in 89 sts from the opposite side and attach the yarn, then repeat the instructions above.
Diamond Crochet Tank Top Edging
With the RS facing, attach the yarn on the front at the first decreasing row, loosely sl st around all the edges without causing any puckering, join to the first st with a sl st. Do not fasten off.
Tips:
Chain 1 on the corners.
Sl st 3 sts per 2 rows along the row edges.
St st 2 sts per row along the decreased edges.
Work in the blo of top and bottom st edges.
First Front Trim
Row 1:
Ch 1 (does not count as a stitch here and for the rest of the pattern), working in the blo sc down the front of the opening, turn.
Row 2:
Ch 1, sc in each front st across, turn.
Row 3:
Ch 1, in the flo sl st in each front st across, fasten off.
Second Front Trim & Button Holes
Row 1:
With the RS facing, use stitch markers to mark the button holes evenly spaced across the front. Each buttonhole will be a ch 2 space.
Join the yarn to the bottom left corner and ch 1, working in the blo sc up the front of the opening, *sc to marker, ch 2, skip 2*; repeat from * to * across, turn.
Row 2:
Ch 1, sc in each front st and ch st across, turn.
Row 3:
Ch 1, in the flo sl st in each front st across, fasten off.
Crochet Tank Top Straps
There are three stitches at the top front of the tank where we will start the straps.
Row 1:
Insert your hook into the first st, yo and pull up a loop, (insert your hook into the next stitch, yo and pull up a loop) twice. Yo and pull through one loop on the hook, (yo and pull through two loops on the hook) twice.
Repeats:
Repeat Row 1 until the strap is the desired length, then fasten off and stitch to the back of the tank. It helps to try it on and pin the placement for the best fit.
For the sample shown, 60 rows were created for the straps.
Diamond Crochet Tank Top Bottom Ribbing
Row 1:
Ch 6, sc in the second chain from hook and across to the bottom of the tank, sl st 2 sts along the edge (these do not count as sts), turn. 5 sts
Row 2:
Skip the two sts from the bottom edge, in blo sc in each st across until the last st, sc in both loops of the last st, turn.
Row 3:
Ch 1 (does not count as a stitch), sc through both loops of the first st, blo sc in each st across, sl st 2 sts along the bottom edge, turn.
Repeats:
Repeat Rows 2-3 around the bottom of the tank, fasten off.
Finishing The Diamond Crochet Tank Top
Fasten off and weave in all ends.
Using a sewing needle and thread, stitch the buttons to the first side of the tank lining up with the buttonhole on the opposite side.
Block and enjoy wearing and styling! And if you enjoyed this tank top, you might like trying your hand at some colorwork with the Queen Bee Crochet Tank Top Pattern.
Remember to care for your finished garment properly to ensure its longevity and beauty. Handwashing with mild detergent and laying flat to dry is recommended to preserve the delicate stitches and shape of the tank top. Happy Crocheting!
Well, That Was Fun! What’s Next?