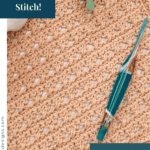
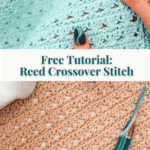
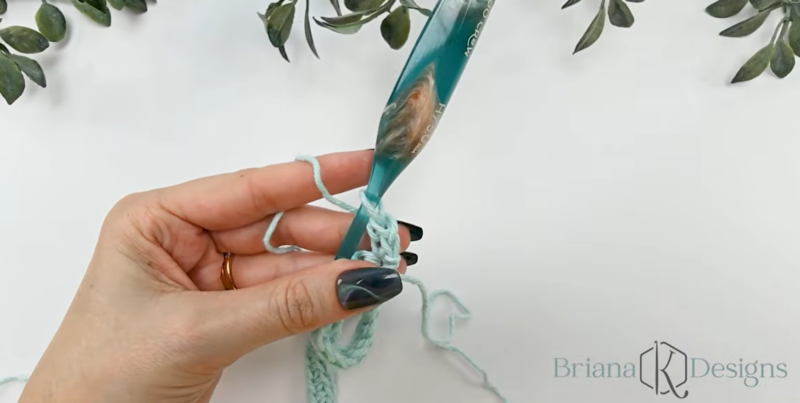
I have a habit of naming stitches after the moment I figure them out. This one came together while I was sitting at my desk at about 10 pm, telling myself I’d just swatch one more row before bed. The crossover mechanic — skip two, double crochet forward, chain one, double crochet into the first skipped stitch — clicked into a rhythm so fast that I was suddenly three inches into a swatch with no memory of starting. I called it the Reed Crossover Stitch because the finished fabric looks exactly like bundled reeds: flat, structured, woven-looking, even though it’s all just crochet. That visual result is the whole point.
What surprised me most was how beginner-accessible the stitch turned out to be. On paper, going backward into a skipped stitch sounds like a coordination puzzle. In practice, after two rows you stop thinking about it entirely. I’ve been designing crochet patterns for years now, and the stitches that earn a permanent spot in my rotation are always the ones that look impressive but don’t ask much of you once you get going. This one qualifies.
Let’s get started.
Disclosure: This post contains affiliate links. Please read my disclosure for more info.
Before You Hook: Crochet Tutorial Details
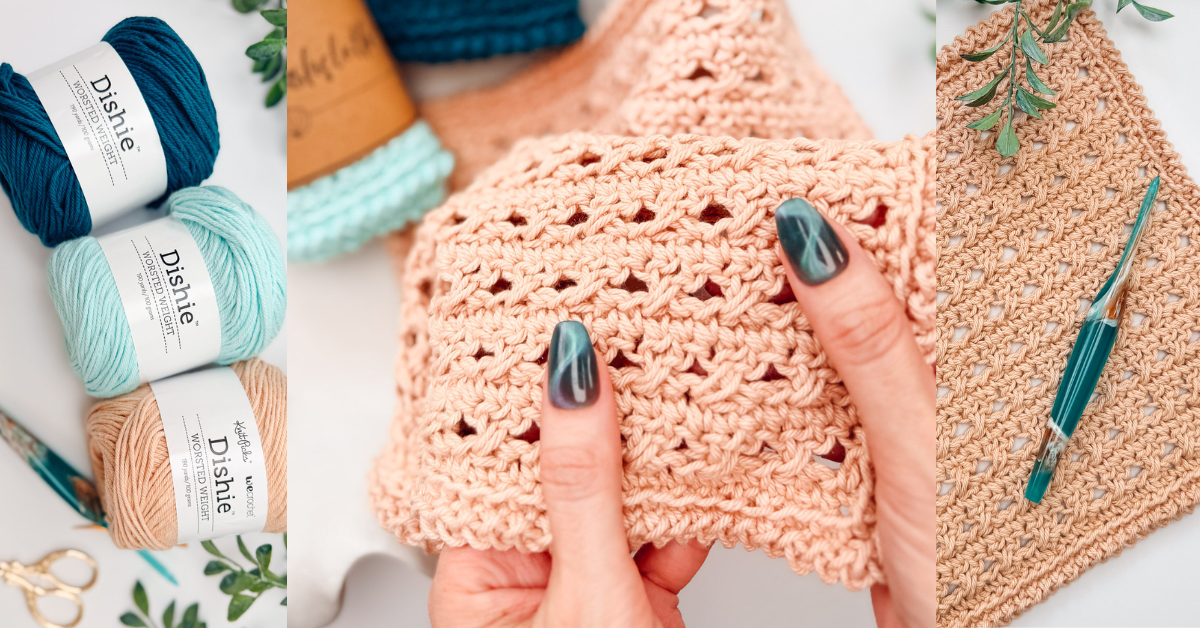
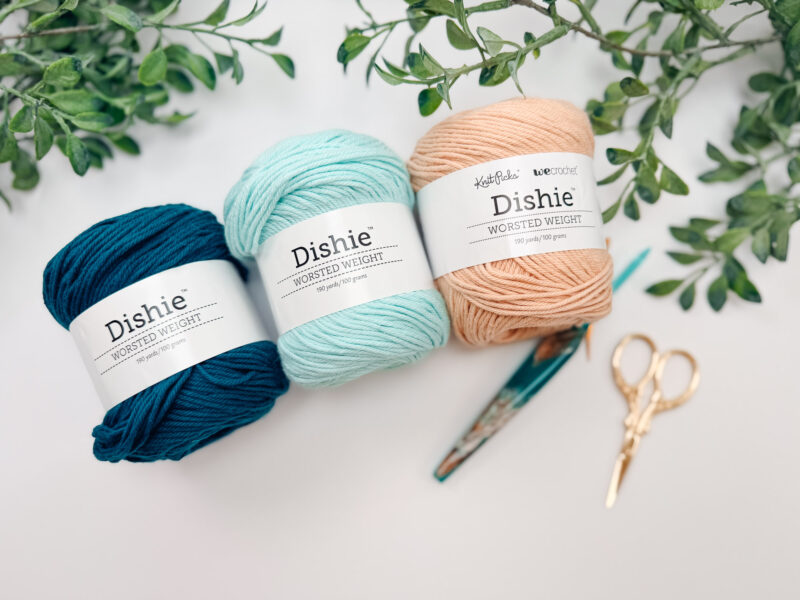
🧶 Yarn Used: WeCrochet Dishie (100% Cotton, 190yds/100g)
⚖️ Yarn Weight: Any weight will work
🧵 Featured Stitch: Reed Crossover (two-row repeat of crossovers and single crochet)
🪝 Hook Size: US H (5.0mm) Crochet Hook, or hook to obtain gauge
Save for Later • Get a Summary • Pick Up Where You Left Off
Why You’ll Love the Reed Crossover Stitch
There are many textured stitches in crochet. Most of them either look impressive and take forever, or work up fast and look exactly as simple as they are. The Reed Crossover Stitch is a rare exception — it lands firmly in the looks-complicated-is-not category, and that combination is genuinely hard to find.
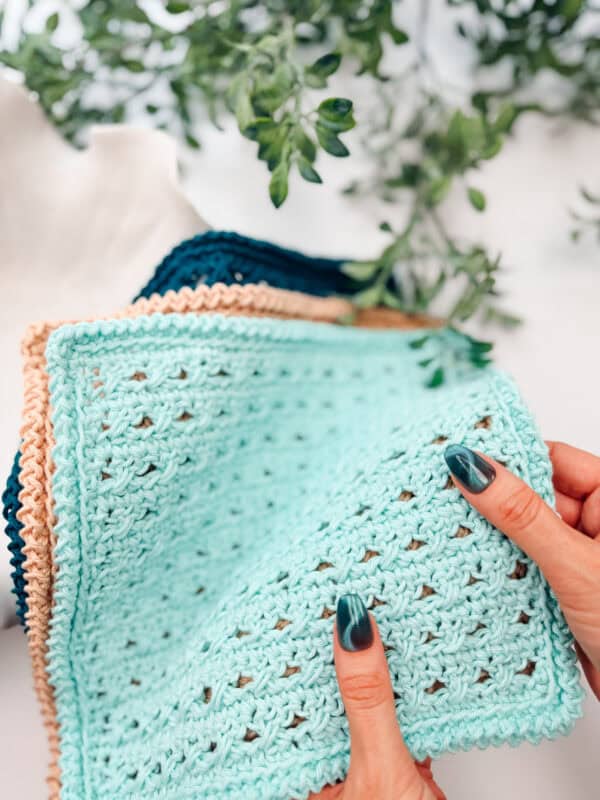
- Woven texture, no weaving required. The crossover mechanism creates a fabric that looks genuinely woven from a distance. Every time I set down a finished piece, someone asks if it was handwoven. It was not. It was crocheted on my couch.
- Simple two-row repeat. Row 2 is your crossover row; row 3 is single crochet. Repeat those two rows until your piece is done. There is nothing else to memorize.
- Reversible fabric. Both sides of the Reed Crossover Stitch are attractive and usable. You get to choose which side faces out — a genuinely useful quality in a washcloth or any home goods project.
- Works up faster than it looks. The double-crochet height means your rows build up quickly. A small swatch comes together in one sitting.
- Infinitely scalable. The stitch works in multiples of 3 plus 2. Any project size is reachable with a simple chain adjustment.
Reed Crossover Stitch Tutorial Supplies
Yarn
WeCrochet Dishie
100% Cotton, 190yds/100g
Yarn Quantities
Less than 100yds
Crochet Hook
Size US H (5.0mm) Crochet Hook or hook to obtain gauge.
Notions
Scissors
Yarn Needle
Removable Stitch Marker
Be sure to check out the full tutorial tips below
Yarn Substitutions
For this tutorial, you can use any yarn weight and fiber of your choosing. I find that worsted-weight cotton creates a lovely fabric with excellent stitch definition, so I chose it.
Yarn substitutions that work well with this stitch:
Village Yarn Craft Cotton — 100% Cotton, 115 yards/71g
Herrschners Cottage Cotton — 60% Cotton/40% Acrylic, 207 yards/100g
Premier Home Cotton — 85% Recycled Cotton/15% Polyester, 131 yards/75g
Lily Sugar’n Cream — 100% Cotton, 120 yards/70g
Remember always to check the gauge and drape when substituting yarns.
Skill Level
You need to know how to chain, single crochet, and double crochet. The crossover mechanic is new, but it is just a double crochet worked backward into a stitch you already passed — the video tutorial shows exactly how that looks and feels in motion.
Gauge
17 sts and 11 rows = 4″ by 4″ in Reed Crossover Stitch pattern repeat, not blocked. Gauge is not critical for the gauge swatch practice piece in this tutorial.
Tips
How to Crochet A Gauge Swatch
- Working a gauge swatch will let you know if you will have the correct sizing for this pattern. It will also help you practice the stitches used in this project and improve your stitch work for a flawless look.
- Are you struggling to match the gauge? Check out the blog post on What is Crochet Gauge and How To Fix It
Abbreviations
ch – chain
dc – double crochet
RS/WS – Right Side/Wrong Side
sc – single crochet
sk – skip
sl st – slip stitch
st(s) – stitch(es)
Stsc – stacked single crochet
Special Stitches Used in This Pattern
Stacked Single Crochet (Stsc):
The Stacked Single Crochet is how every crossover row begins. Do NOT chain at the beginning of the row. Instead, insert your hook into the first stitch, yarn over, and pull up a loop. Yarn over and pull through both loops on the hook — this looks like a single crochet, but you are not done yet. Insert your hook into the vertical bar directly below that stitch, yarn over, pull up a loop, yarn over, and pull through both loops. That completes one Stsc. It creates a taller, more structured edge than a standard single crochet start, and it keeps the edge of your fabric from pulling in.
What to Look for in a Practice Yarn
The yarn you learn a new stitch with makes a bigger difference than most people expect. When you’re trying to see what your hook is doing — especially with a stitch that involves going back into a skipped stitch — the wrong yarn makes everything harder than it needs to be. A few things to look for:
- Smooth over fuzzy. You need to see the stitch structure clearly, particularly the X crossover shape as it forms. A fuzzy or textured yarn hides your stitches and makes it nearly impossible to find the skipped stitch you need to go back into. Save the mohair for later.
- Worsted weight. Worsted is the sweet spot for learning. It’s large enough to clearly show you what your hook is doing without the stitches being so big that tension becomes difficult to manage. Fingering weight makes the crossover mechanic fussier than it needs to be; bulky weight gives you less control over tension.
- A light or medium color. Dark colors hide your stitches. When you are learning to work back into a specific skipped stitch, you need to be able to see exactly where your hook is going. A light neutral or medium tone makes every stitch easy to identify at a glance.
- A well-plied yarn that holds together. Splitty yarn — the kind where your hook catches individual plies instead of the whole strand — turns the backward double crochet into a frustrating exercise. A tightly or evenly plied yarn slides onto your hook cleanly and makes the crossover mechanic feel much more natural from the start.
As it happens, Dishie checks every one of those boxes — and honestly, that is no surprise given how much cotton lives in my studio. Any smooth, worsted weight, well-plied yarn in a light color will work just as well, so raid your stash before you buy anything new.

Important Pattern Notes
How to Crochet the Reed Crossover Stitch — Step by Step
The Reed Crossover Stitch runs on a two-row repeat:
- one crossover stitch row
- one single crochet row
That’s the whole structure, repeated until your piece reaches the size you need. The instructions below walk through a 20-stitch gauge swatch so you can get the rhythm of the stitch before committing it to a larger project.
Hints & Tips
A few things to keep in mind before you start:
- Keep your tension even and relaxed, especially on the crossover rows — the double crochets should sit comfortably, not pull tight.
- If you find yourself losing track of which stitch you skipped, place a removable stitch marker in the first skipped stitch before you work the forward double crochet. You can pull it out as you go, or leave it until the row is done and use it as a visual checkpoint.
- Don’t be afraid to frog and try again!
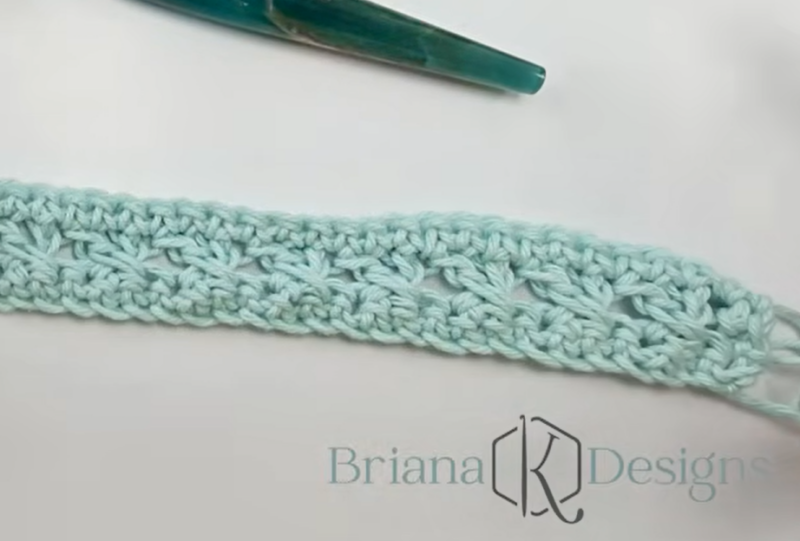
What to Expect from the Reed Crossover Stitch Fabric
A few things about this stitch’s fabric that are worth knowing before you start:
The fabric is reversible. Both sides have the same X pattern, just mirrored. One side tends to read slightly more raised than the other depending on your tension, but neither side is wrong. For washcloths and other home goods, this means you don’t need to track which side is facing out.
The fabric is moderately dense. The crossover stitch is denser than an open lace stitch but airier than a pure single-crochet fabric. For washcloths, this is the sweet spot: dense enough to hold water and scrub effectively, open enough to dry quickly between uses.
The tension matters more on Row 2 than on Row 3. The crossover rows carry most of the visual interest, so if your tension is inconsistent, it will show up there most. Work the crossover rows at an even, relaxed tension and let the SC rows be your reset. If you’re finding the fabric pulling in at the edges, check that your Stsc at the start of Row 2 is worked fully — a half-worked Stsc is the most common cause of edge tension.
Subscribe, Like & Watch on YouTube
Click the box below to unlock this exclusive subscriber content for free. Add your email and create a password. If you are having trouble, reset your password or log in to the Grow Portal.
I’m thrilled to share this amazing crochet pattern with you! Please don’t copy, paste, or distribute this pattern. Prefer an ad-free experience? Purchase a digital PDF file for a small fee from one of my online stores. I appreciate your support and readership. You are why I can keep doing what I love and sharing it with others. Thank you from the bottom of my heart.
Reed Crossover Stitch Written Instructions
Repeats:
Repeat Rows 2-3 until the desired height is reached. Fasten off and weave in ends.
Now, let’s break that down step-by-step.
Foundation Row (Row 1)
Chain 21. Single crochet in the 2nd chain from the hook and in each chain across. Turn. (20 stitches)
This is your base row. It establishes the stitch count and gives you a clean foundation for the crossover stitches above it. The foundation row is always plain single crochet — no crossovers yet.
Crossover Row (Row 2)
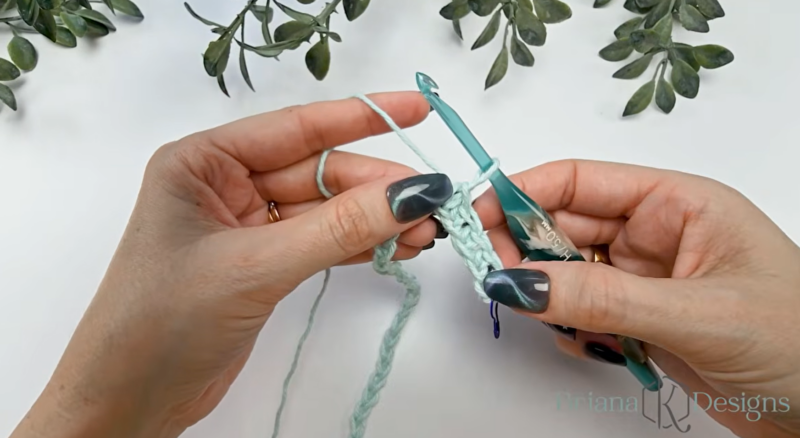
Step 1: Work a Stsc in the first stitch (see Special Stitches above — do NOT chain at the start of this row).
Tip: Put a stitch marker in the top of this stitch!
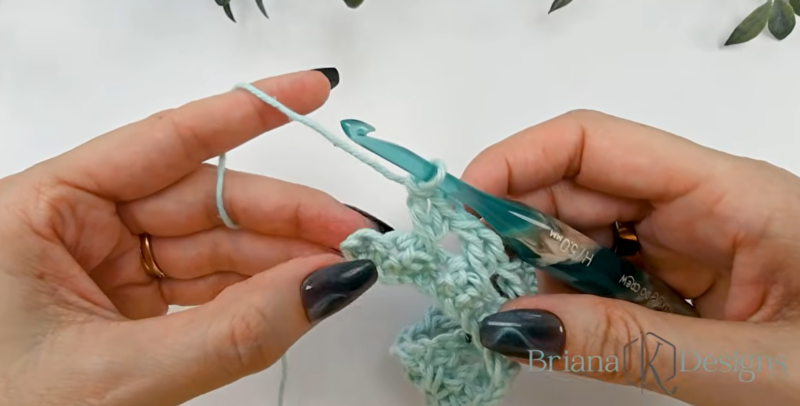
Step 2: Skip the next 2 stitches. Double crochet into the 3rd stitch. Chain 1.
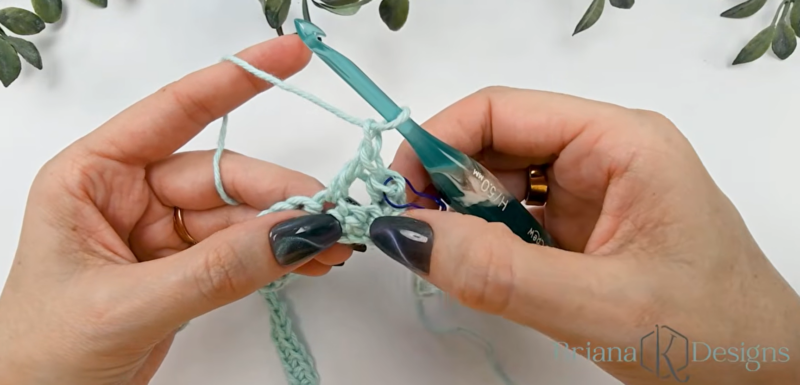
Step 3: Now — working back over the chain-1 just made — double crochet into the FIRST skipped stitch. One crossover stitch is now complete.
Note: The chain-1 is what makes the X happen. When you double crochet forward into the 3rd stitch and chain 1, that chain sits directly above the middle skipped stitch — creating a space at the top that mirrors the open stitch at the bottom. Working back into the first skipped stitch closes the X from below, and those two spaces together are what give the stitch its woven, crossed look.
Step 4: Repeat from * — skip the next 2 stitches, dc in the 3rd, chain 1, dc back into the first skipped stitch — across the row to the last stitch.
Double crochet in the last stitch, and turn. (20 stitches)
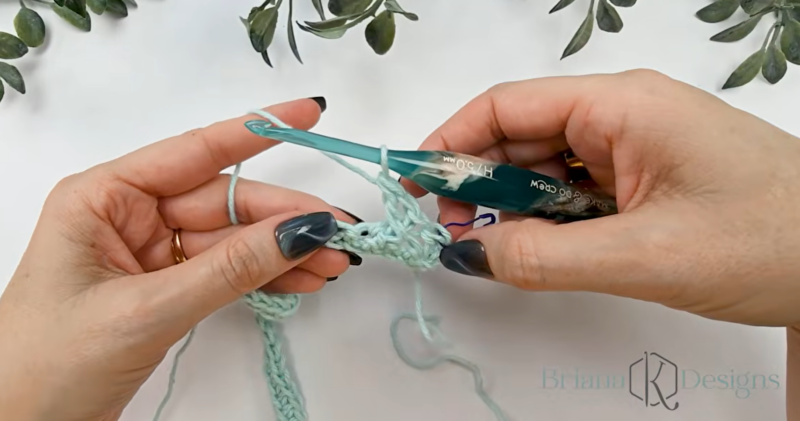
Single Crochet Row (Row 3)
Chain 1 (does not count as a stitch now and throughout). Single crochet in each stitch across. Turn. (20 stitches)
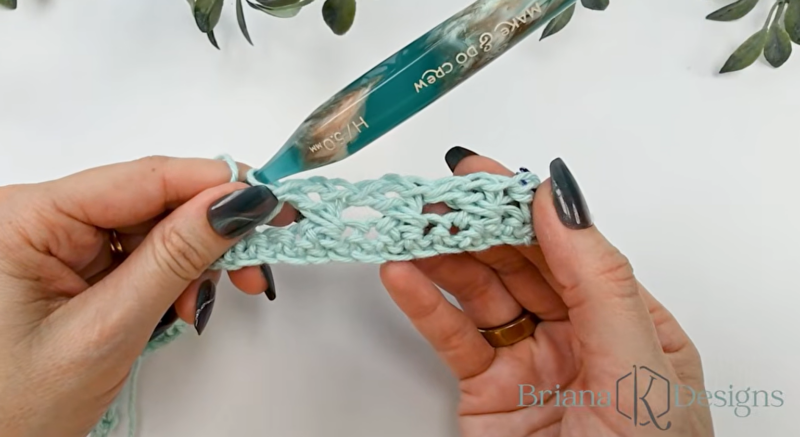
![Hands holding a crochet hook and yarn, working on a crochet project with light blue yarn. Green leaves and the "Briar [K] Designs" watermark are visible.](https://brianakdesigns.com/wp-content/uploads/2026/06/Reed-SC-in-Each-Row-3-800x414.png)
This row is the breather. Plain single crochet across the top of the crossover row. It locks the X shapes in place and gives you a clean, flat surface to work the next set of crossovers into. Nothing tricky here.
Continue the Pattern
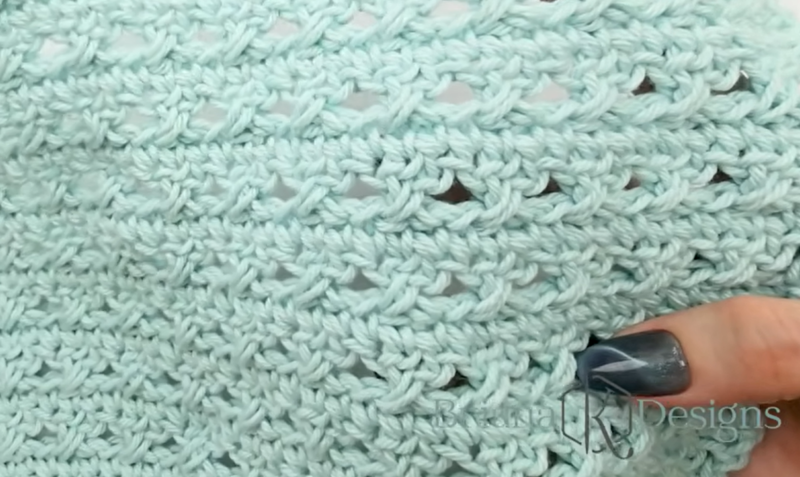
Repeat Rows 2 and 3 until your swatch reaches your desired size. The rhythm establishes itself very quickly — most people stop thinking consciously about the crossover mechanic by the third or fourth repeat.
Isn’t this fabric stunning?!
How to Resize the Reed Crossover Stitch
The Reed Crossover Stitch works in a multiple of 3, plus 2, plus 1 turning chain. To adjust the size of any project using this stitch, change your starting chain in increments of 3.
Length is simply a matter of how many times you repeat Rows 2 and 3. There is no length constraint built into the stitch — work until your piece reaches the dimensions you need.
Join The Kindest Community
Join our vibrant community of crafters on Facebook today. Whether you enjoy crafting with others or simply have burning questions, we’ve got you covered – join us now!
Reed Crossover Stitch FAQs
What is the Reed Crossover Stitch?
The Reed Crossover Stitch is a textured crochet stitch with a woven appearance, designed by Briana K Designs. It uses a simple two-row repeat: one row of crossover stitches (each made by skipping two stitches, double crocheting forward, chaining back, then double crocheting into the first skipped stitch) and one row of plain single crochet. The result is a fabric that looks like bundled reeds or woven textile even though it is worked entirely in standard crochet stitches.
What stitches do I need to know before trying this stitch?
You need to be comfortable with chain, single crochet, and double crochet. The Stacked Single Crochet (Stsc) is a new technique for most crocheters, but it is not a separate skill so much as a two-step single crochet with a specific hook insertion (and the full Stacked Single Crochet tutorial is available).
Is the Reed Crossover Stitch reversible?
Yes. The Reed Crossover Stitch creates a reversible fabric, meaning both sides of the finished piece show the X crossover pattern. One side may have a slightly different visual emphasis depending on your personal tension, but neither side is wrong. This makes the stitch especially practical for home goods projects like washcloths, table runners, or pot holders where both sides of the fabric might be seen during use.
Can I resize the Reed Crossover Stitch for different projects?
Yes, and it is straightforward. The stitch works in multiples of 3, plus 2, plus 1 turning chain. To make a wider piece, add stitches in multiples of 3. To make a narrower piece, subtract in multiples of 3. There is no length restriction — work as many rows of the two-row repeat as you need to reach your desired finished length.
What can I make with the Reed Crossover Stitch?
The Reed Crossover Stitch is versatile enough for washcloths, dishcloths, baby blankets, lightweight scarves, table runners, placemats, and pot holders. The first BKD pattern using this stitch is the Reed Crossover Stitch Washcloth, available in two sizes with a fun zigzag border (coming soon)!
Why does my edge look uneven on the crossover rows?
The most common cause is tension — specifically, pulling the crossover rows tighter than the single crochet rows. Because the crossover row involves more hook insertions and direction changes, it is easy to unconsciously tighten up as you work across it. Try consciously relaxing your grip on Row 2 and letting the stitches sit a little looser than feels instinctive.
The second thing to check is your stitch count. A miscount on a crossover row — skipping 3 stitches instead of 2, or losing the last dc at the end of the row — throws off the alignment of every X in that repeat and shows up immediately as an uneven edge. Count your stitches at the end of each row until the rhythm feels automatic.
If your tension and stitch count are both right and the edge is still pulling, then look at how you are working into the Stacked Single Crochet on the following row. The most common Stsc mistake happens not when you make the stitch, but when you come back to it — working the last stitch of the next row into the side of the Stsc rather than the top. That side insertion sits lower and tighter than a correct top insertion, and it compounds over multiple rows into a noticeably uneven edge. When you reach the end of any row and your last stitch lands next to the Stsc from the row below, make sure your hook is going into the top of that stitch, not the side bar. (This is why I always recommend putting a stitch marker into the top of that Stsc!)
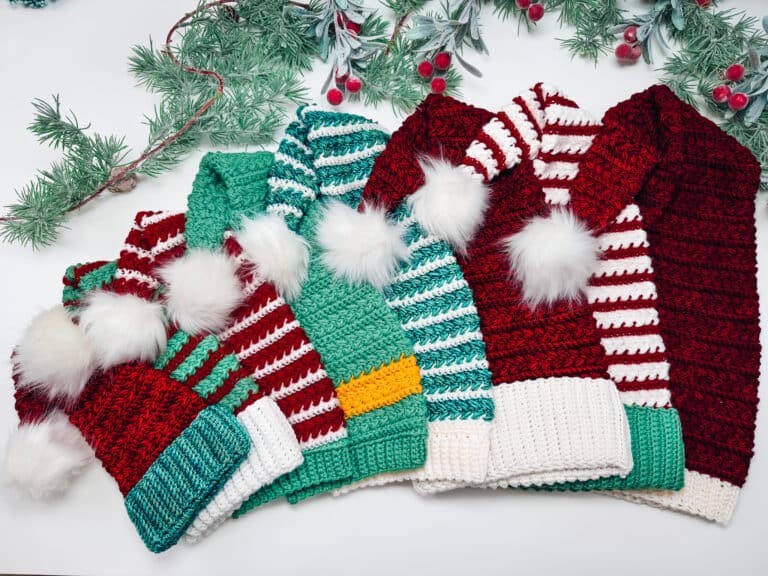
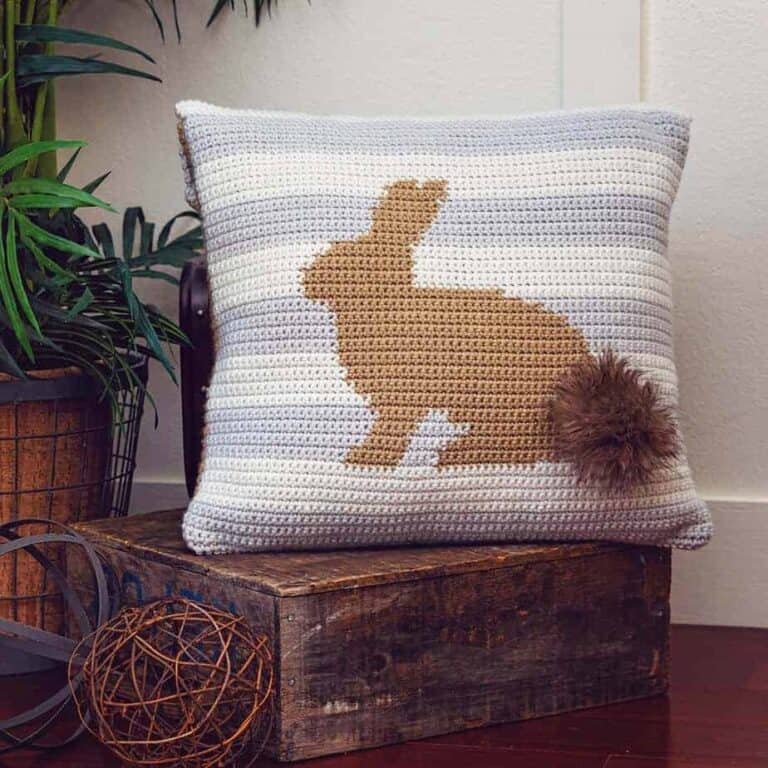
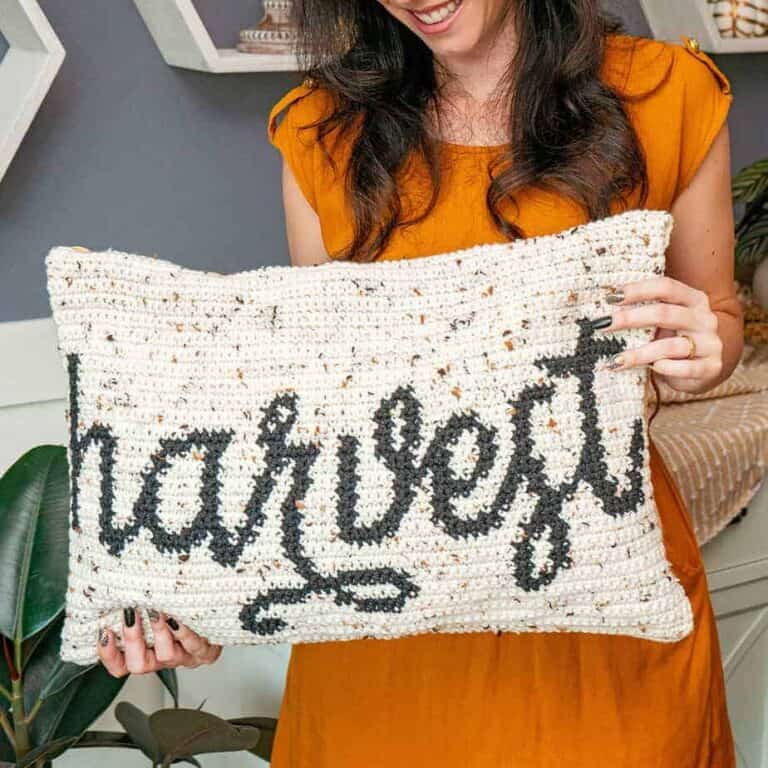
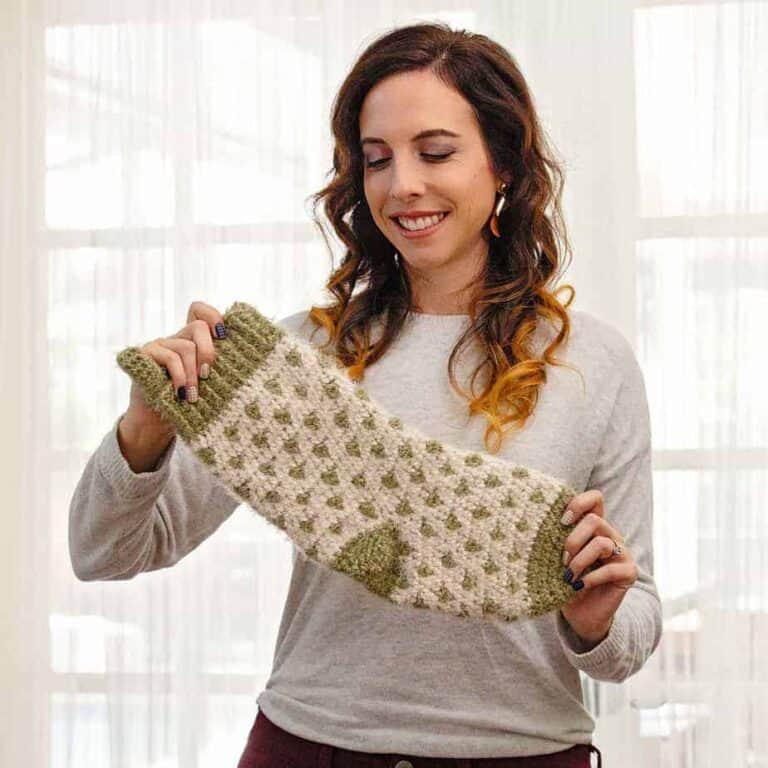
More Crochet Tutorials You’ll Love
If the Reed Crossover Stitch is your kind of project, here are a few more BKD stitch tutorials and pattern families worth exploring:
🥂 Cheers, and happy crocheting!
Well, That Was Fun! What’s Next?