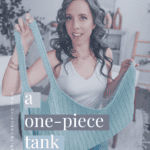
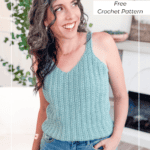
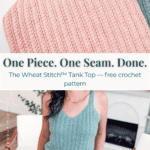

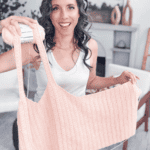
I’ll be honest — I didn’t expect to make this one more than once. But somewhere between finishing the first one in that blue Willow Yarns Farmhouse Cotton and realizing I’d been wearing it on repeat, a second one was already on my hook. That’s really the best thing I can say about a pattern: it’s the kind of top you finish and immediately want in another color. One piece, one seam, the Wheat Stitch doing all the heavy lifting on texture — and a fit you can actually dial in for your body.
Disclosure: This post contains affiliate links. Please read my disclosure for more info.
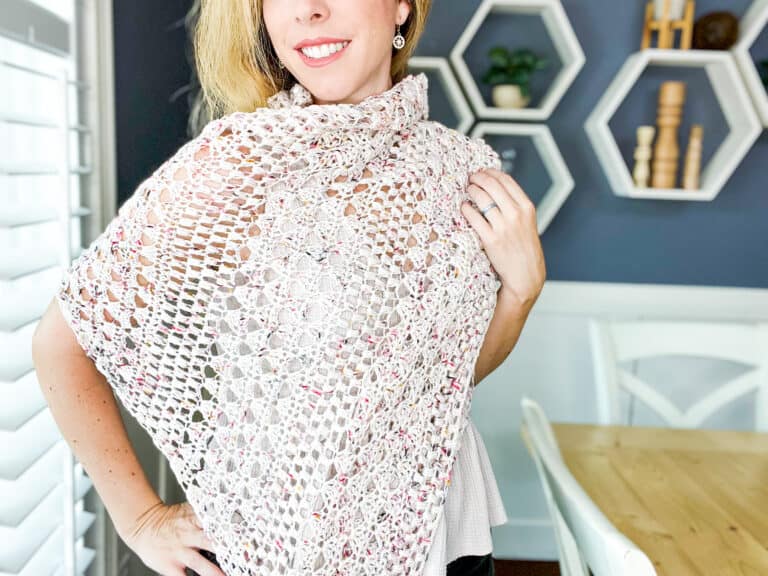
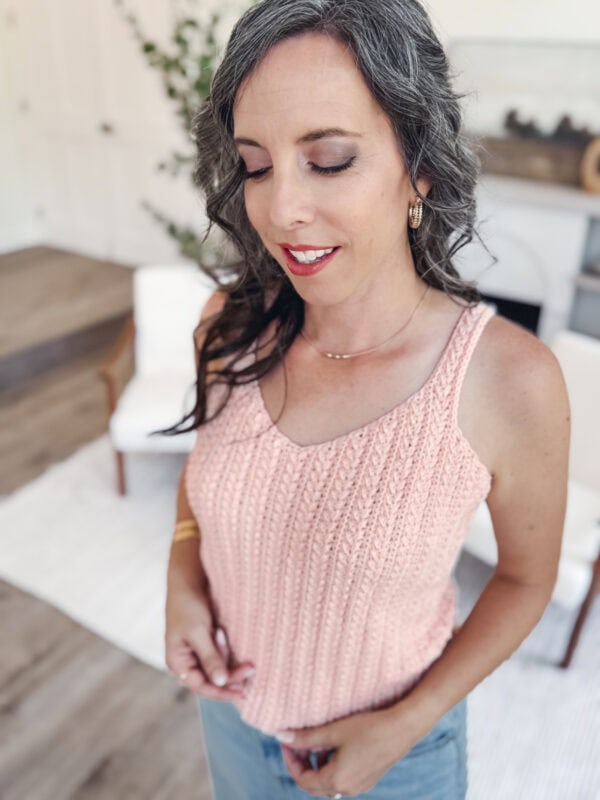
Whether you’re heading to a farmers market, layering it under a linen blazer, or throwing it on over a swimsuit for a beach day, this top transitions effortlessly. The side-to-side construction makes the fit easy to customize, the cotton keeps things light and breathable, and the Wheat Stitch adds just enough texture to make it look way more complicated than it actually is. If you love warm-weather makes that feel like real wardrobe pieces, you’re in the right place — here are a few more favorites: the Braided Wheat Easy Summer Top, the Circle Leaf Summer Top, and the Summer House Tank Top!

Crochet Tank Top Supplies (What You’ll Need)
Yarn
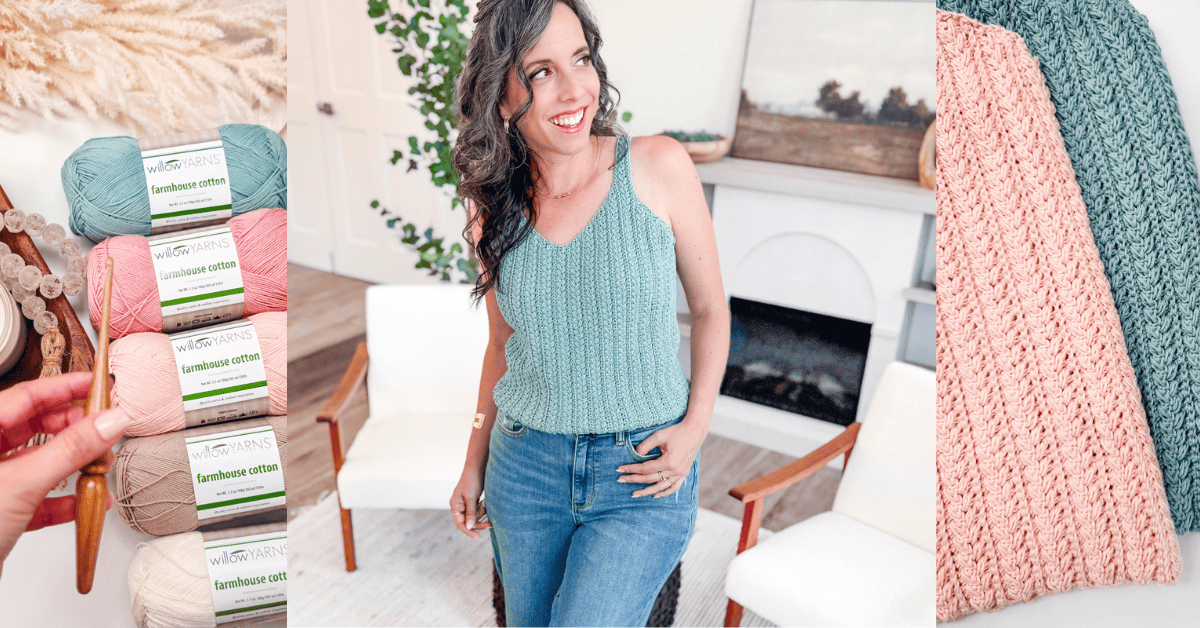
Willow Yarns Farmhouse Cotton
100% Cotton, 360yds/100g
Yarn Quantities
670 (700, 740, 815, 930) (1050, 1160, 1280, 1400) yds
2 (2, 3, 3, 3) (3, 4, 4, 4) skeins
Yarn Substitutions
WeCrochet Comfy Fingering – 75% Pima Cotton, 25% Acrylic; 218yds/50g
Lion Brand Mandala String – 100% Acrylic; 350yds/100g
Premier Cotton Collage – 46% Cotton, 33% Superwash Fine Merino Wool, 12% Polyamide, 9% PBT, 246yds/50g
Please note: While the Farmhouse Cotton is labeled a DK (weight #3), it swatches more like a fingering (weight #1) yarn. Other yarn substitutions can work, just check gauge.
Remember always to check the gauge and drape when substituting yarns.
Best Yarn for a Crochet Tank Top (Fiber Guide)
Not all yarns work equally well for a summer top, and the fiber you choose will completely change how the finished piece feels and drapes. Here’s what I’ve learned from making this pattern in multiple yarns.
Cotton is the go-to for a reason. It’s breathable, doesn’t stretch out of shape, and has a natural drape that hangs beautifully in a tank-top silhouette. For this pattern, I used Willow Yarns Farmhouse Cotton — and here’s the thing: even though it’s labeled a DK weight, it swatches more like a fingering weight once it’s worked up. That lighter gauge is actually what gives the top its airy quality. If you sub a true DK, your fabric will be noticeably thicker and heavier, so check your gauge blocked before committing.
Bamboo and bamboo-cotton blends are another great option. They have an even more fluid drape than cotton and feel incredibly soft against the skin, which makes them lovely for a top you can wear all day. The tradeoff is they can stretch more over time, especially at the shoulders — size down if you go this route.
What to avoid: heavy acrylic. I know it’s affordable and widely available, but acrylic doesn’t breathe, and in a tank top you’ll feel it on warm days. The fabric also tends to be stiffer and less drapey than cotton or bamboo. If you’re attached to acrylic, look for a cotton-acrylic blend (like the Lion Brand Mandala String listed above) — you’ll get some of the breathability with easier care.
Crochet Hook
Size US G (4.0mm) Crochet Hook or hook to obtain gauge.
Notions
Scissors
Yarn Needle
Removable Stitch Marker
Skill Level
Advanced Beginner-Intermediate
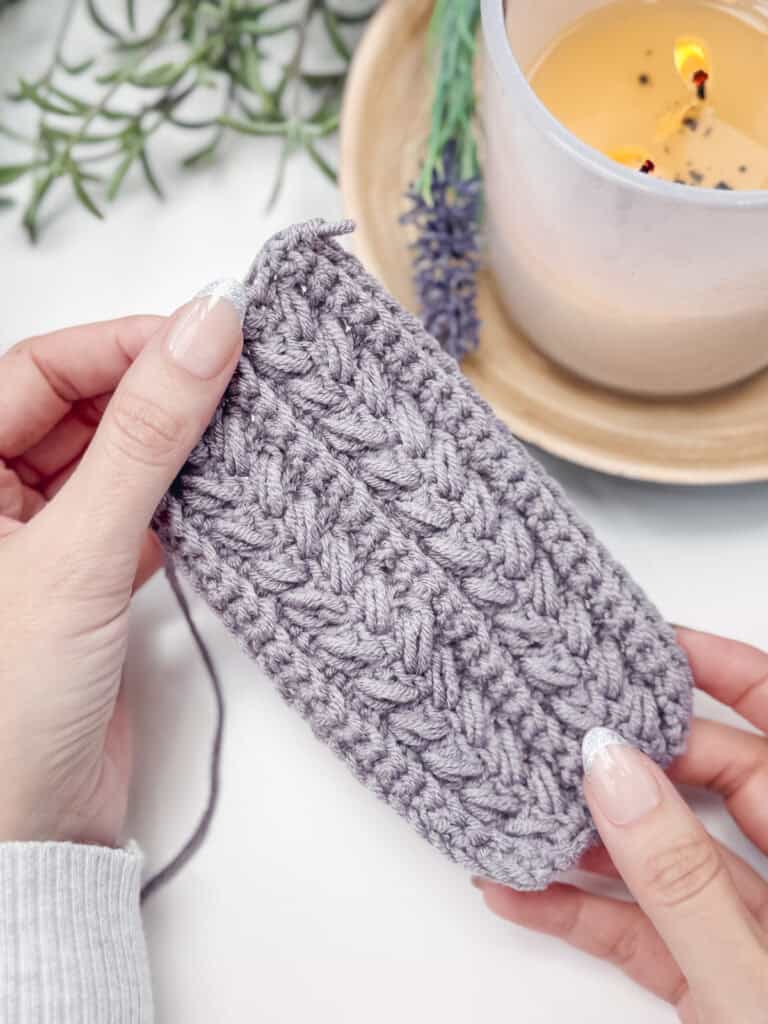
A note on skill level: This pattern is listed as Advanced Beginner, and an advanced beginner absolutely can make it — but I want to be honest with you. The Wheat Stitch itself is rated easy-intermediate, and the tank top construction involves increases and decreases to shape the neckline, which adds a layer of complexity you won’t find in a true beginner pattern. If you’re newer to crochet, I’d recommend getting comfortable with the Wheat Stitch tutorial before casting on. If you’ve got a few projects under your belt and you’re ready for a challenge, you’re going to love this one.
Why This Free Crochet Tank Top Pattern Works
♥️ Super satisfying and approachable – with its simple construction, this top is perfect for all crocheters!
♥️ Customizable sizing – just a few simple adjustments are needed for this top to fit all bodies!
♥️ Lightweight cotton summer tank – fingering weight yarn paired with the wheat stitch creates a gorgeously textured fabric that isn’t too dense!
Sizes
XS (S, M, L, 1X) (2X, 3X, 4X, 5X)
To fit chest:
30 (36, 40, 44, 48) (52, 56, 60, 64)” finished bust measurement; garment is meant to be worn with 3-4” of positive ease
Abbreviations
blo – back loop only
ch – chain
Puff st – puff stitch
rem – remaining
sc – single crochet
sc2tog – single crochet 2 together
sl st – slip stitch
st(s) – stitch(es)
Gauge
21 sts and 18 rows = 4″ by 4″ in st pattern, blocked.
How to Crochet A Gauge Swatch
Working a gauge swatch will let you know whether you will have the correct sizing for this puff-stitch tank. It will also help you practice the stitches used in this project and improve your stitch work for a flawless look.
Want to know how to substitute yarn for a different look? Are you struggling to match the gauge? Check out the blog post on What is Crochet Gauge and How To Fix It
Construction
The Wheat Stitch Tank Top is worked flat in rows from side to side, with no complicated shaping — just some easy increases and decreases to form the neckline. Customizing the fit is super easy — add or subtract rows on the back panel to get the length that feels right for you. To finish, we just seam the edges together (that’s right – only ONE seam) and attach the straps as desired.
If you like lightweight summer tank tops, you’ll love the Shine Bright Like a Diamond and the Honeycomb Crochet Tops!
Special Stitches
Modified Puff Stitch: Yarn over and insert your hook into the stitch/space. Yarn over again and pull up a long loop. Yarn over and insert your hook into the same stitch/space. Yarn over again and pull up a long loop (5 loops on the hook). Yarn over and pull through the first 4 loops, yarn over and pull through remaining loops.
Before You Start: Pattern Notes
- The ch 1 at the beginning of a row does not count as a stitch.
- Using a stitch marker at the beginning of each row is recommended.
- The instructions and stitch counts are given for the smallest size, with the larger sizes in brackets ( ). Before you dive into your project, take a moment to identify the stitch and row counts that match the size you’re making. By highlighting or marking them, you’ll save time and effort later on. Trust us, this small step will make a big difference in your crochet journey!
- For a full tutorial on the Wheat Stitch, visit: https://brianakdesigns.com/how-to-crochet-the-wheat-stitch/
- This is a one‑piece crochet pattern worked flat.
Subscribe & Like
Video Tutorial: Wheat Stitch Free Crochet Tank Top
Relax & Crochet
Upgrade to the Printable PDF
Beautifully formatted to print and relax while crocheting. The paid pattern includes:
The Ad-Free PDF can be purchased on Etsy or Ravelry.
Click the box below to unlock this exclusive subscriber content for free. Add your email and create a password. If you are having trouble, reset your password or log in to the Grow Portal.
I’m thrilled to share this amazing crochet pattern with you! Please don’t copy, paste, or distribute this pattern. Prefer an ad-free experience? Purchase a digital PDF file for a small fee from one of my online stores. I appreciate your support and readership. You are why I can keep doing what I love and sharing it with others. Thank you from the bottom of my heart.
Free Crochet Tank Top Pattern: Step-by-Step Instructions
First Increase Section
Row 1:
First Strap
Setup: Do not turn on the last row of the previous section, ch 48 (50, 52, 54, 56) (58, 60, 62, 64), turn. Adjust the strap length by chaining more or fewer chains in multiples of 2.
Row 1:
Sc in second ch from the hook and across, turn. | 122 (128, 134, 136, 142) (144, 150, 152, 158) sts
Row 2:
Ch 1, blo sc in each st across, turn.
Rows 3-4:
Ch 1, sc in first st, [skip the next st, sc in next, work a puff st into the skipped st] work until the last st, sc in last, turn.
Rows 5-6:
Ch 1, blo sc in each st across, turn.
Fasten off.
Join The Kindest Community
Join our vibrant community of crafters on Facebook today. Whether you enjoy crafting with others or simply have burning questions, we’ve got you covered – join us now!
First Decrease Section
Setup: Skip the first 42 (44, 46, 48, 50) (52, 54, 56, 58) sts in the row and attach your yarn.
Row 1:
Ch 1, sc2tog, sc in next, [skip the next ch, sc in next, work a puff st into the skipped ch] work until the last st, sc in last, turn. | 79 (83, 87, 87, 91) (91, 95, 95, 99) sts
Row 2:
Ch 1, sc in first. [skip the next ch, sc in next, work a puff st into the skipped ch] work until the last 2 sts, sc2tog, turn. | 78 (82, 86, 86, 90) (90, 94, 94, 98) sts
Row 3:
Ch 1, sc2tog, blo sc in the remaining sts across, turn. | 77 (81, 85, 85, 89) (89, 93, 93, 97) sts
Row 4:
Ch 1, blo sc until the last 2 sts, sc2tog, turn. | 76 (80, 84, 84, 88) (88, 92, 92, 96) sts
Rows 5-14 (16, 18, 20, 22) (24, 26, 30, 32):
Rep Rows 1-4 (some sizes will end on a Row 2) until the total stitch count is: 66 (68, 70, 68, 70) (66, 70, 66, 68) sts
The total row count at the end of this section is: 32 (38, 44, 46, 52) (54, 60, 62, 68) rows.
Front Middle
For Sizes XS, M, 1X, 3X, 5X:
Rows 1-2:
Ch 1, blo sc in each st across, turn. | 66 (-, 70, -, 70) (-, 70, -, 68) sts
For Sizes S, L, 2X, 4X:
Rows 1-2:
Ch 1, sc in first, [skip the next ch, sc in next, work a puff st into the skipped ch] work until the last st, sc in last, turn. | – (68, -, 68, -) (66, -, 66, -) sts

Style
The Wheat Stitch Tank Top is a perfect addition to any wardrobe!
Everyday Casual: Pair with high-waisted denim shorts or cropped jeans. Style with a straw hat, casual sandals, and a simple bag, such as the Wheat Stitch Rectangle Bag or the Summer House Crossbody Bag. Perfect for farmers’ markets, picnics, or beach days!
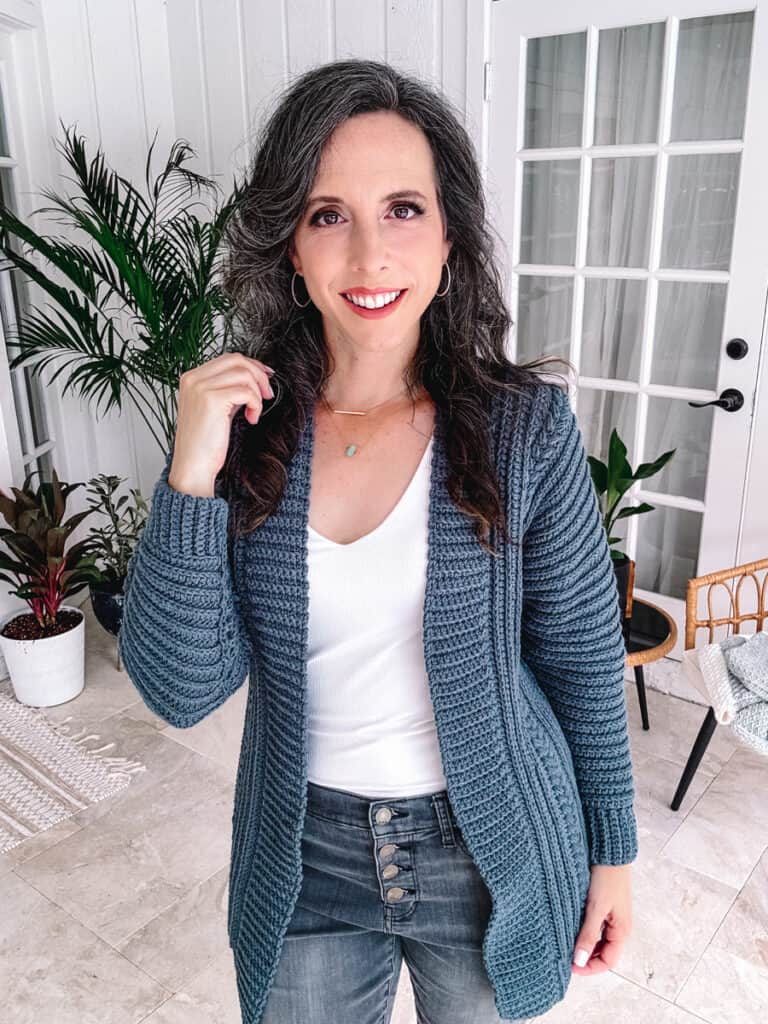
Work-Appropriate Layering: Pair with: A light linen blazer or cotton cardigan (like the Robin Duster or the Beginner Autumn Wheat Cardigan) over the tank, and wide-leg trousers or a midi skirt. Style with neutral flats, minimalist jewelry, and a structured bag.
Sunset Evenings: Pair with: A flowy maxi skirt or high-rise palazzo pants. Style with statement earrings, strappy sandals, and a lightweight shawl like the Picot Shawl or the Beginner Triangle Shawl.
Beach or Poolside: Pair with linen shorts or a sarong and wear as a cover-up over a swimsuit. Style with oversized sunglasses and flip-flops.
Second Increase Section
For Sizes XS, M, 1X, 3X, 5X:
Row 1:
Ch 1, 2 sc in first st, [skip the next st, sc in next, work a puff st into the skipped st] work until the last st, sc in last, turn. | 67 (69, 71, 69, 71) (67, 71, 67, 69) sts
Row 2:
Ch 1, sc in first. [skip the next ch, sc in next, work a puff st into the skipped ch] work until the last 2 st, sc in next, 2 sc in last, turn. | 68 (70,72, 70, 72) (68, 72, 68, 70) sts
Row 3:
Ch 1, 2 sc in first, blo sc in the remaining sts across, turn. | 69 (71, 73, 71, 73) (69, 73, 69, 71) sts
Row 4:
Ch 1, blo sc until the last st, 2 sc in last, turn. | 70 (72, 74, 72, 74) (70, 74, 70, 72) sts
For Sizes S, L, 2X, 4X:
Row 1:
Ch 1, 2 sc in first, blo sc in the remaining sts across, turn. | 67 (69, 71, 69, 71) (67, 71, 67, 69) sts
Row 2:
Ch 1, blo sc until the last st, 2 sc in last, turn. | 68 (70, 72, 70, 72) (68, 72, 68, 70) sts
Row 3:
Ch 1, 2 sc in first st, [skip the next st, sc in next, work a puff st into the skipped st] work until the last st, sc in last, turn. | 69 (71, 73, 71, 73) (69, 73, 69, 71) sts
Row 4:
Ch 1, sc in first. [skip the next ch, sc in next, work a puff st into the skipped ch] work until the last 2 st, sc in next, 2 sc in last, turn. | 70 (72, 74, 72, 74) (70, 74, 70, 72) sts
Rows 5-14 (16, 18, 20, 22) (24, 26, 30, 32):
Rep Rows 1-4 until the total stitch count is: | 80 (84, 88, 88, 92) (92, 96, 96, 100) sts
The total row count at the end of this section is: 48 (56, 64, 68, 76) (80, 88, 96, 104) rows.
Second Strap
Setup: Do not turn on the last row of the previous section, 43 (45, 47, 49, 51) (53, 55, 57, 59), turn. If you adjusted the first strap, be sure to match the stitch count for this strap.
Row 1:
Sc in second ch from the hook and across, turn. | 122 (128, 134, 136, 142) (144, 150, 152, 158) sts
Row 2:
Ch 1, blo sc in each st across, turn.
Rows 3-4:
Ch 1, sc in first st, [skip the next st, sc in next, work a puff st into the skipped st] work until the last st, sc in last, turn.
Rows 5-6:
Ch 1, blo sc in each st across, turn. Fasten off.
Second Decrease Section
Setup: Skip the first 45 (48, 49, 51, 54) (55, 57, 59, 61) sts in the row and attach your yarn in the next st.
Row 1:
Ch 1, sc2tog, sc in next, [skip the next ch, sc in next, work a puff st into the skipped ch] work until the last st, sc in last, turn. | 75 (79, 83, 83, 87) (87, 91, 91, 95) sts
Row 2:
Ch 1, sc in first. [skip the next ch, sc in next, work a puff st into the skipped ch] work until the last 2 sts, sc2tog, turn. | 74 (78, 82, 82, 86) (86, 90, 90, 94) sts
Row 3:
Ch 1, sc2tog, blo sc in the remaining sts across, turn. | 73 (77, 81, 81, 85) (85, 89, 89, 93) sts
Row 4:
Ch 1, blo sc until the last 2 sts, sc2tog, turn. | 72 (76, 80, 80, 84) (84, 88, 88, 92) sts
Rows 5-14 (16, 20, 20, 24) (24, 28, 28, 32):
Rep Rows 1-4 until the total stitch count is: 64 sts
The total row count at the end of this section is: 68 (78, 90, 94, 106) (110, 122, 130, 142).

Wheat Stitch Tank Top FAQs
🧶 What size should I make?
The best place to start is your finished bust measurement — this pattern is designed with 3–4 inches of positive ease built in, so the top will wear slightly larger than your actual chest measurement. If you’re between sizes, I’d suggest going up a size for a relaxed, flowy fit or staying true to size if you prefer something a little more fitted. When in doubt, crochet a gauge swatch first (blocked!), then measure across the back panel after a few inches to see how your actual finished width compares to the size chart. It’s much easier to add or subtract rows at that point than to frog the whole thing.
🧶 How long does it take to crochet this tank top?
Most people finish this pattern in 2–4 crochet sessions, depending on their speed and the size they’re making. The smaller sizes (XS–M) typically take around 8–12 hours of actual crochet time, while the larger sizes (3X–5X) can take 14–18 hours. The good news is that the stitch pattern is very rhythmic once you get into it — a lot of people tell me they work through this one faster than they expected because it gets meditative after the first few rows.
🧶 Can I use a different yarn for this pattern?
Yes — I’ve included three yarn substitutions in the supplies section above, and any fingering or lightweight DK cotton (or cotton blend) should work well. The most important thing is to match the gauge after blocking, not before — cotton especially can shift quite a bit once wet. If you want a drapier, more flowy result, choose a bamboo or bamboo-cotton blend. If you want the fabric to hold its shape more firmly, stick with 100% cotton. I’d avoid heavy acrylic for this one — it won’t breathe, and the fabric will feel stiff and warm rather than light and airy.
🧶 Will this fit if I’m plus-size?
Yes — this pattern goes up to a 5X (64″ finished bust measurement with ease). The side-to-side construction actually makes it easier to adjust the fit than a top-down pattern: you add or subtract rows on the back panel to get the length and width that feels right for your body. If you want more ease than the pattern calls for, go up one size from your actual bust measurement. The single-seam construction also means fewer fit issues at the sides — there’s no need to sew two panels together and hope they line up perfectly.
🧶 How do I block a crochet tank top?
Blocking is what makes the difference between a home-crochet look and a finished, professional result — don’t skip it. For this pattern, I recommend wet blocking: soak the finished top in cool water for 15–20 minutes, gently squeeze out the water (don’t wring), then lay it flat on a blocking mat and pin or shape it to your finished measurements. Let it dry completely flat before wearing — this can take 24 hours depending on your humidity. Once dry, the fabric will have a beautiful drape, and the wheat stitch texture will really open up. For more information about blocking your crochet pieces, see this blog post: How to Block Crochet: Wet, Steam & Spray Methods for Any Yarn
🧶 Can I make this longer as a dress?
You can! The side-to-side construction makes lengthening this pattern straightforward — just chain more stitches in multiples of 2 on the first row to add length from the underarm down. Just remember that you’ll need significantly more yarn — a mini dress length typically requires 30–50% more yardage than the tank-top quantities listed in the pattern. I’d recommend buying an extra skein or two and keeping your receipt.
Back
Rows 1-2:
Ch 1, sc in first, [skip the next st, sc in next, work a puff st into the skipped st] work until the last st, sc in last, turn.
Rows 3-4:
Ch 1, blo sc in each st across, turn.
Rows 5-6:
Ch 1, sc in first, [skip the next st, sc in next, work a puff st into the skipped st] work until the last st, sc in last, turn.
Repeat Rows 3-6 until there are 52 (64, 76, 80, 92) (100, 108, 116, 124) rows in this section, or the desired fit. For a more fitted or relaxed look, remove or add rows. Go to Joining.
Joining
Lightly block the measurements. Fold the tank to align the first and last rows. To join, either slip-stitch the rows together or fasten off your yarn, leaving a long tail, and hand-sew the rows together with your yarn needle.
Seaming Straps
To ensure the straps are positioned correctly, pin them in place, then try the top on and adjust as needed. If desired, line up the straps in the stitch pattern to the back. This is also a great time to consider how best to cover bra straps, if necessary. Once the straps’ placement is determined, sew them to the back of the tank.
Subscribe to my youtube channel
Finishing
Weave in all ends and lightly block again if necessary. Wear and enjoy!
How to Wash and Care for Your Crochet Tank Top
Cotton crochet pieces are surprisingly easy to care for once you know what to expect. For this top, I recommend hand washing in cool water with a gentle detergent — avoid hot water, which can cause cotton to shrink and lose its shape. Gently squeeze out the water (no wringing — that distorts the stitches) and then reshape the top flat on a towel or blocking mat before drying. Always dry flat, never in the dryer, and keep it out of direct sunlight, which can fade the color over time.
One thing to expect: cotton relaxes and softens significantly after the first wash, and the top will have a slightly different drape than when you finished it off the hook. That’s normal, and honestly, it gets better. If your top stretches more than you’d like after washing, a quick re-blocking (see the FAQ above) will bring it right back to shape. I store mine folded flat, not hung — hanging a cotton piece long-term can cause it to stretch at the shoulders.
What to Wear Under Your Crochet Tank Top
This is the question I get most often about crochet tops, so let’s talk through it. My go-to is a skin-tone bralette or bandeau — something with no visible straps is the cleanest look since you can see through the stitches slightly.
For positioning the crochet straps: before you sew them down permanently, try the top on with your bra of choice and pin the straps in place. What looks right lying flat on a table is often not what sits correctly on your actual shoulders. Once you’re happy with the placement, then sew them down. A few extra minutes here saves you from redoing the seam later. And honestly — a simple tank or bralette underneath turns this into a really versatile layering piece, which is half the reason I’ve made so many of them.
Crocheted summer tops are the perfect blend of style, comfort, and creativity — and there’s nothing more satisfying than wearing something you made with your own hands.
Whether you’re heading to the beach, running errands, or just enjoying the sunshine, a handmade garment or accessory adds a special touch to any outfit. Check out the Muse Summer Top, Long Summer Duster, and the Granny Summer Top for more gorgeous warm-weather designs sure to inspire you!
Cheers, and happy crocheting!
Well, That Was Fun! What’s Next?