


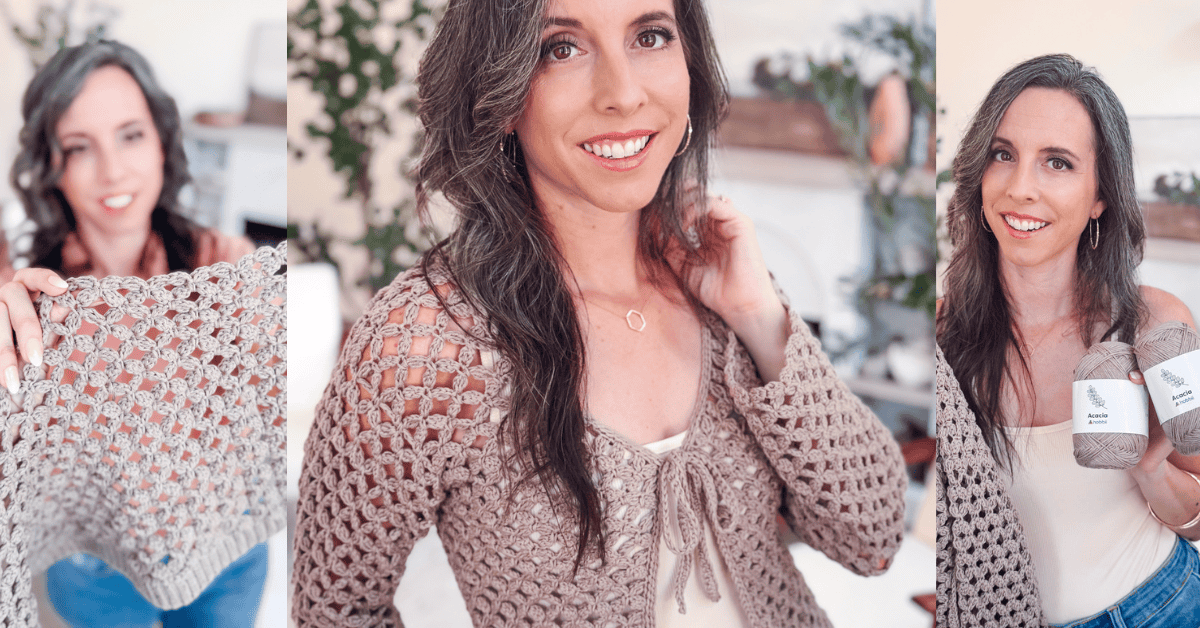
Some crochet garments are fun to make. Some are the ones you actually reach for. I wrote this lacy crochet summer cardigan pattern to be both, and the reason it works comes down to the stitch.
Disclosure: This post contains affiliate links. Please read my disclosure for more info.
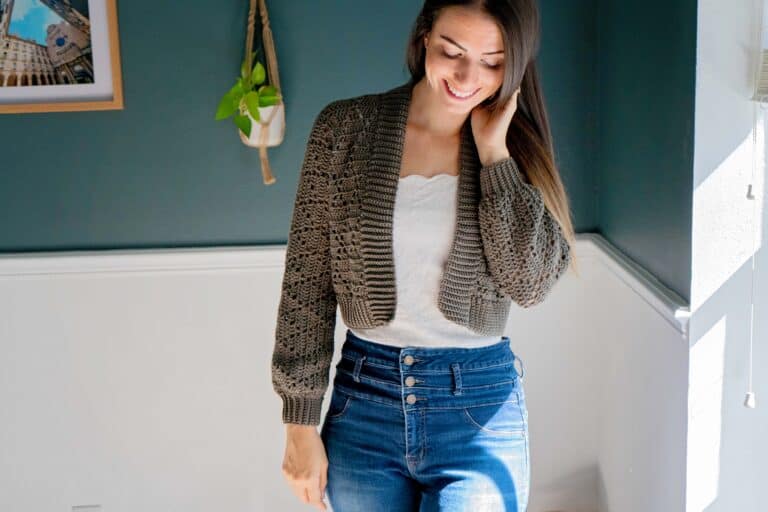
The Circle Leaf Stitch reminds me of the motifs in Amish wedding quilts, the way the clusters stack and angle across the fabric. Worked in a heavier yarn, that texture reads as cozy. Worked here in a sport weight cotton and acrylic blend on a G (4.0mm) hook, the same stitch reads as lace. That is the whole trick here. It looks like a substantial, textured piece, and it wears like a summer layer, so it is genuinely interesting to work with, and you still put it on in July.
The one thing I would tell you before you cast on is about the front trim. It is worked into the raw edge of the fabric and spaced by eye, which means it has to go on after blocking. Finish the body, block it, let it dry, then work the trim and the ties into fabric that has already settled. Do it in the other order and the edge will either pull in or wave at you.
If you love the Circle Leaf Stitch, make sure to check out the long Cardigan, Water Bottle Holder, and Market Bag!
Why You Will Love This Free Crochet Summer Cardigan Pattern
- Nine sizes, XS through 5X, with a finished bust from 32 to 64 inches. Not grouped sizes, nine separate sets of numbers.
- The open Circle Leaf lace makes it genuinely wearable in warm weather, unlike a sweater you admire and never put on.
- The tie front means you can wear it open and drapey or tied and shaped, which is two garments for one project.
- Sleeves are worked directly onto the armholes in the round, so there are no sleeve seams to sew.
- The length is easy to adjust. Add or remove rows in multiples of 2 before shaping the armholes.
- A full video tutorial walks through the stitch and the construction.
Before You Hook: Circle Leaf Lace Summer Cardigan Pattern Details
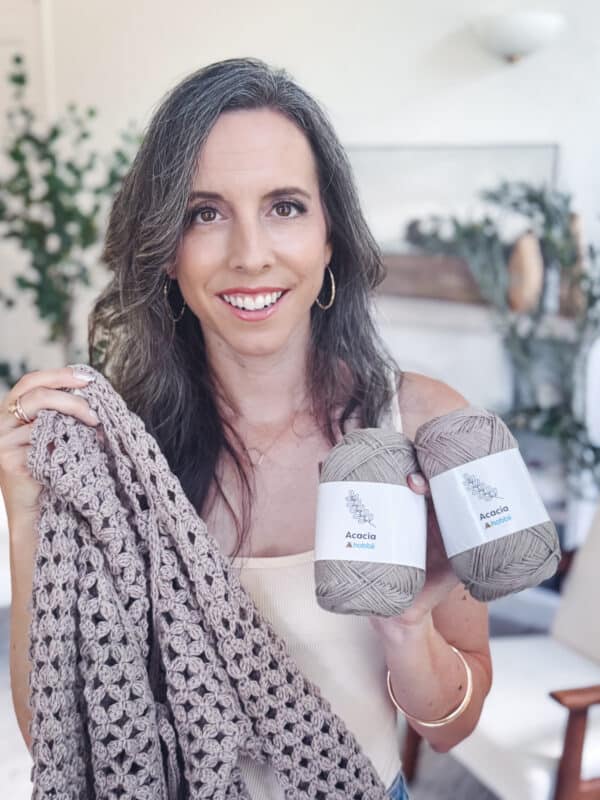
🧶 Yarn Used: Hobbii Acacia
⚖️ Yarn Weight: #2 Sport Weight
🧵 Featured Stitch: Circle Leaf Stitch
🪝 Hook Size: US G (4.0mm) Crochet Hook
📏 Sizes: XS to 5X, finished bust 32 (36, 40, 44, 48) (52, 56, 60, 64) inches
🩷🩷🩷🤍 Difficulty level: Intermediate
🕐 Approx Crochet Time: Around 20 to 35 hours depending on your size and your pace
🏷️ Project Type: A lightweight summer cardigan for layering, worked in panels with seamed shoulders and a tie front closure.
Save for Later • Get a Summary • Pick Up Where You Left Off
Circle Leaf V-Neck Crochet Cardigan Supplies
Yarn
Hobbii Acacia
51% Acrylic, 49% Cotton, 273yds/100g
This is a sport-weight yarn, and that lightness does half the work. The cotton in the blend gives the clusters enough body to hold their shape, and the acrylic keeps the fabric soft rather than stiff. That balance matters more than usual in an open stitch, where every cluster is on display, and there is nothing around it to hide behind.
Yarn Quantities
1010 (1110, 1220, 1345, 1480) (1630, 1790, 1970, 2165) yds
4 (5, 5, 5, 6) (6, 7, 8, 8) balls
Buy your full amount at once so your dye lots match. An open lace fabric shows a lot count shift more than a dense one does.
Yarn Substitutions
Premier Cotton Fair – 52% Cotton, 48% Acrylic, 317yds/100g
Bernat Softee Cotton – 60% Cotton, 40% Acrylic blend, 254yds/120g
Crochet.com Comfy Sport – 75% Pima Cotton, 25% Acrylic, 136yds/50g
Remember always to check the gauge and drape when substituting yarns.
Crochet Hook
G (4.0mm) Crochet Hook or hook to obtain gauge.
Notions
Scissors
Yarn Needle
Removable Stitch Marker
Tape Measure
Blocking Pins
Blocking Mats
Skill Level
The Circle Leaf Stitch itself is not hard, but it does take some getting used to. Work a swatch until the cluster placement no longer requires your full attention and you have handled the fiddliest part of the whole project.
What earns the Intermediate rating is the garment work sitting on top of that: shaping across nine sizes, seaming shoulders, and working sleeves in the round onto an armhole. If you have made a garment before, none of that will surprise you. If this would be your first, the thing that helps most is that the cardigan is built in short, separate sections. Ribbing, then body, then three panels, then sleeves, then the trim. Highlight your size numbers before you start and take one section at a time.
Sizes
XS (S, M, L, 1X) (2X, 3X, 4X, 5X)
32 (36, 40, 44, 48) (52, 56, 60, 64)”
Abbreviations
blo – back loop only
ch – chain
RS/WS – right side/wrong side
sc – single crochet
sl st – slip stitch
st(s) – stitch(es)
Stsc – stacked single crochet
St Cluster – stacked cluster
Stdc – stacked double crochet
tr – treble crochet
yo – yarn over
Gauge
8 sts and 8 rows = 4″ by 4″ in st pattern unblocked.
Swatch. I know. But this is a garment across nine sizes, and a half-stitch difference over 4 inches turns into inches of difference across a bust. Note that this gauge is measured blocked, so block your swatch before measuring it, or your numbers will read small.
How to Crochet A Gauge Swatch
Working a gauge swatch will let you know if you will have the correct sizing for this pattern. It will also help you practice the stitches used in this project and improve your stitch work for a flawless look.
Are you struggling to match the gauge? Check out the blog post on What is Crochet Gauge and How To Fix It
How Much Ease Should You Choose?
This is the question that decides whether you love the finished cardigan or quietly never wear it, and most patterns skip it entirely.
Ease is the difference between the finished garment and your actual body. For a close-fitting, snug look, choose a size 1 to 2 inches smaller than your actual bust measurement. For a relaxed, standard fit, choose the size that matches your bust, or go up to 2 inches larger.
Because this is an open lace fabric with real stretch, I would lean toward the relaxed end unless you specifically want it fitted. Lace stretches when it hangs, and a cardigan you wear open all summer wants a little room to drape.
Measure your actual bust with a tape measure; do not use your ready-to-wear size. Ready-to-wear sizing has almost nothing to do with the number you need here.
Special Stitches
Stsc: DO NOT chain at the beginning of the row. Insert your hook into the first stitch, yarn over, and pull up a loop. Yarn over and pull through both loops on the hook. (This will now look similar to a single crochet stitch, but we aren’t done yet.) Insert your hook into the vertical bar below, yarn over, and pull up a loop. Yarn over and pull through both loops on the hook.
Stacked Double Crochet (Stdc): Do NOT chain; insert hook into next stitch, yo, pull up a loop, yo and pull through both loops, [insert hook in the vertical bar below, yo, pull up a loop, yo and pull through both loops on the hook] twice.
Stacked Cluster (St cluster): *Ch 3, [yo and insert your hook into the 3rd ch from the hook, yo and pull up a loop, yo and pull through two loops] twice, you and pull through all the loops on the hook; repeat from * one more time.
Important Pattern Notes
How the Circle Leaf V-Neck Cardigan Is Made
This cardigan is worked from the bottom up. You start with the ribbed hem, then work the body in one piece to the underarm. From there, the work splits into the first front panel, the back panel, and the second front panel, and the shoulders are seamed. The sleeves are worked directly onto the armholes in the round and taper toward the wrist. Last, a front trim with the ties built into it is worked in one continuous pass around the front opening.
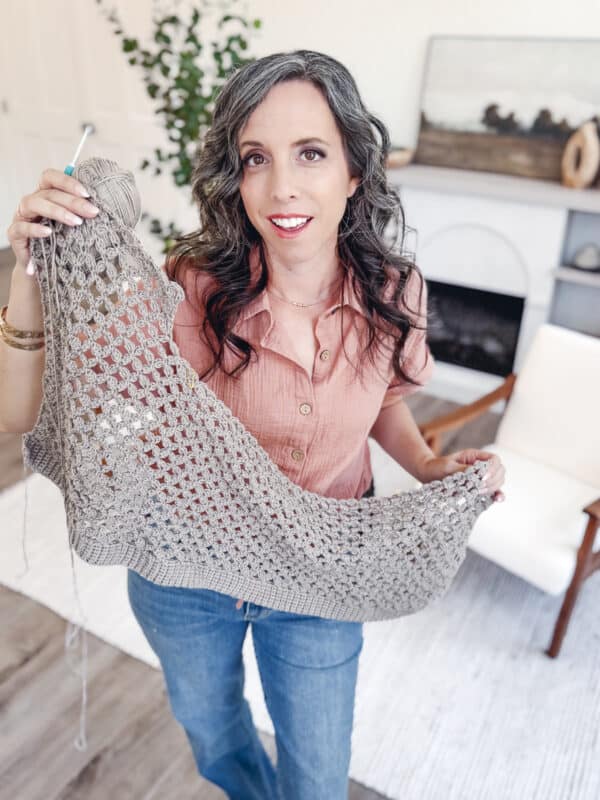
The hem is worth a closer look, because it does double duty. It is worked flat and sideways in back-loop-only single crochet, and then you turn the corner and add a clean edge along its long side. That edge becomes the foundation for the body, so you never work into a foundation chain and never fight a tight starting row, which on a piece this wide is a real relief.
The V neckline comes from the decreases worked into the two front panels rather than from a separate neckband. Panels and seamed shoulders get a bit of a bad reputation next to seamless yokes, but in an open lace stitch they earn their keep. A seam across the shoulder is structure. It stops the whole cardigan from hanging from a stretchy lace yoke and quietly growing a longer neckline every time you wear it.
Lightweight garments are perfect for warm weather! For lighter, airier pieces, check out the Lollipop Cardigan, the Hummingbird Cardi, and the Long Summer Duster.
Why You Should Block Before You Work the Front Trim
This is the single most useful thing I can tell you about this pattern, and it is the step people skip.
The front trim is worked into the edge of the fabric, not into a set number of stitches. You are spacing stitches along a raw edge by eye. If that fabric has not been blocked yet, it is still contracted, so the number of stitches that looks correct will be wrong once the cardigan relaxes to its finished dimensions.
Work the trim into unblocked fabric and one of two things happens. Too few stitches and the front edge pulls in, so the cardigan will not hang straight. Too many and the edge ripples and waves.
So: finish the body and sleeves, weave in your ends, block the cardigan to the finished measurements, let it dry completely, and then work the front trim and ties into the settled fabric. Try it on at that point too, and use stitch markers to place the ties where they actually sit best on you rather than where the schematic suggests.
The rule of thumb for working the edge is simple. Place enough stitches that the edge lies flat. If it starts to pull, add more.
Adjusting the Length and the Sleeves
Both are easy and worth doing rather than living with a garment that is almost right.
For the body, work more or fewer rows in increments of 2 before shaping the armholes. Multiples of 2 keep the stitch pattern intact, since the Circle Leaf repeat runs over two rows. Try it on as you go, or lay it against a cardigan you already love and match the length.
For the sleeves, work more or fewer rounds. If you do not want any taper at the wrist, simply leave out the decrease rounds and work straight. You will get a wide, relaxed bell instead of a gently narrowed sleeve, which suits this fabric beautifully.
The sleeve decreases are scheduled by size rather than by a repeating count, so they are the one place in this pattern where it is easy to lose your spot. The printable tally sheets in the PDF exist for exactly this reason. If you are working from the free version, write your size’s decrease rounds on a sticky note and cross them off as you go.
Choosing a Substitute Yarn for a Lightweight Cardigan
If you are subbing yarn, start in the sport weight range and then check the fabric.
Sport weight gets you in the right neighborhood, but it will not get you all the way there on its own. Two yarns can carry the same category number yet behave quite differently once worked into an open cluster stitch. Yardage per gram and fiber content will tell you more than the symbol on the band.
Acacia runs 273yds/100g, so aim for something in that neighborhood. Premier Cotton Fair at 317yds/100g is slightly finer and gives a slightly airier fabric. Bernat Softee Cotton at 254yds/120g runs a touch heavier per yard, so expect a little more weight and a little more drop. Crochet.com Comfy Sport works out to roughly 272yds/100g, which lands almost exactly on target.
Fiber matters as much as thickness. Cotton or a cotton blend gives you crisp, well-defined clusters and a cool fabric, which is what you want in a summer layer. A pure acrylic will be lighter and softer, but the clusters will look a little less sculpted. A wool blend will bloom and blur the stitch definition, and it will be warm, which defeats the purpose.
Whatever you choose, swatch it and hang the swatch up for a day before you commit 1,000 plus yards to it. Lace grows. Better to find that out in a swatch than in a finished sleeve.
Circle Leaf V-Neck Cardigan FAQs
How much yarn do I need to crochet a summer cardigan?
For this cardigan, see the Yarn Quantities section above for exact yardage by size. As a general rule, an adult-sized crochet cardigan uses between 1,000 and 2,400 yards, depending on size, length, and how open the stitch pattern is. Open lace stitches like this one actually use less yarn than a solid fabric over the same area, because you are covering ground with clusters and skipped stitches rather than dense rows. Always buy a little more than the pattern calls for, especially in the larger sizes, and buy it all in one go so your dye lots match.
What yarn is best for a lightweight crochet cardigan?
A sport weight cotton blend is the sweet spot, which is exactly what this pattern is written for. Cotton is breathable and gives crisp stitch definition, which matters in a textured stitch where the clusters are the whole point. Pure cotton can feel a little heavy and inelastic throughout a garment, which is why a blend works so well here. The acrylic content in Acacia keeps it soft and light without losing the crispness. Avoid wool and wool blends for a summer piece, since they bloom and blur the texture, and they will be too warm for the job.
Is this cardigan too hard for a beginner?
It is rated Intermediate, and that rating is mostly about the garment rather than the stitches. The Circle Leaf Stitch is built from chains, single crochet, and clusters, so nothing in it is beyond a confident beginner, though the cluster placement does take a little getting used to. What lifts the rating is the garment work: shaping across nine sizes, seaming shoulders, and working sleeves in the round onto an armhole. If this is your first garment, work the stitch tutorial and a swatch first so the pattern becomes automatic in your hands. Then take the cardigan one section at a time rather than looking at it as one big project.
Can I make this cardigan longer or shorter?
Yes, and it is one of the easiest adjustments in the pattern. Work more or fewer rows in multiples of 2 in the body before you shape the armholes. Keeping it to multiples of 2 preserves the two-row Circle Leaf repeat so the texture stays consistent. Do the same on the sleeves by working more or fewer rounds. Remember that changing the length affects your yarn requirements, so buy an extra skein if you plan to go longer.
Do I really have to block a crochet cardigan?
For this one, yes, and specifically before you work the front trim. Blocking relaxes the fabric to its true finished dimensions, and since the front trim is spaced by eye along a raw edge, working it into unblocked fabric means you will end up spacing it wrong. The result is either an edge that pulls in or an edge that ripples. Beyond the trim, blocking is what opens up a lace stitch and lets the clusters sit properly. A light steam or a gentle wet block is all it needs.
Can I skip the sleeve tapering?
Absolutely. The decrease rounds are what narrow the sleeve toward the wrist, so if you leave them out and work straight, you get a wide, relaxed sleeve all the way down. In an open lace fabric that looks intentional and rather lovely. You can also work only some of the decreases for a partial taper. Just note that a straight sleeve uses more yarn than a tapered one, so factor that in before you order.
What is the difference between this and the other Circle Leaf cardigan?
This one is shorter, with a V neckline and a tie at the bust that lets you wear it open or closed. The Circle Leaf Lace Crochet Cardigan is a longer, looser piece with ribbing around all edges and no closure. Same stitch, very different garment. If you want a shorter summer layer with an actual neckline, make this one. If you want something long and drapey to throw on over everything, make that one.
What is the Circle Leaf Stitch?
The Circle Leaf Crochet Stitch is a visually striking, textured pattern that creates angled, stacked cluster stitches reminiscent of layered leaves or circular petals. Also known as the Diagonal Leaf Grid Stitch, this stitch pattern reminds me of the intricate designs found in Amish wedding quilts. The way the clusters stack and angle across the fabric creates a sense of movement and layered geometry, much like the carefully pieced motifs in traditional quilt patterns. And, of course, I have a step-by-step tutorial for how to make it! Visit this post: How to Crochet the Circle Leaf Stitch
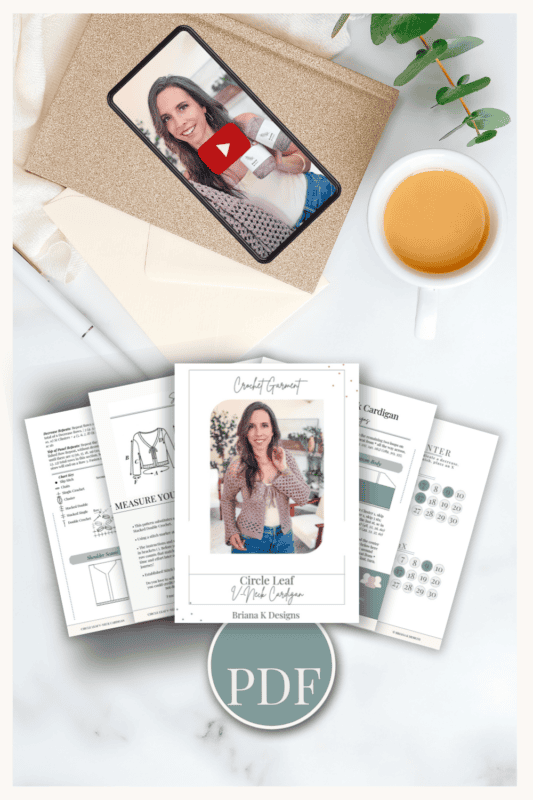
Relax & Crochet with No Ads
Go Distraction Free
Beautifully formatted for printing and taking with you anywhere. The paid version includes:
Subscribe & Like
The Ad-Free PDF can be purchased on Etsy or Ravelry.
Add your email in the box below to unlock this pattern to view on the blog for free. I’m thrilled to share this amazing crochet pattern with you! Please don’t copy, paste, or distribute this pattern. Prefer an ad-free experience? Purchase a digital PDF file for a small fee from one of my online stores. I appreciate your support and readership. You are why I can keep doing what I love and sharing it with others. Thank you from the bottom of my heart.
Circle Leaf V-Neck Cardigan Free Crochet Pattern
Row 3: Sc in first, St Cluster, *sc around the center of the St Cluster, St Cluster; repeat from * across, sc in last, turn.
Row 4: Stdc, Cluster, sc around the center of the St Cluster, *St Cluster, sc around the center of the St Cluster; repeat from * across, Cluster, treble crochet in last, turn.
Repeats: Repeat Rows 3 to 4 until there are a total of 20 rows. Do not fasten off.
Tip: The length of this cardigan can be adjusted to be longer by adding more rows in multiples of 2.
Join The Kindest Community
Join our vibrant community of crafters on Facebook today. Whether you enjoy crafting with others or simply have burning questions, we’ve got you covered – join us now!
First Front Panel Decreases
Row 1: Stsc, Cluster, sc around the center of the next St Cluster, *St Cluster, sc around the center of the St Cluster; repeat from * across, sc in last, turn.
Decrease Repeats: Repeat Rows 1 to 2 for a total of 6 Decrease Rows. | 3 (4, 5, 6, 7) (8, 9, 10, 11) St Clusters + 4 (5, 6, 7, 8) (9, 10, 11, 12) sc sts
Top of Panel Repeats: Repeat the Established Stitch Pattern, without decreasing, until there are 15 (16, 17, 18, 19) (20, 21, 22, 22) total rows in this section. Some sizes will end on a Row 3 (XS, M, 1X, 3X). Fasten off.
Back Panel
Row 1 (WS): Attach yarn to the center of next St Cluster next to the First Front Panel, sc in first, St Cluster, *sc around the center of the St Cluster, St Cluster; repeat from * across until there are a total of 14 (16, 18, 20, 22) (24, 26, 28, 30) St Clusters, sc in next, turn leaving the remaining sts unworked. | 14 (16, 18, 20, 22) (24, 26, 28, 30) St Clusters + 15 (17, 19, 21, 23) (25, 27, 29, 31) sc sts
Row 2: Stdc, Cluster, sc around the center of the St Cluster (from the row below here and throughout), *St Cluster, sc around the center of the St Cluster; repeat from * across, Cluster, treble crochet in last, turn.
Row 3: Sc in first, St Cluster, *sc around the center of the St Cluster, St Cluster; repeat from * across, sc in last, turn.
Row 4: Stdc, Cluster, sc around the center of the St Cluster (from the row below here and throughout), *St Cluster, sc around the center of the St Cluster; repeat from * across, Cluster, treble crochet in last, turn.
Repeats: Repeat Rows 3 to 4 until there are a total of 15 (16, 17, 18, 19) (20, 21, 22, 22) rows. Some sizes will end on a Row 3 (XS, M, 1X, 3X). Fasten off.
Second Front Panel
Row 1 (WS): Attach yarn to the center of next St Cluster next to the Back Panel, sc in first, St Cluster, *sc around the center of the St Cluster, St Cluster; repeat from * across until there are a total of 6 (7, 8, 9, 10) (11, 12, 13, 14) St Clusters, sc in next, turn leaving the remaining sts unworked. | 6 (7, 8, 9, 10) (11, 12, 13, 14) St Clusters + 7 (8, 9, 10, 11) (12, 13, 14, 15) sc sts
Row 2: Stdc, Cluster, sc around the center of the St Cluster (from the row below here and throughout), *St Cluster, sc around the center of the St Cluster; repeat from * across, Cluster, treble crochet in last, turn.
Sizes XS, S and M work no additional rows.
Sizes L and 1X work 2 more rows.
Sizes 2X and 3X work 4 more rows.
Sizes 4X and 5X work 8 more rows.
Second Front Panel Decreases
Row 1: Sc in first, St Cluster, *sc around the center of the St Cluster, St Cluster; repeat from * across until the last St Cluster, sc around the center of the St Cluster, Cluster, dc in the last st, turn.
Row 2: Stdc, Cluster, sc around the center of the next St Cluster, *St Cluster, sc around the center of the St Cluster; repeat from * across, Cluster, treble crochet in last, turn.
Decrease Repeats: Repeat Rows 1 to 2 for a total of 6 Decrease Rows. | 3 (4, 5, 6, 7) (8, 9, 10, 11) St Clusters + 4 (5, 6, 7, 8) (9, 10, 11, 12) sc sts
Top of Panel Repeats: Repeat the Established Stitch Pattern, without decreasing, until there are 15 (16, 17, 18, 19) (20, 21, 22, 22) total rows in this section. Some sizes will end on a Row 3 (XS, M, 1X, 3X). Fasten off.
How to Style a Tie Front Cardigan
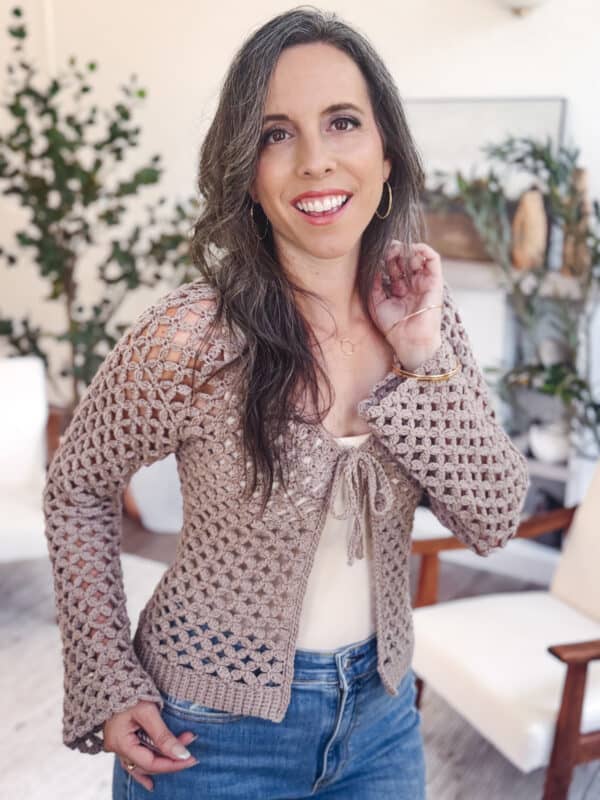
The Circle Leaf V-Neck Crochet Cardigan is a stunning, lightweight garment that brings elegance and versatility to your handmade wardrobe.
Everyday Casual: Pair the cardigan with a simple tank or fitted tee and your favorite high-waisted jeans. Add some hoop earrings or a pendant necklace to keep the look laid-back yet polished.
Date Night: Let the cardigan shine by styling it over a strappy dress or silk cami with a midi skirt. Add heels or ankle boots to elevate the look.
Boho Vibes: Layer it over a flowy dress or a maxi skirt-and-crop-top combo. Complete the look with sandals and a wide-brim hat for a dreamy, bohemian feel.
Beach or Festival-Ready: Throw it on over a swimsuit or bralette, with shorts, for an effortless festival or beach day outfit. Add layered necklaces and comfy sandals for all-day wear.
Shoulder Seams
With the wrong side facing you, fold both front panels inward toward the center back panel. Align the outer edges at the top of each front panel with the corresponding edges of the back panel, and seam across the shoulders to join.
Sleeves
Rnd 1 (RS): Join to the center of a St Cluster just to the right of the center underarm. Work in the Established Stitch Pattern around the opening, placing 16 (17, 18, 19, 20) (21, 22, 23, 23) St Clusters + sc sts, join to the first sc of the round and turn.
Rnd 2 (WS): Sl st to the middle of the St Cluster (Tip: always work sl st on the WS of the fabric), *sc around the center of the St Cluster, St Cluster; repeat from * around and join.
For each size, we will work the stitch pattern for 35 total rnds, with some decreases, but it will still be a wide sleeve at the wrist.
How to decrease: Decreases are completed after working two rounds, as follows:
First Decrease Rnd: Work in st pattern until the underarm area. Cluster, sc around the center of the St Cluster, Cluster, continue to work in pattern until the end of the rnd, join and turn.
Second Decrease Rnd: Work in st pattern until the first single Cluster, skip the Cluster and sc in the next sc st, St Cluster and skip next single cluster and sc around the center of the next St Cluster, continue to work in pattern until the end of the rnd, join and turn.
Size XS: decrease on Rnds 3, 7, 11, 15, 19.
Size S: decrease on Rnds 3, 7, 11, 15, 19, 23.
Size M: decrease on Rnds 3, 7, 9, 13, 17, 21, 25.
Sizes L and 1X: decrease on Rnds 3, 5, 9, 11, 15, 17, 21, 25.
Sizes 2X and 3X: decrease on Rnds 3, 5, 7, 11, 13, 17, 19, 23, 25.
Sizes 4X and 5X: decrease on Rnds 3, 5, 7, 9, 13, 15, 17, 19, 23, 25.
Continue working in the Established Stitch Pattern until there is a total of 35 Sleeve Rnds (this includes Rnd 1), or desired length, join and fasten off. | 11 (11, 11, 11, 12) (12, 13, 13, 13) St Clusters + same amount of sc sts
Tip: To adjust for sleeve length, work more or fewer rounds. If you do not want any tapering in the sleeves, leave out the decreases.
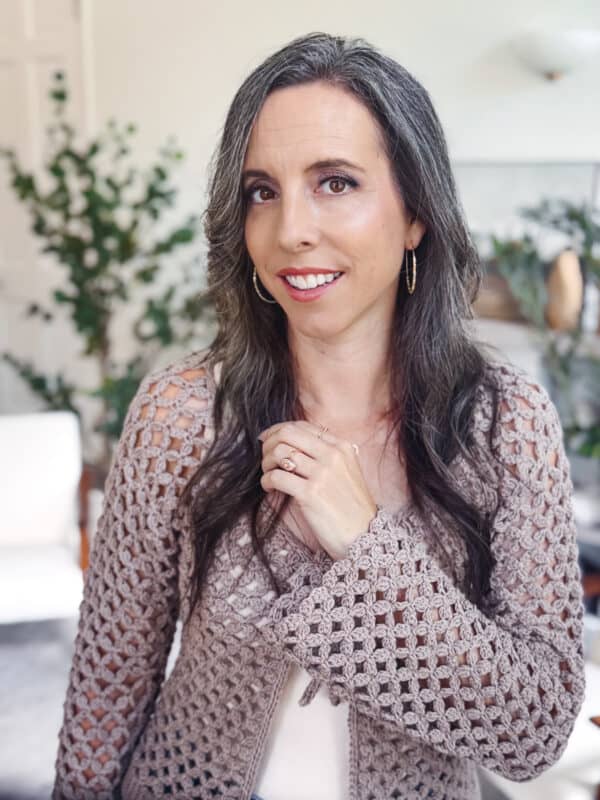
Front Trim and Tie
Setup for Ties: Use stitch markers to mark where you would like the ties on the front of the cardigan. If possible, try it on to find the most comfortable and flattering placement. Blocking the cardigan before creating the front edge is helpful to make sure you are working your stitches evenly to the finished fabric.
Around Front Opening: With the right side of the fabric facing, join your yarn to the bottom front corner of the opening, ch 1, sc 1, *insert your hook into the left bar of the sc just made, then insert into the next space on the edge of the fabric (we want to space these evenly along the edge without it being too tight), yarn over and pull a loop through the fabric and also through one loop on the hook. Yarn over and pull through two loops on the hook. Repeat from * until the first stitch marker.
Instructions for Tie: Ch 61, working into the second ch from the hook, sc in each ch across back to the body edge. Once at the body edge, resume working from * into the last st worked along the edge.
Work all the way around until the next stitch marker. Repeat the instructions for the tie, then resume working from * into the last st worked along the edge and work until the bottom corner, fasten off.
Tip: It is important to place enough stitches along the edge that it lays flat, add more as needed.
Why a V-Neck with a Tie Front?
One of the standout features of this cardigan is the V-neckline paired with the front tie, and it plays a big role in how the piece fits and feels when worn.
The V-neck naturally creates a more open, elongated shape through the front, which helps the cardigan sit flatter and feel less bulky. It also makes layering easy without adding extra weight around the neckline.
The front tie gives you flexibility in how you wear it. Leave it open for a relaxed, drapey look, or tie it for a bit more structure and shape through the body. It’s a small detail, but it makes the cardigan feel much more versatile day-to-day.
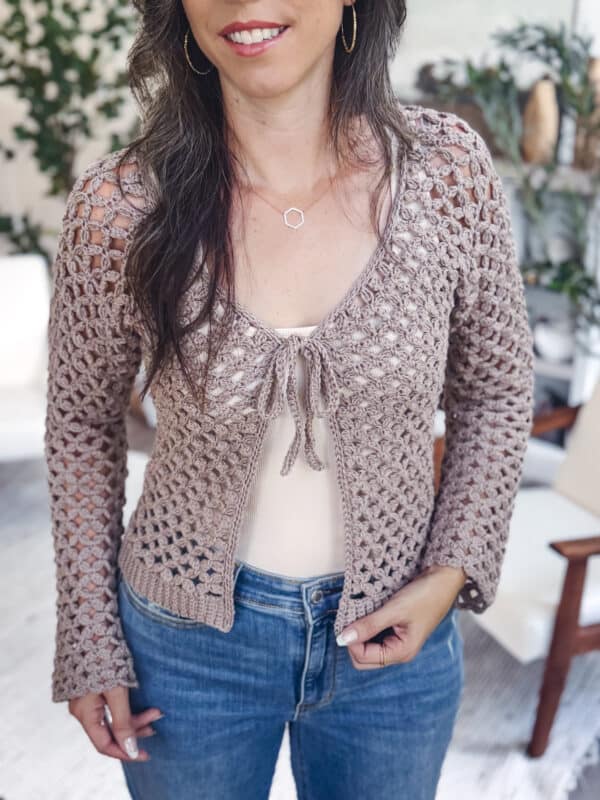
Yarn Talk: Hobbii Acacia (Yes, again!)
I’ve said it before, and I’ll say it again… Hobbii Acacia is a perfect yarn for the Circle Leaf Stitch!
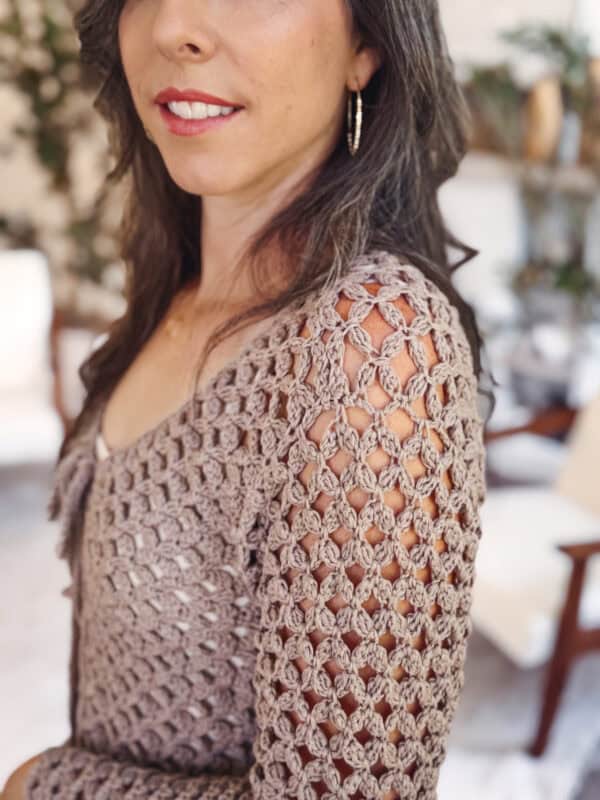
The softness of the yarn, combined with the structure and texture of the stitches, creates a stunning drape, perfect for this type of open, lacy stitch. It’s especially nice for garments like this because it doesn’t feel bulky or stiff, just easy, wearable, and comfortable. If you want a cardigan that feels polished but still relaxed, this yarn is a great match.
Finishing
Weave in all ends and lightly block if necessary. Wear and enjoy!
More Crochet Patterns You’ll Love
If the Circle Leaf Stitch has you hooked, here is where to go next.
🥂 Cheers, and happy crocheting!
Get the Circle Leaf V-Neck Cardigan Pattern
The full pattern is free right here on the blog, in all nine sizes, supported by ads.
If you would rather have it printed and ad-free, the PDF adds the Circle Leaf stitch charts, the measuring and style guide, and the printable sleeve tally sheets that make the decrease rounds much easier to track.
And if you get stuck, come find us in the Briana K Community on Facebook. Someone has almost always just finished the exact row you are on.
Hook down? Not so fast…
I’d Love to See Yours!
You made something beautiful. Here’s how to keep it, show it off, and inspire the next maker.

What should you make next?
Keep the hook movingReaders Are Loving
 Petal Loop Cardigan
 Wheat Stitch Sweater
 Wheat Triangle Shawl
 Pine Sweater