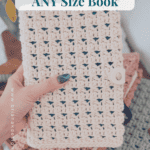
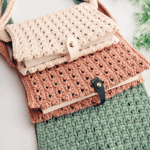
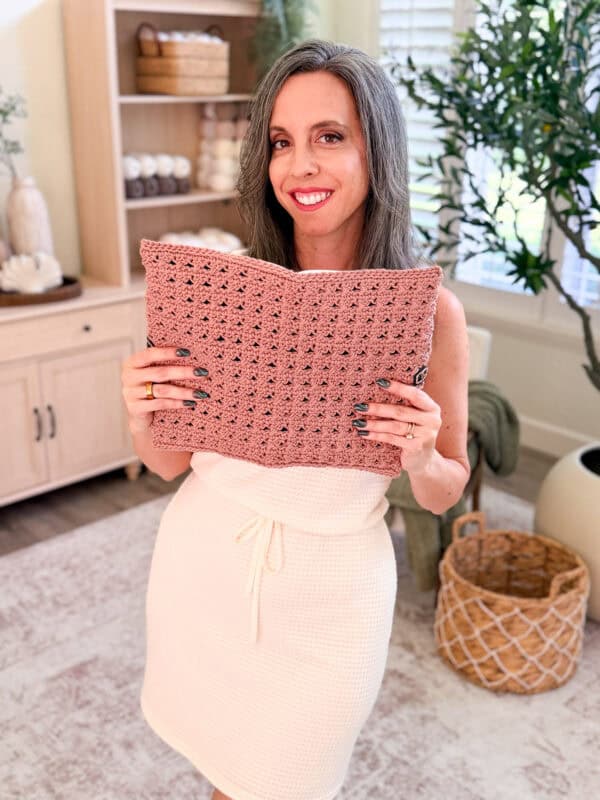
I am the person who dog-ears a paperback, drops it in a tote bag, and then fishes it back out three days later with a bent cover and a receipt wedged somewhere around chapter four. My current read looked so beat up that I finally sat down and made it a cover. I grabbed the Village Yarn Craft Cotton I had left over from a dishcloth batch, measured the cover of my book, and had a snug little Reed Crossover Stitch jacket for it by the end of one evening.
Disclosure: This post contains affiliate links. Please read my disclosure for more info.
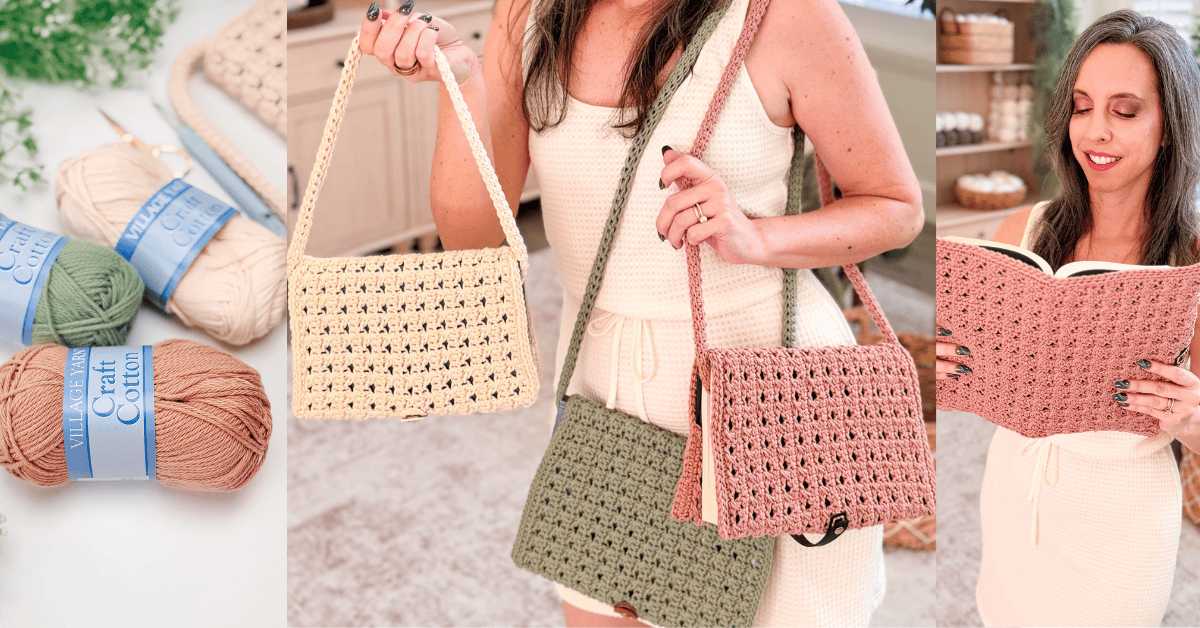
What surprised me was how much I reached for it afterward. I made a second one in Sage for a trade paperback and a cream one for the Bible my grandmother gave me, which is the whole reason this went from a one-off to a pattern. Ten-plus years of designing crochet, and it is still the tiny practical makes that end up in daily rotation, not the showpieces.
This is a made-to-measure pattern, which sounds fancier than it is. You measure your book, do two small bits of math, and crochet a flat rectangle that folds into pockets at each end. No sizes to pick, no stitch count to memorize. And if math makes your eye twitch, I built a size chart for the five most common book formats so you can chain and go. Below you will find the full free pattern, the size chart, the yarn I used and why, and answers to the questions I get asked most about crocheting book covers.
Before You Hook: Reed Book Cover Pattern Details
🧶 Yarn Used: Village Yarn Craft Cotton (100% cotton, 115yds/71g)
⚖️ Yarn Weight: Worsted
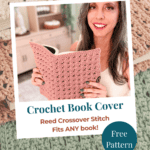
🧵 Featured Stitch: Reed Crossover Stitch
🪝 Hook Size: US G (4.0mm) & H( 5.0mm) Crochet Hooks, or hook to obtain gauge
Save for Later • Get a Summary • Pick Up Where You Left Off
Why You’ll Love This Crochet Book Cover
- It fits any book you own. Because it is made to measure, one pattern covers a slim mass-market paperback, a chunky hardcover novel, a coffee-table book, and everything in between.
- The math is genuinely two steps. Measure around the book, measure the height, and you are done. I’ll walk you through a real example so the numbers aren’t scary.
- No measuring required if you don’t want to. The size chart provides the exact starting chain and row counts for the five most common book formats.
- The Reed Crossover Stitch looks intricate but rides on a simple two-row repeat. It is rated Easy, and it is the kind of rhythm that turns into muscle memory fast.
- It works up in an evening in cotton, so it is a fast, satisfying gift for the readers in your life.
- Coordinates perfectly with the Reed Bookmark!

Reed Crochet Book Cover Pattern Supplies
Yarn
Village Yarn Craft Cotton
100% Cotton, 115yds/71g
Yarn Quantities
Yardage depends entirely on your book size. As a reference, a hardcover novel takes roughly 335 yards, and a slim mass-market paperback takes closer to 218. The full size chart lists an estimate for each format.
Crochet Hook
Size US G (4.0mm) & H (5.0mm) Crochet Hooks or hook to obtain gauge.
Notions
Scissors
Yarn Needle
Removable Stitch Marker
Tape Measure
Be sure to check out the full pattern tips below
Yarn Substitutions
Herrschners Cottage Cotton — 60% Cotton/40% Acrylic, 207yds/100g
When substituting, stick with a cotton or cotton-blend yarn in the same weight. Cotton is my pick here on purpose. It has almost no stretch, so the cover holds its shape around the book instead of sagging the way a springy acrylic would. It also takes a crisp fold at the pockets and only softens with use, which is exactly what you want on something you handle constantly.
A few I would reach for:
Premier Home Cotton (85% recycled cotton, 15% polyester, 131yds/75g)
Lily Sugar’n Cream (100% cotton, 120yds/71g)
WeCrochet Dishie (100% cotton, 190yds/100g)
Remember always to check the gauge and drape when substituting yarns.
Skill Level
If you can chain, single crochet, and double crochet, you already have every base skill you need. The Reed Crossover Stitch is the one new thing, and it is a friendly one. It uses a stacked single crochet to start each textured row and a simple crossover of two double crochets. Confident beginners ready to try a stitch with a little more personality will do great here, and the video tutorial walks through every step.
Sizing and How to Measure Any Book
There are no set sizes with this cover, which is the whole point. Two measurements do all the work. The wrap measurement sets your starting chain, and the height measurement tells you how many rows to crochet. Measure carefully, and the fit takes care of itself.
The two measurements
Wrap measurement (your width). With the book closed, lay a soft tape across the front cover, around the spine, and across the back cover to the far edge. Subtract half an inch for a tailored fit, since cotton has no give, then add six inches for the pockets, three inches folded in on each end.
Wrap measurement minus half an inch plus six inches equals your finished width.
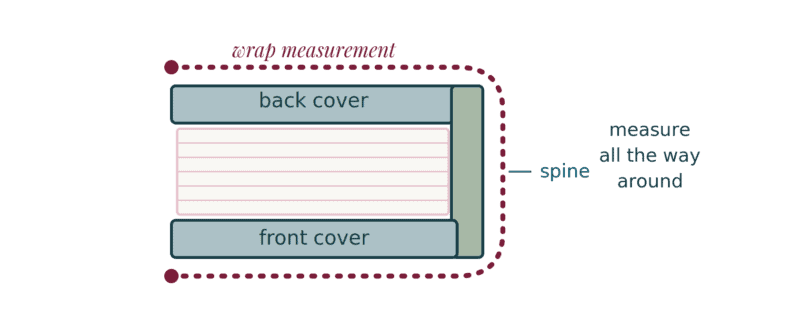
Tip: Keep your starting chain a multiple of 3. The Reed Crossover Stitch repeats over three stitches, so a multiple of 3 keeps the crossings lined up. Once you have chained to your width, nudge the count up or down a stitch or two to the nearest multiple of 3 (30, 33, 36, and so on). A stitch either way will not change the fit.
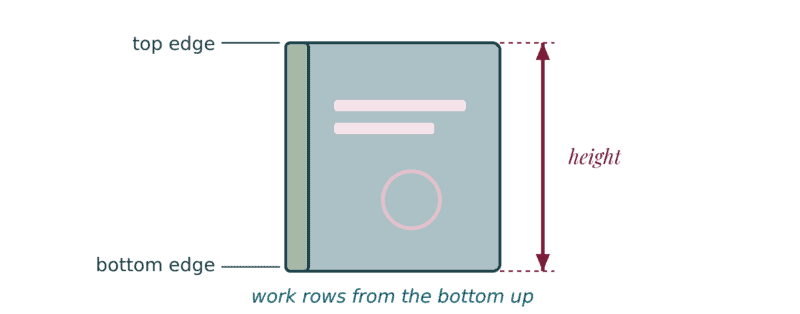
Height measurement (your rows). Stand the book up and measure from the bottom edge to the top edge, then add half an inch of breathing room. Work the stitch in two-row repeats until the piece reaches that height.
Why the extra half inch? After folding, you’ll sc across the top and bottom to close the pockets. The extra ½” keeps the book from sitting crammed edge to edge and stops the closing rows from pulling the cover
short.
A note on counting vs. measuring: Cotton grows with handling, so trust your tape over a row count. Lay the piece flat (don’t stretch) and measure to your body target. If you land between rows, stop one short rather than one over.
Prefer to skip the measuring?
If your book is a standard size, skip the measuring entirely. Find your book type in the chart below and use the starting chain and row count listed. Every number is worked at this pattern’s gauge and already includes the pocket fold-over and a half-inch of height, so you can chain and go.
If your book falls between two sizes, size up, and the snug fit takes care of the difference. For anything unusually thick, like a chunky padded journal, the spine adds width the chart can’t predict, so measure that one with the guide above.

Yardage estimates are based on the pattern’s primary yarn (Village Yarn Craft Cotton, #4
worsted weight) at the gauge listed. Yarn substitutions will affect yardage. All chain counts
are multiples of 3, and all row counts are odd, ending on a sc row ready to fold. Pocket allowance
and height margin are already included.
Abbreviations
ch – chain
dc – double crochet
sk – skip
RS/WS – Right Side/Wrong Side
sc – single crochet
sl st – slip stitch
st(s) – stitch(es)
Stsc – stacked single crochet
Gauge
17 sts and 11 rows = 4″ by 4″in stitch pattern repeat, not blocked.
Gauge is NOT critical with made-to-measure.
Tips
How to Crochet A Gauge Swatch
- Working a gauge swatch will let you know if you will have the correct sizing for this pattern. It will also help you practice the stitches used in this project and improve your stitch work for a flawless look.
- Are you struggling to match the gauge? Check out the blog post on What is Crochet Gauge and How To Fix It
Special Stitches Used in This Pattern
Clean Sc: Insert your hook into the left bar of the sc st, then insert into the next row edge space. YO and pull up a loop, then pull through the first loop on the hook. YO and pull through the remaining two loops on the hook.

Important Pattern Notes
How the Crochet Book Cover is Made
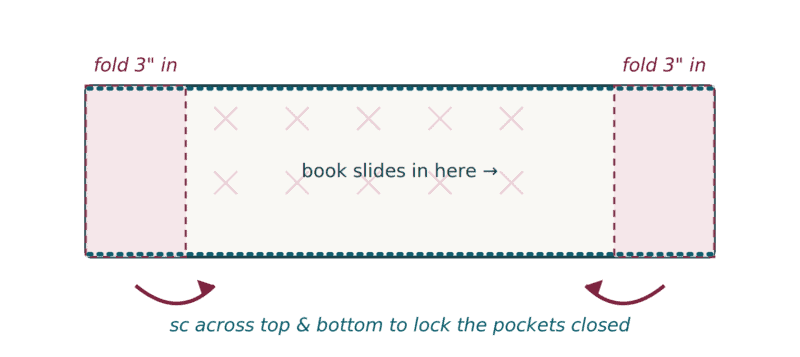
The construction is refreshingly simple, which is part of why I love recommending it to newer crocheters. You crochet one flat rectangle. The starting chain runs the full width of the cover, wrapping the whole closed book plus a little extra at each end for the pockets, and you build height by adding two-row repeats until the piece is as tall as your book.
When the rectangle is done, you fold each short end inward to form a pocket, then slide the front cover of your book into one pocket and the back cover into the other. A single row of single crochet across the top and the bottom locks those folds in place, and the spine side stays open so the book slides in and out. That is the whole thing.
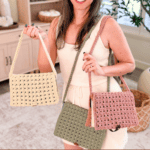
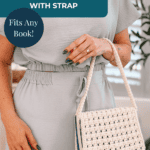
There is also an optional Tunisian carrying strap worked on the smaller G hook. It doubles as a bookmark and a little purse-style handle, so you can carry your covered book around the house or toss it in a bag by the strap. A small button closure at the spine edge is another optional add-on if you want your book to travel without flapping open.
Getting the Fit Just Right
Because this is made to measure, small adjustments are easy and expected. Before you seam the pockets closed, slip your book in and test the fold depth. The cover should lie flat against the book with no puckering or gaping at the spine. This test step is the difference between a cover that looks handmade in a good way and one that looks a little off.
A touch too wide? Fold a little deeper than three inches on each end before you work the closing rows.
A touch too snug? Fold a little shallower, or block the finished cover to open it up.
A touch too short? Add a two-row repeat or two to the body before folding and closing.
One thing worth trusting: cotton grows a little with handling, so measure the piece flat rather than counting on row numbers alone. Lay it down without stretching and measure to your target. If you land between rows, stop one short rather than one over. A slightly snug cotton cover is a good thing. It eases into a comfortable fit after a few uses.
How to Care for a Cotton Book Cover
Cotton is the ideal fiber for this project, and caring for it is simple. Hand wash the finished cover in cool water and lay it flat to dry. While it is still damp, take a moment to reshape it, since a little attention while wet goes a long way on a structured piece like this and helps the edges stay crisp.
Avoid the temptation to toss it in a hot dryer. Heat and agitation are what shrink and warp cotton, and since your cover was measured to fit a specific book, you want to protect that fit. If the cover ever feels a bit relaxed after months of use, a quick wash and reshape bring it right back.
Subscribe, Like & Watch on YouTube
Relax & Crochet with NO Ads
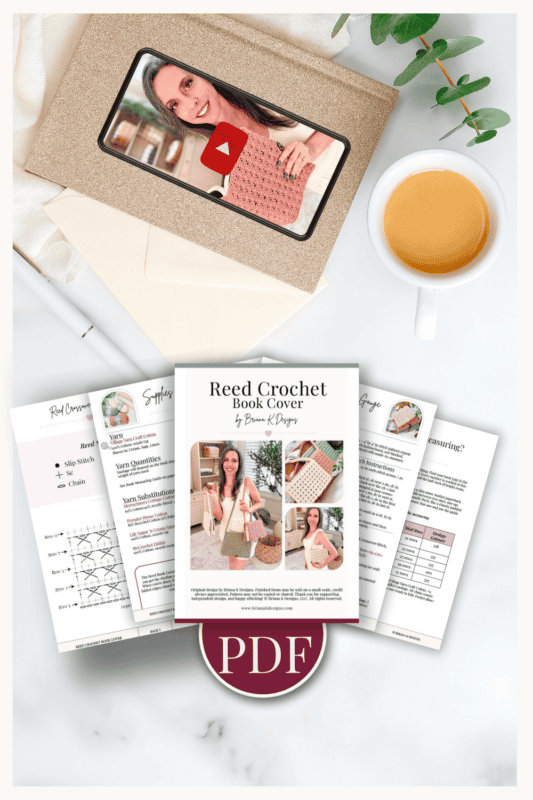
Upgrade to the Printable PDF
Beautifully formatted to print and take with you anywhere. The paid pattern includes:
Click the box below to unlock this exclusive subscriber content for free. Add your email and create a password. If you are having trouble, reset your password or log in to the Grow Portal.
I’m thrilled to share this amazing crochet pattern with you! Please don’t copy, paste, or distribute this pattern. Prefer an ad-free experience? Purchase a digital PDF file for a small fee from one of my online stores. I appreciate your support and readership. You are why I can keep doing what I love and sharing it with others. Thank you from the bottom of my heart.
Reed Crochet Book Cover Pattern
Repeats:
Repeat Rows 2-3 until height is reached, then weave in ends.
Optional Closure
For a book that travels with you, a button closure keeps things tidy. Before seaming the top and bottom edges, add a small chain loop at the open spine edge on one side. Sew a button to the opposite side to match. Nothing fancy needed — a simple toggle or flat button works beautifully with the Reed Crossover Stitch texture.
Folding & Closing
Step 1:
Block the book cover lightly, if needed. For more information about Blocking, see this blog post: How to Block Crochet.
Step 2:
Fold each short end inward approximately 3 inches. You can adjust this depth, folding in more or less, depending on how snug you want the fit to be when the book is closed. Both folds should be the same
depth so the cover sits evenly. With the folds in place (Tip: pin them in place), hold the folded edge together and attach yarn with a sl st. Work a row of Clean sc across the top edge with the RS facing, working through both the folded layers to join them. Repeat across the bottom edge. Fasten off and
weave in ends.
Tip: Before working the Clean sc closing rows, slip your book in and test the fold depth. The cover should lie flat against the book with no puckering or gaping at the spine. If it’s too loose, fold each end in a little more. If it’s too tight, ease the fold back slightly.
Both folds need to stay equal in depth, or the cover will sit crooked on the book. Once you’re happy with the fit, pin or clip the layers in place before you start seaming so nothing shifts while you work.
Tunisian Carrying Strap
For a step-by-step tutorial of the Tunisian Simple Stitch, check out this blog post: How to Crochet a Tunisian Crochet Strap with a Regular Hook.
With G (4.0mm) Hook
Length of straps in images: Beige is 29″, Brown is 42″ inches”, Green is 53″.
Starting Chain: Ch 6.
Set-Up Row (Forward Pass): Insert hook into the second ch from hook, yarn over, pull up a loop. Pull up a loop in each remaining ch across, keeping all loops on your hook. | 6 loops on hook
Set-Up Row (Return Pass): Yarn over, pull through 1 loop. *Yarn over, pull through 2 loops; repeat from * across until 1 loop remains on the hook. | 6 sts
Row 1 (Forward Pass): Skip the first vertical bar. Insert hook under the next vertical bar, yarn over, pull up a loop. Pull up a loop under each vertical bar across. For the last stitch, insert hook under both vertical bars of the final stitch, yarn over, pull up a loop. | 6 loops on hook
Row 1 (Return Pass): Yarn over, pull through 1 loop. *Yarn over, pull through 2 loops; repeat from * across until 1 loop remains on the hook. | 6 sts
Repeat Row 1 (both passes) until the strap reaches your desired length.
Bind-Off Row: Skip the first vertical bar. *Insert hook under the next vertical bar, yarn over, pull through the bar and the loop on your hook; repeat from * across.
Fasten off.
To join the strap ends, slip-stitch or seam with a yarn needle — whichever you prefer. See the video tutorial for the invisible join in action.
Finishing
Fasten off and weave in all ends.
The strap works as both a bookmark and a carrying handle. With your book open to your current page, loop the strap around the outside of the covered book, then close the book with the strap flattened between the pages. Tug gently until the strap gathers snugly around the spine like a purse handle. If you added the optional button closure, fasten it so your book doesn’t flap — and off you go.
Join The Kindest Community
Join our vibrant community of crafters on Facebook today. Whether you enjoy crafting with others or simply have burning questions, we’ve got you covered – join us now!
Crochet Book Cover FAQs
What yarn is best for a crochet book cover?
Cotton or a cotton blend is the best choice, and it is what I used and recommend. Cotton has very little stretch, so it holds the book’s shape instead of drooping and takes the pocket folds crisply. It also softens with use rather than pilling. A worsted weight, number 4, cotton like Village Yarn Craft Cotton or Lily Sugar’n Cream is easy to find and works up quickly. I would steer away from a very springy acrylic here, since the stretch tends to make the finished cover feel loose around the book.
How much yarn do I need to crochet a book cover?
It depends on your book, but as a guide, a slim mass-market paperback takes roughly 218 yards, a trade paperback around 315 yards, and a hardcover novel about 335 yards of the listed worsted cotton. Larger nonfiction and coffee table books run closer to 400 yards. Those estimates are for the primary yarn at the pattern’s gauge, so if you substitute a different weight or fiber, your yardage will shift. One skein of worsted cotton covers a standard paperback with room to spare.
Can I make this book cover fit any size book?
Yes, and that is exactly what it is designed to do. Rather than giving you fixed sizes, the pattern has you measure your book and work two simple calculations, one for the width and one for the height. That means the same pattern covers a tiny travel paperback, a thick hardcover, a journal, or a Bible. If you would rather not measure, the size chart in this post provides ready-made measurements for the five most common book formats.
Is a crochet book cover hard to make for a beginner?
Not at all. This is rated Easy, and the construction could not be simpler: it is a single flat rectangle that folds into pockets. The only new skill for most people is the Reed Crossover Stitch, which is a two-row repeat you will have memorized within a few inches. If you can chain, single crochet, and double crochet, you are ready. The video tutorial and the linked stitch guides walk you through anything unfamiliar, so it is a great project for a confident beginner looking to try some texture.
How do I keep the book cover from being too loose or too tight?
The secret is testing the fit before you seam. Once your rectangle is folded into pockets, slide the book in and check it before working the closing rows. If it is loose, fold the ends in a little deeper. If they are snug, fold them more shallowly or block the finished piece to relax it. Keep both folds equal in depth so the cover sits straight. And remember cotton eases with handling, so a cover that feels just barely snug at first will settle into a perfect fit.
Can I sell book covers made from this pattern?
Yes. You are welcome to sell finished items made from this pattern on a small scale, and a credit back to Briana K Designs is always appreciated. What you cannot do is copy, share, or resell the pattern itself. Handmade book covers make lovely additions to a craft fair table or a small shop, especially around the holidays and the back-to-school season, when readers are shopping for gifts.
More Crochet Patterns You’ll Love
If this quick, textured make is your speed, here are a few more from the blog to line up next:
🥂 Cheers, and happy crocheting!
Well, That Was Fun! What’s Next?
Whichever way you make it, I would love to see your finished cover. Tag your makes with #brianakdesigns so I can cheer you on, and if you get stuck, the Briana K Community on Facebook is always happy to help.