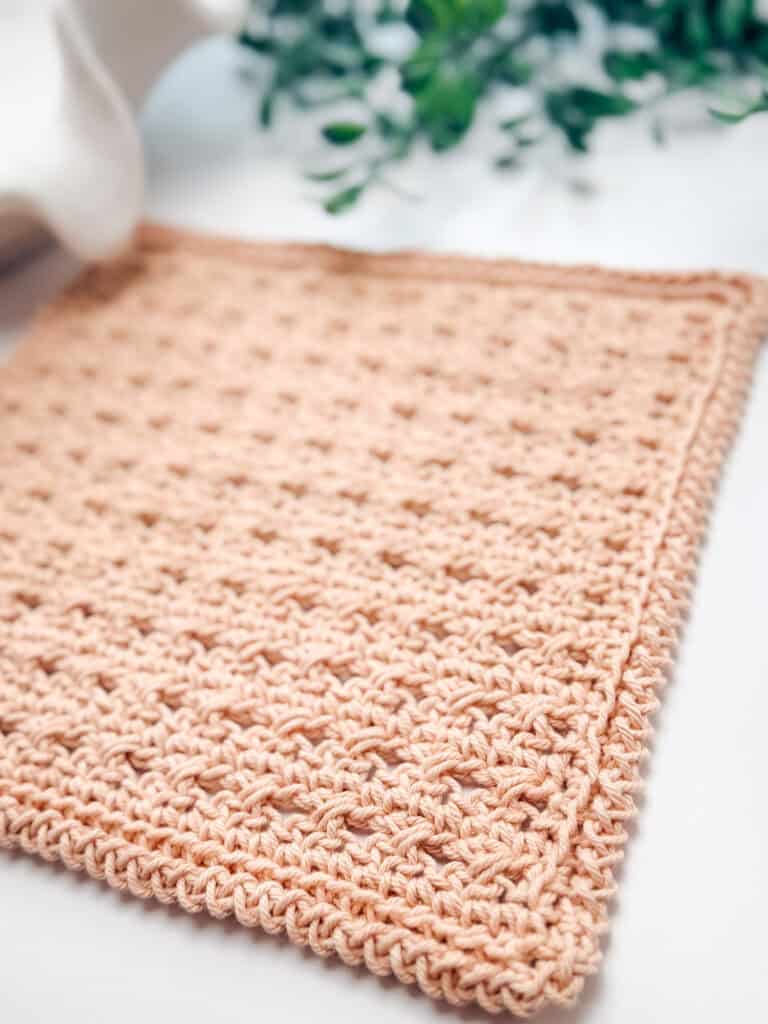


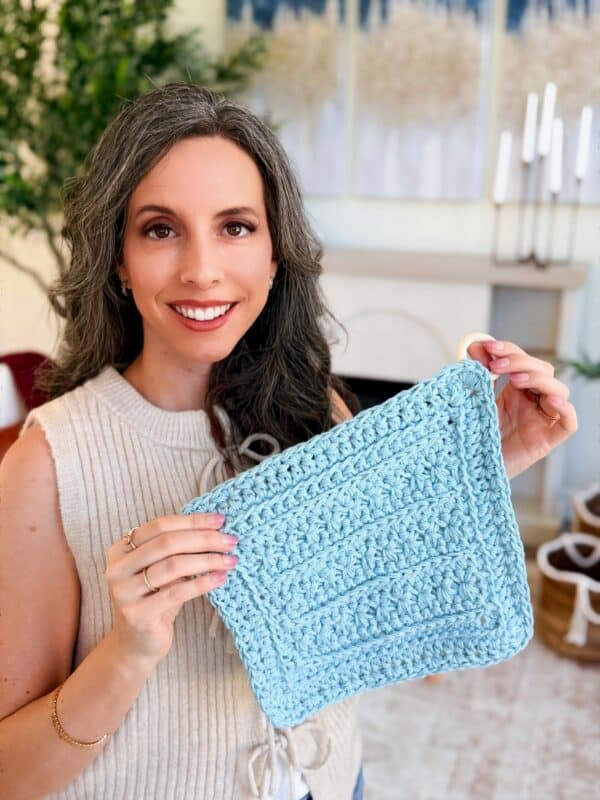
Add a touch of handmade charm to your kitchen with the Petal Loop Stitch Trivet crochet pattern, a beautifully textured and practical project that’s as fun to make as it is to use.
This trivet is worked flat in rowsusing the 4-row repeat Petal Loop Stitch, creating soft, looped “petals” across the fabric. The combination of simple stitches and unique loop construction results in a fabric that’s both visually striking and wonderfully tactile.
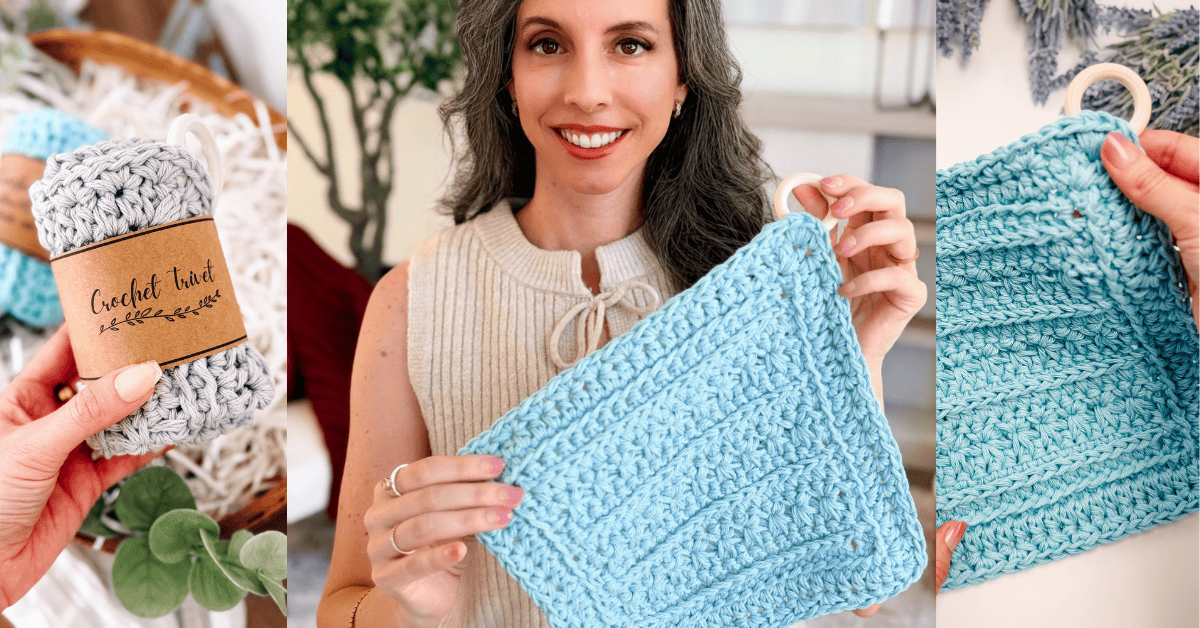
If you’ve made a Petal Loop Stitch Washcloth and wanted to try a slightly larger project, this trivet is the perfect place to start, especially since it’s worked with yarn held double, giving you extra texture and a thicker, more durable finished piece.
Whether you’re protecting your countertops or adding a cozy handmade detail to your kitchen, this trivet is a quick and satisfying project you’ll reach for again and again. And if you love texture-rich crocheted home decor, try making some coordinating Wheat Stitch™ Hotpads or Dishtowel Holders!
Disclosure: This post contains affiliate links. Please read my disclosure for more info.
What you’ll love about the Petal Loop Stitch Trivet
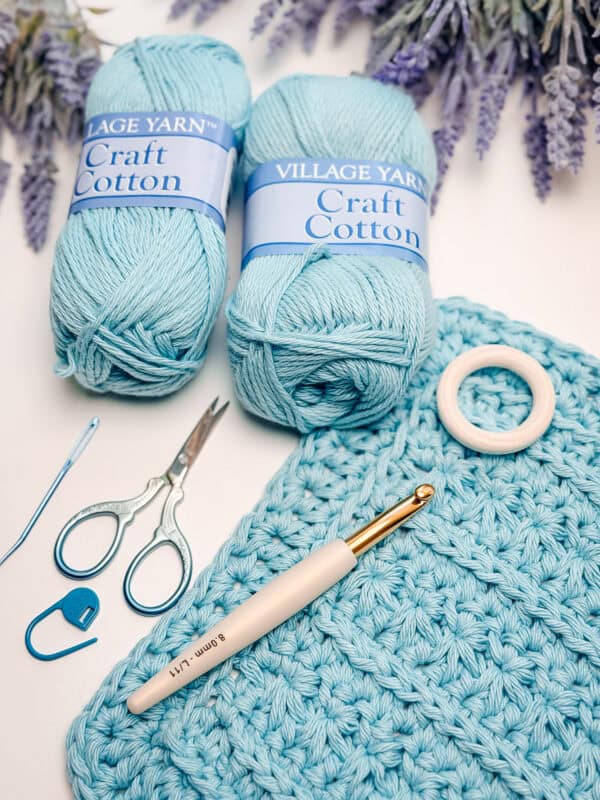
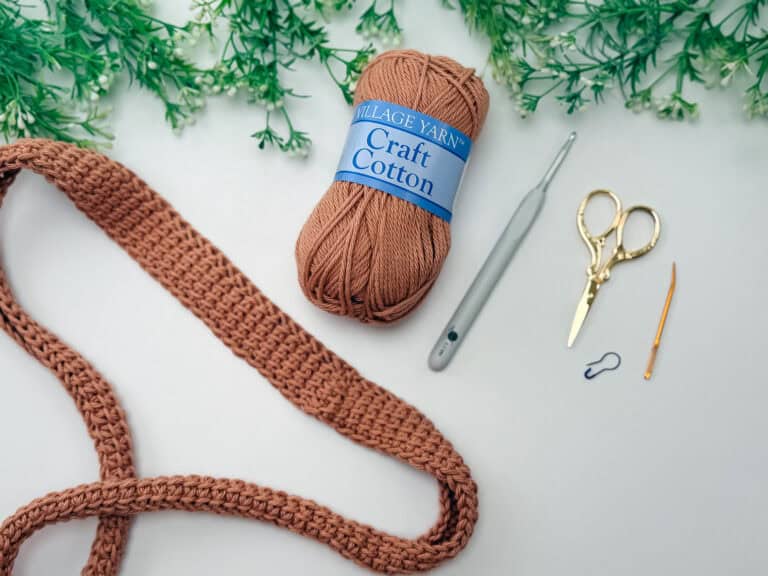
Petal Loop Stitch Crochet Trivet Supplies
Yarn
Village Yarn Craft Cotton
100% Cotton; 115yds/71g
Yarn Quantities
150 yds
Yarn Substitutions
Premier Home Cotton – 85% Recycled Cotton/15% Polyester; 131yds/75g
Lily Sugar ’n Cream Yarn – 100% Cotton; 120yds/71g
WeCrochet Dishie – 100% Cotton; 190yds/100g
Remember always to check the gauge and drape when substituting yarns.
Crochet Hook
Size US L (8.0mm) Crochet Hook or hook to obtain gauge.
Notions
Scissors
Yarn Needle
Cat Removable Stitch Marker
Tape Measure
Wooden Ring
Skill Level
Sizing
One Size – 12″ x 11″
Abbreviations
blo – back loop only
ch – chain
hdc – half double crochet
RS/WS – right side/wrong side
sc – single crochet
sl st – slip stitch
st(s) – stitch(es)
Stsc – Stacked Single Crochet
Gauge
10 sts and 8 rows = 4″ by 4″ unblocked, in pattern repeat. Not critical for this pattern.
How to Crochet A Gauge Swatch
Working a gauge swatch will let you know if you will have the correct sizing for this pattern. It will also help you practice the stitches used in this project and improve your stitch work for a flawless look.
Are you struggling to match the gauge? Check out the blog post on What is Crochet Gauge and How To Fix It
Special Stitches
Stacked Single Crochet (Stsc): Do NOT chain, insert hook into next stitch, yo, pull up a loop, yo and pull through both loops, insert hook in the vertical bar below, yo, pull up a loop, yo and pull through both loops on the hook.
3-Loop-Petal: Insert the hook into the back loop of the previously worked star (or stitch) and pull up a loop. Pull up one loop in each of the next two stitches of the previous row, for a total of four loops on the hook. Yarn over and draw through all four loops to complete the stitch.
Clean Sc: Insert your hook into the left bar of the sc st, then insert into the next row edge space. YO and pull up a loop, then pull through the first loop on the hook. YO and pull through the remaining two loops on the hook.
For a step-by-step tutorial for this straight-edge stitch, visit: How to Crochet a Straight Edge
Construction
The Petal Loop Stitch Trivet is worked flat in rows, beginning with a starting chain.
From there, the trivet is built using a repeating 4-row stitch pattern, which forms the signature looped petal texture across the fabric. Because the project is worked with yarn held double, the fabric builds quickly and creates a thick, sturdy surface that’s ideal for a trivet.
Once the main body is complete, the work is rotated, and a border is crocheted evenly around all four sides. The border helps smooth the edges and gives the trivet a clean, finished look. On the final round, a wooden ring is attached directly to the stitches, allowing you to hang your trivet for easy storage or display.
Have some leftover cotton from this project? Try the Wheat Stitch™ Napkin Ring or the Circle Leaf Water Bottle Holder.
Pattern Notes
- This pattern substitutes a traditional chain 2 on some edges for a Stacked Single Crochet. A ch 1 at the beginning of a single crochet row is unnecessary.
- For striping, work Rows 1 & 2 in one color, and Rows 3 & 4 in a different color. Change colors by yarning over with the new color when making the last stitch of the row before your new color begins. Keep both colors attached and carry the unused yarn up the back of the trivet without fastening off.
- This Pattern Uses Standard US Terminology. I use affiliate links and follow GPSR Compliance: privacy & disclosure policy.
❓ Frequently Asked Questions About the Petal Loop Stitch Trivet
Is this trivet beginner-friendly?
🧶 This pattern is best suited for easy-to-intermediate crocheters, especially those comfortable learning a new stitch pattern. A full, step-by-step tutorial for the Petal Loop Stitch can be found here: How to Crochet the Petal Loop Stitch
Can I use acrylic yarn for a trivet?
🧶 Cotton yarn is strongly recommended because it handles heat better. Acrylic yarn can melt under high temperatures, so it’s not ideal for hot dishes.
Why is cotton yarn best for a crochet trivet?
🧶 Cotton yarn is heat-resistant. It also holds its shape well and withstands repeated use, making it ideal for kitchen items. Most cotton yarns are machine washable, making your trivet easy to clean after everyday use. Plus, they’re eco-friendly! Cotton yarns are also affordable and easy to find.
Why is the yarn held double?
🧶 Holding yarn double creates a thicker, more durable fabric, which is important for protecting surfaces from heat.
Can I make this in different sizes?
🧶 The pattern is written for one size, but you can adjust the starting chain and rows to customize the size if desired.
Is this a good project for gifts?
🧶 Absolutely! Crochet trivets make excellent housewarming gifts, hostess gifts, and handmade kitchen sets.
What is a crochet trivet used for?
🧶 A crochet trivet is a protective pad that sits between hot dishes and your table or countertop. Because this trivet is worked with thick, double-stranded yarn, it creates a sturdy fabric that helps protect surfaces from heat while adding a decorative, handmade touch.
You can use a crochet trivet for:
• protecting countertops from hot pans
• placing under serving dishes
• decorating your table or kitchen
• layering into farmhouse-style décor
• gifting as part of a handmade kitchen set.
How long does it take to crochet a trivet?
🧶 Estimated time: 2-4 hours. This is one of those wonderfully quick projects that gives you instant gratification. Because the trivet is worked with yarn held double, it builds faster than many single-strand projects.
Tips for Speeding Up Your Project
🧶 Use smooth yarn to keep your stitches flowing easily
🧶 Work in good lighting to see the loops clearly
🧶 Set small goals (a few rows at a time)
🧶 Treat it as a relaxing, low-pressure project
A Better Way to Crochet Beautiful Texture
If you love richly textured crochet stitches like the star stitch, the Petal Loop Stitch is one you’ll want to keep in your rotation.
It creates a beautifully layered fabric with soft, looped details that add depth and movement, without feeling overly complicated to crochet.
Many crocheters find that once they learn the repeat, the stitch becomes rhythmic and relaxing, making it perfect for projects like this trivet, where you can enjoy the process while watching the texture build.
Subscribe & Like
Video Tutorial for the Petal Loop Stitch Crochet Trivet
Relax & Crochet
Upgrade to the Printable PDF
Beautifully formatted to print and relax while crocheting. The paid pattern includes:
The Ad-Free PDF can be purchased on Etsy or Ravelry.
Click the box below to unlock this exclusive subscriber content for free. Add your email and create a password. If you are having trouble, reset your password or log in to the Grow Portal.
I’m thrilled to share this amazing crochet pattern with you! Please don’t copy, paste, or distribute this pattern. Prefer an ad-free experience? Purchase a digital PDF file for a small fee from one of my online stores. I appreciate your support and readership. You are why I can keep doing what I love and sharing it with others. Thank you from the bottom of my heart.
Petal Loop Stitch Trivet Written Crochet Pattern Instructions
Repeats
Rows 5-12:
Repeat Rows 1-4.
Rows 13-14:
Repeat Rows 1-2.
Go to Border.
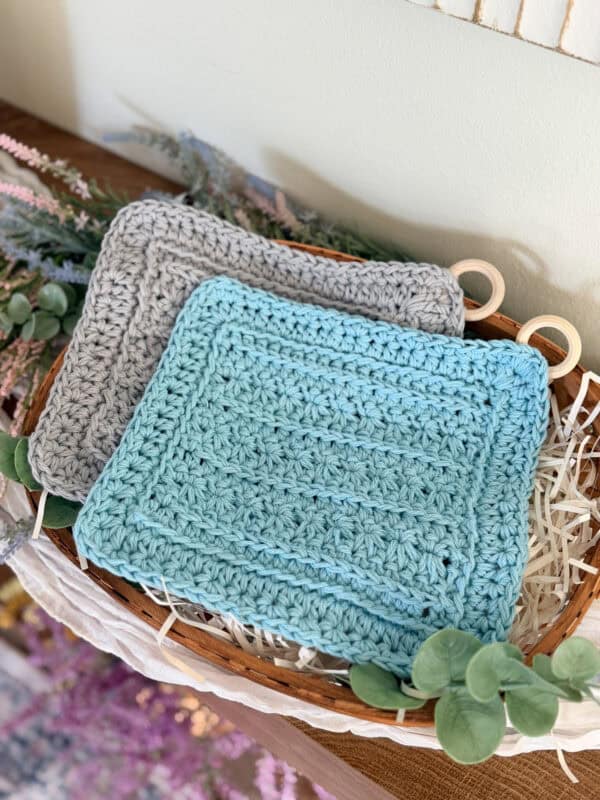
Best Yarn Colors for Crochet Kitchen Projects
Choosing the right color can make your Petal Loop Stitch Trivet stand out even more, especially with a textured stitch like this one.
Solid Colors Show Texture Best
Because the Petal Loop Stitch creates beautiful raised loops, solid colors are the best way to highlight that texture. Lighter shades in particular help the details pop.
Great options include:
- soft cream
- warm beige
- light gray
- sage green
- dusty blue
Rich, Deep Colors for a Cozy Look
If you love a more dramatic or cozy kitchen aesthetic, deeper tones can give your trivet a bold, finished look.
Try:
- wine or deep red
- forest green
- navy blue
- charcoal
Neutral Palettes for Farmhouse Style
For a clean and timeless feel, stick to a neutral color palette. These work especially well if you’re making a set of kitchen items.
Popular combinations:
- cream + taupe
- gray + white
- beige + soft green
Coordinating Sets for Gifting
If you’re planning to gift your trivet, consider pairing it with a coordinated set in matching colors. Pair it with:
- dishcloths
- washcloths
- kitchen towels
Using 2–3 complementary colors creates a polished, gift-ready look.
Choosing the right color is a simple way to elevate your finished project—and with a stitch this pretty, it’s worth letting the texture take center stage.
Border
Rnd 1:
Ch 1, sc in the first st, clean sc 2 into the same st, clean sc, until the last st of the row, *work 3 clean sc sts into the last st (corner space), working around the other side clean sc across all edge row sts (placing 1 st per row or st); repeat from * around and join. | 76 sts
Rnd 2:
Ch 1, sc in first, 3 hdc sts in next, hdc until the next corner st, *3 hdc in the corner st, hdc until the next corner; repeat from * around and join. | 84 sts
Rnd 3:
Ch 1, 2 sc in the first st, skip the next st, *2 sc in the next st, skip the next st; repeat from * evenly around the edges of the trivet, working 3 sts in each corner, until the very last corner. On the final corner, work the stitches around the wooden ring if adding one. See the video tutorial for detailed instructions.
Join The Kindest Community
Join our vibrant community of crafters on Facebook today. Whether you enjoy crafting with others or simply have burning questions, we’ve got you covered – join us now!
Finishing
Fasten off and create an invisible join. Then weave in all ends, taking care to secure them neatly along the textured stitches for a clean, seamless look.
The Petal Loop Stitch Trivet is the perfect blend of texture, function, and quick satisfaction. With its beautiful stitch pattern, sturdy construction, and practical use, it’s a project you’ll enjoy making and actually using in your home. Caring for a crocheted trivet is simple – just wash according to the yarn label instructions, dry, and reuse!
Looking for more eco-friendly projects?
Summer House Crochet Bag
Moss Stitch Washcloth
Wheat Stitch™ Mug Cozy
Wreath Coaster
Circle Leaf Market Bag
Cheers, and happy crocheting!
Well, That Was Fun! What’s Next?