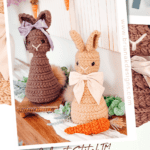
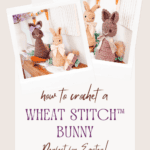

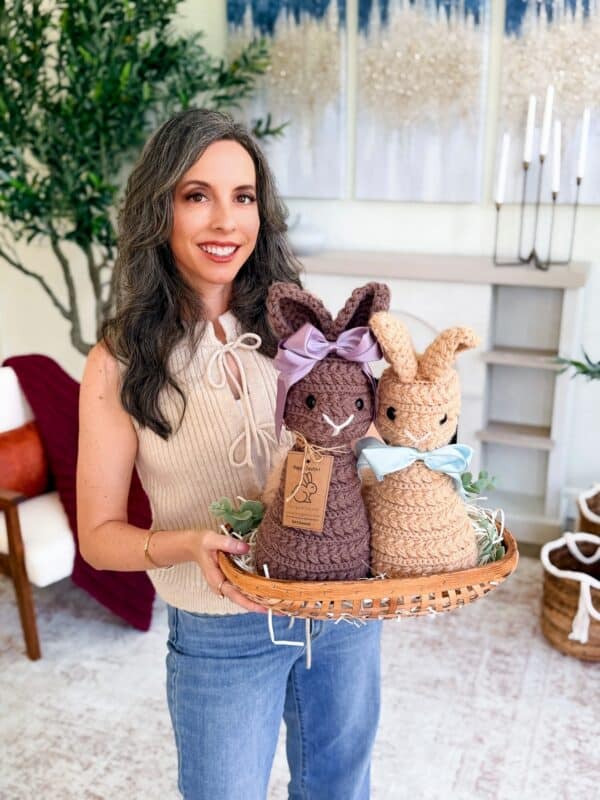
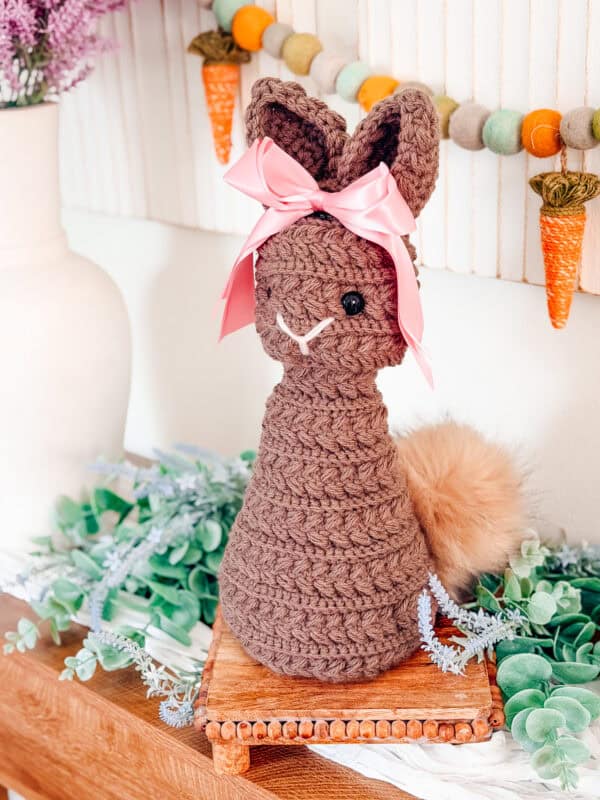
Looking for the sweetest textured bunny crochet pattern for Easter? This Wheat Stitch™ Bunny crochet pattern is a cozy, top-down amigurumi bunny designed with bold texture, simple shaping, and just the right amount of fluffy charm. Featuring signature Wheat Stitch™ puff details and a one-piece body construction, this bunny is both beginner-friendly (for confident makers) and irresistibly giftable.

Whether you’re filling Easter baskets, decorating for spring, or adding handmade cuteness to your market table, this bunny is about to hop straight into your heart. For more Easter fun, check out the Wheat Stitch™ Easter Bunny Basket and the Reusable Easter Eggs patterns! And don’t forget to make your bunny a few Wheat Stitch™ Carrots!
Disclosure: This post contains affiliate links. Please read my disclosure for more info.
What you’ll love about this bunny pattern.
Wheat Stitch™ Bunny Crochet Pattern Supplies
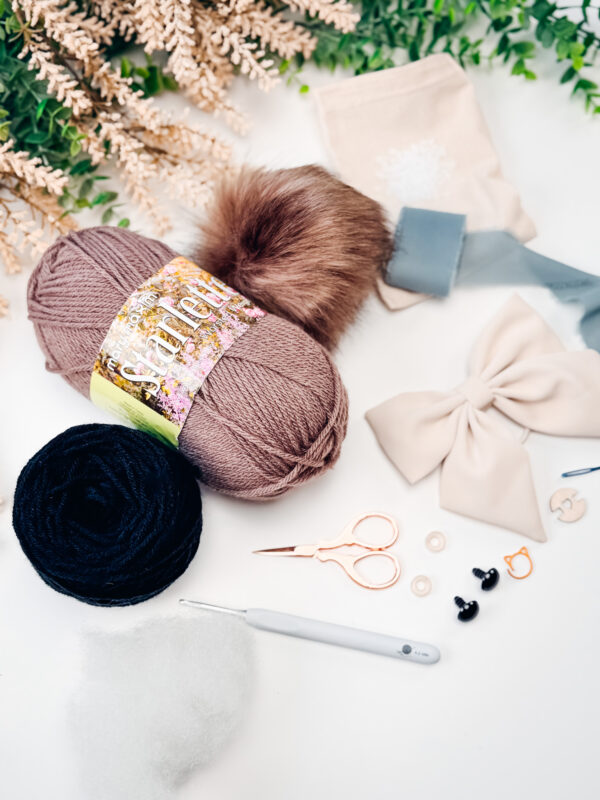
Yarn
Herrschners Worsted 8
100% Acrylic, 489yds/226g
Shown in Colorway: Sandstone
Mary Maxim Starlette
100% Ultra Soft Acrylic, 180yds/100g
Shown in Colorway: Warm Brown
Yarn Quantities
285 total yds per bunny
Yarn Substitutions
Brava Worsted – 100% Premium Acrylic, 218yds/100g
Red Heart Super Saver – 100% Acrylic, 389yds/150g
Premier Everyday Worsted – 100% Anti-Pilling Acrylic, 180yds/100g
Remember always to check the gauge and drape when substituting yarns.
Crochet Hook
Size US G (4.0mm) & H (5.0mm) Crochet Hooks or hook to obtain gauge.
Notions
Scissors
Yarn Needle
Cat Removable Stitch Marker
Safety Eyes
Fiberfill
Hair Tie Ribbons
Chiffon Ribbon
Pompom
Skill Level
Sizing
One Size: 15″ tall x 6″ wide
Changing yarn weight/hook size will change the finished dimensions
Abbreviations
blo – back loop only
ch – chain
MC – magic circle
RS?WS – right side/wrong side
sc – single crochet
sl st – slip stitch
st(s) – stitch(es)
Gauge
12 sts and 17 rows = 4″ by 4″ in stitch pattern repeat; NOT critical for this pattern.
How to Crochet A Gauge Swatch
Working a gauge swatch will let you know if you will have the correct sizing for this pattern. It will also help you practice the stitches used in this project and improve your stitch work for a flawless look.
Are you struggling to match the gauge? Check out the blog post on What is Crochet Gauge and How To Fix It
Construction
The Wheat Stitch™ Bunny crochet pattern is thoughtfully designed for clean shaping and minimal finishing work.
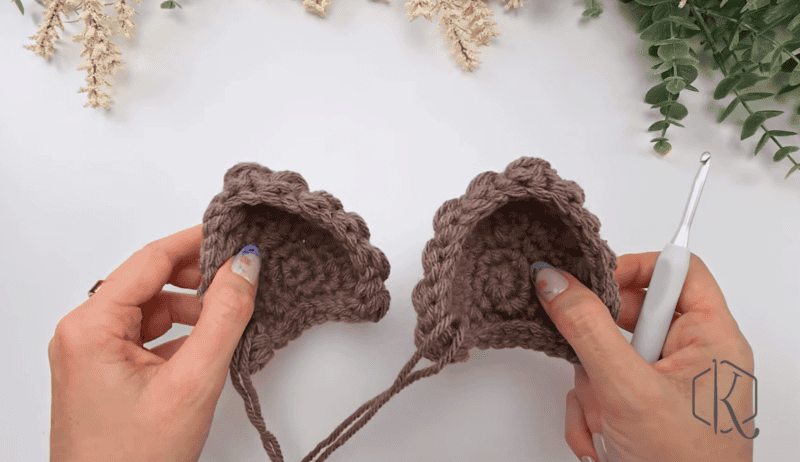
Step 1: Make the Ears: The bunny begins with the ears. They’re worked first and set aside, ready to be joined as the body is constructed.
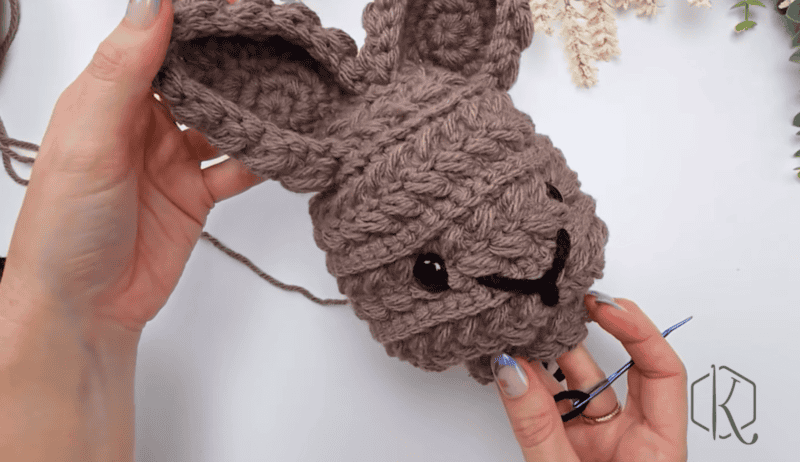
Step 2: Top-Down Body Construction: The body is worked in one piece from the top down, beginning with the head. As you crochet, the ears are attached, eyes are added (either safety eyes or embroidered eyes), and the nose it stitched. You will also start stuffing your bunny.
Step 3: Final Details: Once the body is complete, you will finish stuffing, add a tail, and finish with a bow (if desired).
And just like that, you’ve made bunny magic. Looking for more fun animal friends to make? Try the Wheat Stitch™ Chicken or any of the Hooked on the Sea Creatures, like the Wheat Stitch™ Turtle!
Special Stitches
Puff Stitch: Yarn over and insert your hook into the stitch/space; yarn over again and pull up a long loop; yarn over and insert your hook into the same stitch/space; yarn over again and pull up a long loop (5 loops on the hook); yarn over and pull through the first 4 loops; yarn over and pull through remaining loops.
Invisible sc2tog: Insert your hook into the front loop of the first st, and then insert into the front loop of the second st (3 loops on the hook). Yarn over and pull through both front loops (2 loops on the hook), yarn over and pull through the remaining loops on the hook.
Pattern Notes
- One of the great things about crocheting amigurumi is the freedom to experiment with any yarn you love — from fingering weight to bulky! Simply adjust your hook size to match your yarn choice, and have fun creating!
- Using a stitch marker at the beginning (or end) of the round is recommended.
- Warning: If you choose to add eyes, safety eyes are not suitable for children under three years old, as they can pose a choking hazard if they become detached. Adult supervision is recommended. Feel free to embroider the eyes.
- A ch 1 at the beginning of a row is not counted as a stitch.
- This Pattern Uses Standard US Terminology. I use affiliate links and follow GPSR Compliance: privacy & disclosure policy here.
❓ FAQs About the Wheat Stitch™ Bunny Crochet Pattern
🐰 Is this bunny made in one piece?
Yes! The body is worked top-down as a single continuous piece. The ears are made first and attached during construction.
🐰 How big is this bunny?
Finished size will vary slightly depending on yarn weight and hook choice. As written, the bunny should end up around 15” tall and about 6” wide.
🐰 Can I use different yarn weights?
Absolutely. Changing yarn weight and hook size will adjust the final size of your bunny!
🐰 Is this pattern beginner-friendly?
This pattern is best suited for intermediate crocheters or confident beginners comfortable with the Wheat Stitch™ and with increasing and decreasing.
🐰 Can I sell finished bunnies?
Yes, finished items may be sold on a small scale. Credit is always appreciated.
Subscribe & Like
Video Tutorial for the Wheat Stitch™ Bunny Crochet Pattern – Pt 1
Relax & Crochet
Upgrade to the Printable PDF
Beautifully formatted to print and relax while crocheting. The paid pattern includes:
The Ad-Free PDF can be purchased on Etsy or Ravelry.
Click the box below to unlock this exclusive subscriber content for free. Add your email and create a password. If you are having trouble, reset your password or log in to the Grow Portal.
I’m thrilled to share this amazing crochet pattern with you! Please don’t copy, paste, or distribute this pattern. Prefer an ad-free experience? Purchase a digital PDF file for a small fee from one of my online stores. I appreciate your support and readership. You are why I can keep doing what I love and sharing it with others. Thank you from the bottom of my heart.
Wheat Stitch™ Bunny Crochet Pattern Written Instructions
Bunny Body
G (4.0mm) hook
The Bunny Body will be done in one piece.
Rnd 1 (WS):
Inside MC, sc 12, join and turn. | 12 sts
Rnd 2 (RS):
Ch 1, blo 2 sc in each st around, join and turn. | 24 sts
Rnds 3-4:
Ch 1, skip the first st, sc in next, work a puff st into the skipped st, *skip the next st, sc in next, work a puff st into the skipped st; repeat from * around, join and turn.
Rnd 5:
Ch 1, blo 2 sc in first, blo sc in next, *blo 2 sc in next, blo sc in next; repeat from * around, join and turn. | 36 sts
Rnd 6:
Ch 1, blo 2 sc in first, blo sc in the next 2 sts, *blo 2 sc in next, blo sc in the next 2 sts; repeat from * around, join and turn. | 48 sts
Rnds 7-8:
Repeat Rnds 3-4.
Rnds 9-10:
Ch 1, blo sc in each st around, join and turn.
Size Tip
Want a different size? Use any yarn of your choice and adjust the hook size for a different look.
Rnds 11-14:
Repeat Rnds 7-10.
Rnds 15-16:
Repeat Rnds 3-4.
Sew the Ears to the top of the Bunny Head. You can point them forward, or slanted and off to the sides.
Using safety eyes (or stitch with yarn), place the eyes on the front of the Bunny between Rows 11 and 12, about 12 sts apart.
Rnd 17:
Ch 1, blo sc2tog around, join and turn. | 24 sts
Rnd 18:
Ch 1, blo sc in each st around, join and turn.
Rnds 19-20:
Repeat Rnds 3-4.
Begin to stuff the Bunny with fiberfill as you go.
With your yarn needle, embroider the nose on the front center of the Bunny by first making a horizontal line across the front (Rounds 14-15), then a lower vertical line (start on Round 18) that loops over the middle of the horizontal line and pulls it into a ‘V’; see video.
Video Tutorial for the Wheat Stitch™ Bunny Crochet Pattern – Pt 2
Rnd 21:
Ch 1, 2 blo sc in the first, blo sc in the next, * 2 blo sc in the next, blo sc in the next; repeat from * around, join and turn. | 36 sts
Rnd 22:
Ch 1, blo sc in each st around, join and turn.
Rnds 23-24:
Repeat Rnds 3-4.
Rnd 25:
Ch 1, 2 blo sc in the first, blo sc in the next 8, * 2 blo sc in the next, blo sc in the next 8; repeat from * around, join and turn. | 40 sts
Rnd 26:
Ch 1, 2 blo sc in the first, blo sc in the next 9, * 2 blo sc in the next, blo sc in the next 9; repeat from * around, join and turn. | 44 sts
Join The Kindest Community
Join our vibrant community of crafters on Facebook today. Whether you enjoy crafting with others or simply have burning questions, we’ve got you covered – join us now!
Rnds 27-28:
Repeat Rnds 3-4.
Rnd 29:
Ch 1, 2 blo sc in the first, blo sc in the next 10, * 2 blo sc in the next, blo sc in the next 10; repeat from * around, join and turn. | 48 sts
Rnd 30:
Ch 1, 2 blo sc in the first, blo sc in the next 11, * 2 blo sc in the next, blo sc in the next 11; repeat from * around, join and turn. | 52 sts
Rnds 31-32:
Repeat Rnds 3-4.
Rnd 33:
Ch 1, 2 blo sc in the first, blo sc in the next 12, * 2 blo sc in the next, blo sc in the next 12; repeat from * around, join and turn. | 56 sts
Rnd 34:
Ch 1, 2 blo sc in the first, blo sc in the next 6, * 2 blo sc in the next, blo sc in the next 6; repeat from * around, join and turn. | 64 sts
Rnds 35-36:
Repeat Rnds 3-4.
Rnd 37:
Ch 1, 2 blo sc in the first, blo sc in the next 7, * 2 blo sc in the next, blo sc in the next 7; repeat from * around, join and turn. | 72 sts
Rnd 38:
Ch 1, blo sc in each st around, join and turn.
Rnds 39-40:
Repeat Rnds 3-4.
Rnds 41-42:
Ch 1, blo sc in each st around, join and turn.
Rnds 43-44:
Repeat Rnds 3-4.
Rnd 45:
Ch 1, *blo sc2tog, sc in the next 4 sts; repeat from * around, join and turn. | 60 sts
This is a good time to attach the pompom if using a button to attach.
Rnd 46:
Ch 1, *blo sc2tog, sc in the next 3 sts; repeat from * around, join and do not turn. | 48 sts
Rnd 47:
Ch 1, *sc2tog, sc in the next 2 sts; repeat from * around, join. | 36 sts
Rnd 48:
Ch 1, *sc2tog, sc in the next st; repeat from * around, join. | 24 sts
Rnd 49:
Ch 1, sc in each st around, join.
Rnd 50:
Ch 1, *blo sc2tog, sc in the next st; repeat from * around, join. | 16 sts
Rnd 51:
Ch 1, blo sc2tog around, join and fasten off. | 8 sts
Fasten off, leaving a tail. Use the tail end to loop through the 8 sts and pull closed. Weave in end.
Finishing
Now it’s time to give your bunny a little glow-up. Weave in all remaining ends and fluff the body to your liking, making sure everything looks smooth and huggable. If you’re adding a bow, tie it on now and adjust until it feels just right (slightly crooked is a vibe).
The Wheat Stitch™ Bunny crochet pattern is the kind of project that brings a little extra joy to your hook. With its cozy puff stitch texture, thoughtful one-piece construction, and adorable finishing details, this bunny is sure to hop straight into your handmade collection — and probably multiply while it’s there.
More Spring Crochet Patterns You’ll Love
🌸 Wheat Stitch™ Snail with Heart
🌸 Circle Leaf Water Bottle Holder
🌸 Rainbow Hues Crochet Cardigan
🌸 Stash Buster Motif Shawl
🌸 Be My Bunny
Cheers, and happy crocheting!
Well, That Was Fun! What’s Next?