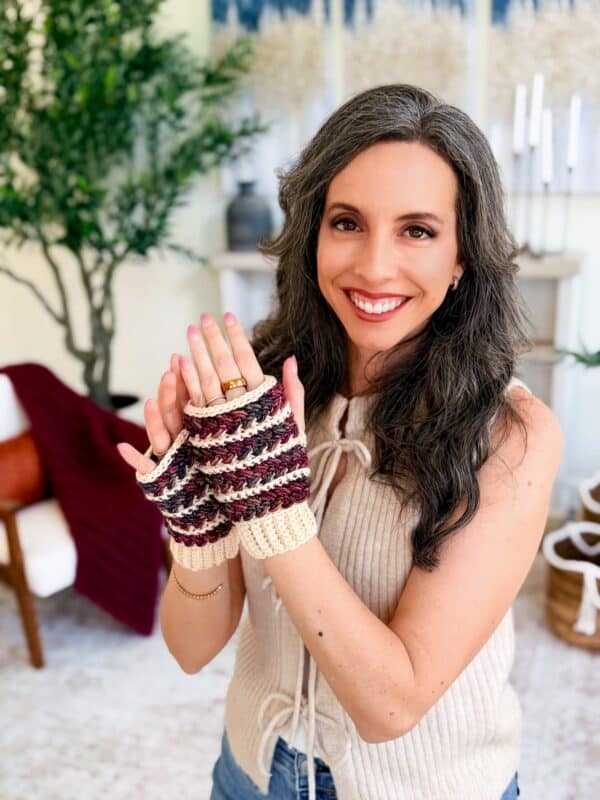
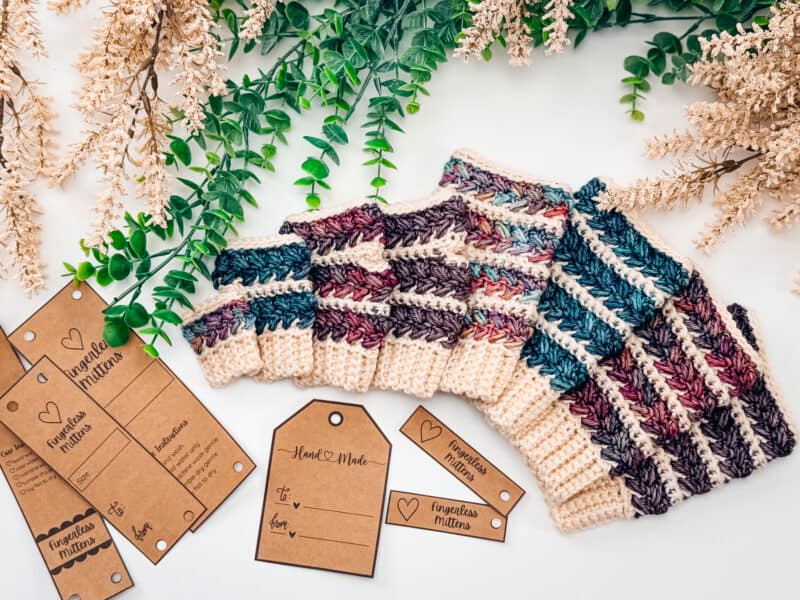
Wrap your hands in cozy texture with the Wheat Stitch™ Crochet Fingerless Mittens. This free fingerless mittens crochet pattern creates a warm, stylish accessory that strikes the perfect balance between comfort and function. These mitts are ideal for chilly mornings, holiday gifting, craft fairs, and everyday wear, especially when you still need your fingers free for coffee cups, phones, and hooks.
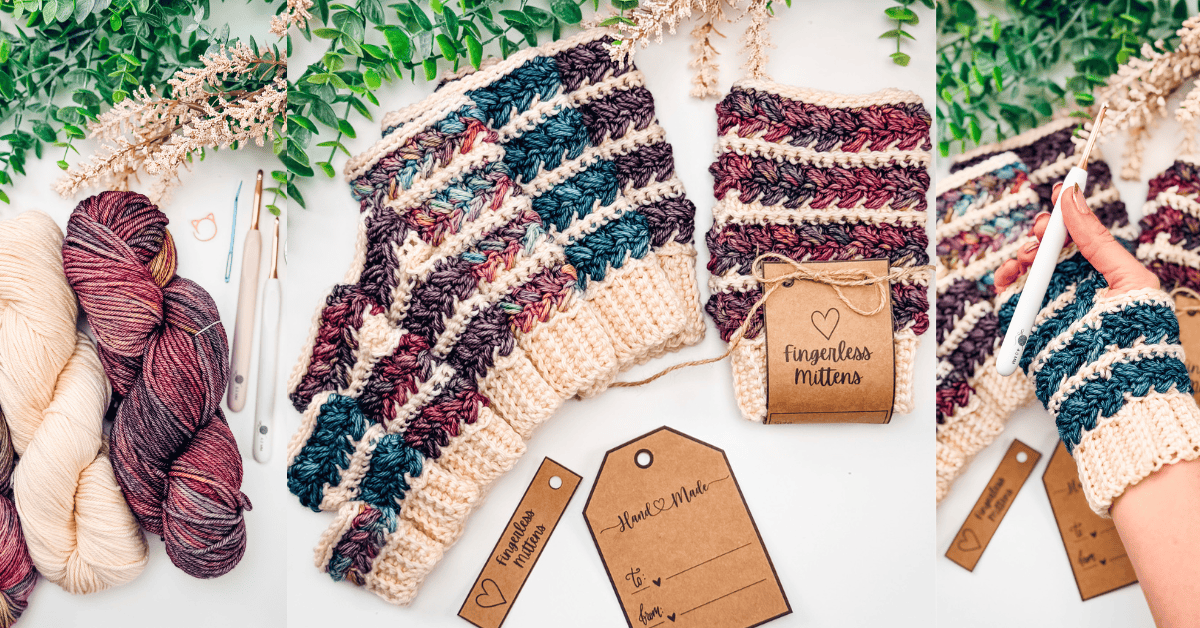
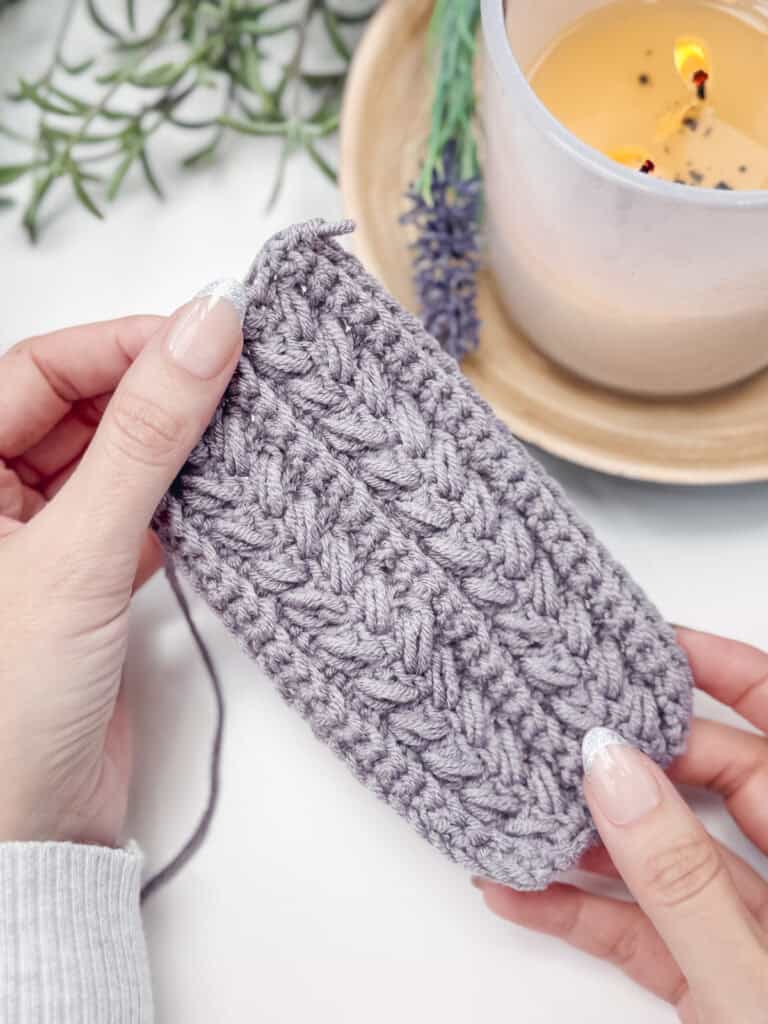
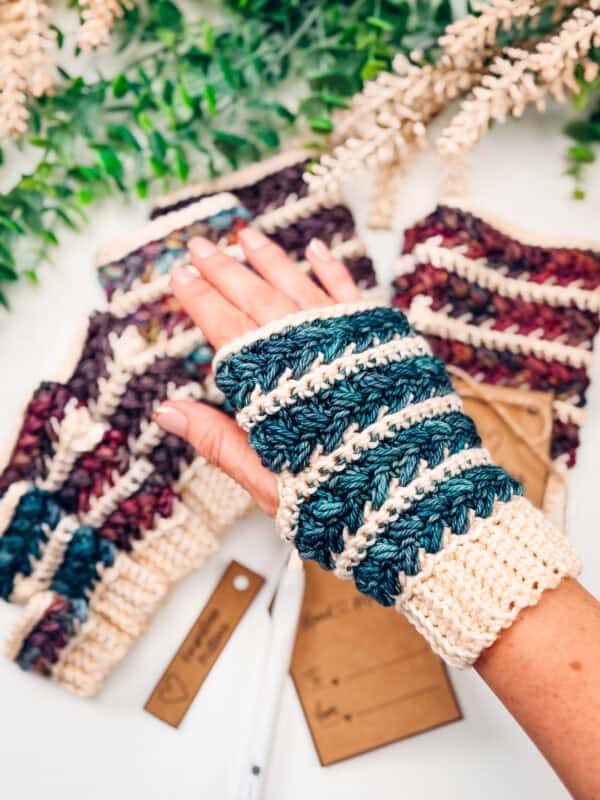
Designed with a wrist-up construction, these fingerless mittens start with a snug ribbed cuff and transition into a beautifully textured mitten body worked in my signature Wheat Stitch™. The result is a soft, dimensional fabric that’s just as satisfying to crochet as it is to wear. Thoughtful shaping keeps them comfortable, while the texture adds that polished, handmade look we all love.
Best of all, this Wheat Stitch™ Fingerless Mittens crochet pattern includes 8 sizes from Newborn through Adult Large, making it perfect for the whole family. It’s a dream for batch-making gifts or stocking up for craft fairs as it’s a quick, satisfying project that works up fast without sacrificing style. Try making a coordinating Wheat Stitch™ Beanie, Wheat Stitch™ Earwarmer, or a Wheat Stitch™ Scarf for a perfectly textured winter set!
Disclosure: This post contains affiliate links. Please read my disclosure for more info.
What you’ll love about this fingerless mitten pattern.
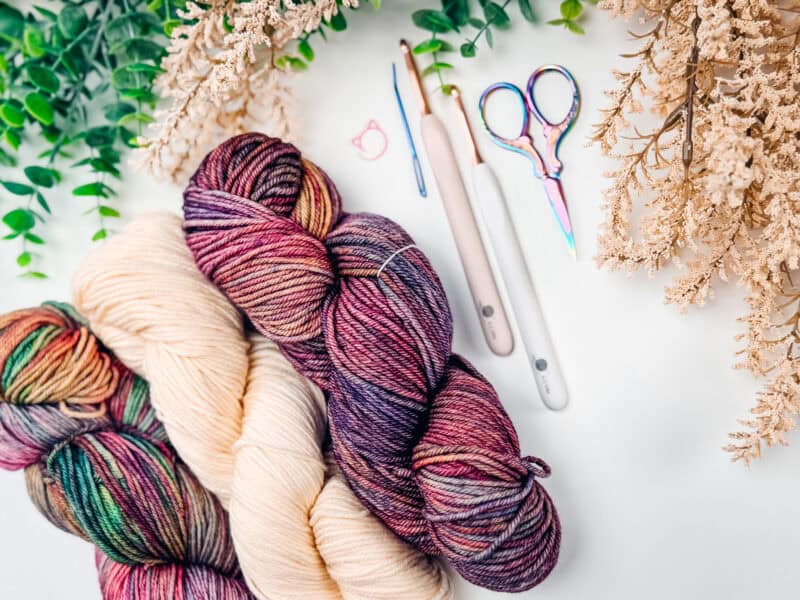
Wheat Stitch™ Fingerless Mittens Crochet Supplies
Yarn
Malabrigo Rios
100% Superwash Merino Wool, 210yds/100g
Main Color (MC): Ivory
Coordinating Color (CC): Arco Iris, Aguas, Queguay, Cloud Sunshine
Yarn Quantities
25 (35, 45, 65, 75) (100, 105, 110) total yards per pair
1 ball of each CC & MC
MC: 8 (11, 14, 20, 23) (30, 32, 33) yds
CC: 17 (24, 31, 45, 52) (70, 73, 77) yds
Yarn Substitutions
Soho Playful
Contrast Color (CC)
65% Acrylic/35% Cotton, 218yds/100g
+
Herrschners Supreme
Main Color (MC)
100% Acrylic, 169yds/100g
Remember always to check the gauge and drape when substituting yarns.
Crochet Hook
Size US G (4.0mm) & H (5.0mm) Crochet Hook or hook to obtain gauge.
Notions
Scissors
Yarn Needle
Removable Stitch Marker
Skill Level
Intermediate
For more information about Crochet Skill Levels, check out this post: https://brianakdesigns.com/crochet-skill-levels/
Sizing
Sizes are written as: Newborn (Baby, Toddler, Child, Teen) (Adult Small, Medium, Large)
Abbreviations
blo – back loop only
ch – chain
RS/WS – right side/wrong side
sc – single crochet
sl st – slip stitch
st(s) – stitch(es)
Gauge
17 sts and 12 rows = 4″ by 4″ unblocked, in pattern repeat.
How to Crochet A Gauge Swatch
Working a gauge swatch will let you know if you will have the correct sizing for this pattern. It will also help you practice the stitches used in this project and improve your stitch work for a flawless look.
Are you struggling to match the gauge? Check out the blog post on What is Crochet Gauge and How To Fix It
Construction
The Wheat Stitch™ Fingerless Mittens are thoughtfully constructed for comfort and ease:
- Ribbed Cuff (Worked Flat): Each mitten begins with a ribbed cuff worked flat in rows, then seamed to form a tube for a snug, stretchy fit at the wrist.
- Mitten Body (Worked in the Round): Stitches are picked up and the mitten body is worked in the round using the Wheat Stitch™, creating warm, textured fabric.
- Thumb Opening: As you crochet the body, a thumb opening is formed by skipping stitches and chaining to create space—simple and effective.
- Thumb Finish: Once the mitten length is reached, stitches are rejoined around the thumb opening and the thumb is worked in the round for a smooth, polished finish.
The result is a comfortable, wearable mitten that feels intentional from cuff to thumb.
Love that wonderful texture? Try the Wheat Stitch™ Flat Mittens, Wheat Stitch™ Hooded Scarf, or the Wheat Stitch™ Rectangle Bag!
Special Stitches
Puff Stitch: Yarn over and insert your hook into the stitch/space; yarn over again and pull up a long loop; yarn over and insert your hook into the same stitch/space; yarn over again and pull up a long loop (5 loops on the hook); yarn over and pull through the first 4 loops; yarn over and pull through remaining loops.
Pattern Notes
- For a full tutorial on the Wheat Stitch, visit: https://brianakdesigns.com/how-to-crochet-the-wheat-stitch/
- A ch 1 at the beginning of a row is not counted as a stitch.
- Using a stitch marker at the beginning (or end) of the round is recommended.
- Try the mitten on as you go to check sizing.
- To create the striped look, use one color for all the puff st rows, and another color for all
the blo sc rows. Change colors by yarning over with the new color when making the last
stitch of the row. Keep both colors attached and carry the unused yarn up the inside of the mitten without fastening off. - This Pattern Uses Standard US Terminology. I use affiliate links and follow GPSR Compliance: privacy & disclosure policy here.
Frequently Asked Questions
Is this pattern beginner-friendly?
🫶 This pattern is best suited for confident beginners and intermediate crocheters who are familiar with my signature Wheat Stitch™ and are comfortable working flat and in the round, as well as following stitch repeats.
How many sizes are included?
🫶 The pattern includes 8 sizes from Newborn through Adult Large, making it ideal for the whole family.
Is this a fast project?
🫶 Yes! These mittens work up quickly, making them perfect for last-minute gifts or batch-making for markets.
Can I sell finished mittens?
🫶 Yes—finished items may be sold on a small scale, with credit to the designer appreciated.
What kind of yarn should I use?
🫶 This pattern was written for worsted-weight (#4) yarn. You can use any fiber or color(s) you prefer!
Subscribe & Like
Video Tutorial for the Wheat Stitch™ Fingerless Mittens Crochet Pattern – Part 1
Relax & Crochet
Upgrade to the Printable PDF
Beautifully formatted to print and relax while crocheting. The paid pattern includes:
The Ad-Free PDF can be purchased on Etsy or Ravelry.
Click the box below to unlock this exclusive subscriber content for free. Add your email and create a password. If you are having trouble, reset your password or log in to the Grow Portal.
I’m thrilled to share this amazing crochet pattern with you! Please don’t copy, paste, or distribute this pattern. Prefer an ad-free experience? Purchase a digital PDF file for a small fee from one of my online stores. I appreciate your support and readership. You are why I can keep doing what I love and sharing it with others. Thank you from the bottom of my heart.
Wheat Stitch™ Fingerless Mittens Written Crochet Pattern Instructions
With H (5.0mm) Hook & MC
Setup: Working along the top edge of the mitten cuff ch 1, sc along the edge space of the first row, *insert your hook into the left bar of the sc st, then insert into the next row edge space. YO and pull up a loop, then pull through the first loop on the hook. YO and pull through the remaining two loops on the hook. Repeat from * all the way around the top edge, join to the first st. The rest of the pattern will be worked in rounds. | 18 (20, 24, 26, 28) (30, 32, 34) sts
To see this clean sc edging with step-by-step instructions, visit: https://brianakdesigns.com/how-to-crochet-a-straight-edge/
🫶 Newborn Wrist Warmer
With CC – Shown in Arco Iris
Rnd 1:
Ch 1, skip the first st, sc in next, work a puff st into the skipped st, *skip the next st, sc in next, work a puff st into the skipped st; repeat from * around, join and turn. | 18 sts
Rnd 2:
Ch 1, skip the first st, sc in next, work a puff st into the skipped st, *skip the next st, sc in next, work a puff st into the skipped st; repeat from * around, join and do not turn. Fasten off CC. | 18 sts
With MC
Rnd 3:
Ch 1, sc in first, *insert your hook into the left bar of the sc st, then insert into the next row edge space. YO and pull up a loop, then pull through the first loop on the hook. YO and pull through the remaining two loops on the hook. Repeat from * all the way around the top edge, join to the first st and fasten off.
🫶 Baby Mitten
With CC – Shown in Aguas
Rnds 1-2:
Ch 1, skip the first st, sc in next, work a puff st into the skipped st, *skip the next st, sc in next, work a puff st into the skipped st; repeat from * around, join and turn. | 20 sts
With MC
Rnd 3:
Ch 1, blo sc in each st around, join and turn.
Rnd 4 Right Hand:
Ch 1, blo sc in each st around until the last 4 sts, ch 4 (all chains count as sts for this rnd), skip 4, join and turn. | 20 sts
Rnd 4 Left Hand:
Ch 4 (all chains count as sts for this rnd), skip 4, blo sc in each remaining st around, join and turn. | 20 sts
With CC
Rnd 5:
Ch 1, skip the first st, sc in next, work a puff st into the skipped st, *skip the next st, sc in next, work a puff st into the skipped st; repeat from * around, join and turn.
Rnd 6:
Ch 1, skip the first st, sc in next, work a puff st into the skipped st, *skip the next st, sc in next, work a puff st into the skipped st; repeat from * around, join and do not turn. Fasten off CC.
With MC
Rnd 7:
Ch 1, sc in first, *insert your hook into the left bar of the sc st, then insert into the next row edge space. YO and pull up a loop, then pull through the first loop on the hook. YO and pull through the remaining two loops on the hook. Repeat from * all the way around the top edge, join to the first st and fasten off.
Baby Thumb
With MC & G (4.0mm) Hook
Rnd 1:
Join to the thumb opening at the seam, sc in first, *insert your hook into the left bar of the sc st, then insert into the next row edge space. YO and pull up a loop, then pull through the first loop on the hook. YO and pull through the remaining two loops on the hook. Repeat from * all the way around the top edge, join to the first st and fasten off. | 8 sts
🫶 Toddler Mitten
With CC – Shown in Queguay
Rnds 1-2:
Ch 1, skip the first st, sc in next, work a puff st into the skipped st, *skip the next st, sc in next, work a puff st into the skipped st; repeat from * around, join and turn. | 24 sts
With MC
Rnds 3-4:
Ch 1, blo sc in each st around, join and turn.
With CC
Rnds 5-6:
Repeat Rnds 1-2.
Rnd 7 Right Hand:
Ch 1, blo sc in each st around until the last 6 sts, ch 6 (all chains count as sts for this rnd), skip 6, join and turn. | 24 sts
Rnd 7 Left Hand:
Ch 7 (all chains count as sts for this rnd), skip 6, blo sc in each remaining st around, join and turn. | 24 sts
With MC
Rnd 8:
Ch 1, blo sc in each st around, join and turn.
With CC
Rnds 9-10:
Repeat Rnds 1-2, do not turn after Rnd 10. Fasten off CC.
With MC & G (4.0mm) Hook
Rnd 11:
Ch 1, sc in first, *insert your hook into the left bar of the sc st, then insert into the next row edge space. YO and pull up a loop, then pull through the first loop on the hook. YO and pull through the remaining two loops on the hook. Repeat from * all the way around the top edge, join to the first st and fasten off.
Toddler Thumb
With MC & G (4.0mm) Hook
Rnd 1:
Join to the thumb opening at the seam, sc in first, *insert your hook into the left bar of the sc st, then insert into the next row edge space. YO and pull up a loop, then pull through the first loop on the hook. YO and pull through the remaining two loops on the hook. Repeat from * all the way around the top edge, join to the first st and fasten off. | 12 sts
🫶 Child Mitten
With CC – Cloud Sunshine
Rnds 1-2:
Ch 1, skip the first st, sc in next, work a puff st into the skipped st, *skip the next st, sc in next, work a puff st into the skipped st; repeat from * around, join and turn. | 26 sts
With MC
Rnds 3-4:
Ch 1, blo sc in each st around, join and turn.
With CC
Rnds 5-6:
Repeat Rnds 1-2.
With MC
Rnd 7 Right Hand:
Ch 1, blo sc in each st around until the last 7 sts, ch 7 (all chains count as sts for this rnd), skip 7, join and turn. | 26 sts
Rnd 7 Left Hand:
Ch 7 (all chains count as sts for this rnd), skip 7, blo sc in each remaining st around, join and turn. | 26 sts
Rnd 8:
Ch 1, blo sc in each st around, join and turn.
With CC
Rnds 9-10:
Repeat Rnds 1-2, do not turn after Rnd 10. Fasten off CC.
With MC & G (4.0mm) Hook
Rnd 11:
Ch 1, sc in first, *insert your hook into the left bar of the sc st, then insert into the next row edge space. YO and pull up a loop, then pull through the first loop on the hook. YO and pull through the remaining two loops on the hook. Repeat from * all the way around the top edge, join to the first st and fasten off.
Child Thumb
With MC & G (4.0mm) Hook
Rnd 1:
Join to the thumb opening at the seam, sc in first, *insert your hook into the left bar of the sc st, then insert into the next row edge space. YO and pull up a loop, then pull through the first loop on the hook. YO and pull through the remaining two loops on the hook. Repeat from * all the way around the top edge, join to the first st and fasten off. | 14 sts
Video Tutorial for the Wheat Stitch™ Fingerless Mittens Crochet Pattern – Part 2
🫶 Teen Mitten
With CC – Shown in Arco Iris
Rnds 1-2:
Ch 1, skip the first st, sc in next, work a puff st into the skipped st, *skip the next st, sc in next, work a puff st into the skipped st; repeat from * around, join and turn. | 28 sts
With MC
Rnds 3-4:
Ch 1, blo sc in each st around, join and turn.
With CC
Rnds 5-6:
Repeat Rnds 1-2.
With MC
Rnd 7:
Ch 1, blo sc in each st around, join and turn.
Rnd 8 Right Hand:
Ch 1, blo sc in each st around until the last 8 sts, ch 8 (all chains count as sts for this rnd), skip 8, join and turn. | 28 sts
Rnd 8 Left Hand:
Ch 8 (all chains count as sts for this rnd), skip 8, blo sc in each remaining st around, join and turn. | 28 sts
With CC
Rnds 9-10:
Repeat Rnds 1-2.
With MC
Rnds 11-12:
Repeat Rnds 3-4.
With CC
Rnds 13-14:
Repeat Rnds 1-2, do not turn after Rnd 14. Fasten off CC.
With MC & G (4.0mm) Hook
Rnd 15:
Ch 1, sc in first, *insert your hook into the left bar of the sc st, then insert into the next row edge space. YO and pull up a loop, then pull through the first loop on the hook. YO and pull through the remaining two loops on the hook. Repeat from * all the way around the top edge, join to the first st and fasten off.
Teen Thumb
With MC & G (4.0mm) Hook
Rnd 1:
Join to the thumb opening at the seam, sc in first, *insert your hook into the left bar of the sc st, then insert into the next row edge space. YO and pull up a loop, then pull through the first loop on the hook. YO and pull through the remaining two loops on the hook. Repeat from * all the way around the top edge, join to the first st and fasten off. | 16 sts
Join The Kindest Community
Join our vibrant community of crafters on Facebook today. Whether you enjoy crafting with others or simply have burning questions, we’ve got you covered – join us now!
🫶 Adult Small Mitten
With CC – Shown in Aguas
Rnds 1-2:
Ch 1, skip the first st, sc in next, work a puff st into the skipped st, *skip the next st, sc in next, work a puff st into the skipped st; repeat from * around, join and turn. | 30 sts
With MC
Rnds 3-4:
Ch 1, blo sc in each st around, join and turn.
With CC
Rnds 5-6:
Repeat Rnds 1-2.
With MC
Rnd 7:
Ch 1, blo sc in each st around, join and turn.
Rnd 8 Right Hand:
Ch 1, blo sc in each st around until the last 8 sts, ch 8 (all chains count as sts for this rnd), skip 8, join and turn. | 30 sts
Rnd 8 Left Hand:
Ch 8 (all chains count as sts for this rnd), skip 8, blo sc in each remaining st around, join and turn. | 30 sts
With CC
Rnds 9-10:
Repeat Rnds 1-2.
With MC
Rnds 11-12:
Repeat Rnds 3-4.
With CC
Rnds 13-14:
Repeat Rnds 1-2, do not turn after Rnd 14. Fasten off CC.
With MC & G (4.0mm) Hook
Rnd 15:
Ch 1, sc in first, *insert your hook into the left bar of the sc st, then insert into the next row edge space. YO and pull up a loop, then pull through the first loop on the hook. YO and pull through the remaining two loops on the hook. Repeat from * all the way around the top edge, join to the first st and fasten off.
Adult Small Thumb
With MC & G (4.0mm) Hook
Rnd 1:
Join to the thumb opening at the seam, sc in first, *insert your hook into the left bar of the sc st, then insert into the next row edge space. YO and pull up a loop, then pull through the first loop on the hook. YO and pull through the remaining two loops on the hook. Repeat from * all the way around the top edge, join to the first st and fasten off. | 16 sts
🫶 Adult Medium Mitten
With CC – Shown in Queguay
Rnds 1-2:
Ch 1, skip the first st, sc in next, work a puff st into the skipped st, *skip the next st, sc in next, work a puff st into the skipped st; repeat from * around, join and turn. | 32 sts
With MC
Rnds 3-4:
Ch 1, blo sc in each st around, join and turn.
With CC
Rnds 5-6:
Repeat Rnds 1-2.
With MC
Rnd 7:
Ch 1, blo sc in each st around, join and turn.
Rnd 8 Right Hand:
Ch 1, blo sc in each st around until the last 8 sts, ch 8 (all chains count as sts for this rnd), skip 8, join and turn. | 32 sts
Rnd 8 Left Hand:
Ch 8 (all chains count as sts for this rnd), skip 8, blo sc in each remaining st around, join and turn. | 32 sts
With CC
Rnds 9-10:
Repeat Rnds 1-2.
With MC
Rnds 11-12:
Repeat Rnds 3-4.
With CC
Rnds 13-14:
Repeat Rnds 1-2, do not turn after Rnd 14. Fasten off CC.
With MC & G (4.0mm) Hook
Rnd 15:
Ch 1, sc in first, *insert your hook into the left bar of the sc st, then insert into the next row edge space. YO and pull up a loop, then pull through the first loop on the hook. YO and pull through the remaining two loops on the hook. Repeat from * all the way around the top edge, join to the first st and fasten off.
Adult Medium Thumb
With MC & G (4.0mm) Hook
Rnd 1:
Join to the thumb opening at the seam, sc in first, *insert your hook into the left bar of the sc st, then insert into the next row edge space. YO and pull up a loop, then pull through the first loop on the hook. YO and pull through the remaining two loops on the hook. Repeat from * all the way around the top edge, join to the first st and fasten off. | 16 sts
🫶 Adult Large Mitten
With CC – Shown in Cloud Sunshine
Rnds 1-2:
Ch 1, skip the first st, sc in next, work a puff st into the skipped st, *skip the next st, sc in next, work a puff st into the skipped st; repeat from * around, join and turn. | 34 sts
With MC
Rnds 3-4:
Ch 1, blo sc in each st around, join and turn.
With CC
Rnds 5-6:
Repeat Rnds 1-2.
With MC
Rnd 7:
Ch 1, blo sc in each st around, join and turn.
Rnd 8 Right Hand:
Ch 1, blo sc in each st around until the last 8 sts, ch 8 (all chains count as sts for this rnd), skip 8, join and turn. | 34 sts
Rnd 8 Left Hand:
Ch 8 (all chains count as sts for this rnd), skip 8, blo sc in each remaining st around, join and turn. | 34 sts
Rnds 9-12:
Repeat Rnds 1-4.
Rnds 13-14:
Repeat Rnds 1-2, do not turn after Rnd 14. Fasten off CC.
With MC & G (4.0mm) Hook
Rnd 15:
Ch 1, sc in first, *insert your hook into the left bar of the sc st, then insert into the next row edge space. YO and pull up a loop, then pull through the first loop on the hook. YO and pull through the remaining two loops on the hook. Repeat from * all the way around the top edge, join to the first st and fasten off.
Adult Large Thumb
With MC & G (4.0mm) Hook
Rnd 1:
Join to the thumb opening at the seam, sc in first, *insert your hook into the left bar of the sc st, then insert into the next row edge space. YO and pull up a loop, then pull through the first loop on the hook. YO and pull through the remaining two loops on the hook. Repeat from * all the way around the top edge, join to the first st and fasten off. | 16 sts
Finishing
Weave in all ends securely and give your mittens a gentle, smooth-out. Slip them on, admire your handiwork, and enjoy that “I made these!” moment — because yes, you absolutely did. These fingerless mittens are ready to keep your hands cozy while still leaving your fingers free for coffee cups, phones, hooks, and all the important things. Now, make a second mitten to complete the pair… because one mitten is a fashion statement, but two is a lifestyle.
Care Instructions:
To keep your mittens looking their best:
👉 Hand wash gently in cool water with mild detergent.
👉 Lay flat to dry and reshape as needed.
👉 Do not wring, twist, or toss into the dryer unless the yarn label indicates you can.
With a little love and care, your mittens will stay cozy, textured, and ready for many seasons of wear.
Looking for more cool-weather projects?
Wheat Stitch™ Pocket Shawl
Shades of Diamonds Pullover
Macchiato Beanie
Cascade Cardigan
Crochet Knit-Look Mittens
Cheers, and happy crocheting!
Well, That Was Fun! What’s Next?