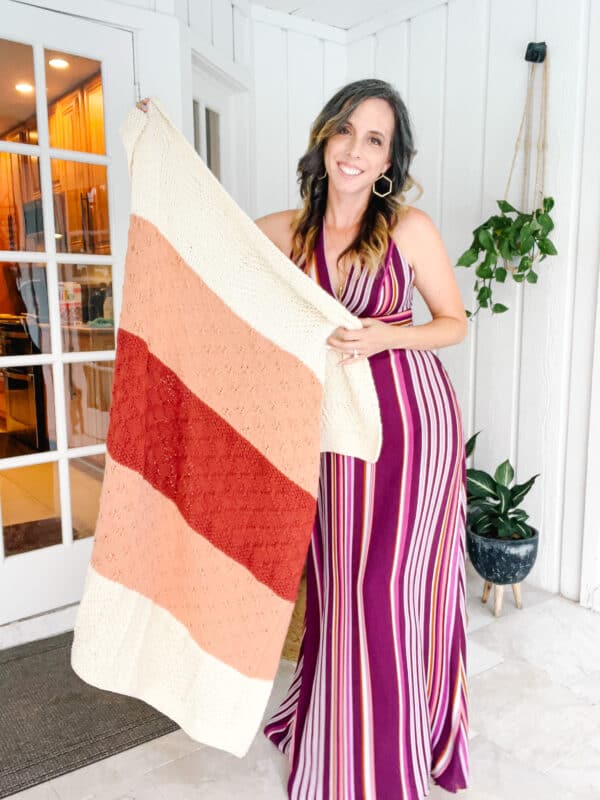
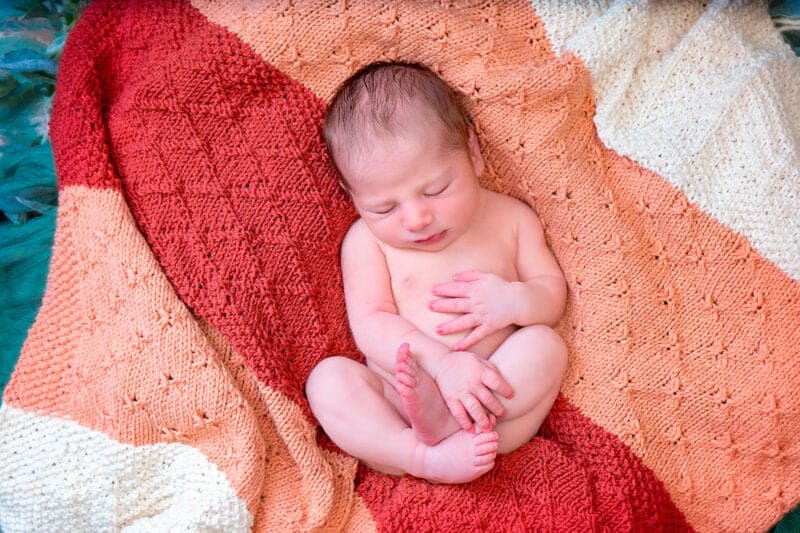
Get ready to fall in love with the ultimate knitting project! This gender-neutral knit blanket is a
breeze to create and bursts with a delightful texture. Each section of the texture blanket features a unique stitch pattern repeat, adding subtle depth and character. And if you would love a cute little outfit for your little one, check out the Blooming Knit Romper & Bonnet Pattern or the Newborn Baby Knit Bunny Free Pattern.

Disclosure: This post contains affiliate links. Please read my disclosure for more info.
And the best part? You can use any colors of yarn to help make it truly your own! Snuggle up a little one or super-size it for ultimate coziness – the choice is yours. Start knitting now and add some serious charm to your home.

Updating Your Home Decor with Textured Knitted Blankets
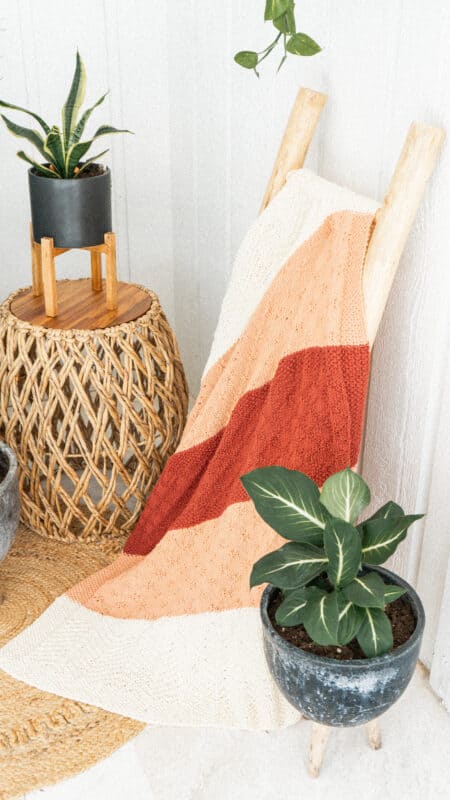
Textured blankets are trendy when it comes to home decorating. Textured blankets and knitting patterns add a unique, handmade touch to any room. They look beautiful draped over furniture or hung on the wall and provide warmth and texture to any area you use. Plus, with various textures available, there is something for everyone. Textured blankets can be created with any yarn, from bulky to cotton, so you can find the perfect pattern to fit your style and preferences.

Updating your home decor with knitted blankets is a great way to add warmth and texture to any room. Whether you are looking for a classic cable knit blanket or something more modern and unique like the Knit a Cozy Blanket with the Stockinette Ridge Stitch, there is something for everyone. And the best part is that you can customize them with different colors and textures to fit your individual style. So whether you’re looking for a cozy blanket for the living room or something to throw in the nursery, knitted blankets are a great way to add warmth and texture to any space.
Knitting textured blankets is also an enjoyable hobby that can help keep your hands busy while bringing beautiful pieces into your home. You’ll love the feeling of accomplishment you get from creating something unique and handmade for your home. So grab some yarn, needles, and a pattern and start crafting something special today!
Why Blankets are a great way to explore new knitting stitches.
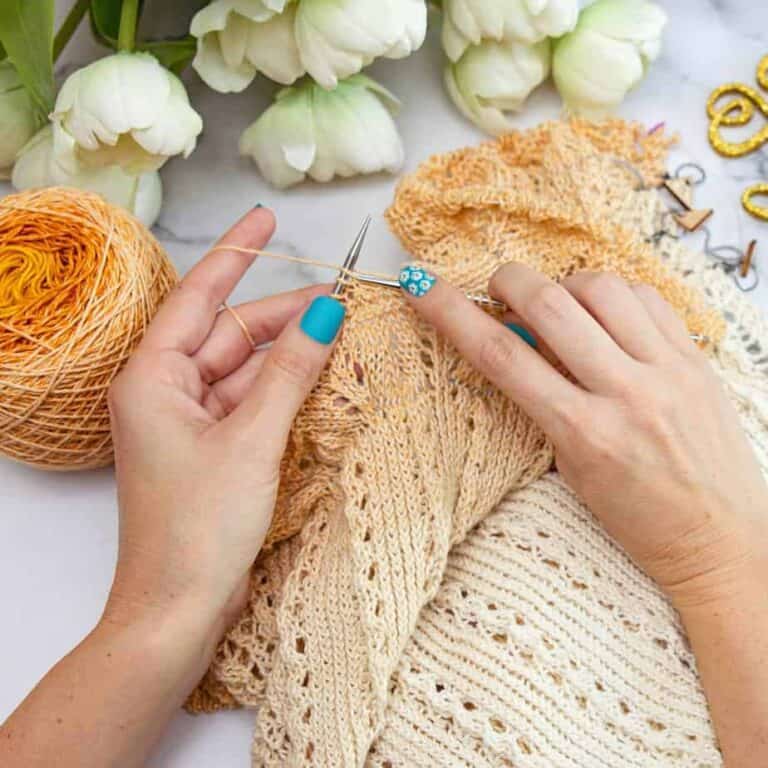
Knitting textured blankets is great for exploring new knitting stitches and techniques. Whether you are a beginner or an experienced knitter, there are endless possibilities for creating beautiful textures with knit. From cabling to bobbles and beyond, the possibilities are limitless! You can even combine multiple stitches together to create a unique pattern. So grab some yarn and needles and get started on creating your own textured blanket masterpiece.
What You Will Need To Knit This Blanket:
Knitting Needles:
Size 8 (5.0mm) Circular Needles, 32” or longer
Notions:
Yarn needle to weave in ends
Scissors
Blocking Mat Starter Set
Cable Needle
Yarn:
Lion Brand Color Theory Yarn
100% Acrylic, 246yds/100g
Yardage:
Color A: Ivory; 370 yds (2 skeins)
Color B: Himalayan Salt 370 yds (2 skeins)
Color C: Canyon 240 yds (1 skein)
Total Yardage is 980.
Abbreviations/Stitches:
1/1 LC – one over one left cross
1/1 RC – one over one right cross
k- knit
p – purl
RS – right side
WS – wrong side
Gauge:
15 sts x 28 rows unblocked= 4×4” in stockinette
Measurements/Sizes:
Approximately 38 inches wide by 42 inches long
Skill Level:
Intermediate
Notes for the Knit Textured Blanket
Special Stitches:
1/1 LC
One over one left cross: Slip 1 stitch onto cable needle and hold to front of the work. Knit the next stitch, then knit the stitch on the cable needle through the back loop.
1/1 RC
One over one right cross: Slip 1 stitch onto cable needle and hold to back of the work. Knit the next stitch through the back loop, then knit the stitch on the cable needle.
Video Tutorial for the Knit Sampler Textured Blanket

Written Instructions for the Knit Sampler Textured Blanket

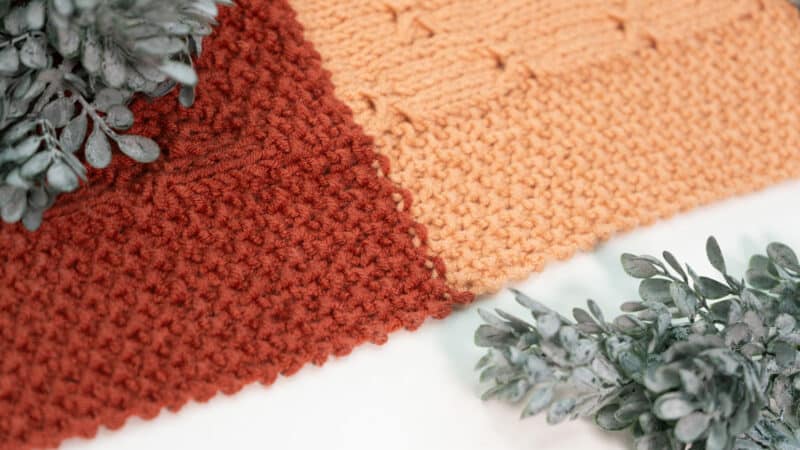
How to Knit The Moss Stitch As A Blanket Border
Using the knitted moss stitch as a blanket border is a fabulous option because it doesn’t tend to curl and can be knitted at the same time with the body of the blanket. This eliminates the need to come back and do edging later, making it a quicker knit for a baby blanket.
This pattern is also available for purchase on Ravelry:
Click the box below to unlock this exclusive subscriber content for free. Add your email and create a password. If you are having trouble, reset your password or log in to the Grow Portal.
I’m thrilled to share this amazing crochet pattern with you! Please don’t copy, paste, or distribute this pattern. Prefer an ad-free experience? Purchase a digital PDF file for a small fee from one of my online stores. I appreciate your support and readership. You are why I can keep doing what I love and sharing it with others. Thank you from the bottom of my heart.
With Color A, Long tail cast on 120 sts for 32 inches wide, or 140 sts for 38 inches wide, or desired width in multiples of 20.
← Row 1 [RS]: k1, p1; repeat from * to * across.
→ Row 2 [WS]: p1, k1; repeat from * to * across.
Repeats: Repeat Rows 1 & 2 for a total of 14 rows, or desired beginning edge in the moss stitch.
Moss Stitch Transition Section


How To Knit The Chevron Section
← Row 1 [RS]: Work the moss stitch pattern for 10 sts, k1, p2, k2, p2, k5, p2, k2, p2, k2; repeat from * until the last 10 sts, work the moss stitch pattern for the last 10 sts.
→ Row 2 [WS]: Work the moss stitch pattern for 10 sts, *p3, k2, p2, k2, p3, k2, p2, k2, p2; repeat from * until the last 10 sts, work the moss stitch pattern for the last 10 sts.
← Row 3: Work the moss stitch pattern for 10 sts, *p1, k2, p2, k2, p2, k1, p2, k2, p2, k2, p1, k1; repeat from * until the last 10 sts, work the moss stitch pattern for the last 10 sts.
→ Row 4: Work the moss stitch pattern for 10 sts, p1, k2, p2, k2, p2, k1, p, k, p2, k2, p2, k2; repeat from * until the last 10 sts, work the moss stitch pattern for the last 10 sts.
Repeats: Repeat Rows 1-4 for a total of 36 rows, or desired length for this section.


Moss Stitch Transition Section
← Row 1 [RS]: Work the moss stitch pattern for 10 sts, knit until the last 10 sts, work the moss stitch pattern for the last 10 sts.
← Row 2-7: Work in the established moss stitch pattern repeat.
→ Row 8: Work the moss stitch pattern for 10 sts, purl until the last 10 sts, work the moss stitch pattern for the last 10 sts.
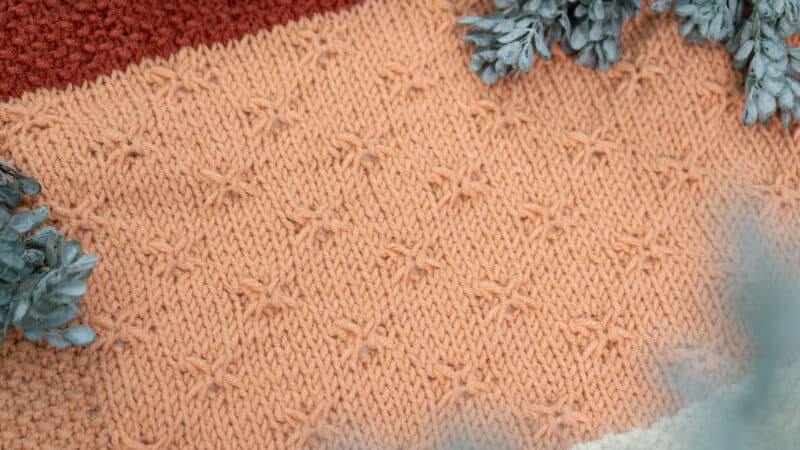
How To Knit The Cross Stitch Section
Set Up Rows:
← Row 1 [RS]: With Color B, work the moss stitch pattern for 10 sts, knit until the last 10 sts, work the moss stitch pattern for the last 10 sts.
→ Row 2 [WS]: Work the moss stitch pattern for 10 sts, purl until the last 10 sts, work the moss stitch pattern for the last 10 sts.
Cross Stitch Section:
← Row 1 [RS]: Work the moss stitch pattern for 10 sts, *(1/1LC), (1/1RC), k6; repeat from * until the last 10 sts, work the moss stitch pattern for the last 10 sts.
→ Row 2 [WS]: Work the moss stitch pattern for 10 sts, purl until the last 10 sts, work the moss stitch pattern for the last 10 sts.
← Row 3: Work the moss stitch pattern for 10 sts, *(1/1RC), (1/1LC), k6; repeat from * until the last 10 sts, work the moss stitch pattern for the last 10 sts.
→ Row 4: Work the moss stitch pattern for 10 sts, purl until the last 10 sts, work the moss stitch pattern for the last 10 sts.
← Row 5: Work the moss stitch pattern for 10 sts, knit until the last 10 sts, work the moss stitch pattern for the last 10 sts.
→ Row 6: Work the moss stitch pattern for 10 sts, purl until the last 10 sts, work the moss stitch pattern for the last 10 sts.
← Row 7: Work the moss stitch pattern for 10 sts, *k5, (1/1LC), (1/1RC), k1; repeat from * until the last 10 sts, work the moss stitch pattern for the last 10 sts.
→ Row 8: Work the moss stitch pattern for 10 sts, purl until the last 10 sts, work the moss stitch pattern for the last 10 sts.
← Row 9: Work the moss stitch pattern for 10 sts, *k5, (1/1RC), (1/1LC), k1; repeat from * until the last 10 sts, work the moss stitch pattern for the last 10 sts.
→ Row 10: Work the moss stitch pattern for 10 sts, purl until the last 10 sts, work the moss stitch pattern for the last 10 sts.
← Row 11: Work the moss stitch pattern for 10 sts, knit until the last 10 sts, work the moss stitch pattern for the last 10 sts.
→ Row 12: Work the moss stitch pattern for 10 sts, purl until the last 10 sts, work the moss stitch pattern for the last 10 sts.
Repeats: Repeat Rows 1-12 for a total of 48 rows, or desired length for this section.

Moss Stitch Transition Section
← Row 1 [RS]: Work the moss stitch pattern for 10 sts, knit until the last 10 sts, work the moss stitch pattern for the last 10 sts.
← Row 2-7: Work in the established moss stitch pattern repeat.
→ Row 8: Work the moss stitch pattern for 10 sts, purl until the last 10 sts, work the moss stitch pattern for the last 10 sts.
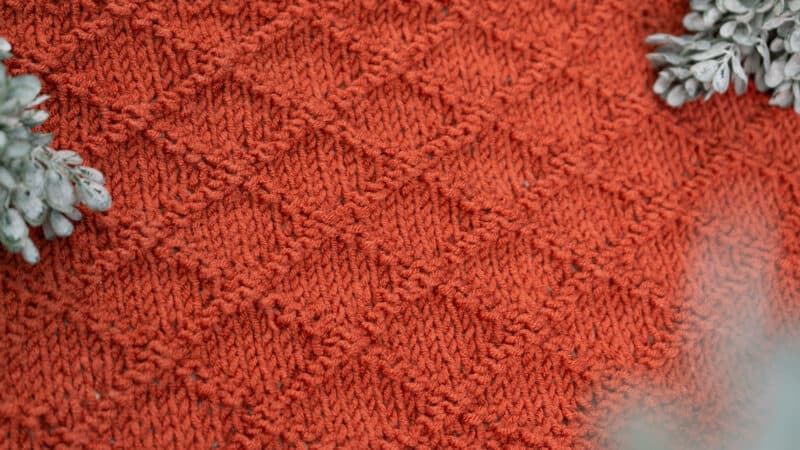
How To Knit The Diamond Stitch Section
← Row 1 [RS]: Work the moss stitch pattern for 10 sts, *p2, k7, p1; repeat from * until the last 10 sts, work the moss stitch pattern for the last 10 sts.
→ Row 2 [WS]: Work the moss stitch pattern for 10 sts, *k2, p5, k2, p1; repeat from * until the last 10 sts, work the moss stitch pattern for the last 10 sts.
← Row 3: Work the moss stitch pattern for 10 sts, *k2, p2, k3, p2, k1; repeat from * until the last 10 sts, work the moss stitch pattern for the last 10 sts.
→ Row 4: Work the moss stitch pattern for 10 sts, *p2, k2, p1, k2, p3; repeat from * until the last 10 sts, work the moss stitch pattern for the last 10 sts.
← Row 5: Work the moss stitch pattern for 10 sts, *k4, p3, k3; repeat from * until the last 10 sts, work the moss stitch pattern for the last 10 sts.
→ Row 6: Work the moss stitch pattern for 10 sts, *p3, k3, p4; repeat from * until the last 10 sts, work the moss stitch pattern for the last 10 sts.
← Row 7: Work the moss stitch pattern for 10 sts, *k3, p2, k1, p2, k2; repeat from * until the last 10 sts, work the moss stitch pattern for the last 10 sts.
→ Row 8: Work the moss stitch pattern for 10 sts, *p1, k2, p3, k2, p2; repeat from * until the last 10 sts, work the moss stitch pattern for the last 10 sts.
← Row 9: Work the moss stitch pattern for 10 sts, *k1, p2, k5, p2; repeat from * until the last 10 sts, work the moss stitch pattern for the last 10 sts.
→ Row 10: Work the moss stitch pattern for 10 sts, *k1, p7, k2; repeat from * until the last 10 sts, work the moss stitch pattern for the last 10 sts.

← Row 1 [RS]: Work the moss stitch pattern for 10 sts, knit until the last 10 sts, work the moss stitch pattern for the last 10 sts.
← Row 2-7: Work in the established moss stitch pattern repeat.
→ Row 8: Work the moss stitch pattern for 10 sts, purl until the last 10 sts, work the moss stitch pattern for the last 10 sts.
Repeats
Repeats: With Color B repeat the Cross Stitch Section.
With Color A repeat the Moss Stitch Transition for a total of 8 rows, and then the Chevron Section, and then Repeat the Moss Stitch Transition Section for a total of 14 rows.
Binding Off and Blocking Your Blanket To Finish
To finish this blanket, we will discuss the importance of blocking your blanket after finishing your knitting project. But first, let’s go over how to properly bind off in a moss stitch pattern.
Binding off, also known as casting off, is the process of securing your stitches on the needle so they don’t unravel. In a moss stitch pattern, this means binding off in the same alternating knit and purl pattern as the rest of your project.
To bind off in a moss stitch, start by knitting the first stitch. Then, purl the next stitch. Now, take the left needle and pass it over the right needle, dropping the second stitch over the first one. Continue this pattern until you have only one stitch remaining on your right needle.
It’s important to keep your tension consistent while binding off to ensure an even edge.
Once you have bound off all of your stitches, you can cut your yarn leaving a tail that is at least three times the width of your project. Thread this tail onto a tapestry needle and weave it through the remaining stitch on your needle. Pull tightly to secure and weave in the end.
The moss stitch bind off creates a neat, textured edge that complements the moss stitch pattern used in your project.
Our Favorite
Blocking Tools
Blocking is an essential step in the knitting process that helps to refine and perfect the final product. It involves shaping and stretching the finished piece to achieve a desired size and shape. This technique is particularly important when it comes to blankets, as it ensures that your project looks polished and professional.
So let’s dive into the steps on how to properly block a knit blanket.
Step 1: Understand Your Materials
Before you begin blocking, it’s crucial to understand what type of yarn you have used for your blanket. Different types of yarn require different methods of blocking. For example, natural fibers like wool and cotton can be blocked with water, while synthetic fibers should be steamed or misted with water, which is what was used for this knitted blanket.
Step 2: Prep Your Materials
To successfully block your blanket, you will need a few materials. These include pins, a measuring tape or ruler, a large flat surface (such as an ironing board, bed, or table), and a spray bottle filled with water if you are using natural fibers. See our favorite tools above! But you don’t need to have all the fancy tools, pins and a towels over a bed work just fine.
Step 3: Soak Your Blanket
For natural fibers, fill your sink or tub with lukewarm water and submerge your blanket. Let it soak for about 15 minutes to allow the fibers to relax. If you are using synthetic yarn, lightly mist the blanket instead.
Step 4: Lay Out Your Blanket
Once your blanket is soaked or misted, remove it from the water and gently squeeze out any excess moisture. Then, lay it out flat on your chosen surface.
Step 5: Pin Your Blanket
Starting at one corner of your blanket, use pins to secure the edges in place. This will help keep the blanket’s shape as it dries. Make sure to evenly space out the pins along each edge.
Step 6: Shape Your Blanket
Using your measuring tape or ruler, check that all sides of your blanket are even and adjust them as needed by lightly tugging on the edges. This step is crucial for achieving a straight and symmetrical finished product.
Step 7: Let It Dry
Now comes the hardest part – waiting for your blanket to dry completely. This can take anywhere from 24-48 hours, depending on the thickness of your yarn and how much water you used.
Step 8: Remove Pins and Enjoy!
Once your blanket is fully dry, remove all of the pins carefully. You will be left with a beautiful and unique piece that you created yourself!
Remember, this is just one method for blocking a knit or crochet blanket. There are many other techniques out there, so don’t be afraid to experiment and find what works best for you.
Lastly, enjoy your handmade knit blanket because you put a lot of love into those stitches.
Well, That Was Fun! What’s Next?