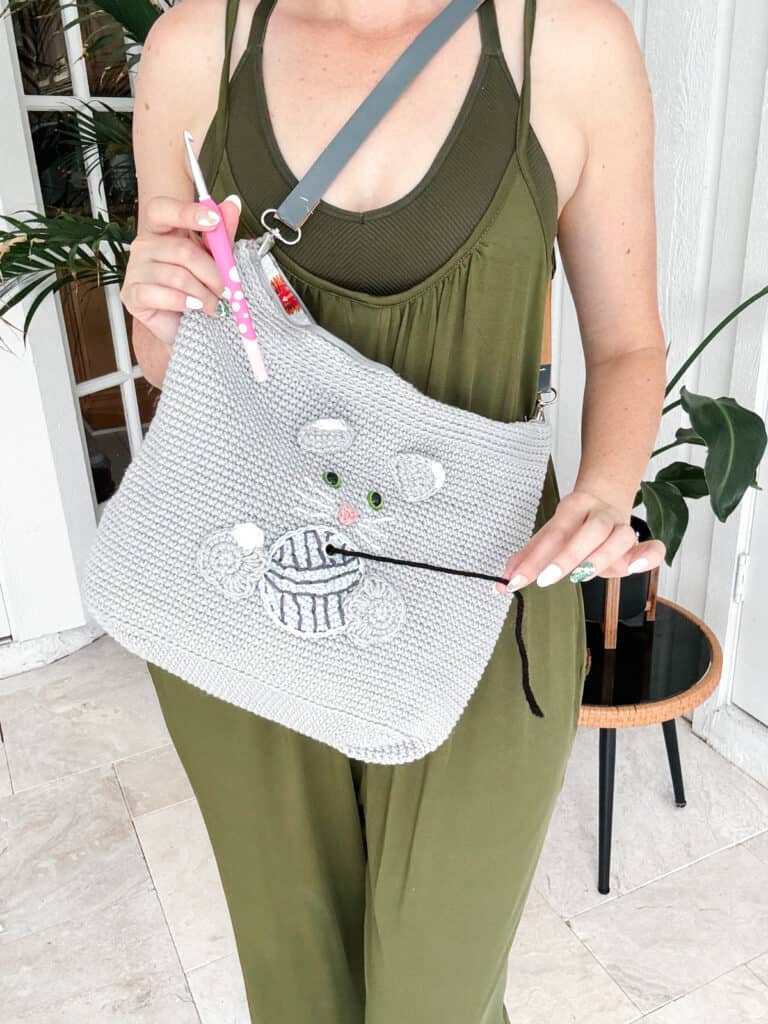


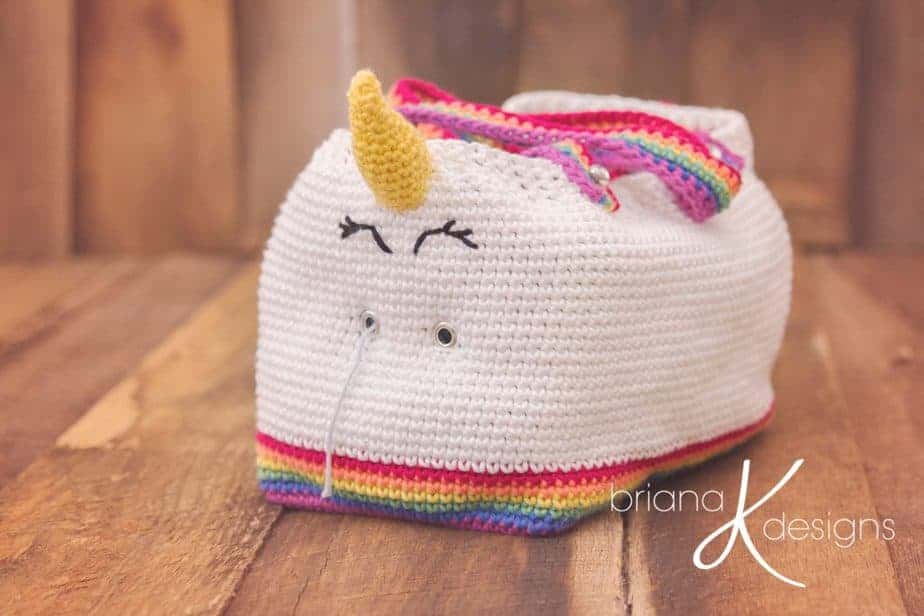
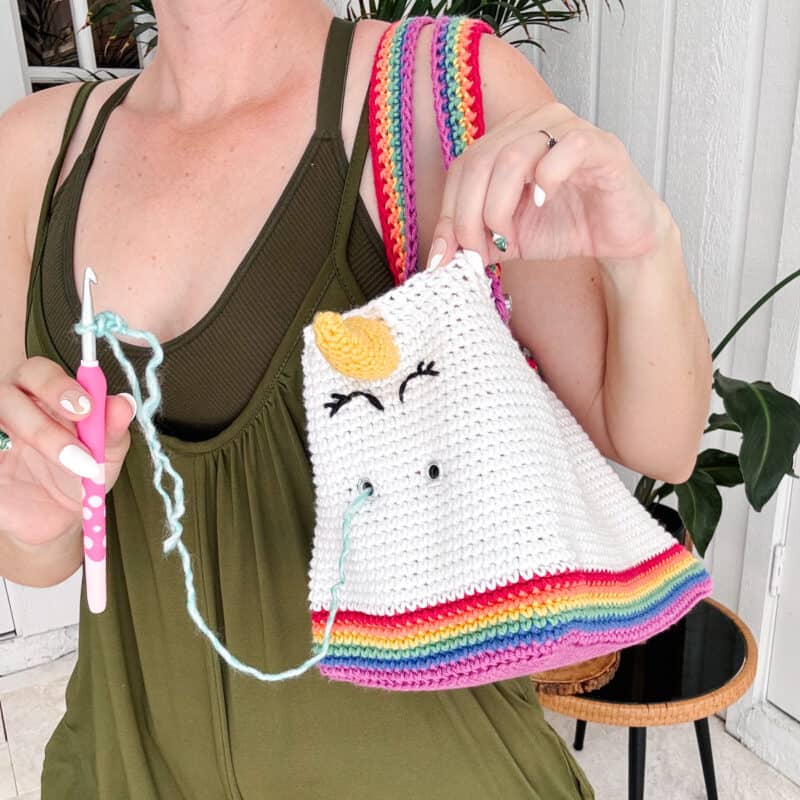
Come crochet this Unicorn Farts Crochet Project Bag to help you keep organized. Both the nostrils and eh-hem, the other end, have grommets to help keep your yarn organized and less tangled. This is a super functional bag, but it’s also silly and fun. We all need more of that in our lives these days! And if you love this crochet bag, you will get a kick out of the Fish Crochet Bag Free Pattern or the Cat Yarn Project Bag Pattern.
Disclosure: This post contains affiliate links. Please read my disclosure for more info.
The Unicorn Farts Crochet Project Bag is one of my favorite bags. ?And who doesn’t need a little rainbow in their life, right? This bag is a cute project sidekick.
What Is a Crochet Project Bag?
You can use almost any bag as a crochet project bag. The idea is to store your yarn and supplies in the bag so you can take a project with you on the go.
However, some bags are better than others. In particular, I prefer bags that help keep the yarn balls separated from each other so they don’t tangle. That’s why I added the grommets to this crochet project bag design.
I wanted you to easily pull your yarn out without opening the bag and never have to worry about it getting tangled up as you craft. I want your crafting life to feel easy and fun … all unicorns, rainbows, and a little silliness!
Unicorn Farts Crochet Project Bag Supplies
Here are the things that you need to complete this project:
- Crochet Hook Sizes: 5.0mm (H hook) &
- 4.0 mm (G hook)
- Ultra-Stiff Plastic Canvas
- Tapestry (yarn) Needle
- Scissors
- Quick Dry Fabric Fusion (Liquid Stitch) or needle and thread for sewing lining
- ¾ yard cotton or non-stretchy fabric
- 4 Diamond Buttons (7/16 inch/ 11mm)
- Large Eyelet Kit ¼ inch (6.35mm)- 4 grommets needed
- Extra-Large Eyelet Kit 7/16 inch (1.1cm)- 4 grommets needed
- Eyelets/Grommets
Yarn Details:
The original bag was made with Hobby Lobby I love this Cotton.
But other yarns such as WeCrohcet Dishie or Comfy Cotton Worsted will work well.
- Color A: Purple (1 skein)
- Color B: Blue (1 skein)
- Color C: Green (1 skein)
- Color D: Yellow (1 skein)
- Color E: Orange (1 skein)
- Color F: Red (1 skein)
- Color G: White (2 skeins)
- Color H: Black (small amount)
Yardage & Measurements:
Yardage: approx. 450 yards
Possible Yarn Substitutes (always check gauge):
Abbreviations / Stitches:
- sl st- Slip Stitch
- ch- Chain
- sc- Single Crochet
- fpsc- Front Post Single Crochet
- bpsc- Back Post Single Crochet
Skill Level:
Intermediate
Bag Measurements in inches:
Folded in half and laid flat: Height: 11 inches, Width: 15 ½ inches
Gauge
Single Crochet: 18 rows x 18 stitches = 4 x4 inches
Notes
-This bag is worked from the bottom up and joined in the round.
-Chains do not count as stitches when joining.
Relax & Crochet
Upgrade to the Printable PDF
Beautifully formatted to print and relax while crocheting. The paid pattern includes:
Purchase the ad-free PDF pattern on Etsy or Ravelry.
Crochet Bag Written Pattern
Bag Body
Click the box below to unlock this exclusive subscriber content for free. Add your email and create a password. If you are having trouble, reset your password or log in to the Grow Portal.
I’m thrilled to share this amazing crochet pattern with you! Please don’t copy, paste, or distribute this pattern. Prefer an ad-free experience? Purchase a digital PDF file for a small fee from one of my online stores. I appreciate your support and readership. You are why I can keep doing what I love and sharing it with others. Thank you from the bottom of my heart.
Rnd 12:
Ch 1, sc in first 12, 3sc in next, sc in next 37, 3sc in next, sc in next 23, 3sc in next, sc in next 37, 3sc in next, sc in last 11, join. | 132 sts
Rnd 13:
Ch 1, in Back Loops Only, sc in each stitch around, join.
Rnd 14:
Ch 1, sc in each stitch around, join.
Rnd 15:
With Color B ch 1, sc in each stitch around, join.
Rnd 16:
With Color C ch 1, sc in each stitch around, join.
Rnd 17:
With Color D ch 1, sc in each stitch around, join.
Rnd 18:
With Color E ch 1, sc in each stitch around, join.
Rnd 19:
With Color F ch 1, sc in each stitch around, join.
Rnds 20-29:
With Color G ch 1, sc in each stitch around, join.
Rnd 30:
Ch 1, sc in first 64, chain 1, skip 1, sc in next 6, chain 1, skip 1, sc in last 60, join.
Rnds 31-36:
Ch 1, sc in each stitch around, join.
Rnd 37:
Ch 1, sc in first, chain 2, skip 2, sc in remaining 129 stitches around, join.
Rnds 38-42:
Ch 1, sc in each stitch around, join.
Rnds 43-46:
Ch1, *fpsc in first, bpsc in next; repeat * around, join.
At the end of round 46, fasten off weave in ends.
Want an Ad-Free PDF Download of this pattern?
This pattern is available in my shops:
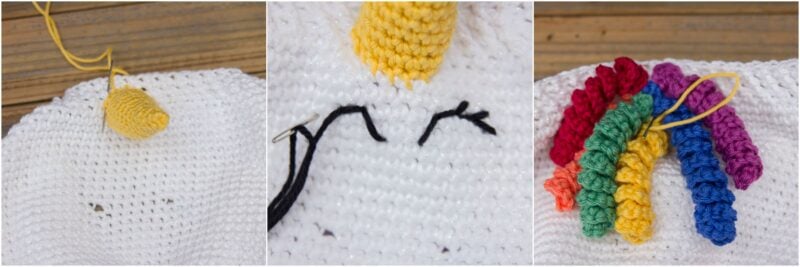
Horn
Use the 5mm H-hook.
Rnd 1:
Work this piece in a continuous round without joining.
With Color D, sc 4 inside Magic Circle. | 4 sts
Rnd 2:
sc in each stitch around. | 4 sts
Rnd 3:
*2sc in first, sc in next; repeat * one more time. | 6 sts
Rnd 4:
sc in each stitch around. | 6 sts
Rnd 5:
*2sc in first, sc in next 2; repeat * one more time. | 8 sts
Rnd 6:
sc in each stitch around. | 8 sts
Rnd 7:
*2sc in first, sc in next 3; repeat * one more time. | 10 sts
Rnd 8:
sc in each stitch around. | 10 sts
Rnd 9:
*2sc in first, sc in next 4; repeat * one more time. | 12 sts
Rnd 10:
sc in each stitch around. | 12 sts
Rnd 11:
*2sc in first, sc in next 5; repeat * one more time. | 14 sts
Rnds 12-14:
sc in each stitch around.
At the end of round 14, fasten off and leave a tail for sewing onto bag. Stuff with a small amount of fiber fill or yarn scraps
Tail
Use the 4mm G-hook.
Row 1:
Chain 31, 3sc in second chain from hook and in each across, fasten off leaving a tail for sewing onto bag. | 90sts
Repeat this for each color of yarn.
Handle (Make 2)
Use the 4mm G-hook.
Row 1:
With Color A, foundation sc 60 (OR chain 61, sc in second hook and in each across), turn. | 60 sts
Row 2:
With Color B ch 1, sc in each stitch across, turn.
Row 3:
With Color C ch 1, sc in each stitch across, turn.
Row 4:
With Color D ch 1, sc in each stitch across, turn.
Row 5:
With Color E ch 1, sc in each stitch across, turn.
Row 6:
With Color F ch 1, sc in each stitch across, fasten off and weave in ends.
Assembly
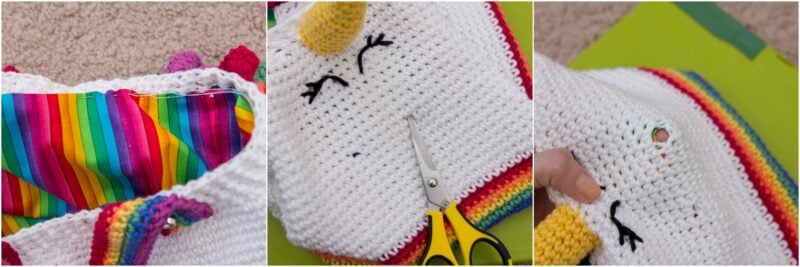
Sew the horn to the bag, centered above the 2 nostril holes. Using Black yarn and needle, sew eyes below the horn. Get creative! If desired and try different type of eyes such as: > <
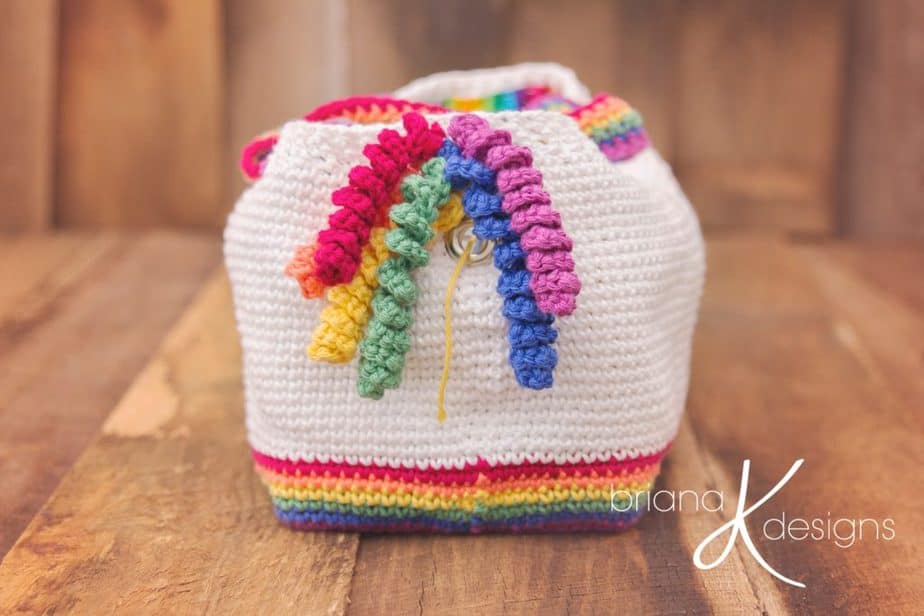
On the other side of bag, sew the 6 tail pieces above the chain 2 space.
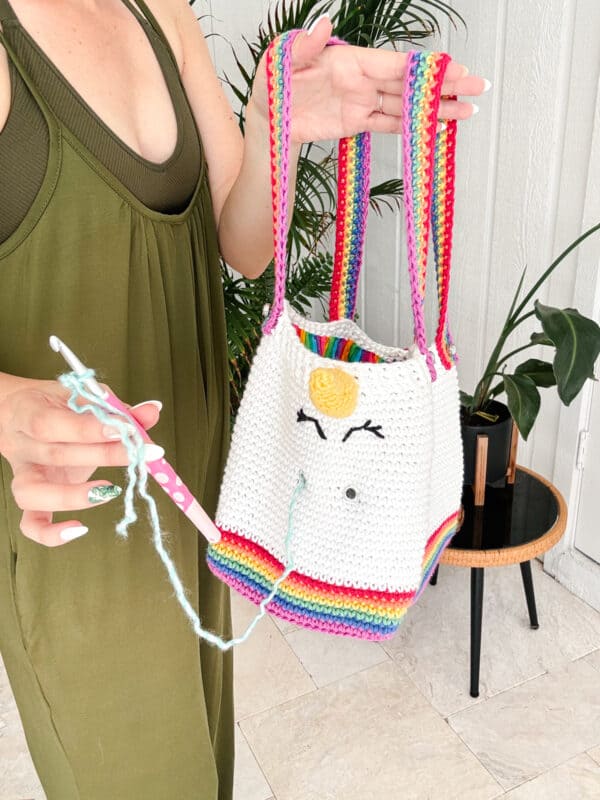
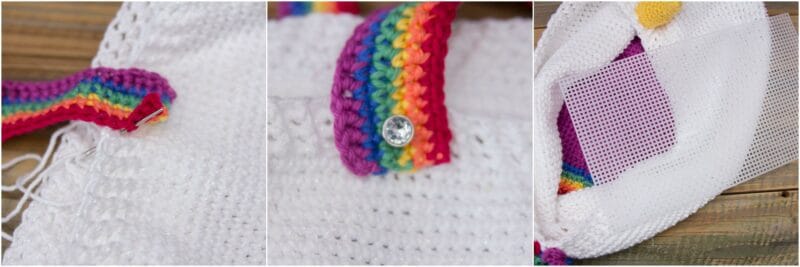
Place handles on long sides of bag and stitch into place. Sew button embellishments onto the ends of handles if desired. Cut a piece of plastic canvas approx. 5 ¾ inches by 9 ¾ inches and place in the bottom of the bag. Tack plastic canvas in place on corners.
How to Line the Crochet Bag
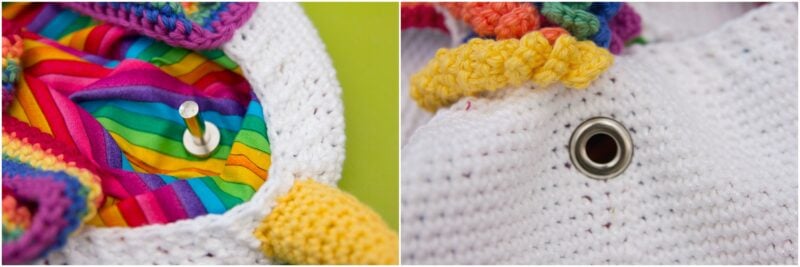
With the fabric folded in half (right sides facing), trace around the bag about ¼ inch out from the sides and bottom and 2 inches above the top of bag. Using a fabric glue or needle and thread, glue/sew the sides and bottom of the fabric together. Fold down the top to meet the height of the bag and glue in place.
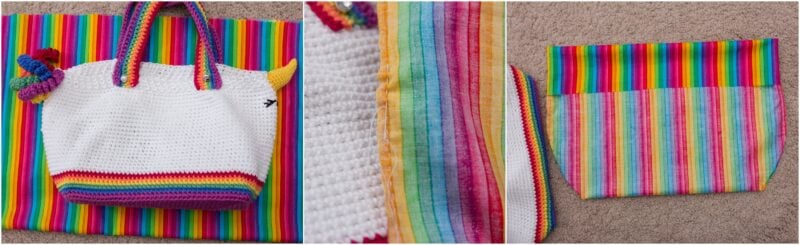
Place the fabric inside the bag and glue/sew the fabric in place on the third single crochet row down from the top of the bag. Place grommets into holes and use as a guide to cut away fabric (large grommets in chain 1 spaces and extra-large grommets in chain 2 spaces at top of bag). With grommet kit, hammer grommets into place.
Place yarn inside and enjoy! As you work up your crochet projects, this bag will help you crochet on the move as well as keep your yarn clean.
To keep the project clean during crochet sessions, simply take your working yarn to the top of the bag and drop it in.
I hope you have enjoyed creating the unicorn crochet bag. I had fun creating this as well as the Pig Project Bag Pattern and the Sheep Crochet Project Bag Pattern.
Enjoy crocheting your next bag, Cheers!
Well, That Was Fun! What’s Next?