Kahlua Crochet Beanie Pattern Free
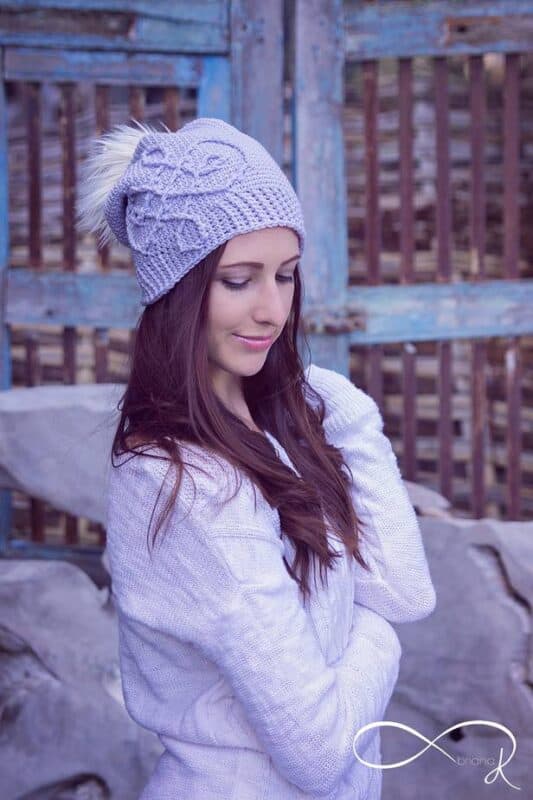
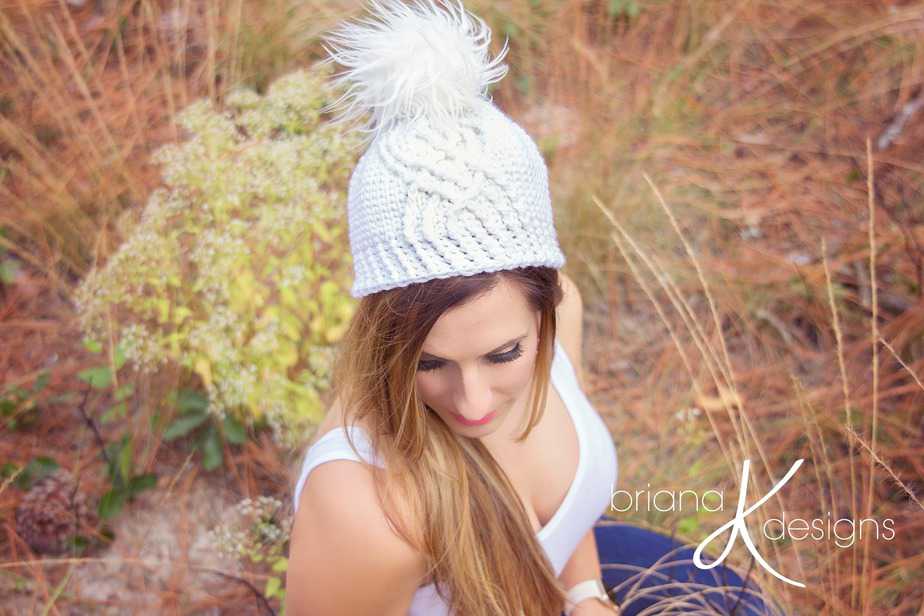
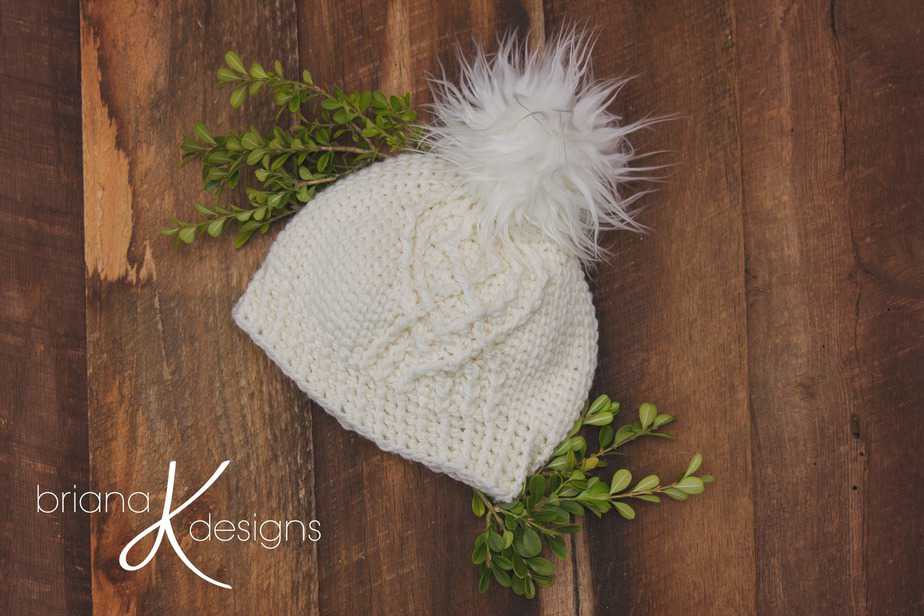
Crochet cables hats are so much fun, and I'm confident you will enjoy working with post stitches on the Kahlua Crochet Beanie Pattern. One evening after a long day, I made myself a cup of tea and took some time to myself. I may have treated myself to a drop of Kahlua.
Disclosure: This post contains affiliate links. Please read my disclosure for more info.
Want an Ad-Free PDF Download of this pattern?
This pattern is available in my shops:
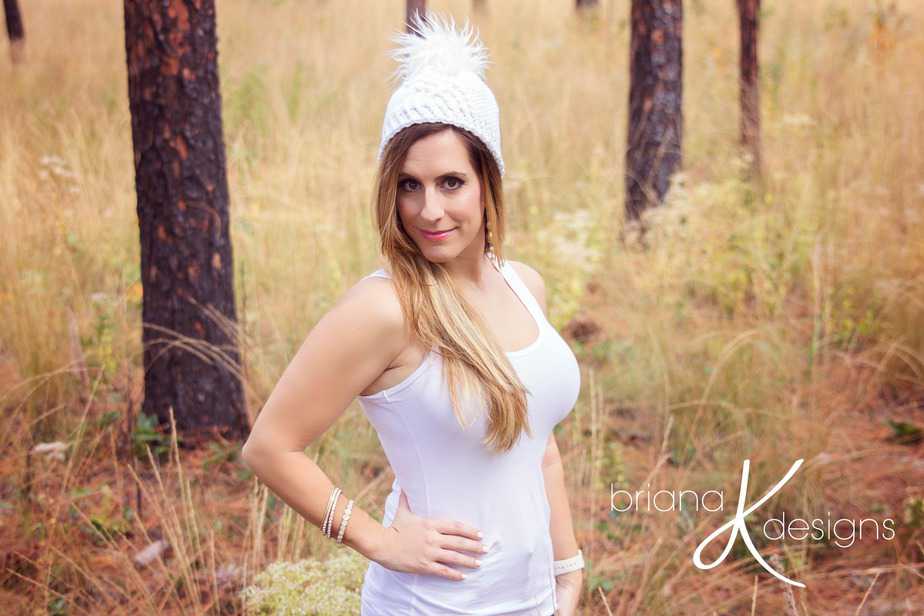
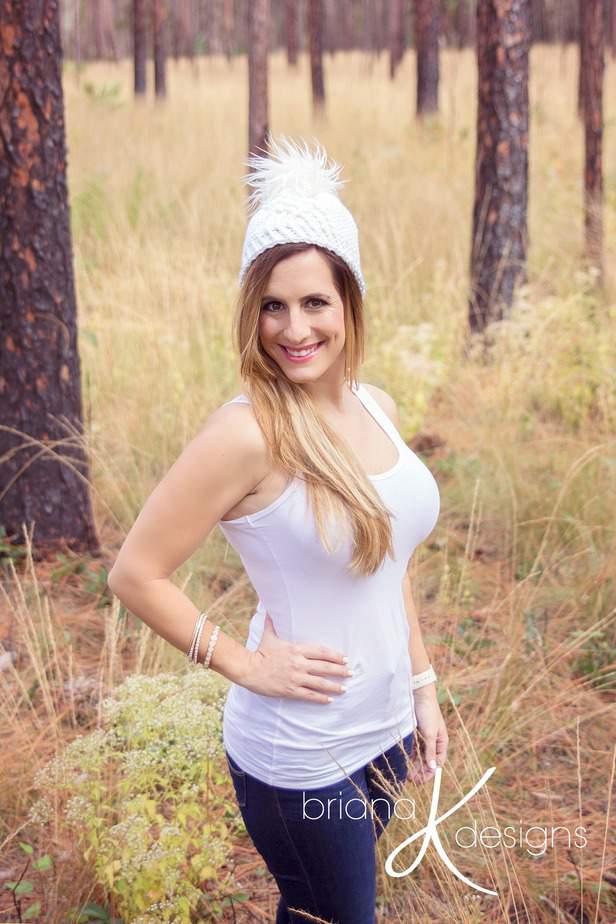
We all feel burnt out at times between the to-do lists, cooking, cleaning, and laundry. It's important to take time for ourselves. Which is how the Kahlua Crochet Beanie came about. I decided it was time for me to make something for myself. I had made so many Christmas gifts for others and I enjoyed doing so, however, I also learned this craft for myself. Not only is crochet good for the soul, but for feeling accomplished and to wear something that was created by your own hands.
Crochet For Yourself
The Kahlua Crochet Beanie is an experienced pattern with split stitches (aka the mattress stitch) and a series of front post stitches to create a cable that can be worn down the front or on the side of the head, whichever you prefer. But most important, enjoy the process of creating.
Looking for more hat inspiration? Check out these patterns!
Create A Cozy Beanie With This Easy Crochet Pattern!
How To Crochet An Amanita Mushroom Hat Free Crochet Pattern
Forest Brooks Crochet Beanie Hat - Free Pattern
Diamond Crochet Fair Isle Beanie Free Pattern
KahluaCrochet Beanie Pattern Supplies:
Crochet Hook:
Notions:
Yarn Needle
Scissors
Faux fur Fabric for Pompom
Sewing Needle & Thread
Yarn:
Cascade Yarns 128 Superwash
Yarn Substitutions:
As long as gauge is met, similar yarns can be substituted. Suggestions:
Knit Picks Wool of the Andes Superwash Bulky
Yardage:
150 yards
Abbreviations/Stitches:
sc- Single Crochet
fpsc-front post single crochet
bpsc- back post single crochet
sl st- Slip Stitch
Split Stitch- defined below
ch- Chain
fpdc- front post double crochet
fptr- front post triple crochet
Gauge:
15 rows x 12 split stitch sc =
4-inch x 4-inch in split stitch. Adjust hook size to obtain gauge if needed.
Measurements/Sizes:
One Size Adult
Laid Flat: 7 ¾ inches tall by 9 ½ inches wide
Skill Level:
Intermediate/Advanced
Kahlua Crochet Beanie Notes:
-Ch 1 at beginning of round does not count as stitch
-This pattern works up best with a soft/non-stiff yarn
-Join to the center of split stitch for each round until brim.
-Do not pull Magic Circle (Ring) closed tight until first two rounds are complete.
-Keep stitches loose and go up a hook size on the first few rounds if needed. The first few rounds will be the most challenging due to increasing. It gets easier as it goes. If you crochet tight, go up a hook size.
Special Stitch:
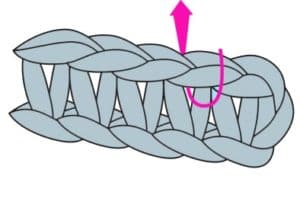
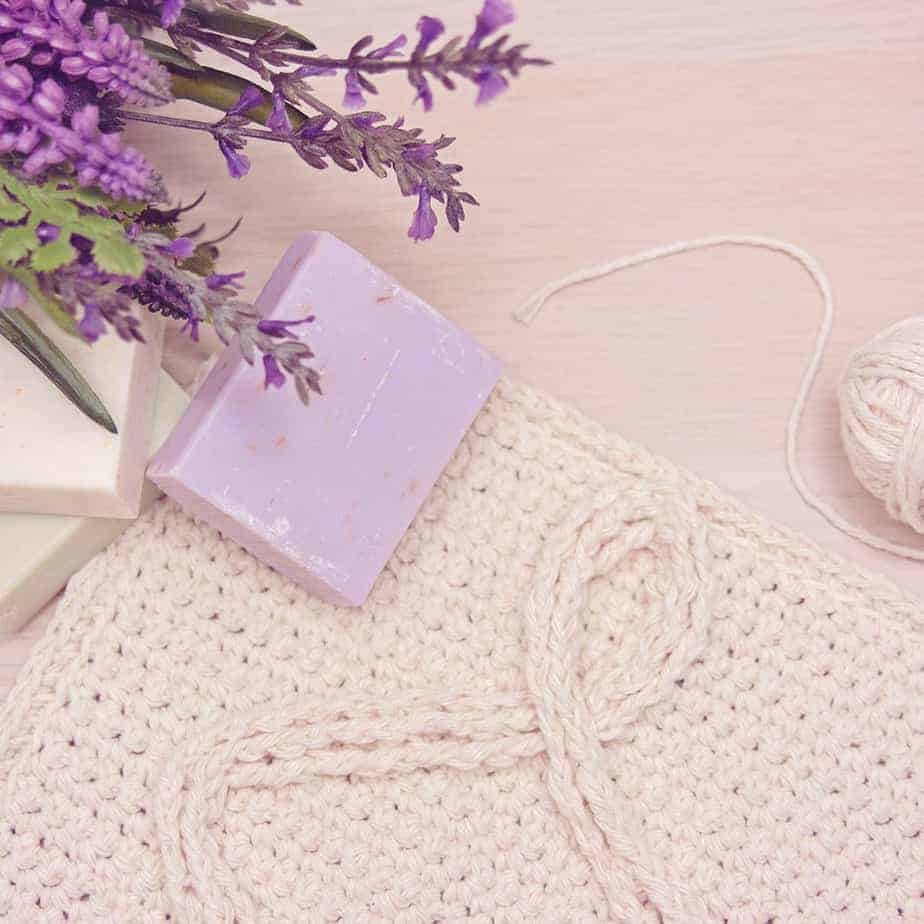
Split Stitch (aka mattress stitch): Spit stitch is worked as a single crochet with one difference. Instead of inserting your hook under the top two loops like a normal sc stitch, you will insert your hook between the “v” of the stitch (as shown in the photo to the right) This gives the Split Stitch that ‘knit look’.

Kahlua Crochet Beanie Pattern Instructions:
| Round | Description | Stitch Count |
| HAT BODY | ||
| 1 | Sc 8 inside magic circle, join | 8 |
| 2 | Ch 1, working in split stitches only, 2sc in each stitch around, join | 16 |
| 3 | Ch 1, working in split stitches only, *2sc in first, sc in next; repeat * around, join | 24 |
| 4 | Ch 1, split stitch 6, fpsc next 6, split stitch 12, join | 24 |
| 5 | Ch 1, work split stitches as split stitches and single crochet the fpsc stitches, *2sc in first, sc in next 2; repeat * around, join | 32 |
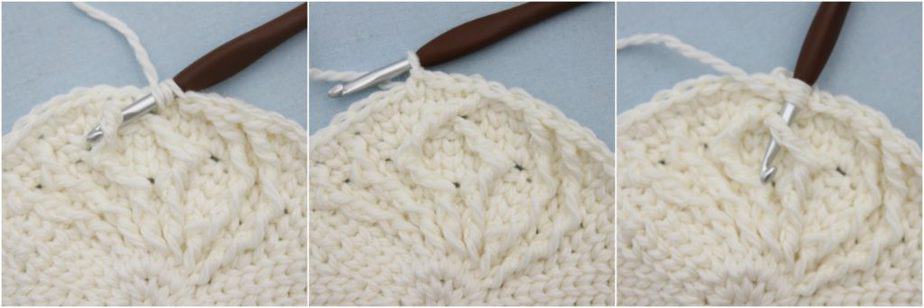
| 6 | *ALL fpdc stitches will be worked around front post stitches from row 4* Tip: When working front post stitches from rows below don’t forget to skip the same amount of stitches on the current row (pic 3). Ch 1, split stitch 9, fpdc around first sc post stitch on row 4, split stitch in next, fpdc around next 4 sc post stitches on row 4, split stitch 1, fpdc around last sc post stitch on row 4, split stitch in remaining 15, join | 32 |
Image instructions for Row 6:

| 7 | Ch 1, work split stitches as split stitches and front post stitches as single crochet, *2sc in first, sc in next 3; repeat * around, join | 40 |
| 8 | *ALL fpdc & fptr stitches will be worked around front post stitches from row 6* Ch 1, split stitch 10, fptr, split stitch 1, fpdc next, split stitch 2, fpdc next 2, split stitch 2, fpdc next, split stitch 1, fptr next, split stitch in last 18, join | 40 |
| 9 | Ch 1, work split stitches as split stitches and front post stitches as single crochet, *2sc in first, sc in next 4; repeat * around, join | 48 |
| 10 | *ALL fpdc and fptr stitches will be worked around front post stitches from row 8* Ch 1, split stitch 12, [fpdc, split stitch 1] twice, fptr next, split stitch 5, fptr next, [split stitch 1, fpdc] twice, split stitch in remaining 21, join | 48 |
Those crochet cables are looking great!
| 11 | Ch 1, work split stitches as split stitches and front post stitches as single crochet, *2sc in first, sc in next 5; repeat * around, join | 56 |
| 12 | *ALL fpdc and fptr stitches will be worked around front post stitches from row 10* Ch 1, split stitch 17, fpdc next, split stitch 1, fpdc next, split stitch 3, fptr next 2, split stitch 3, fpdc next, split stitch 1, fpdc, split stitch next, split stitch in last 25, join | 56 |
| 13 | Ch 1, work split stitches as split stitches and front post stitches as single crochet, *2sc in first, sc in next 6; repeat * around, join | 64 |
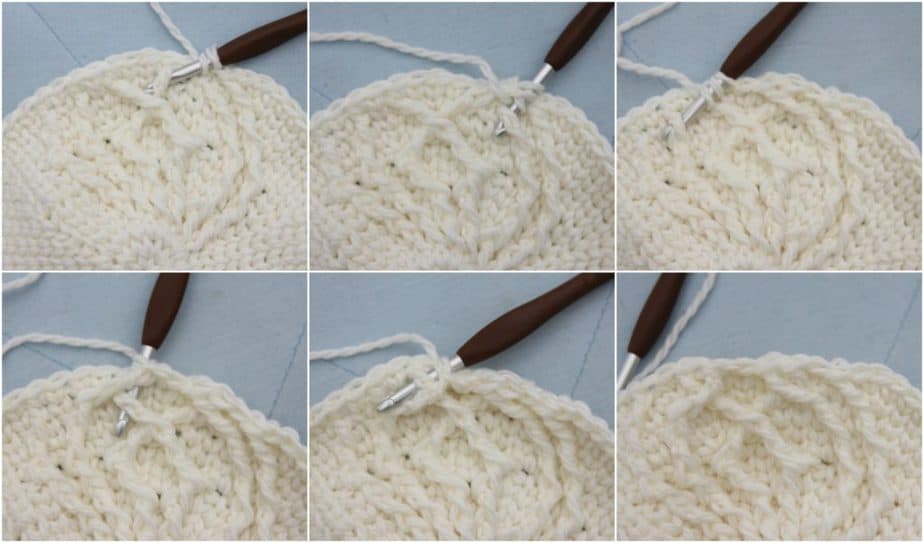
| 14 | *ALL fpdc and fptr stitches will be worked around front post stitches from row 12* Ch 1, split stitch 21, [fpdc next, split stitch 1] twice, skip next fptr and fptr around the next, split stitch next 3, go back and fptr around skipped post sttich, [split stitch 1, fpdc next] twice, split stitch in the last 30, join | 64 |
Image instructions for Row 14:
| 15 | Ch 1, work split stitches as split stitches and front post stitches as single crochet, sc in each stitch around, join | 64 |
| 16 | *ALL fpdc and fptr stitches will be worked around front post stitches from row 14* Ch 1, split stitch 23, fpdc next, split stitch next, skip next post stitch and fpdc around next post stitch, fptr around skipped post stitch, split stitch next, skip next post stitch and fptr around next post stitch, working under fptr just made go back and fpdc around skipped post stitch, split stitch in next, fpdc next, split stitch in last 32, join | 64 |
Image instructions for Row 16:
| 17 | Repeat round 15 | 64 |
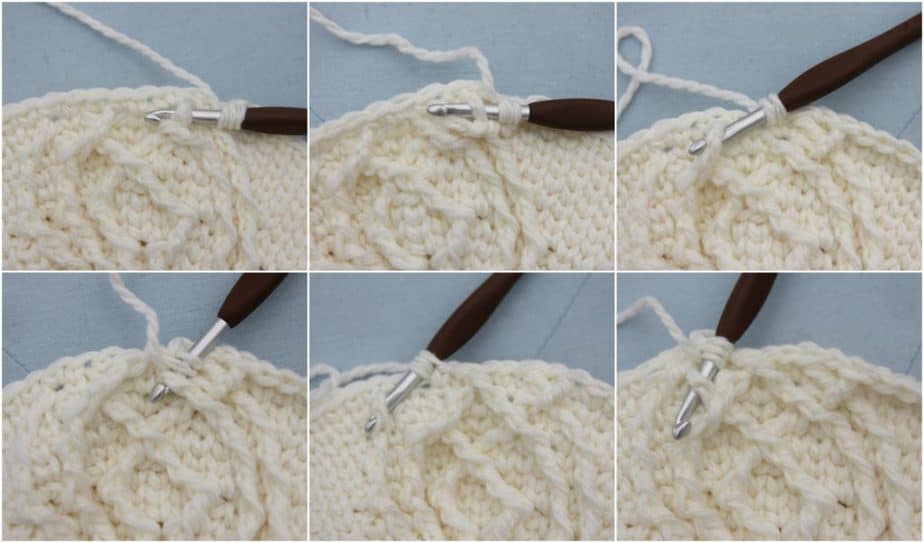
| 18 | *ALL fpdc and fptr stitches will be worked around front post stitches from row 16* Ch 1, split stitch 23, skip next post stitch and fptr around next post stitch, split stitch next, working under fptr just made go back and fptr around skipped post stitch, split stitch in next, skip next post stitch and fpdc around next post stitch, fpdc around skipped fpdc, split stitch in next, skip next post stitch and fptr around next post stitch, split stitch next, fptr around skipped post stitch, split stitch in last 32, join | 64 |
Image instructions for Row 18:
| 19 | Repeat round 15 | 64 |
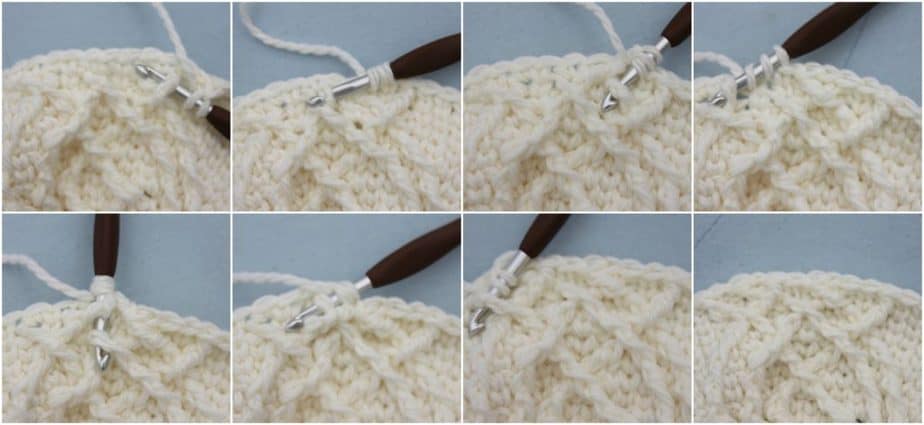
| 20 | *ALL fpdc and fptr stitches will be worked around front post stitches from row 18* Ch 1, split stitch 23, fpdc next, split stitch next, skip next post stitch and fptr around next post stitch, split stitch next, fptr around skipped post stitch, split stitch next, skip next post stitch and fptr around next post stitch, split stitch next, working under fptr just made go back and fptr around skipped post stitch, split stitch in next, fpdc next, split stitch in last 30, join | 64 |
Image instructions for Row 20:
| 21 | Repeat round 15 | 64 |
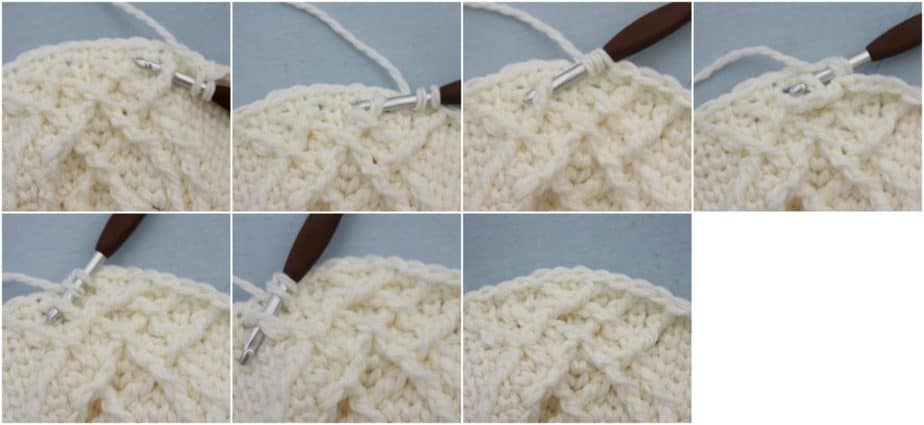
| 22 | *ALL fpdc and fptr stitches will be worked around front post stitches from row 20* Ch 1, split stitch 23, [fpdc next, split stitch 1] twice, skip next post stitch and fptr around next post stitch, split stitch next 2, working under fptr just made go back and fptr around skipped post stitch, [split stitch 1, fpdc next] twice, split stitch in last 30, join | 64 |
Image instructions for Row 22:
| 23 | Ch 1, work split stitches as split stitches and front post stitches as single crochet, *2 split stitch sc in next, sc 31, repeat * one more time, join | 66 |
| 24 | *ALL fpdc and fptr stitches will be worked around front post stitches from row 22* Ch 1, split stitch 23, [fpdc next, split stitch 1] twice, fpdc in next, split stitch 3, fpdc in next, [split stitch 1, fpdc next] twice, split stitch in last 30, join | 66 |
| 25 | Repeat round 15 | 66 |
| 26 | *ALL fpdc and fptr stitches will be worked around front post stitches from row 25* | 66 |
| Ch 1, [bpsc, fpsc] twelve times, [bpsc, fpdc around front post from previous round] three times, bpsc next, fpsc next, [bpsc, fpdc around front post from previous round] three times, bpsc, fpsc | ||
| 27-31 | Ch 1, *bpsc, fpsc; repeat * around, join | 66 |
Kahlua Crochet Beanie Pattern Finishing & Pompom
Finally, fasten off your yarn and weave in any ends. I love a hat with a fun pompom detail and making my own pompom saves money for sure. And trust me, it's not very hard and you can do it as well. Because I also love visuals, please watch the video below or read more HERE.
Crochet & Tag
I hope you have enjoyed creating the Kahlua Crochet Beanie Free Pattern!
If you have made this, please share it on social media. Most importantly, I love to see the projects created with my patterns and also share your beautiful work.
Please use #brianakdesigns or @brianakdesigns
It makes me jump for joy when I see your projects!

