
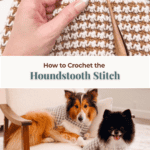
The houndstooth stitch has a bit of a reputation. People see the little broken checks marching across a hat or a sweater and assume there’s a chart involved, or some colorwork technique they haven’t learned yet. When I sat down to write the Houndstooth Beanie, I remember thinking the exact same thing before I actually worked the first round. It’s single crochet and double crochet, in two colors, changed one round at a time. That’s the whole trick
Disclosure: This post contains affiliate links. Please read my disclosure for more info.
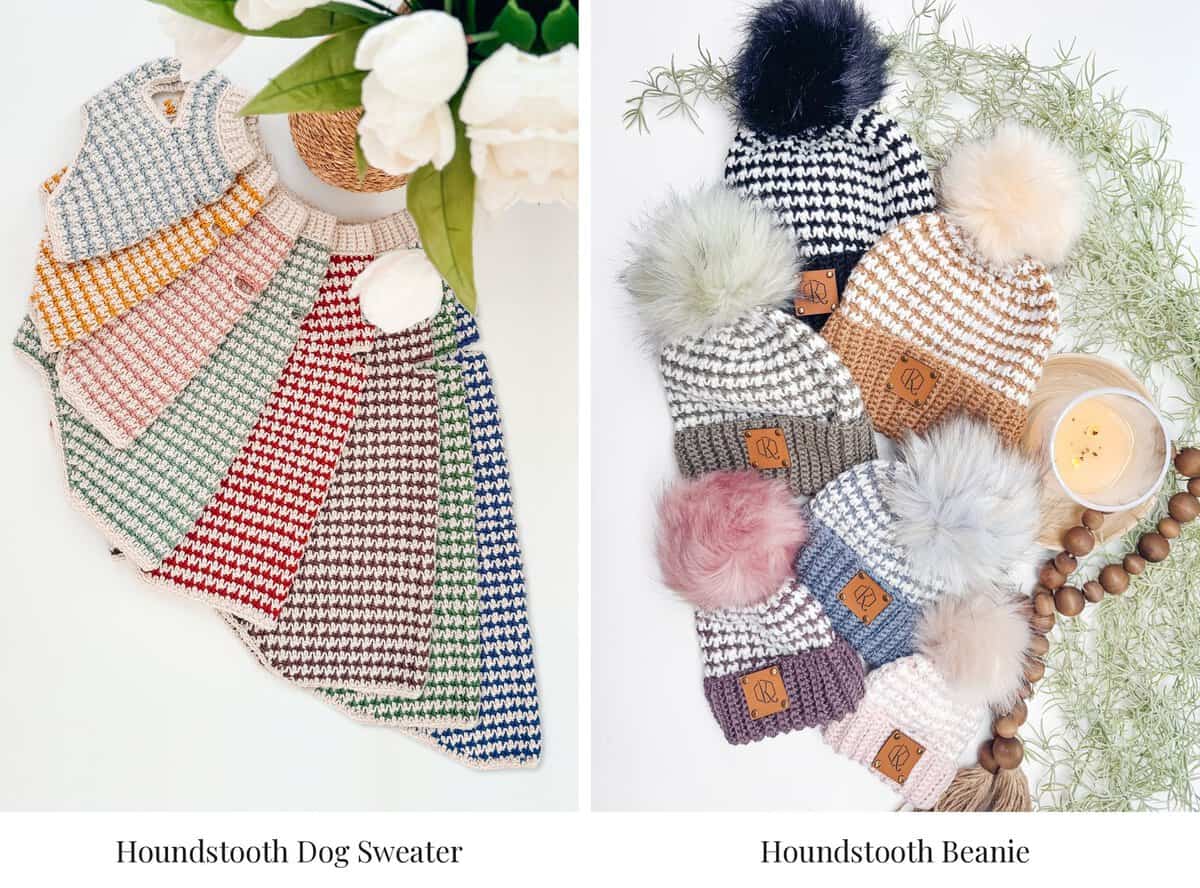
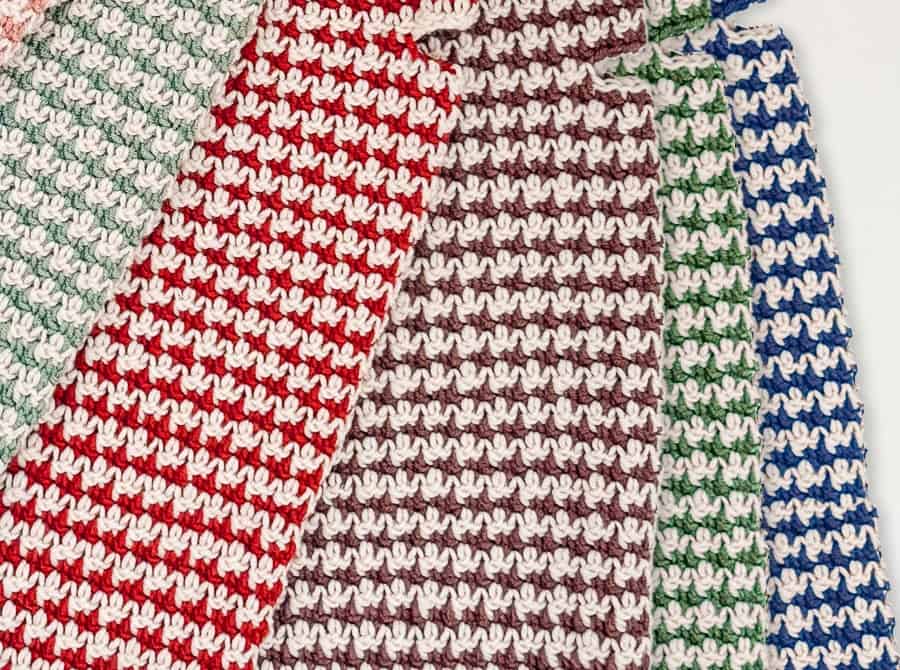
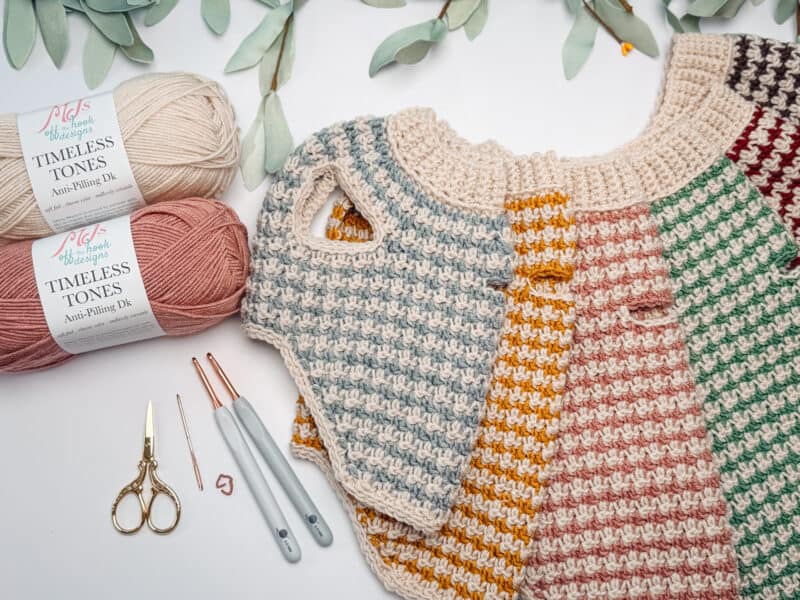
I’ve made this stitch a lot at this point, first for the beanie in six colorways, then again for the Houndstooth Dog Sweater in eight, which my dogs, Luna and Oliver, modeled around the house for a solid week while I photographed it. What still gets me every time is how different the fabric looks depending on the colors you pick. The dog sweaters are bright and bold, with cherry red, cobalt, and mustard, while the hats lean soft and wintry, with blush, plum, and a classic black and white. It’s the exact same two rows repeated over and over.
This post is just the stitch on its own, no full pattern attached, so you can practice it on a swatch before you commit it to a hat, a sweater, or whatever you have in mind. I’ll walk through it both flat in rows and in the round, since I use both depending on the project, and I’ll cover the small habits that keep color changes from turning into a tangled mess.
Jump to: Houndstooth stitch in rows | Houndstooth stitch in the round
Before You Hook: Crochet Pattern Details
🧶 Yarn Used: Any yarn you like. The beanies are worked in Mary Maxim Mellowspun and the dog sweaters in MJ’s Off The Hook Designs Timeless Tones Anti-Pilling DK, both #3 DK.
⚖️ Yarn Weight: #3 DK Weight
🧵 Featured Stitch: Houndstooth Stitch
🪝 Hook Size: US G (4.0mm) Crochet Hook, or whatever hook matches your yarn weight
📏 Sizes: Depends on the pattern you’re using
🩷🩷🤍🤍 Difficulty level: Easy
🕐 Approx. Crochet Time: About 45 minutes for a Small, up to about 2 hours for a Large
🏷️ Project Type: Swatch of a stunningly simple stitch
Save for Later • Get a Summary • Pick Up Where You Left Off
What Is the Houndstooth Stitch
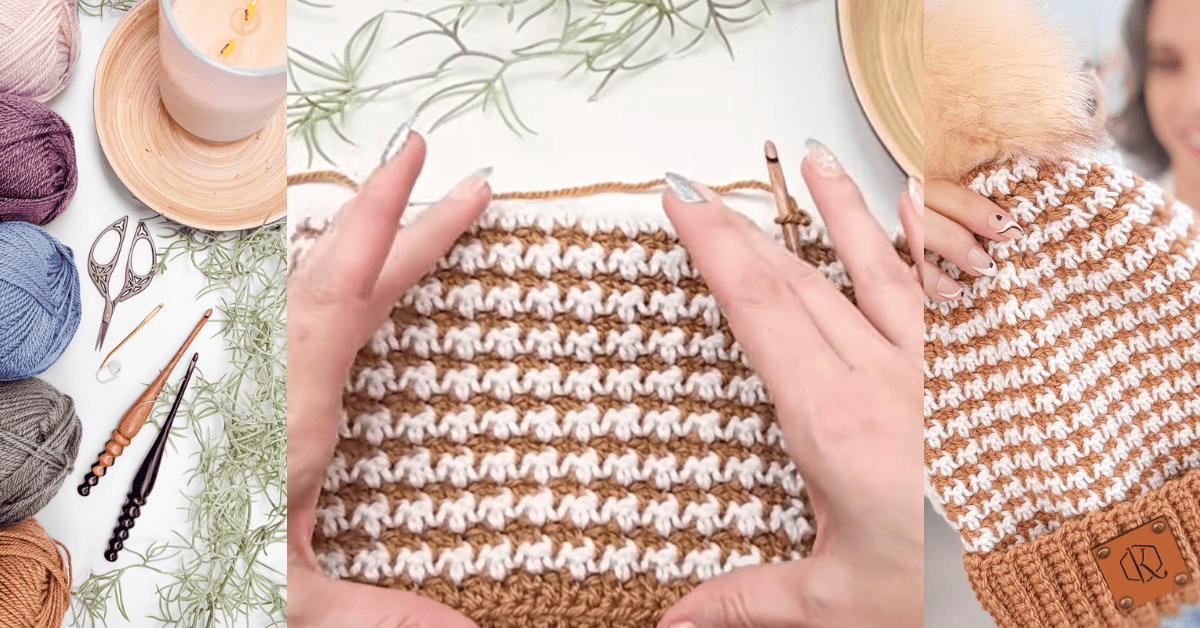
The crochet houndstooth stitch is a two-color stitch pattern that alternates single crochet and double crochet across every row or round, then swaps to a second color on the very next row or round. Because a double crochet stands taller than a single crochet, the side-by-side stitches create a broken, staggered look that mimics the woven houndstooth check you see in fabric and knitwear. It’s a one-row repeat, so once you’ve worked two rows, one in each color, you’ve already learned the entire pattern.
If you already know the stacked single crochet stitch, houndstooth is a nice next stitch to try. It uses the same two basic stitches you already know, sc and dc, and the only new skill is timing your color changes so they land in the right spot.
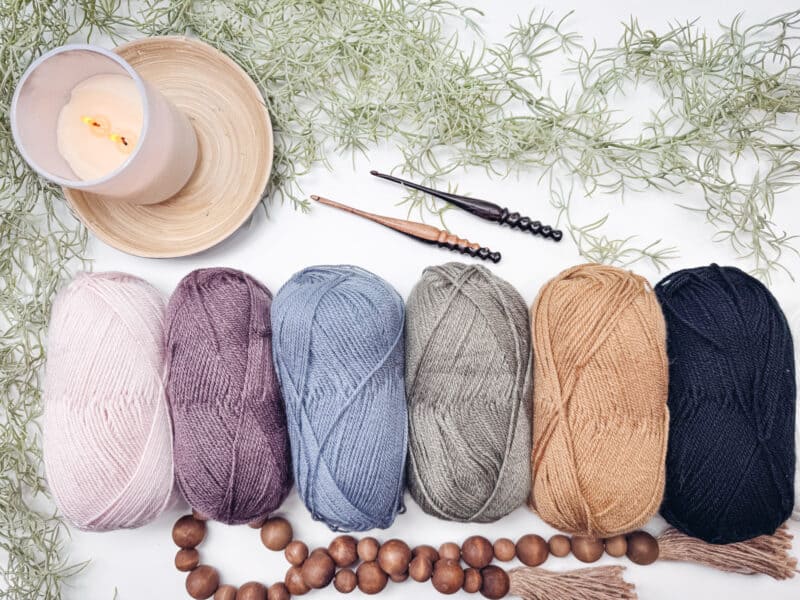
Houndstooth Stitch Tutorial Supplies
Yarn
Mary Maxim Mellowspun
100% Acrylic, 284yds/100g
MJ’s Off The Hook Designs Timeless Tones Anti-Pilling DK
100% Acrylic, 273yds/100g
Two colors
Yarn Quantities
One ball of each color
Scraps will do!
Crochet Hook
Size US G (4.0mm) Crochet Hook or hook to obtain gauge.
Notions
Scissors
Yarn Needle
Removable Stitch Marker
Be sure to check out the full pattern tips below
Skill Level
Easy – Advanced Beginner. If you can make a single crochet and a double crochet, you can do the Houndstooth Stitch!
Abbreviations
ch – chain
dc – double crochet
RS – right side
sc – single crochet
st(s) – stitch(es)
WS – wrong side
Gauge
Gauge isn’t critical for this. Use whatever hook your yarn label recommends. If you want a refresher, here’s what crochet gauge is and how to fix it.

Important Pattern Notes
The Houndstooth Stitch
The check comes from just two stitches, single crochet and double crochet, alternating the whole way across. Because a double crochet stands taller than a single crochet, the two colors stagger against each other instead of sitting in a clean line, which is what gives it that broken, houndstooth look.
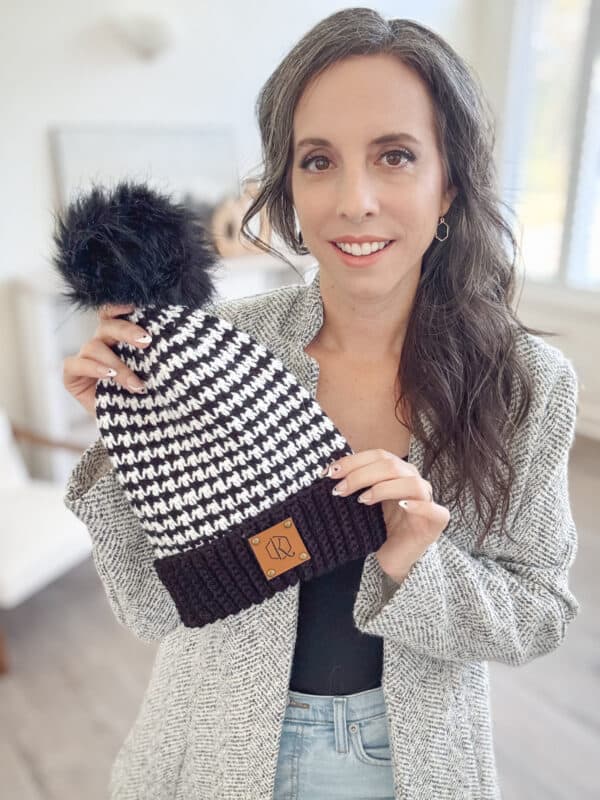
Two colors, one row or round in each, and that’s the entire pattern. There’s no chart to follow and no tricky increases, just the same stagger repeated for as long as you want the fabric to go. It’s simple and stunning! Just look at this hat!
How to Crochet the Houndstooth Stitch in Rows
Working flat is the easiest way to get a feel for the stitch, and it’s exactly how I’d practice it on a swatch before starting a project like the Houndstooth Beanie or Dog Sweater. Your foundation chain needs to be an even number, so the sc and dc pattern lines up cleanly across every row.
The chest panel of the Houndstooth Dog Sweater is worked flat in this exact stitch, so if you’d rather watch than read, the video below starts at 14:38, when the chest panel begins.

Step 1. With Color A, chain an even number of stitches, plus 1 for your turning chain.
Step 2. Sc in the second chain from the hook, dc in the next chain. Repeat sc, dc across the row, turn.
Step 3. Change to Color B on the last yarn over of the previous row (see Tips below). Ch 1; this doesn’t count as a stitch. Sc in the first stitch, dc in the next stitch. Repeat sc, dc across the row, turn.
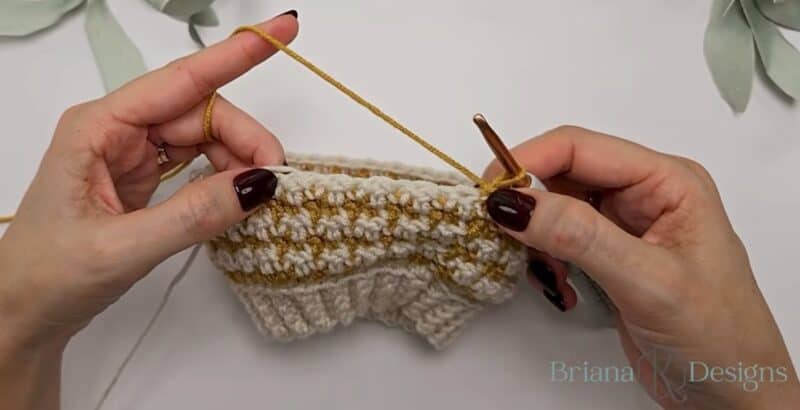
Step 4. Change back to Color A and repeat Step 3, working a sc on top of every dc from the row below, and a dc on top of every sc from the row below. This is what creates the staggered check, so each stitch sits on top of the opposite stitch from the previous row.
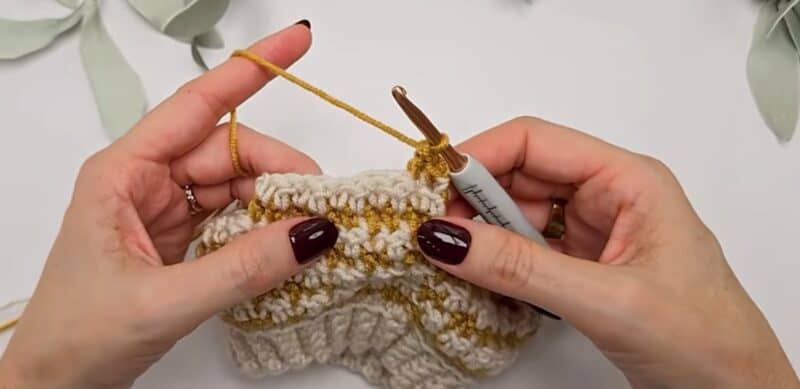
Step 5. Keep alternating Color A and Color B one row at a time until your swatch or project is the size you want.
A note on the dropped color: When you’re working flat, the color you just dropped sits on the wrong edge the next time you need it, since every row turns the opposite direction from the one before it. Carrying it straight up the side won’t work here. See the tapestry carry method under Tips below for how to keep both colors moving without cutting. You can see this at 16:18 in the video.
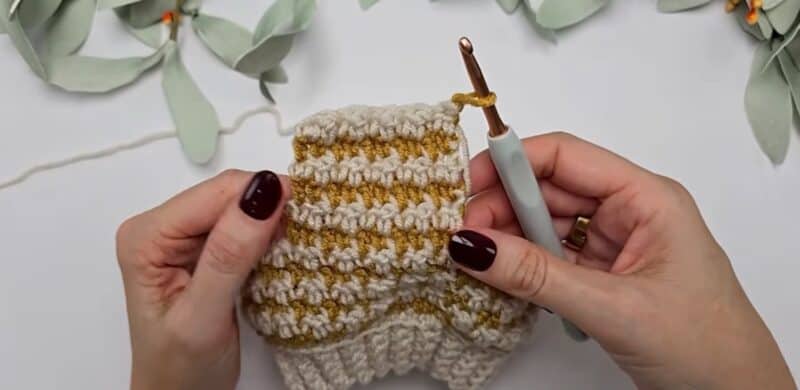
How to Crochet the Houndstooth Stitch in the Round
Both the Houndstooth Beanie and the Houndstooth Dog Sweater work this stitch in the round, joined and turned after every round rather than spiraling continuously. Turning keeps the sc/dc alternation aligned, since the stitch pattern depends on always starting from the right side or the wrong side in a predictable order.
The Houndstooth Beanie is worked in the round in this exact stitch, so if you’d rather watch it than read it, the video below starts right at the first houndstooth round, at 9:36.

Step 1. Start with a joined round of stitches in an even number. For the beanie, this comes from working a ribbed brim flat, then single crocheting evenly around the edge and joining. For a simpler practice swatch, chain an even number, join into a ring with a slip stitch, being careful not to twist the chain.
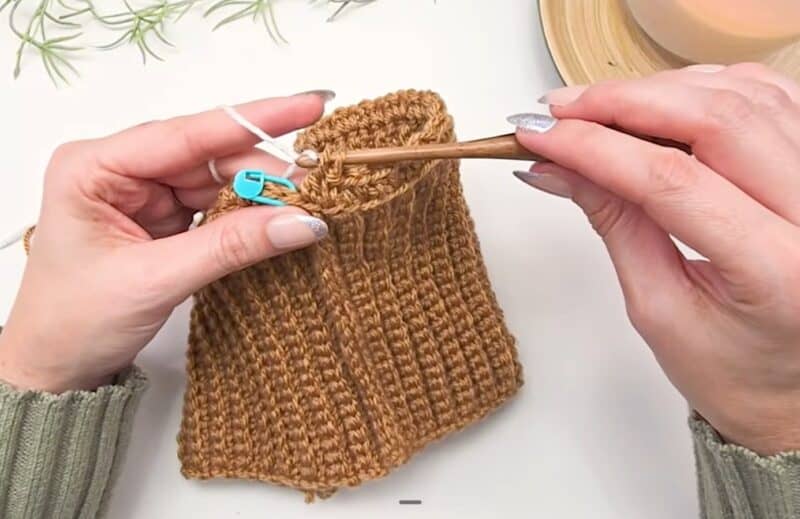
Step 2 (RS). With Color A, ch 1 (does not count as a stitch). Sc in the first stitch, dc in the next stitch. Repeat sc, dc around.
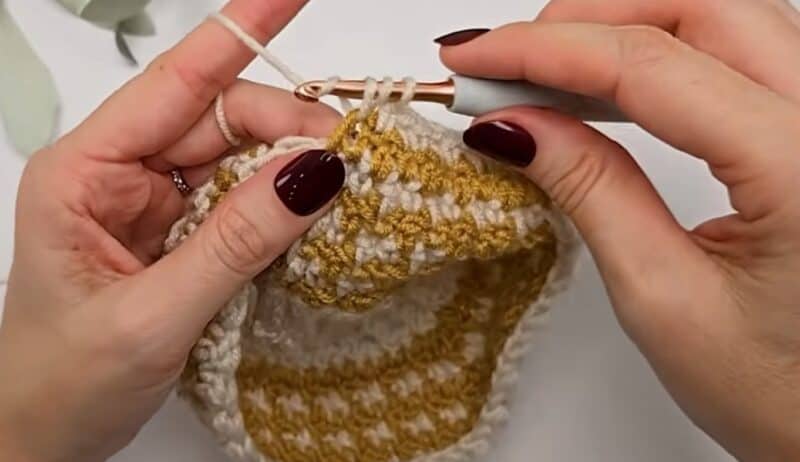
Step 3 (WS). Change to Color B on the last yarn over of the final stitch of the previous round, then join with a slip stitch in Color B and turn (see Tips below). Ch 1, sc in the first stitch, dc in the next stitch. Repeat sc, dc around.
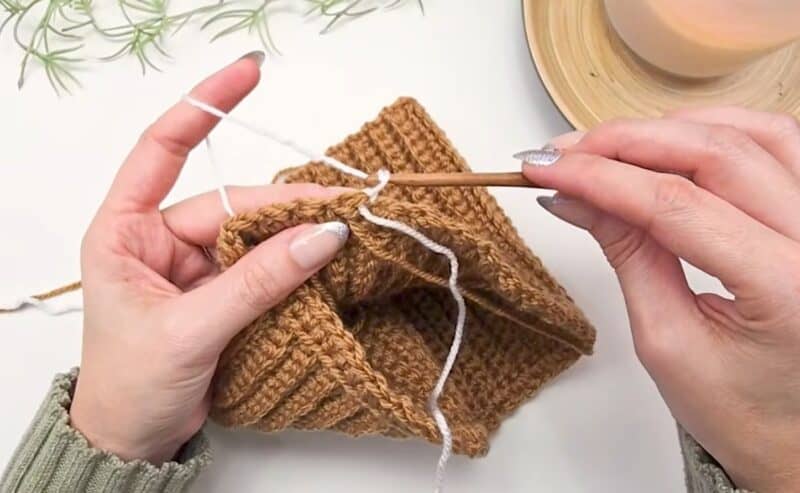
Step 4. Continue alternating Color A and Color B one round at a time, changing color and joining the same way as Step 3, then turning. Every round should start with a sc on top of the dc below it, so the check pattern keeps building correctly.
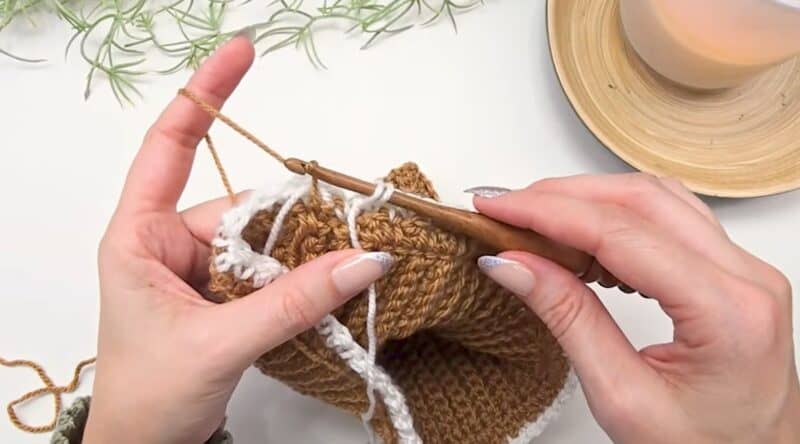
Quick tip: If you lose track of which stitch comes next in the middle of a round, look at the stitch directly below your hook. If it’s a dc, you work a sc into it. If it’s a sc, you work a dc. The stitch below always tells you what to do next.
Tips for Clean Color Changes and Even Tension
Carrying yarn in the round. When you work in the round with the join-and-turn method, the start of every round always lands back at the same seam, even though the direction reverses each time. That means the color you just dropped is sitting right there waiting for you a round later, so you can carry it up along that seam on the inside of the work with almost no extra bulk. This is the easy way to carry, and it’s how I avoid weaving in a mountain of ends on both the beanie and the dog sweater.
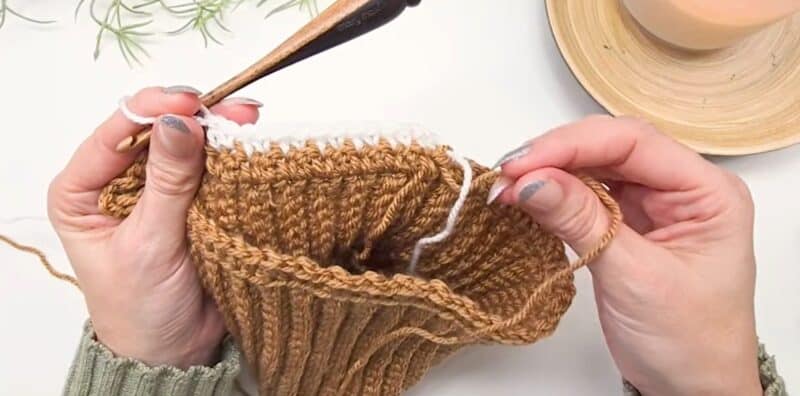
Carrying yarn in rows, tapestry style. Working flat is different, and it trips people up. Because a turned row reverses direction every single time, the color you drop on the right edge after row 1 isn’t where you need it for row 3. It’s on the wrong side entirely. There’s no side to carry it up. The only way to keep both colors moving without cutting and rejoining every row is to carry the unused color across the entire row and crochet over it, tapestry crochet style, so it’s tucked inside the stitches of the working color the whole way across and comes out the other end exactly where you need it. This is the technique noted in the Chest Panel and Bottom Back sections of the Houndstooth Dog Sweater, where those pieces are worked flat.
Expect a thicker fabric when you carry across rows. Since you’re running two full strands through every stitch in a carried row instead of one, that section of fabric will end up noticeably denser and a little heavier than a single-strand section. That’s normal, not a mistake. If you’d rather keep the fabric thinner, especially in a bulkier yarn, cutting and rejoining each color every row is the trade-off: more ends to weave in later in exchange for a lighter fabric.
Make your last stitch change color for you. Switch colors on the last yarn over of the final stitch in a row or round, not after you finish the stitch. Work the stitch until two loops are left on your hook. Then yarn over with the new color and pull through. That last pull changes your color, and it keeps the transition clean instead of leaving a visible knot or jog.
Keep your ch 1 loose. A tight turning chain pulls the edge of your work in and makes the first stitch of the next row hard to find. Since this ch 1 never counts as a stitch here, there’s no reason to crochet it tightly, just loose enough that your hook slides into the first real stitch easily.
Use a stitch marker at the start of every round. This matters more with houndstooth than with a plain single crochet fabric, because it’s easy to lose track of whether you’re sitting on a sc or a dc round when the colors are also changing. A marker at your join point removes the guesswork.
Common Houndstooth Stitch Mistakes (and How to Fix Them)
The check pattern looks blurry or uneven. This almost always means the sc and dc aren’t landing on top of the opposite stitch from the row below. Check that every sc sits directly on top of a dc, and every dc sits directly on top of a sc. If that alignment slips even once, the stagger that creates the houndstooth look breaks down for the rest of the piece above it.
My stitch count keeps drifting. Houndstooth is unforgiving about stitch count because it needs an even number to repeat cleanly. If you gained or lost a stitch somewhere, work back to the last row or round you’re sure was correct and recount from there rather than guessing forward.
My fabric is puckering at the color changes. This is usually tension on the carried yarn, not the working yarn. If you’re pulling the strand you’re carrying too tightly across the back or inside of the work, it will bunch the fabric at that spot. Let the carried strand lie a little loose. It shouldn’t be pulling on the stitches at all.
Put It to Work
Once you’ve got the check down, here’s where I’ve put it to use.
Houndstooth Beanie
Worked in the round on top of a ribbed brim and finished with a faux fur pom-pom.
Houndstooth Stitch FAQs
No, it’s considered an advanced beginner stitch. The only two stitches involved are single crochet and double crochet, both of which most beginners already know by the time they finish their first project. The part that takes a little practice isn’t the stitches themselves. It’s remembering to change colors at the right moment and keeping the sc and dc stacked correctly on top of the row below.
They’re worked exactly the same way, alternating sc and dc across every row or round. The only difference is color. Lemon peel stitch is typically made in a single color, while houndstooth uses two contrasting colors and changes color every row or round to create the checked look.
Two. You could technically use more, but the classic houndstooth check comes from alternating exactly two contrasting colors, one row or round at a time. A light-and-dark combination, like cream and black or cream and a deep jewel tone, will show off the pattern most clearly as you learn it.
You don’t have to. Since you’re switching colors every single row or round, cutting and rejoining each time creates a lot of extra ends to weave in later. Carrying the unused color inside your work, up the seam when you’re working in the round or tapestry style across the row when you’re working flat, saves a lot of finishing time and is how I work this stitch on my own patterns.
Yes, and it’s worked almost identically. The one difference is that rounds are joined with a slip stitch and turned, rather than simply turning at the end of a row. Turning after every round keeps the sc and dc alternation lining up the same way it does when the stitch is worked flat, which is what actually creates the check pattern.
Worsted and DK weight yarns both work well and make the stitch definition easiest to see while you’re learning. Thinner yarns will still create the houndstooth look, but they’ll take more rows or rounds to build the same amount of fabric, and the check will read smaller and more subtle.
This is usually a tension difference between how you crochet with Color A versus Color B, or a difference in the two yarns themselves if they’re not the same weight or fiber. Try to keep even tension regardless of which color is active, and use two yarns of the same weight and similar fiber content for the most consistent fabric.
Join The Kindest Community
Join our vibrant community of crafters on Facebook today. Whether you enjoy crafting with others or simply have burning questions, we’ve got you covered – join us now!
More Crochet Goodies to Love
Not ready to put the hook down? Here are a few more favorites from the shop and blog to keep the momentum going.
🥂 Cheers, and happy crocheting!
Well, That Was Fun! What’s Next?

Which stitch is your soulmate?
Keep the hook movingReaders Are Loving
 Crochet Book Cover
 Wheat Hooded Scarf
 Wheat Bottle Holder
 Reed Crossover Stitch