
I’ll let you in on something: Tunisian crochet is a technique I’m still falling in love with. I’ve made a handful of projects with the long hook over the years, but lately I’ve wanted to really explore it, to understand the stitches more deeply and design more patterns around them. So I’m treating this as a learn-along, and I’d love for you to pick up your hook and dig in right beside me.
Disclosure: This post contains affiliate links. Please read my disclosure for more info.
We’re starting where everything in Tunisian starts: the simple stitch. And here’s the part I love, friend. You can learn it with the regular crochet hook you already own. The Tunisian simple stitch is the gateway to this whole technique, and a short, narrow project is the perfect way to get the flow into your hands before you ever reach for a longer hook. That’s exactly what I’ll walk you through here, and at the end you’ll have a real finished strap to show for it, not just a practice swatch you tuck in a drawer.
I’ve been designing crochet patterns for over a decade, and what I love about coming back to a technique with fresh eyes is realizing how approachable it really is once you strip away the intimidation. So many makers stall out on Tunisian before they start because they assume the equipment is a barrier. It isn’t. Let’s get that hook moving and learn this one together.
Before You Hook: Crochet Tutorial Details
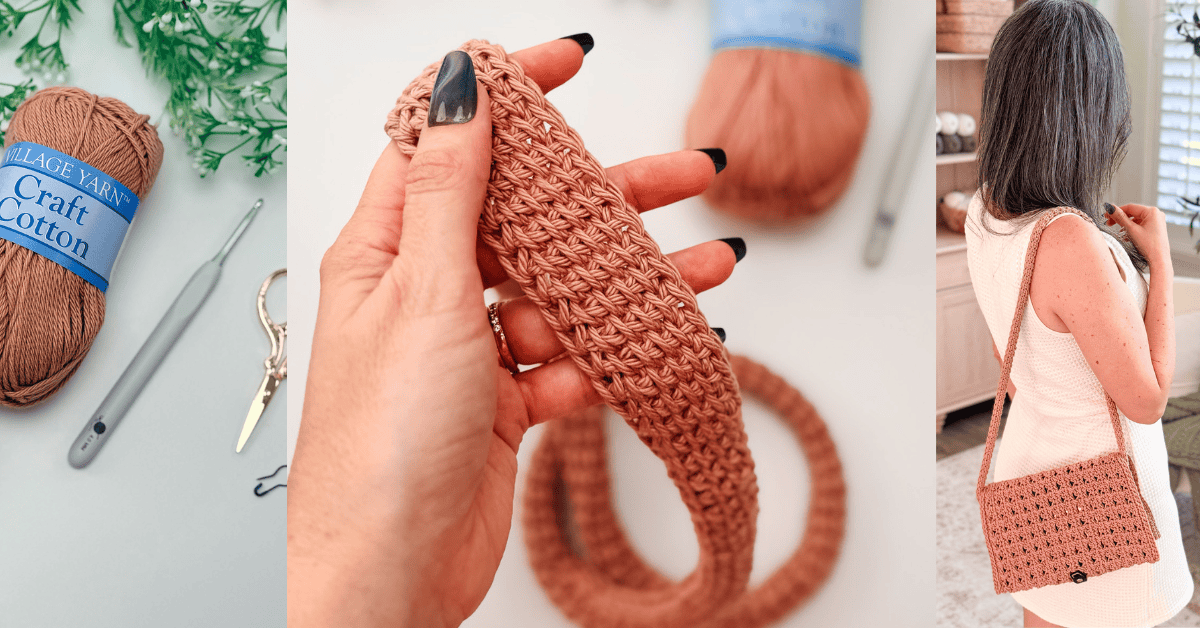
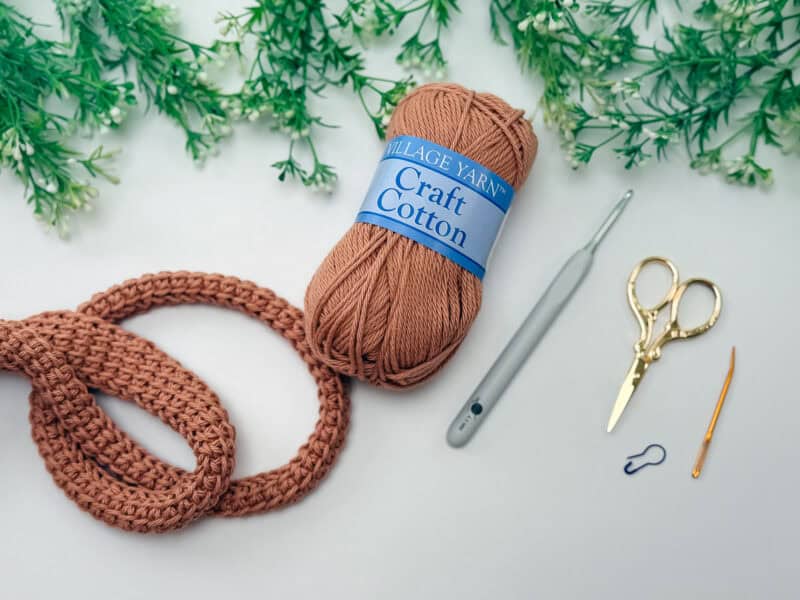
🧶 Yarn Used: Village Yarn Craft Cotton (100% cotton, 115yds/71g)
⚖️ Yarn Weight: Worsted
🧵 Featured Stitch: Tunisian simple stitch (TSS)
🪝 Hook Size: US G (4.0mm) Crochet Hook, or hook to obtain gauge
📏 Sizes: One width
🩷🩷🤍🤍 Difficulty level: Easy
🕐 Approx Crochet Time: About 1 to 3 hours depending on length of strap.
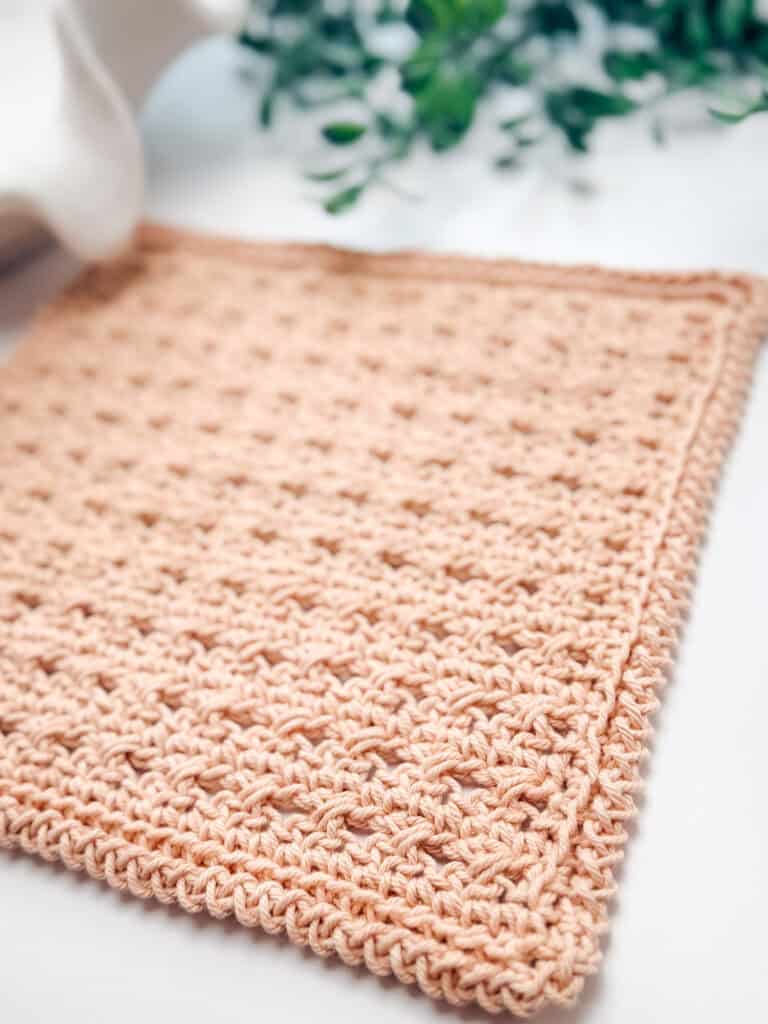
🏷️ Project Type: A simple and sturdy strap perfect for the Reed Book Cover or any bag
Save for Later • Get a Summary • Pick Up Where You Left Off
What Is the Tunisian Simple Stitch?
The Tunisian simple stitch, usually written as TSS in patterns, is the most basic stitch in Tunisian crochet. You might also see it called the afghan stitch, which is just an older name for the same thing. It makes a dense, woven-looking fabric with neat little vertical bars, and it’s the foundation that almost every other Tunisian stitch builds on.
Tunisian crochet sits somewhere between knitting and regular crochet. You keep a row of loops on your hook like you would on a knitting needle, then work them all back off again. It uses one crochet hook, but you never turn your work, so the right side always faces you. Once you feel that rhythm, it’s genuinely hard to put down.
Do You Need a Special Tunisian Hook?
Not to get started, no. A standard Tunisian hook is longer than a regular crochet hook, with a stopper on the end, and that extra length exists for one reason: to hold a lot of loops at once. The wider your project, the more loops pile up, and a regular hook eventually runs out of room.
But for a narrow project, a regular hook is all you need, and it’s a wonderful way to get used to the flow of Tunisian without buying anything new. The strap we’re making here is only six stitches wide, so six loops sit comfortably on an ordinary G or H hook with room to spare. Learn the rhythm first, on the hook already in your hand. That’s the whole goal of this post.
And when you’re ready to make something wider, like a blanket or a wrap, don’t be afraid of the longer hook. It isn’t a harder tool; it’s just a roomier one, and once you know the stitch, picking one up feels like a natural next step rather than a leap. I’ll have a full guide to choosing Tunisian hooks coming soon. For today, though, grab what you’ve got and let’s stitch.
Tunisian Simple Stitch Strap Supplies
Yarn
Village Yarn Craft Cotton
100% Cotton, 115yds/71g
Yarn Quantities
1 ball
Crochet Hook
Size US G (4.0mm) Crochet Hook or hook to obtain gauge.
Notions
Scissors
Yarn Needle
Removable Stitch Marker
Be sure to check out the full pattern tips below
Yarn Substitutions
Herrschners Cottage Cotton — 60% Cotton/40% Acrylic, 207yds/100g
Premier Home Cotton – 85% Recycled Cotton/15% Polyester; 131yds/75g
Lily Sugar ’n Cream – 100% Cotton; 120yds/71g
WeCrochet Dishie – 100% Cotton; 190yds/100g
When substituting for this tutorial, stick with a cotton or cotton-blend yarn in the same weight. I find that cotton really shows off the definition of these stitches, and it might be what you’re already using for the project you’re adding a strap to.
Remember always to check the gauge and drape when substituting yarns.
Skill Level
While not difficult, Tunisian crochet isn’t quite the same as regular crochet. We’ll be pulling up loops on the forward pass and then closing all of the stitches on the return pass. Keep reading for more details.
Sizing & Finished Measurements
The length of your finished strap is totally up to you. In the Reed Book Cover pattern, I made 3 different lengths: 29, 42, and 53″.
Abbreviations
ch – chain
st(s) – stitch(es)
Gauge
Not critical.
Tips
How to Crochet A Gauge Swatch
- Working a gauge swatch will let you know if you will have the correct sizing for this pattern. It will also help you practice the stitches used in this project and improve your stitch work for a flawless look.
- Are you struggling to match the gauge? Check out the blog post on What is Crochet Gauge and How To Fix It
Special Stitches Used in This Pattern
TSS – Tunisian Simple Stitch: The Tunisian Simple Stitch is best described in passes. See below.
Forward Pass: Insert hook into the second ch from hook, yarn over, pull up a loop. Pull up a loop in each remaining ch across, keeping all loops on your hook.
Return Pass: Yarn over, pull through 1 loop. *Yarn over, pull through 2 loops; repeat from * across until 1 loop remains on the hook.

Important Pattern Notes
How the Tunisian Simple Stitch Strap is Made
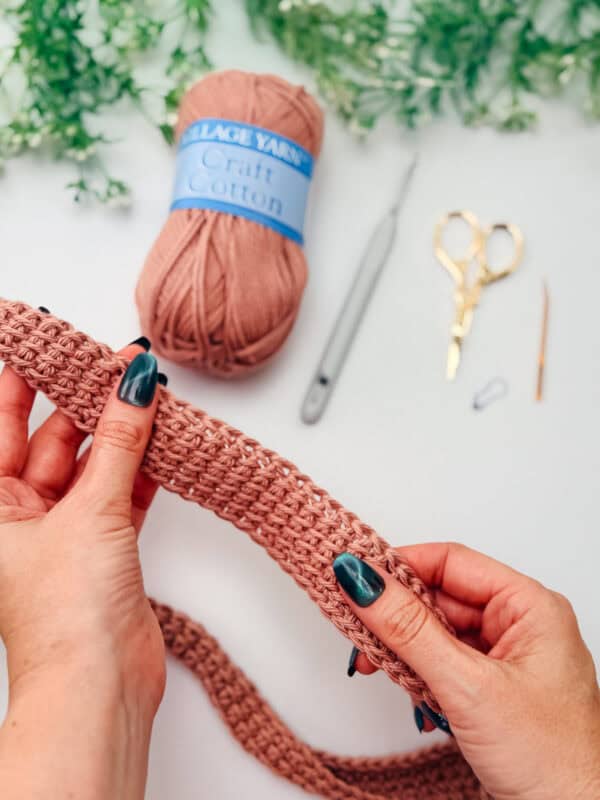
The strap is worked in the Tunisian simple stitch using a regular G (4.0mm) crochet hook, no special long hook needed. You start with a chain of 6, then work each row in two passes: a forward pass where you pull up a loop under every vertical bar and keep them all on your hook, and a return pass where you close those loops back off two at a time. You repeat that same two-pass rhythm until the strap reaches the length you want, bind off, and seam the ends together into a loop. That’s it, a simple narrow strip that doubles as a bookmark and a carrying handle.
Understanding the Two Passes in Every Row
This is the one concept that trips up every beginner, so let’s slow down here. In Tunisian crochet, a single row is made of two halves: a forward pass and a return pass. You work one, then the other, and together they count as one row. Get this, and the rest is just repetition.
The Forward Pass
Working from right to left, you pull up a loop in each stitch across and leave every loop on your hook. You’re not finishing anything yet, just collecting loops. By the end of the forward pass, your hook is loaded with loops, one for each stitch in the row.
The Return Pass
Now you work back the other way, left to right, closing those loops off two at a time. Yarn over, pull through two loops, and repeat all the way across until a single loop remains on your hook. That last loop becomes the first stitch of your next forward pass, which is why you never turn your work. Right side, always facing you.
Subscribe, Like & Watch on YouTube
Relax & Crochet with NO Ads
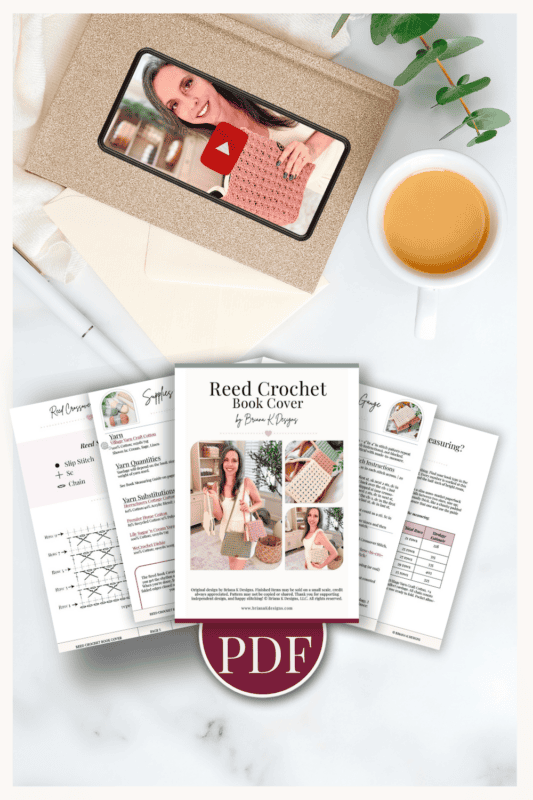
Upgrade to the Printable PDF
Beautifully formatted to print and take with you anywhere. The paid pattern includes:
Click the box below to unlock this exclusive subscriber content for free. Add your email and create a password. If you are having trouble, reset your password or log in to the Grow Portal.
I’m thrilled to share this amazing crochet pattern with you! Please don’t copy, paste, or distribute this pattern. Prefer an ad-free experience? Purchase a digital PDF file for a small fee from one of my online stores. I appreciate your support and readership. You are why I can keep doing what I love and sharing it with others. Thank you from the bottom of my heart.
How to Crochet the Tunisian Simple Stitch, Step-by-Step
If you’re a visual learner, the video above walks through every step in real time. Keep scrolling for the written instructions with step-by-step images.
Step 1 — The Foundation Row
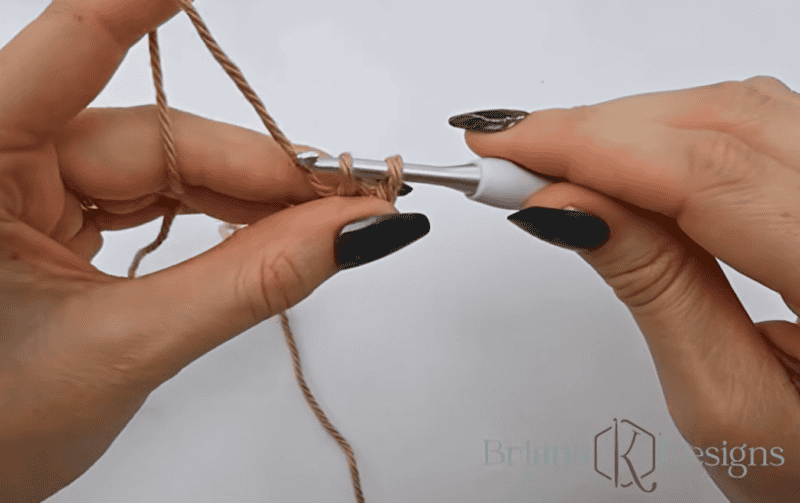
Chain the number of stitches you want. For the simple stitch, there’s no special multiple to worry about, so any number works. For our strap, you’ll chain 6. Now, we’re going to work our forward pass.
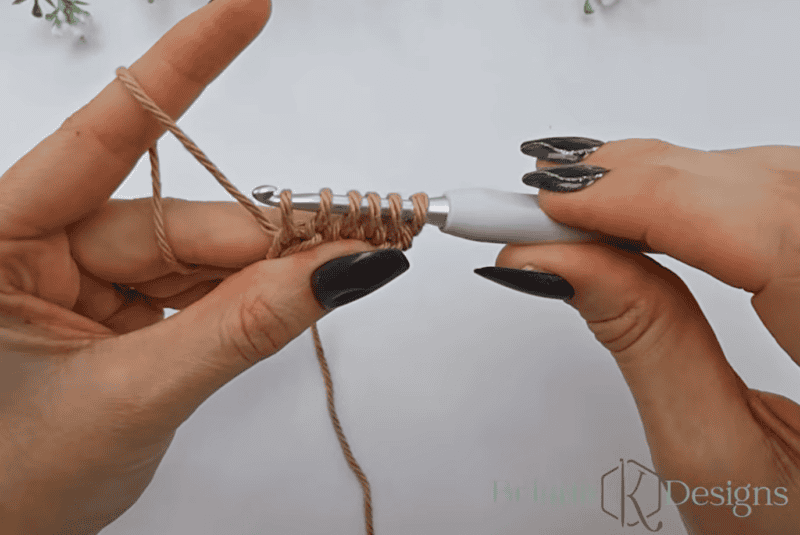
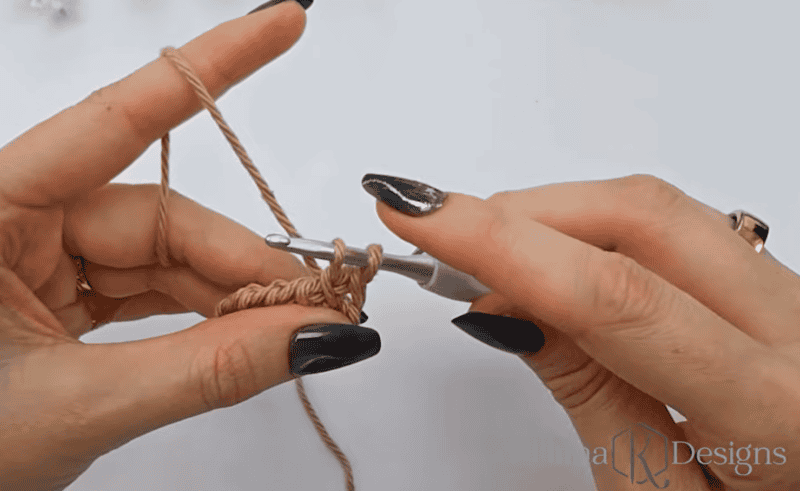
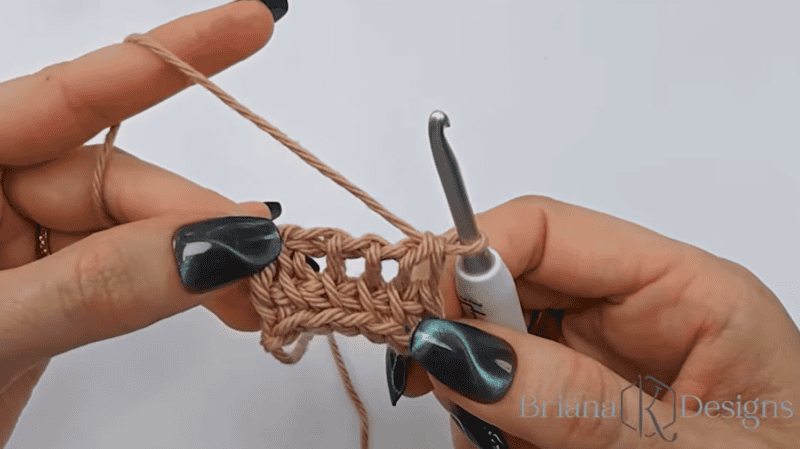
Forward Pass: Insert your hook into the back bump of the second chain from the hook. Yarn over and pull up a loop as you normally would for a regular single crochet.
Here’s where things are different: Do NOT finish your stitch! Just leave that loop right on your hook. Your hook should look like this – there are 2 loops on the hook:
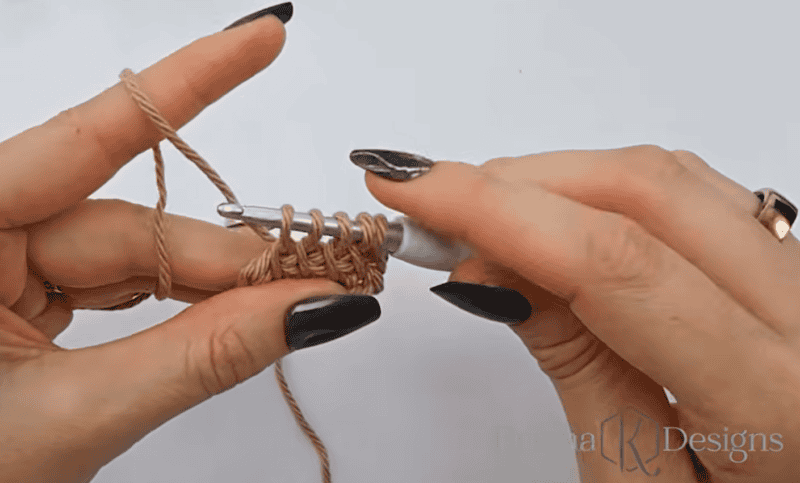
Pull up a loop in each chain across the same way, keeping every loop on your hook. You’ll end with as many loops as you started with chains. So for this tutorial, you should have 6 loops on your hook – that first loop counts as a stitch. (For Tunisian crochet, we count loops!) Your hook should look like this:
That’s your forward pass!
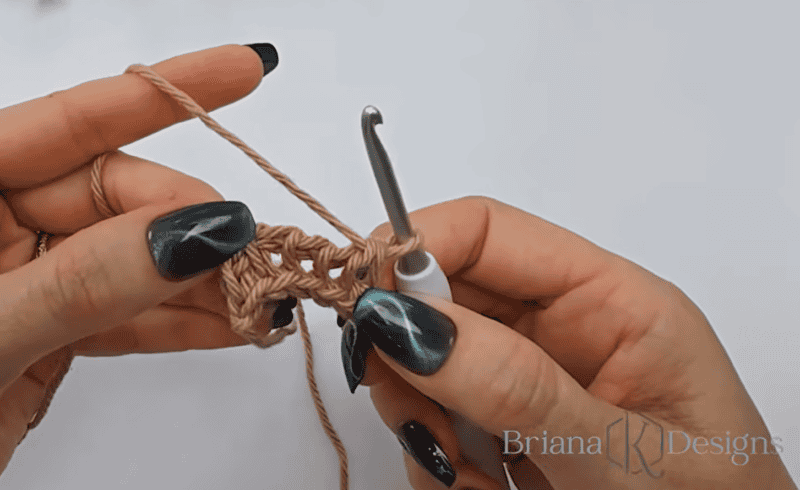
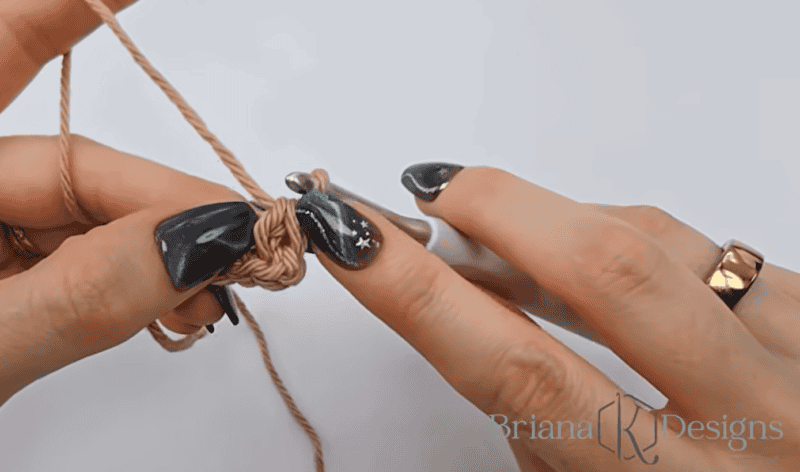
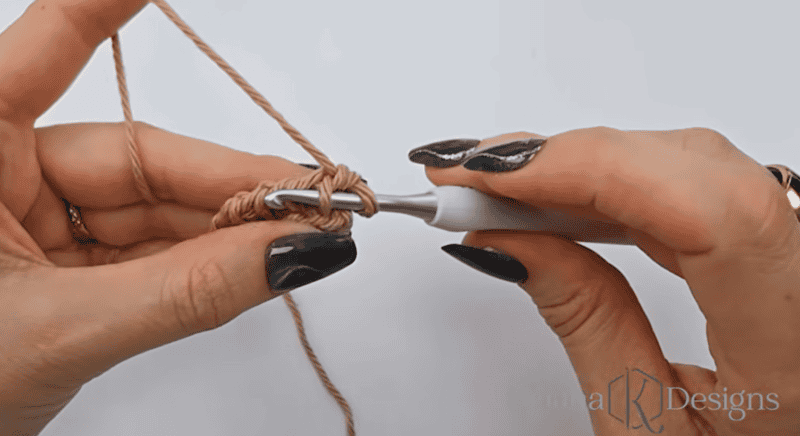
Now work the return pass to close each of those stitches, putting you back at the beginning of your row.
Return Pass: yarn over, pull through one loop, then yarn over and pull through two loops repeatedly until one loop remains. Your foundation row is done. You did it!
Tunisian Crochet Hook Tip
A quick tip that saves a lot of frustration: when you do move on to bigger Tunisian projects, work with a hook about two sizes larger than your yarn label suggests. It keeps the fabric relaxed. For a six-stitch strap, though, you don’t need to fuss with that yet.
Step 2 — Working the Tunisian Simple Stitch
Now that you’ve worked your first row, it’s time to go to Row 2. We’re going to work a forward pass and a return pass.
Forward Pass: Skip the first vertical bar (the loop already on your hook counts as your first stitch).
Skip this bar:
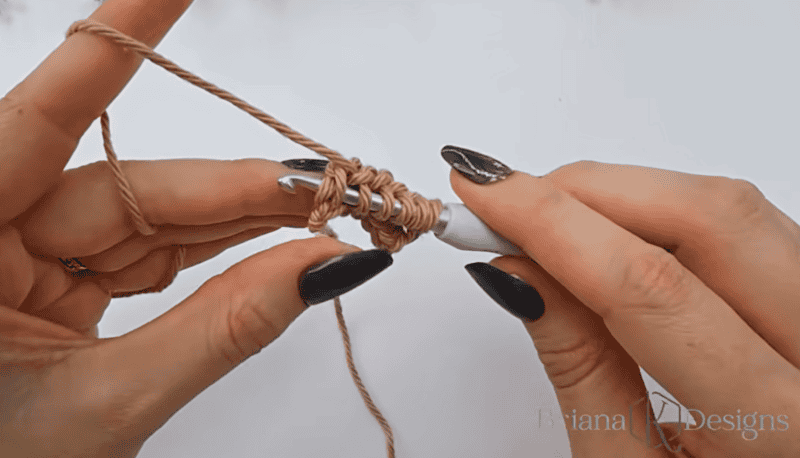
Insert your hook from right to left, under the next front vertical bar. Like this:
Yarn over and pull up a loop, leaving it on the hook. Now you have 2 loops on your hook:
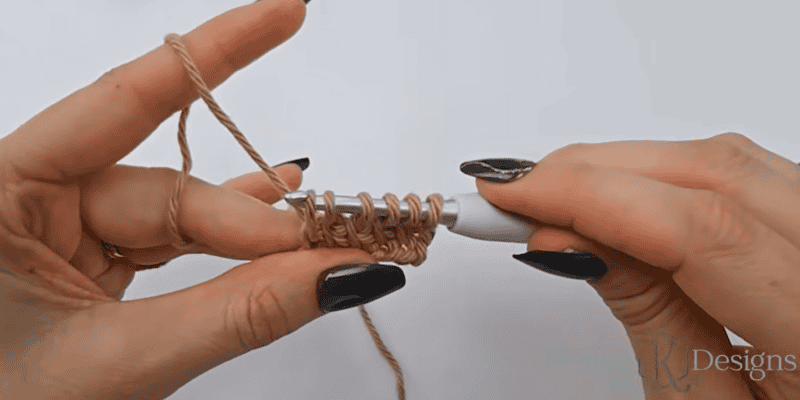
Repeat across the row, picking up one loop under each vertical bar UNTIL you get to the last stitch of your previous row. You will have 5 loops on your hook:
For the very last stitch, insert your hook under both strands of the final stitch (the front and back bars together) to give your edge stability. Pull up your last loop.
After you’ve gone under the side loops of the last stitch, you will have 6 loops on your hook.
Now, work the return pass exactly as before: yarn over, pull through one, then pull through two across until one loop remains.
Repeat Step 2 until your piece is as long as you need. Every row is the same forward-then-return rhythm. That’s the whole stitch.
Join The Kindest Community
Join our vibrant community of crafters on Facebook today. Whether you enjoy crafting with others or simply have burning questions, we’ve got you covered – join us now!
Once your strap is the length you want, you can fasten off.
For this strap, all I’m doing is cutting a long tail, then pulling my yarn through the last loop. Because I’m seaming the ends of my steaps together to create a ring, I don’t want to do the standard Tunisian Bind Off. I find that having a little less bulk on that end will help things stay a little tidier.
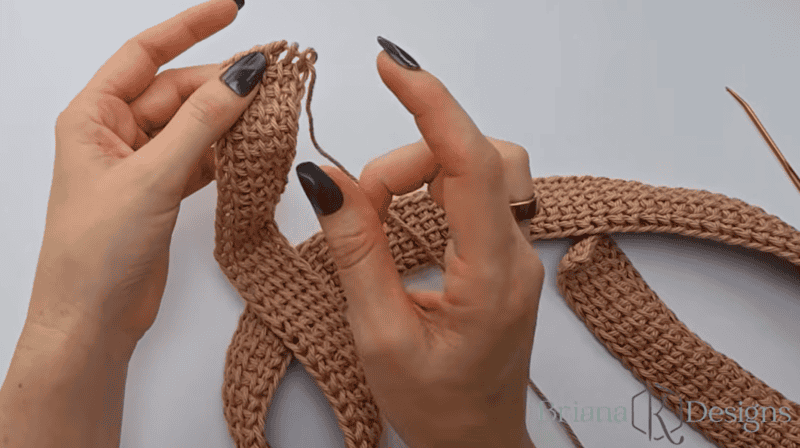
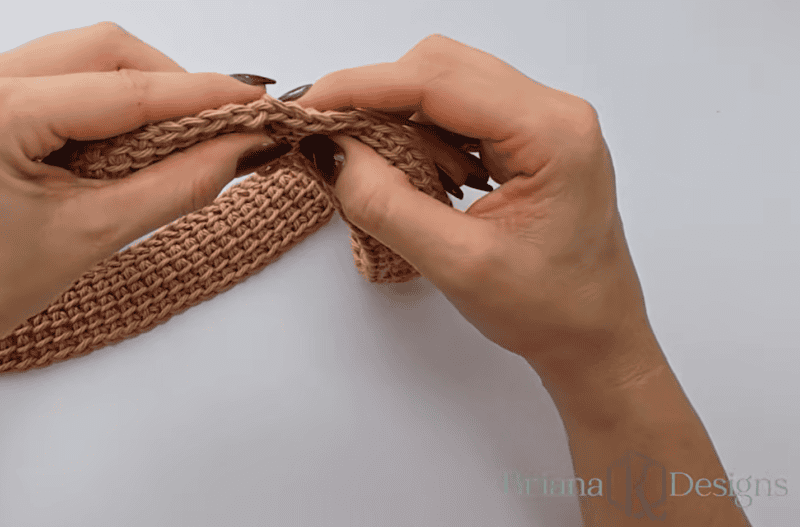
Now that we’ve fastened off with a long tail, all we need to do is seam the ends together.
Make sure that your strap isn’t twisted when you line up the short edges.
I like to loop through the first two sts from left to right to tighten up my end. Then, we will add a “mock” stitch to the side edge to join the corners. Tilt your work to the side, then insert your needle under the two loops on the side of the first row:
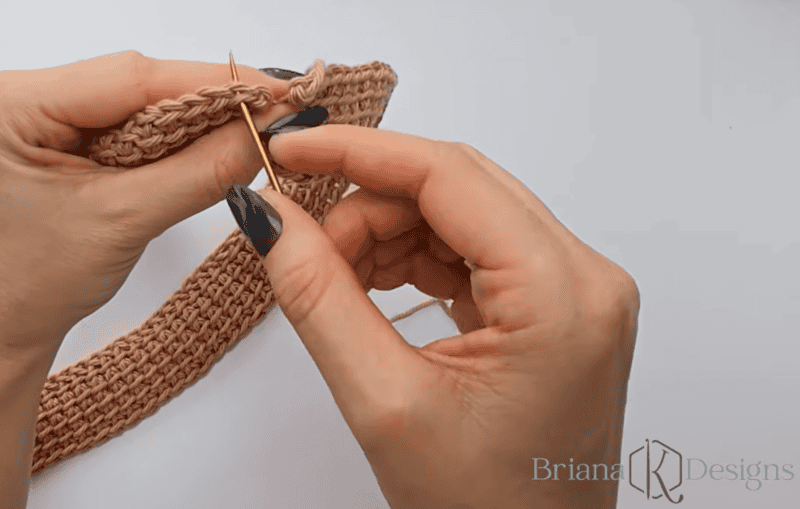
Then, insert your needle through the middle of the loops on the side of the stitch from the opposite end of the strap (the last row you finished before you fastened off).
Snug things up a bit, but don’t pull too tightly. This creates an invisible join.
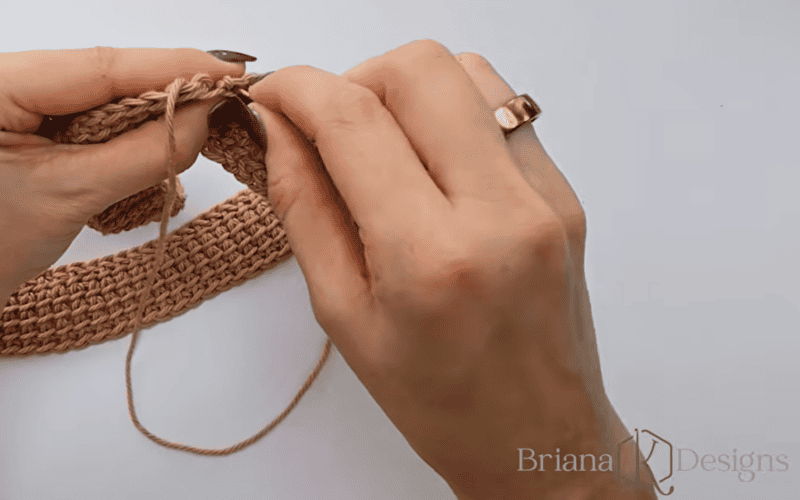
Now, you can stitch the edges together in your preferred way. To see my preference, watch the video. To finish your join, follow the same steps from above to create an invisible join on the edge. Then, fasten off and weave in your ends.
If you wanted to do the standard bind off, here’s how you would do that:
Skip the first vertical bar, then insert your hook under the next bar, yarn over, and pull through both the bar and the loop on your hook (that’s a slip stitch). Repeat under each bar across the row, keeping the stitches loose so the edge doesn’t pucker. Fasten off and weave in your ends.
Why Does Tunisian Crochet Curl?
Let’s be honest about this, because it’s the number one thing people panic about. Tunisian crochet curls. The simple stitch especially likes to roll up at the bottom edge, and it’s not you doing anything wrong; it’s just the nature of the fabric. The good news is it’s easy to manage.
Here’s the part that makes a strap such a smart first project: at only six stitches wide, curl is barely a factor. A narrow strip simply doesn’t have enough width to roll dramatically, and once you join or use it, any slight curl relaxes right out. You get to learn the stitch without fighting the curl, which is exactly why I steer beginners here.
When you do move on to wider pieces, three things keep curl in check:
- Go up a hook size or two. A looser fabric curls less than a tight one.
- Keep your tension relaxed and even. Crocheting too tightly is the most common culprit for curls.
- Block your finished piece. Pinning it flat and hitting it with steam works wonders. I walk through exactly how in my how to block crochet post.
Tips for Clean, Even Tunisian Stitches
- Mind your edge stitches. The first and last stitches of each row are where wobbles show up. Keep the loop on your hook at a consistent height, and you’ll get tidy edges.
- Chain loosely. A tight foundation chain pulls the bottom of your work in. If yours tends to be tight, start your chain with a hook one size up.
- Count your loops. At the end of every forward pass, your loop count should match your stitch count. Catching a missed stitch early saves a lot of frogging.
- Don’t rush the return pass. Pulling through two loops at a time has a satisfying rhythm, but yanking too hard tightens the top edge. Easy does it.
What to Make Next
Once the simple stitch feels natural, the whole world of Tunisian opens up. Here’s where I’d send you next:
- Tunisian Honeycomb Stitch tutorial — once you’ve got TSS, honeycomb combines it with the purl stitch for a gorgeous textured fabric. A natural next step. This one does need a longer hook.
- Wheat Stitch Pumpkin Cup Cozy – the little leaves are made with a variation of the TSS.
Tunisian Simple Stitch FAQs
Is the Tunisian simple stitch the same as the afghan stitch?
Yes. Afghan stitch is simply an older name for the Tunisian simple stitch. If you come across a vintage pattern calling for afghan stitch, you can work it as TSS, and you’ll get the same woven fabric.
Can I really do Tunisian crochet with a regular hook?
For narrow projects, absolutely. A regular hook holds loops just fine as long as your stitch count stays low, which is why a six-stitch strap is such a great place to start. Once your projects get wide enough that the loops won’t all fit, that’s your cue to reach for a longer Tunisian hook. By then, the stitch will already feel familiar, so the only thing changing is the tool.
How many chains do I need to start?
The Tunisian simple stitch has no required stitch multiple, so you can start with any number of chains you like. Chain however wide you want your piece to be. (Some other Tunisian stitches, like honeycomb, do need a specific multiple, but simple stitch is wonderfully forgiving.)
Why does my Tunisian crochet keep curling?
Curling is normal, especially with the simple stitch. It usually means your tension is a little tight or your hook is a little small for the yarn. Going up a hook size, keeping your tension relaxed, and blocking the finished piece will all settle it down. And narrow projects like a strap barely curl at all.
Does Tunisian crochet use more yarn than regular crochet?
It’s actually the opposite for many makers: the dense fabric can use a similar or slightly different amount depending on the stitch, but the simple stitch is economical and works up into a sturdy, substantial fabric. For a small strap, you’ll use very little yarn.
That’s the Tunisian simple stitch, worked from start to finish on the regular hook you already own. Make that strap, get the flow into your hands, and you’ll have the foundation for every Tunisian project that comes next, longer hook and all. I’m learning right alongside you, so stick around as I explore this technique further.
More Crochet Tutorials You’ll Love
If you enjoyed this tutorial, here are a few more I think you’ll enjoy, too:
🥂 Cheers, and happy crocheting!
Well, That Was Fun! What’s Next?