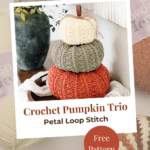
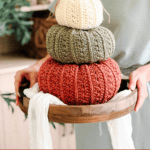
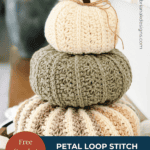

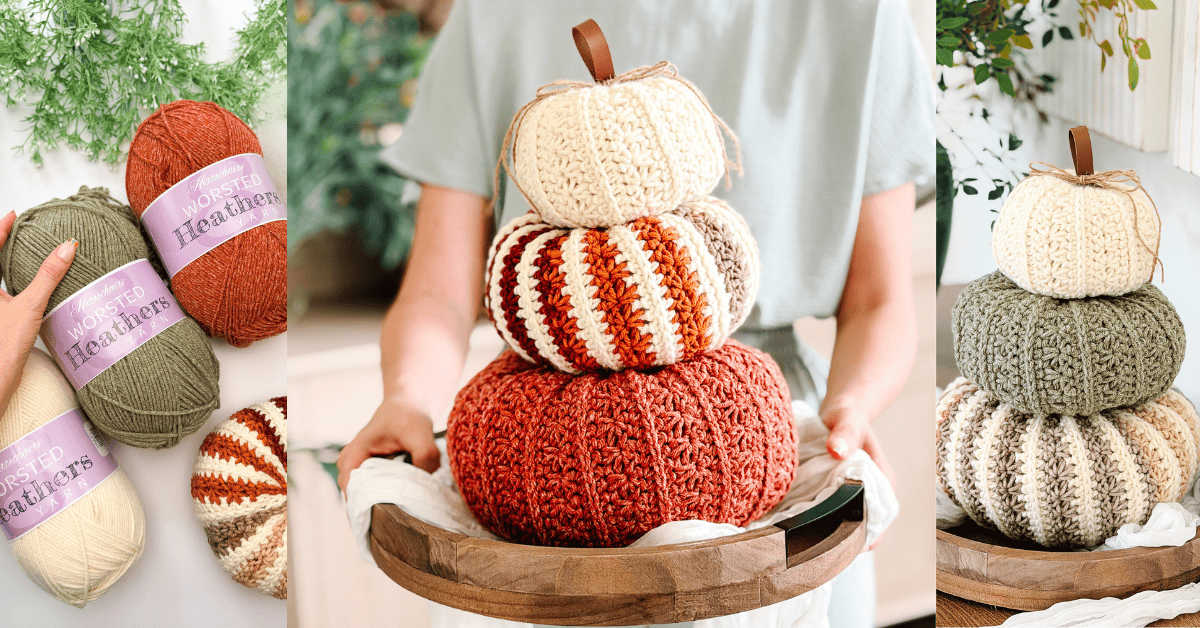
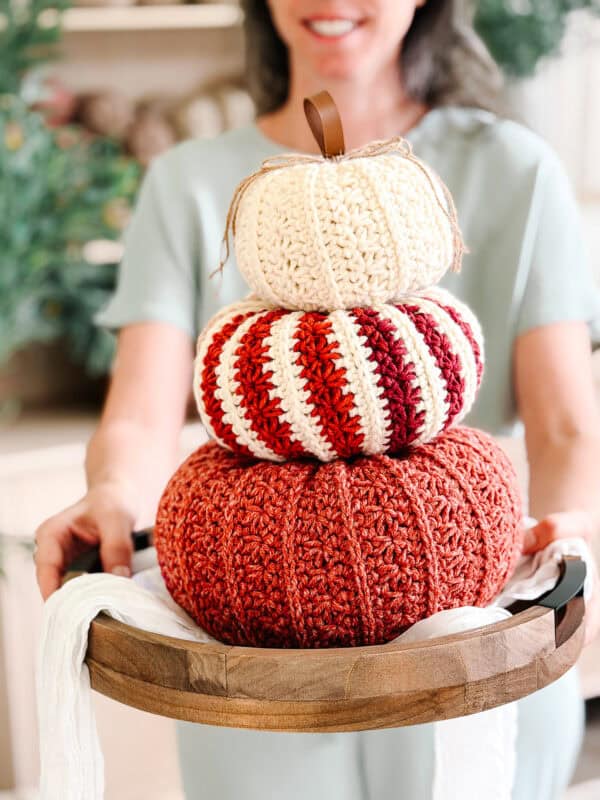
I have made so many of these pumpkins that I can’t tell you which one came first. That is what happens when a stitch gets its hooks in you. I kept pulling out another skein to see what the Petal Loop Stitch would do in a different color, and somewhere along the way I ended up with crochet pumpkin stacks on every surface and loose pumpkins piling up in the corners.
Disclosure: This post contains affiliate links. Please read my disclosure for more info.
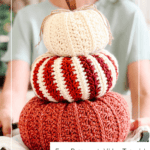
The striped one was not a happy accident, in case you were wondering. I wanted to see how two colors played together across the texture, so I worked the stripes on purpose and then sat there turning it over in my hands for longer than I want to admit.
Here is the part I think you will actually care about. The ridges on these pumpkins are not sewn in afterward. Most crochet pumpkin stacks have you cinch the shape closed and then take a long needle and pull yarn down the outside five or six times to fake the grooves. These do not need that. The Petal Loop Stitch builds the ridges as you go, so when you close the pumpkin up, the texture is already there.
The whole pattern is free right here, all three sizes, nothing held back.
Before You Hook: Petal Loop Pumpkin Trio Pattern Details
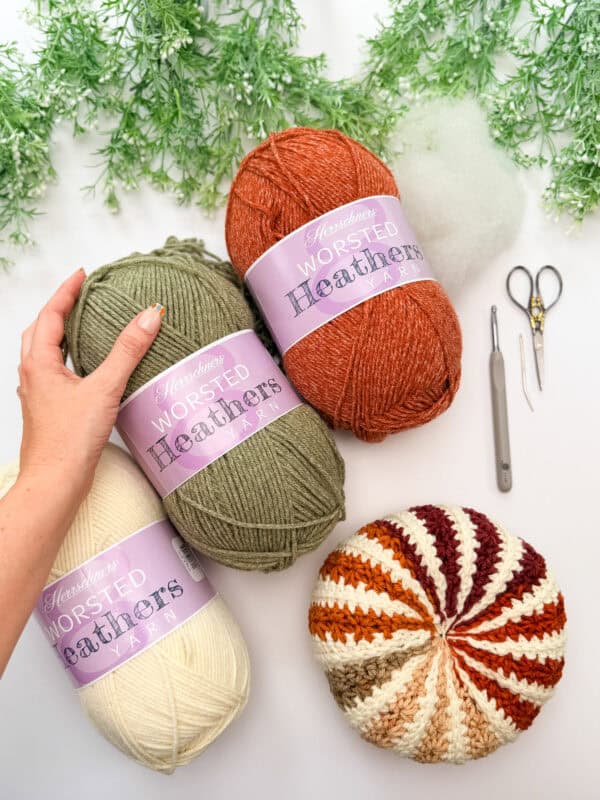
🧶 Yarn Used: Herrschners Worsted 8 Heathers (100% Acrylic, 489yds/226g)
⚖️ Yarn Weight: #4, Worsted
🧵 Featured Stitch: Petal Loop Stitch
🪝 Hook Size: US H (5.0mm) Crochet Hook, or hook to obtain gauge (gauge not critical)
📏 Sizes: Three sizes, Small 5″ x 2.75″, Medium 7″ x 3.5″, Large 9″ x 5″
🩷🩷🩷🤍 Difficulty level: Intermediate
🕐 Approx Crochet Time: 1 to 2 hours for the small, 2 to 3 hours for the medium, and 3 to 4 hours for the large. Around 6 to 9 hours for the full stack.
🏷️ Project Type: A set of three stacking crochet pumpkins for fall decor, worked flat and seamed into a tube, with ridges built into the stitch.
Save for Later • Get a Summary • Pick Up Where You Left Off
Why You’ll Love This Pumpkin Stack
- The ridges come from the stitch itself, so there is no sewing yarn down the outside to fake them
- One set of instructions covers all three sizes, with the size changes in parentheses
- There is a joining method that seams the pumpkin closed while you crochet the last row, so seaming stops being a separate chore
- Two color stripes carry up the inside, which means no ends to weave in at every color change
- A cinnamon stick becomes the stem, so there is nothing extra to crochet and nothing to hot glue
- Stack them permanently or leave them loose and rearrange whenever the mood strikes
- They look amazing with the Wheat Stitch Pumpkin Spice Trio
Petal Loop Pumpkin Trio Pattern Supplies
Yarn
Herrschners Worsted 8 Heathers
100% Acrylic, 489yds/226g
Colors shown: Pearly, Fossil, Saffron, Driftwood
For the colorful pumpkins, switch your color every two rows and carry the unused yarn along the edge. I used Herrschners Worsted 8 Stripes in Foliage and Neutrals, and Herrschners Worsted 8 Specks in Toffee Crunch.
Yarn Quantities
Total: 100 (140, 215) yds
Color A: 40 (60, 90) yds
Color B: 60 (80, 125) yds
Crochet Hook
Size US H (5.0mm) Crochet Hook or hook to obtain gauge.
Notions
Scissors
Yarn Needle
Removable Stitch Marker
Fiberfill
Cinnamon Stick
Faux Leather Ribbon
Be sure to check out the full pattern tips below
Yarn Substitutions
Herrschners Worsted 8, 100% Acrylic, 489yds/226g
Herrschners Halloween Sparkle, 92% Acrylic, 8% Polyester, 489yds/226g
Lion Brand Color Theory, 100% Acrylic, 246yds/100g
Brava Tweed, 97% Premium Acrylic, 3% Viscose, 340yds/100g
Remember always to check the gauge and drape when substituting yarns.
Skill Level
The four-row repeat takes a couple of repeats to click, and after that your hands know where they are going. If you have never worked the Petal Loop Stitch before, watch the stitch tutorial first, and the pattern will read much more easily.
Sizing & Finished Measurements
Small: 5″ wide and 2.75″ tall
Medium: 7″ wide and 3.5″ tall
Large: 9″ wide and 5″ tall
Stacked, the trio stands a little over 11″ tall depending on how firmly you stuff each one and how much they settle into each other.
Changing the yarn weight changes the size. A bulky yarn and a bigger hook will give you a noticeably larger pumpkin from the same instructions. A fingering-weight yarn will give you a noticeably smaller pumpkin. Experiment with all the yarn weights and make a whole pumpkin patch full of variety!
Abbreviations
blo – back loop only
ch – chain
dc – double crochet
hdc – half double crochet
RS/WS – Right Side/Wrong Side
sc – single crochet
sl st – slip stitch
st(s) – stitch(es)
Stsc – stacked single crochet
Third loop – see video
Gauge
14 sts and 12 rows = 4″ x 4″ in stitch pattern
Gauge is not critical here. These are decorative, so a slightly bigger or smaller pumpkin is still a pumpkin.
Tips
How to Crochet A Gauge Swatch
- Working a gauge swatch will let you know if you will have the correct sizing for this pattern. It will also help you practice the stitches used in this project and improve your stitch work for a flawless look.
- Are you struggling to match the gauge? Check out the blog post on What is Crochet Gauge and How To Fix It
Special Stitches Used in This Pattern
Both petal stitches belong to the Petal Loop Stitch, and the tutorial walks through them slowly with video if the written version is not landing.
3-Loop-Petal: Insert the hook into the back loop of the previously worked stitch (or petal) and pull up a loop. Pull up one loop in each of the next two stitches of the previous row, for a total of four loops on the hook. Yarn over and draw through all four loops to complete the stitch.
2-Loop-Petal: Insert the hook into the back loop of the previously worked stitch (or petal) and pull up a loop. Pull up one loop in the next st/space, for a total of three loops on the hook. Yarn over and draw through all three loops to complete the stitch.

Important Pattern Notes
How the Petal Loop Pumpkin Trio is Made
Each pumpkin is worked flat, then seamed into a tube. That is what makes the Petal Loop texture run vertically around the finished pumpkin, just like the ridges on a real rind.
Every row begins and ends with a slip stitch section worked in the first and last 4 sts. Those sections build a firm border along both ends of the piece, and once the tube is seamed, those borders become the top and bottom rims. That is what you cinch. It gives you a tidy edge to pull against instead of gathering loose stitch loops and hoping it closes evenly.
You get two ways to seam. Option 1 works the final row into Row 1 as you go, so each stitch finishes and seams in the same motion and there is no separate seaming step waiting for you at the end. Option 2 slip stitches the starting chain edge to the final row once the body is done, if you would rather keep the two jobs separate.
From there, stuff, cinch, and add a cinnamon stick for the stem.
What Makes These Ridges Different
Most crochet pumpkin stacks get their ridges one of two ways. Either you work rows of half double crochet in the back loop only, which gives you a ribbed rectangle, or you finish the pumpkin and then thread a long needle with yarn and pull it down the outside five or six times to indent the shape.
The second method works. This is also where a lot of people get frustrated: the ridges have to be spaced evenly by eye, the long needle is awkward inside a stuffed pumpkin, and pulling too tight on one and not enough on another gives you a lopsided result.
Here the ridges are structural. The Petal Loop Stitch creates a raised column of texture as part of the four-row repeat, and seaming the flat piece into a tube turns that texture into the vertical grooves. When the pumpkin is closed, the shaping is already done. No long needle, no eyeballing the spacing, no yarn pulled down the outside.
The practical upshot is that every pumpkin in the stack looks like it belongs with the others, which matters when you are lining up three sizes.
Stacking Options: Attach or Rearrange
You do not have to commit. I left mine loose, and I move them around constantly depending on where they end up and what else is on the shelf.
If you want a set that stays put, stack them and sew a few stitches between the pumpkins to hold them in place. One thing to plan ahead for: if you are permanently stacking the trio, only leave a stem opening on the smallest pumpkin. Close the other two all the way, since their tops will be hidden anyway.
If you leave them loose, close all three the same way and add a stem to each one. Then you can stand them in a row, stack them in a different order, or split them between two rooms.
Either way, skip the hot glue. Sewn stitches hold fine, and you can undo them later if you change your mind.
Striping Without Weaving in a Pile of Ends
The striped pumpkin was intentional. I wanted to see how two colors sat against each other across the texture, and the answer is that the Petal Loop rows and the single crochet rows read as two very different stripes, so the contrast is stronger than you would expect from a simple two-color repeat.
To stripe: work Rows 1 and 2 in one color and Rows 3 and 4 in a different color. Change colors by yarning over with the new color when you make the last stitch of the row before the new color begins.
The important part is what you do not do. Do not fasten off. Keep both colors attached and carry the unused yarn up the edge of the pumpkin. Since the piece becomes a tube, that carried yarn on the edges ends up hidden where nobody will ever see it, and you finish with two ends instead of a dozen.
Plan Your Colors Before You Start
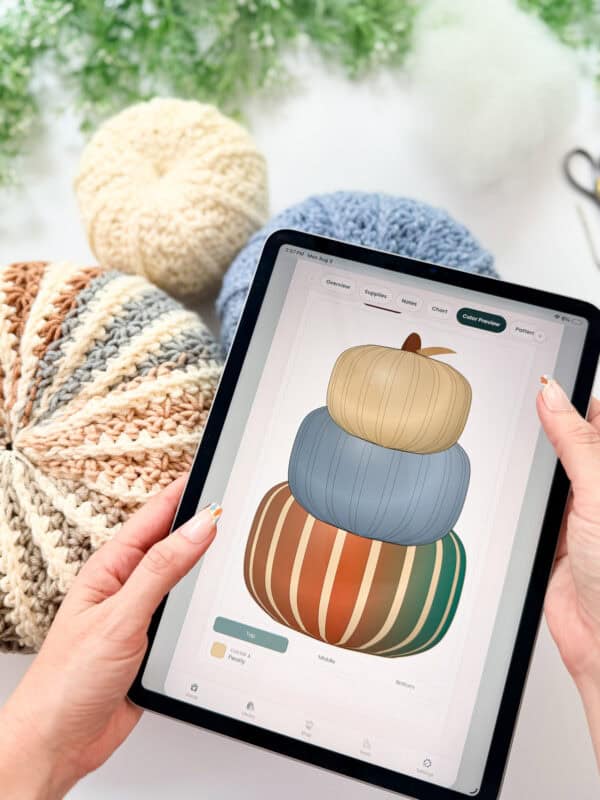
If you want to see how a color combination will look before you commit yarn to it, the full pattern in the Briana K app includes a built-in color planning tool. You can map out exactly how you want each pumpkin to come out, which is genuinely useful for the striped version where the two colors trade places every two rows and it is hard to picture from the skeins alone.
It saved me a fair amount of guessing, and it is a lot cheaper than buying a color you end up not liking.
Pumpkin Stack FAQs
What is the easiest way to crochet a pumpkin?
The easiest method is to work a flat rectangle and seam it into a tube, which is exactly what this pattern does. Working in rows means no counting rounds, no magic ring, and no increasing or decreasing to track. You cinch the top and bottom, stuff it, and add a stem. Pumpkins worked in the round require shaping as you go, and while they are not difficult, they demand more attention. If you are brand new to crochet pumpkins, start flat.
What yarn works best for crochet pumpkins?
Worsted weight holds its shape best, which is why this pattern uses a #4 acrylic. Acrylic in particular has enough body to keep the pumpkin from slumping once it is stuffed, and it will not absorb humidity sitting out on a mantel all autumn. Cotton works, though it is heavier and tends to sag a little in the larger sizes. Wool is lovely and gives a softer, rounder look. If you want a bigger pumpkin without changing the instructions, move up to a bulky yarn and a larger hook.
How do you make a crochet pumpkin stack?
Make one pumpkin in each size, then stack them largest to smallest. This pattern gives you a small, a medium, and a large from one set of instructions, and the sizes are proportioned to sit on each other without the top one sliding off. Sew a few stitches between the pumpkins if you want them to stay together, or leave them loose. If you are attaching them, only leave a stem opening on the smallest pumpkin, since the tops of the other two will be covered.
Do you have to attach the pumpkins together?
Not at all. Mine are loose, and they stay stacked perfectly well on their own, mostly because the flat cinched tops and bottoms give them a stable surface to rest against. Loose also means you can rearrange them, split them up across different rooms, or hand one to a kid who wants to carry it around. Attach them if the stack is going somewhere it will get bumped, like a table where people reach across.
How do you keep a crochet pumpkin from looking like a ball?
Two things do the work here. First, the ridges: this pattern builds them into the stitch, so the pumpkin already has vertical grooves instead of a smooth surface. Second, the shaping tail. After the pumpkin is stuffed and closed, weave the tail through the center of the pumpkin and out the bottom, catch a few strands at the center bottom, then bring it back up through the center to the top. Pulling that gently flattens the pumpkin from a sphere into a proper squat pumpkin shape. Repeat as needed until it looks right. Also, do not overstuff. That is the most common reason a crochet pumpkin ends up looking like a ball.
Can I make these bigger or smaller?
Yes, and you do not need to change a single stitch count. Changing your yarn weight changes the size. Move to a bulky yarn with a larger hook for a bigger pumpkin, or a DK or sport weight with a smaller hook for a smaller one. The proportions stay the same because everything scales together. This is the simplest way to add a fourth size to the stack or to make a set of tiny pumpkins for a shelf.
How much yarn does a crochet pumpkin take?
Not much, which is what makes these such good stash projects. The small takes about 100 yards total, the medium about 140, and the large about 215. If you are striping, that splits into roughly 40 (60, 90) yards of Color A and 60 (80, 125) yards of Color B. A single 489-yard skein of worsted will get you through the whole trio with yarn to spare, so this is a solid way to use up the partial skeins that have been sitting in your bin since last fall.
Subscribe, Like & Watch on YouTube
Relax & Crochet with NO Ads
Upgrade to the Printable PDF
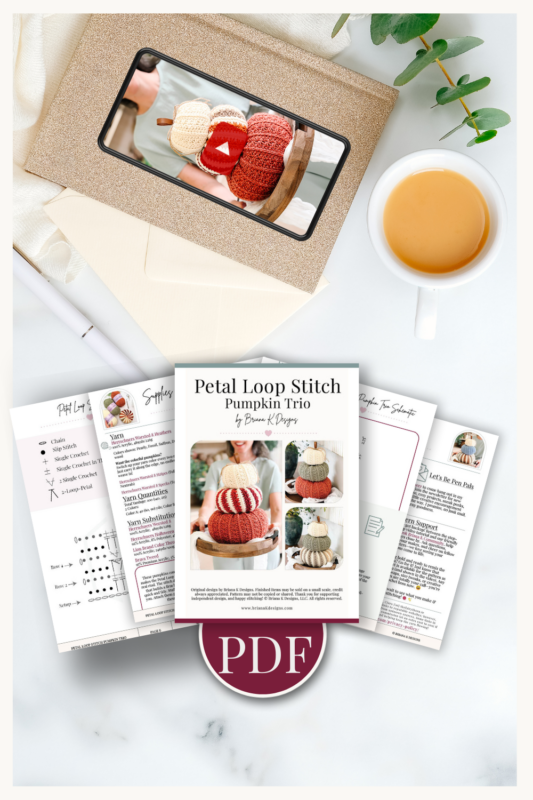
Beautifully formatted to print and take with you anywhere. The paid pattern includes:
Add your email in the box below to unlock this pattern to view on the blog for free. I’m thrilled to share this amazing crochet pattern with you! Please don’t copy, paste, or distribute this pattern. Prefer an ad-free experience? Purchase a digital PDF file for a small fee from one of my online stores. I appreciate your support and readership. You are why I can keep doing what I love and sharing it with others. Thank you from the bottom of my heart.
Printable Version
This pattern is free to read here on the blog. The ad-free printable PDF is available in the Briana K Designs shop on Etsy and Ravelry.
brianakdesigns.com
Petal Loop Stitch Pumpkin Trio Written Pattern
Rows 5 to 36 (52, 68): Repeat Rows 1 to 4 a total of 8 (12, 16) additional times. | 24 (28, 32) sts
If using Joining Option 1, leave the last row unworked, as you’ll crochet and join it at the same time.
Joining Option 1
The last row closes the pumpkin into a tube, so you’ll seam it to Row 1 as you crochet instead of sewing it later.
Work the row exactly as written, with one change to every stitch. Before inserting your hook into the stitch on your current row, insert your hook through the matching stitch on the base of Row 1. Then yarn over and pull through everything on your hook, including that Row 1 stitch. Each stitch finishes and sews in the same motion. Fasten off, leaving a long tail, then turn the tube so the right side is facing out.
Joining Option 2
With the wrong side facing out, sl st the starting chain edge to the final row, working through the blo of the final row and the corresponding loop along the chain edge.
Fasten off leaving a long tail, then turn the tube so the right side is facing out.
Join The Kindest Community
Join our vibrant community of crafters on Facebook today. Whether you enjoy crafting with others or simply have burning questions, we’ve got you covered – join us now!
Closing Tops and Bottoms
Make sure your pumpkin is facing right side out.
Using the long tail and your yarn needle, loop through each ridge of the bottom all the way around. Pull closed and weave in the end.
Stuff the pumpkin with fiberfill and keep stuffing as you begin to close the top. Don’t overstuff.
Attach a new strand at the top of the pumpkin, loop through each ridge all the way around, and cinch the opening closed around the stem or cinnamon stick.
If you’re permanently stacking the trio, only leave a stem opening on the smallest pumpkin.
Weave the tail through the center of the pumpkin and out the bottom, catch a few strands at the center bottom, then bring it back up through the center to the top. Repeat as needed to shape the pumpkin.
Styling Your Pumpkin Stack
The pattern gives you a cinnamon stick stem and a ribbon bow, and honestly that is plenty. But the top of a pumpkin is a small stage, and if you want to dress it up, here are the things I have tried or watched other makers do beautifully.
- Swap the cinnamon stick for a real twig from the yard. Nothing says fall like a stem you found on a walk, and it costs nothing.
- Tie on a raffia or jute bow instead of the faux leather ribbon for a more rustic, farmhouse look.
- Tuck a few faux fall leaves or eucalyptus sprigs in where the pumpkins meet, so the stack looks like it grew that way.
- Add a small crocheted leaf or two at the base of the stem. A curly tendril made from a chain worked back on itself is a nice touch here.
- Wrap a strand of tiny battery fairy lights loosely around the stack for evenings and holiday tables.
- Tie a wooden tag or a tiny bell to the ribbon if the stack is going somewhere seasonal, like a mantel or a front entry table.
- Try a coat of matte spray or a light dusting of fabric stiffener on the largest pumpkin if you want it to hold a crisper shape under the weight of the others.
- Set the trio on a wooden dough bowl, a cake stand, or a stack of old books to give it some height.
One thing I would gently steer you away from is anything heavy on the top pumpkin. The small one is doing the least structural work in the stack, and a chunky ornament up there tends to tip the whole thing forward. Keep the weight low and the decoration light.
Finishing
Fasten off and weave in your ends. If you’re adding a ribbon, tie it in a bow around the stem and fuss with the loops until it sits how you like it.
Stacked or standing on their own, these look good just about anywhere you set them down. A mantel, or the entry table where the mail usually piles up. Enjoy them all season long.
More Crochet Patterns You’ll Love
If you are stocking up on fall decor, these are the ones I reach for.
🥂 Cheers, and happy crocheting!
Get the Petal Loop Stitch Pumpkin Trio Pattern
The complete pattern is free on the blog, in all three sizes.
If you would rather have a printable copy without ads, the PDF includes the stitch chart, the schematic, both seaming options, and Easy Print pages for when you are short on ink.
Etsy: Get the PDF here
Ravelry: Add to your Ravelry Library
YouTube tutorial: Watch here
Color planning tool: Briana K app
If you make a stack, I would love to see it. Tag #brianakdesigns so I can find it.
Psst: my crochet pattern app keeps your row count and your place for you, plus four free crochet tools. No subscription required.
Hook down? Not so fast…
I’d Love to See Yours!
You made something beautiful. Here’s how to keep it, show it off, and inspire the next maker.

What should you make next?
Keep the hook movingReaders Are Loving
 Blossom Granny
 Wheat Stitch Chick
 Wheat Easter Egg
 Wheat Stitch Carrot