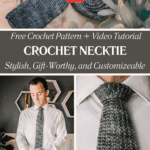

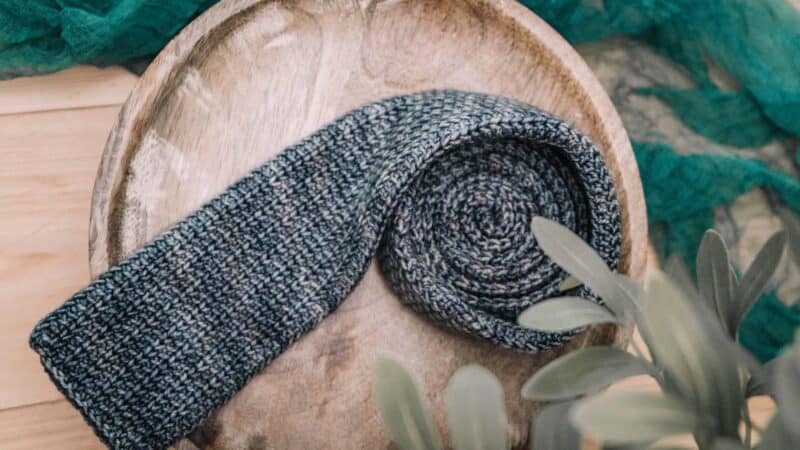
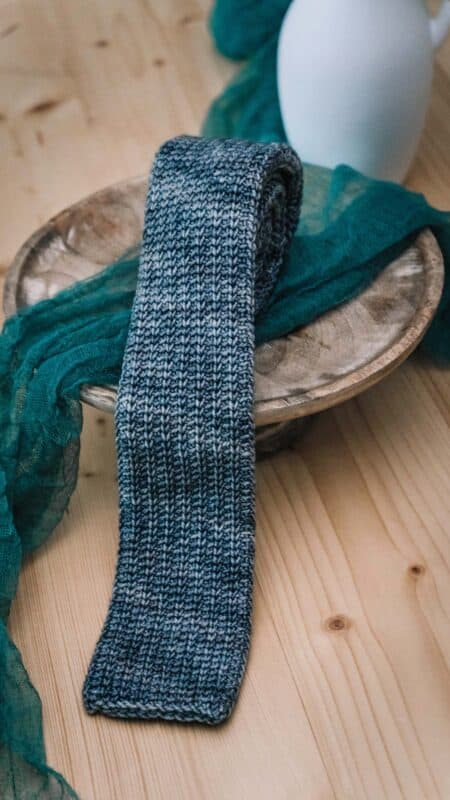
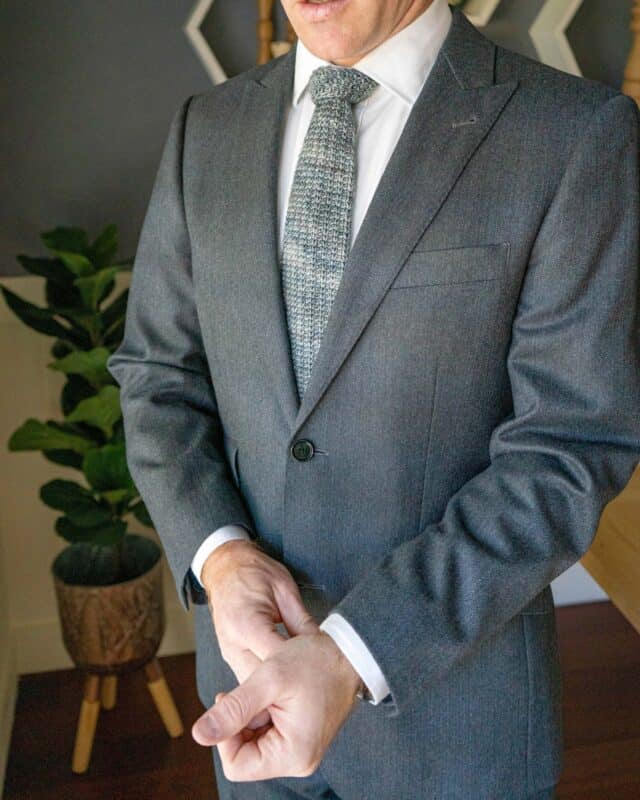
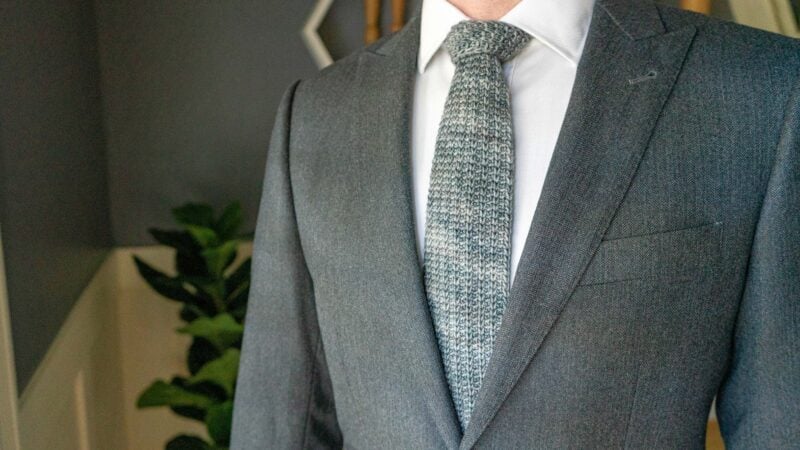
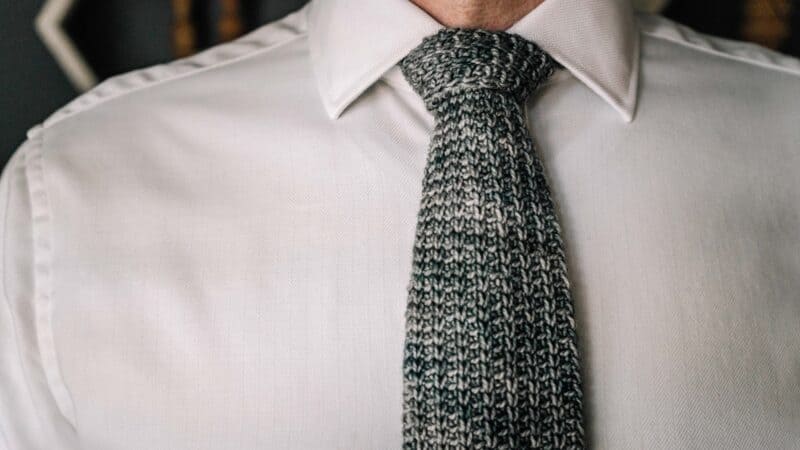
If you’ve ever searched for a high-quality crochet tie pattern for men, you already know they’re surprisingly rare. This free necktie pattern is here to fill the gap — combining timeless style with the rich texture of crochet.
Disclosure: This post contains affiliate links. Please read my disclosure for more info.
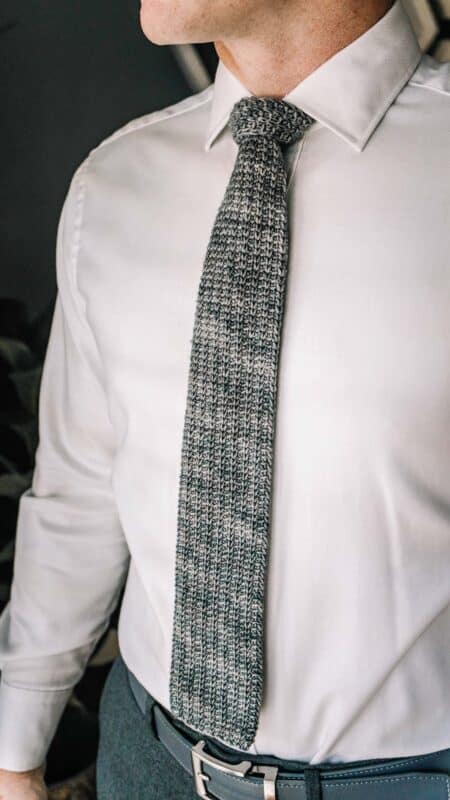
Made with elegant knit-purl-inspired stitches, this tie works beautifully for birthdays, Father’s Day, weddings, holidays, or simply adding a modern handmade accessory to your wardrobe. While it may take more time than buying one, the result is a thoughtful, custom-made gift that will be cherished for years.
And if you love the look of the crochet knit-purl stitch, check out these patterns:
Crochet Knit Purl Free Pillow Pattern
Crochet Knit Purl Free Hat Pattern
Simple And Best Crochet Sock – Free Pattern
Vine Colorwork Crochet Sock – Free Pattern

This crochet tie pattern is gender-neutral and easy to adjust for different sizes and styles, making it a wonderful project whether you’re crafting for yourself, a partner, or a stylish little one in your life. Crocheting a tie does take more time than purchasing one from a store. A lot of love and thought is put into picking the yarn and each stitch.
What yarn should you use to make a crochet tie?
What’s the best yarn for a crochet tie?
When crafting something as tailored as a tie, the fiber matters. You want your finished piece to drape well without being too stretchy or bulky. Here are some great suggestions:
Stroll – 75% Fine Superwash Merino Wool, 25% Nylon
Stroll Tonal – 75% Fine Superwash Merino Wool, 25% Nylon
Hawthorne Fingering Kettle Dye – 80% Fine Superwash Highland Wool, 20% Polyamide (Nylon)
Gloss Fingering – 70% Merino Wool, 30% Silk
How do you determine the crochet tie length?
How long should a crochet tie be?
The best way to determine the tie length is by the person’s height. Here are some other general rules and a size chart:
- For most adults, a tie should hit right at or just above the belt buckle.
- For someone tall or using a larger knot (like a Full Windsor), add a few extra inches.
- A finished length of 55–60 inches is a safe starting point for average adults.
Pro tip: If gifting, measure a favorite tie they already own and use it as a guide.
| Tie Size | Body Height | Tie Length |
| Short | Less than 5’9″ (175 cm) | 53″ to 55″ (135 to 140 cm) |
| Standard | 5’9″ to 6’3″ (175 to 190 cm) | 57″ to 58″ (145 to 147 cm) |
| Long | More than 6’3″ (190 cm) | 61″ to 63″ (155to 160 cm) |
Crochet Tie Supplies


Crochet Hook:
3.5mm (E hook), or crochet hook to obtain gauge
Notions:
Removable stitch markers if needed
Yarn needle to weave in ends
Scissors
Yarn:
Hawthorne Tonal Hand Painted
80% Fine Superwash Highland Wool, 20% Polyamide (Nylon), 357yds/100g
Colorway Shown: Astoria
Yardage:
300yds
Abbreviations/Stitches:
ch – chain
rnd- round
sc – single crochet
ssc – split single crochet
sl st – slip stitch
st(s) – stitch(es)
Gauge:
22 sts x 21 rows = 4×4 inches in est st pat (see Rnd 2 of Front Body of Tie)
Skill Level:
Easy Beginner
Size:
Short, Standard, Long (see chart above)
Crochet Tie Pattern Notes
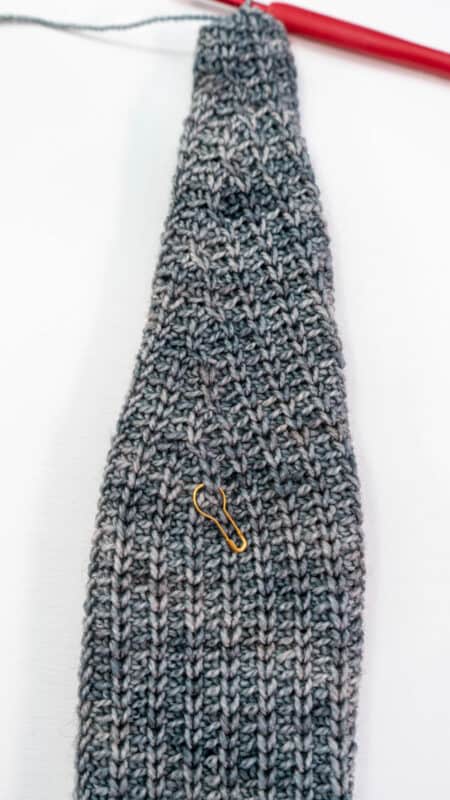
The Crochet Men’s Tie is worked in the round without joining. A stitch marker is helpful for keeping track of your rounds. It is worked from the bottom up with the wider part of the tie first, then we will decrease for the smaller section used to tie around the neck.
This tie can easily be made wider or narrower by adding more or fewer starting chain stitches in multiples of two.
Since this is worked continuously, a ch 1 at the beginning of the round is not needed. It is helpful to place a stitch marker on the first stitch of each row.
Tip: As the tie gets longer it might get bunched on your lap as you rotate. Place the tie in a shallow bowl and turning your work becomes more manageable.
✅ FAQs
❓Can beginners crochet a tie?
Yes! This pattern is beginner-friendly and includes straightforward stitches with no shaping.
❓Is this pattern adjustable for kids or women?
Absolutely! Just reduce the foundation chain length and taper the width slightly to suit smaller sizes or styles.
❓How do I block a crochet tie?
Steam blocking is best. Pin the tie flat, gently steam without pressing too hard, and let dry completely to set the shape.
Crochet Tie Video Tutorial

Special Stitches:
Split Single Crochet (ssc), also known as the waistcoat stitch:
Insert hook between the legs of the stitch (on the back of work the hook should be under the horizontal bar and between the upside-down ‘V’ shape as well), yarn over, pull up a loop to the height of a single crochet, yarn over, pull through both loops on hook. Tip: Keep a loose tension so the stitches are easily worked.
ssc3tog: insert hook into the next ssc, yo and pull a loop, skip the next blo sc sts, insert hook into the next ssc, yo, pull up a loop, yarn over and pull through all of the loops on the hook.
If you want to purchase the downloadable ad-free pattern, visit WeCrochet, Ravelry, or Etsy.
Written Instructions for Crochet Tie:
Click the box below to unlock this exclusive subscriber content for free. Add your email and create a password. If you are having trouble, reset your password or log in to the Grow Portal.
I’m thrilled to share this amazing crochet pattern with you! Please don’t copy, paste, or distribute this pattern. Prefer an ad-free experience? Purchase a digital PDF file for a small fee from one of my online stores. I appreciate your support and readership. You are why I can keep doing what I love and sharing it with others. Thank you from the bottom of my heart.
Decreasing the Neck of the Tie
Rnd 1:
Ssc2tog, in blo sc 1, *ssc in next, in blo sc 1*; repeat from * to * around. (decreases 2 sts)
Rnds 2-3:
*In blo sc 1, ssc in next*; repeat from * to * around.
Repeat Rnds 1-3 until the stitch count is 12 sts. (see photo on next page)
Special Tip:
To keep the decreases on the back of the tie, it might be necessary to change the placement of where you decrease. Sometimes, you may need to decrease before the start of the round.
Tail of Tie
Rnd 1- 147:
*In blo sc 1, ssc in next*; repeat from * to * around.
This is for a standard tie on a man 5’11”, crochet fewer or more rounds to adjust the tie length.
Finishing the Tie
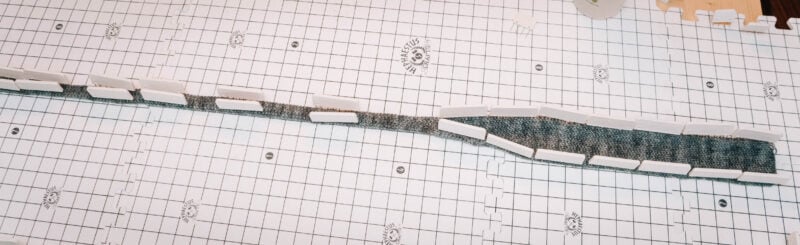
Fasten off and leave the tail ends for later. Next, block the tie. It’s best to use blocking mats and pins, but getting the item damp and laying across a surface can work well too. Once the tie is blocked, use the tail ends to seam each opening closed.
The Men’s Crochet Tie Pattern is more than just an accessory — it’s a thoughtful, handmade piece that blends tradition with modern style. Whether you’re creating it as a gift or a personal wardrobe upgrade, this tie adds character and charm to any outfit.
Do you knit? I also have these knit tie patterns available:
Kingston Tie Knit Pattern
Carlisle Knit Bow Tie Pattern
Wakefield Men’s Knit Tie Pattern
Bradford Knit Tie Pattern
Well, That Was Fun! What’s Next?