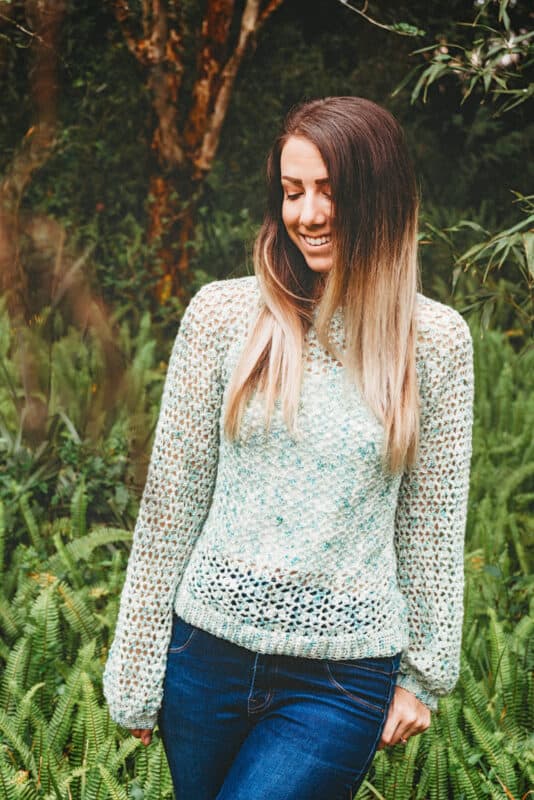
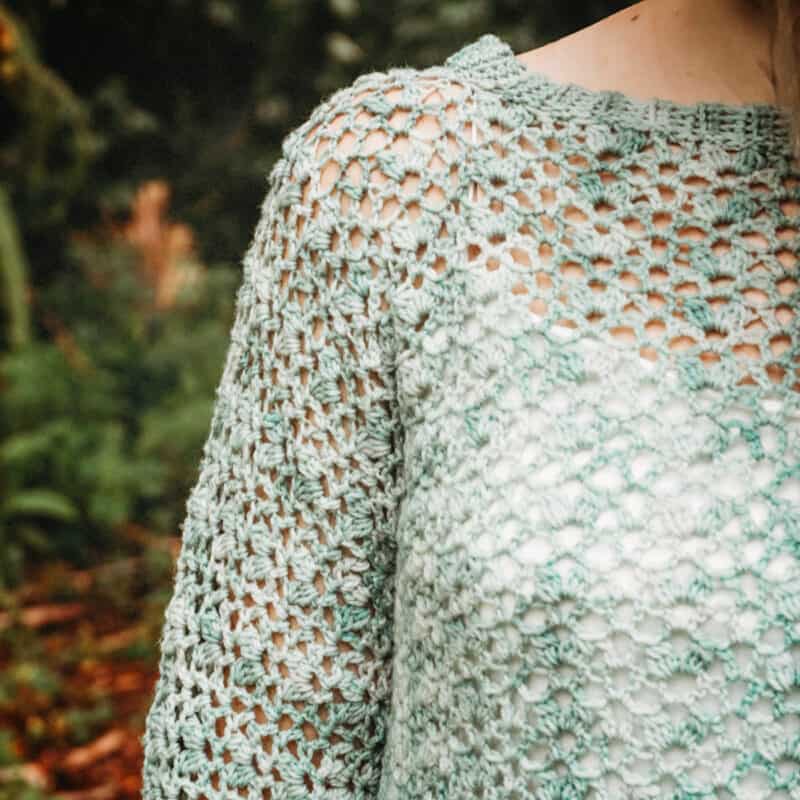
Easy Muse Crochet Summer Top


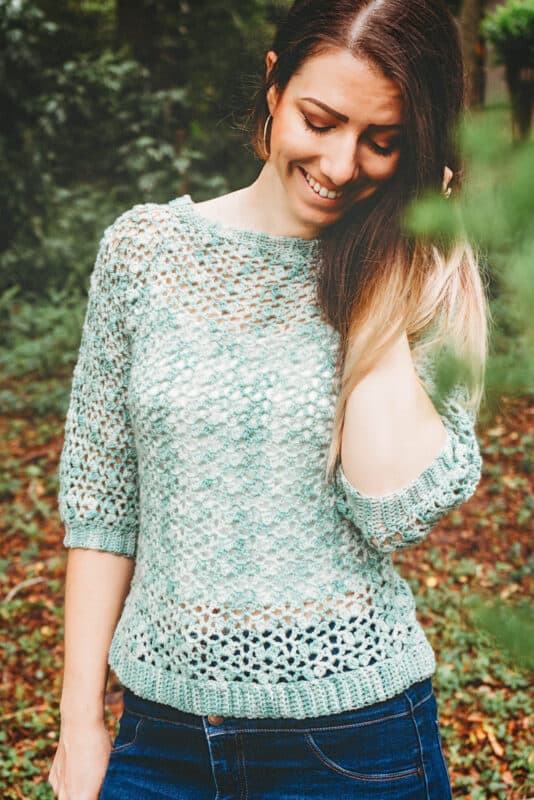
This is the time of year to put away the bulky yarn and get out the lightweight, perhaps for something like the Muse Crochet Summer Top Pattern. With this simple stitch repeat and easy crochet lace, it's not only fun to make but comfortable to wear. Love building a summer wardrobe? Also check out the Easy Beginner Summer Crochet Tank Top Free Pattern or the Lollipop Summer Simple Cardigan Crochet Pattern.
Disclosure: This post contains affiliate links, meaning I get a commission if you decide to make a purchase through my links, at no cost to you.
What else do I love about this pattern? It's created as one piece and in rows. So if you are a beginner crocheter and want to try your hand at garments, this crochet pattern is for you. It's a great addition to a summer crochet project!
About The Yarn
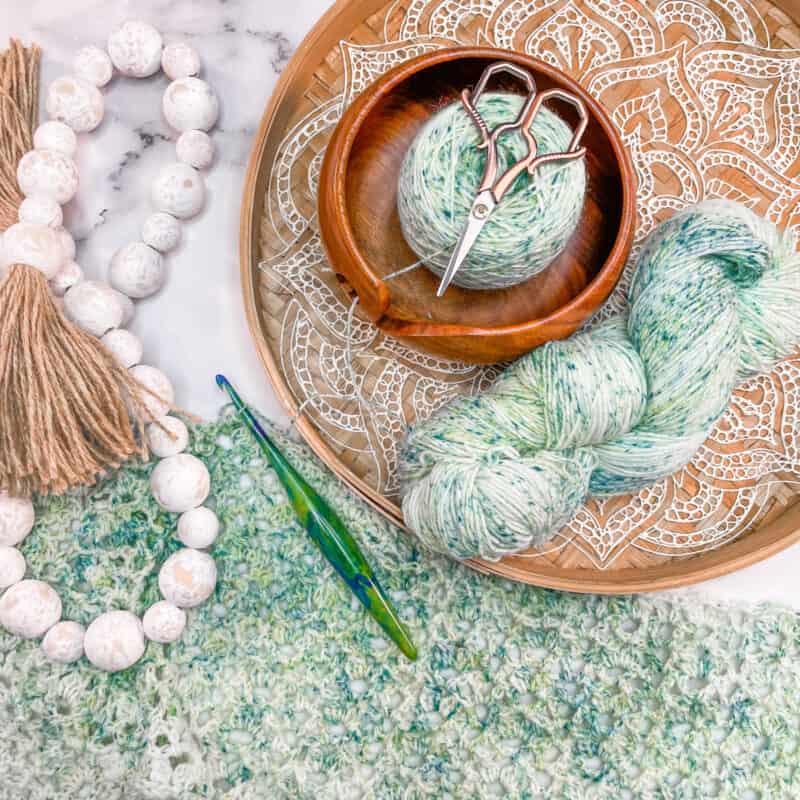
The Muse Hand Painted Fingering yarn is a perfect choice for creating beautiful garments and accessories. Its softness and lovely colors make it ideal for sweaters, shawls, hats, mittens, socks, scarves, and toys. The fingering weight of this yarn makes it suitable for all sorts of projects - from delicate lacework to complex cables! It’s also incredibly easy to work with and feels fantastic on your skin. The vibrant colors of this yarn will make any project stand out, while its softness will keep you comfortable all day. Plus, the hand-painted nature of the yarn gives it unique character that can’t be found anywhere else. Whether a beginner or an experienced knitter, Muse Hand Painted Fingering Yarn is an excellent choice for creating beautiful projects, you’ll love to show off.
Depending on the size of the garment you choose to make will determine how much yarn is used.
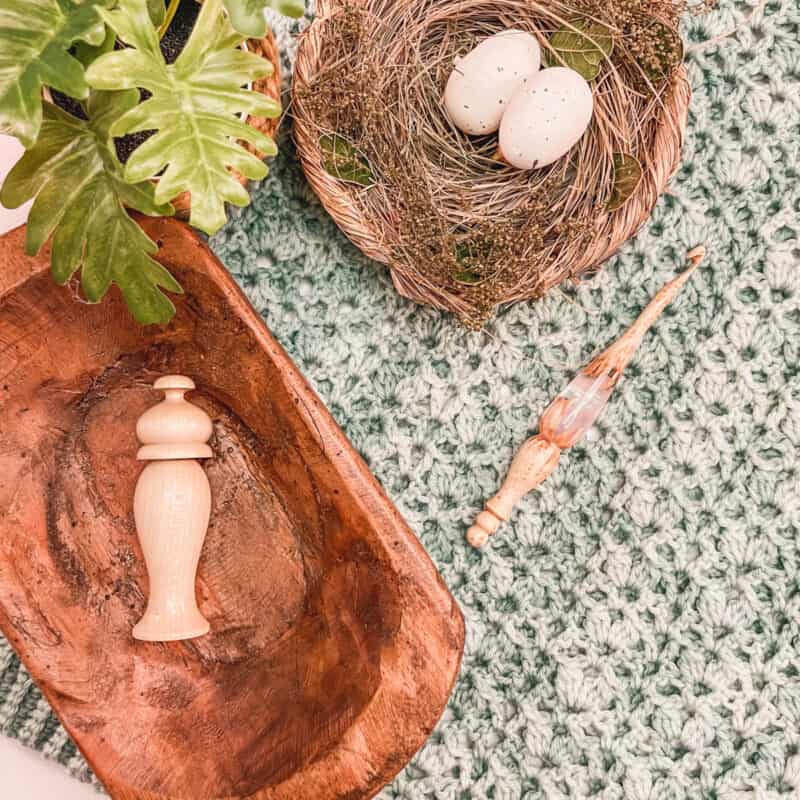
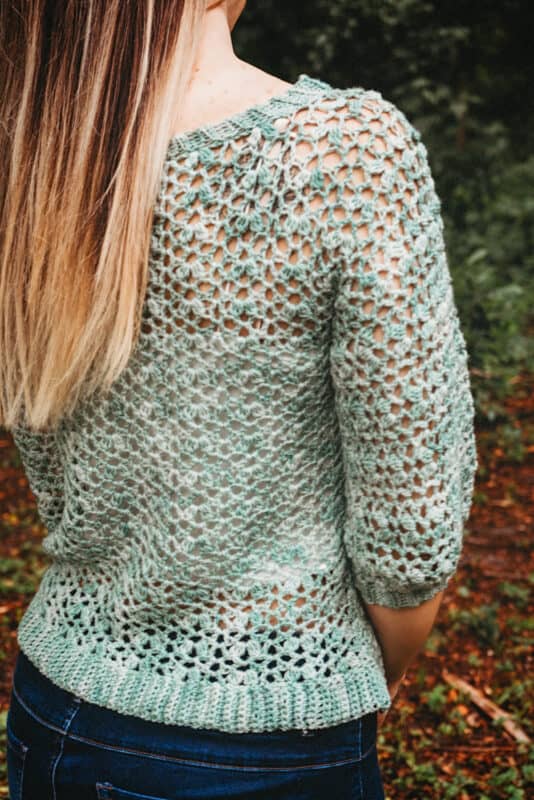
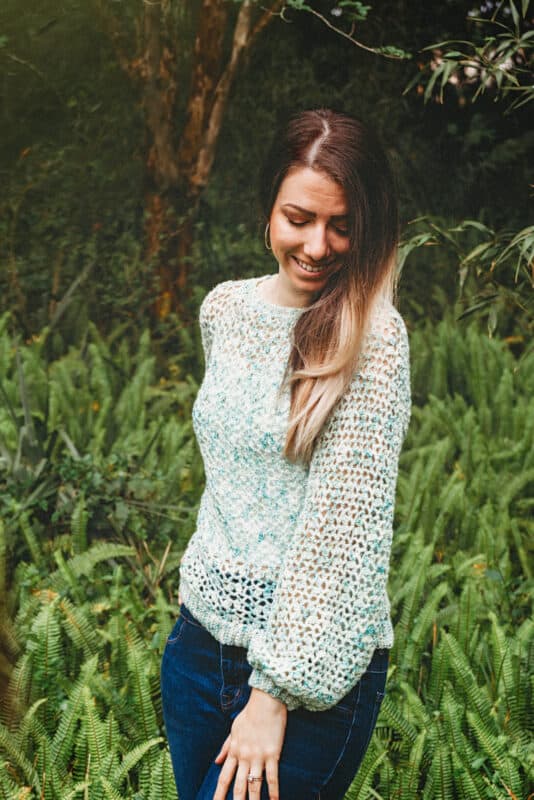
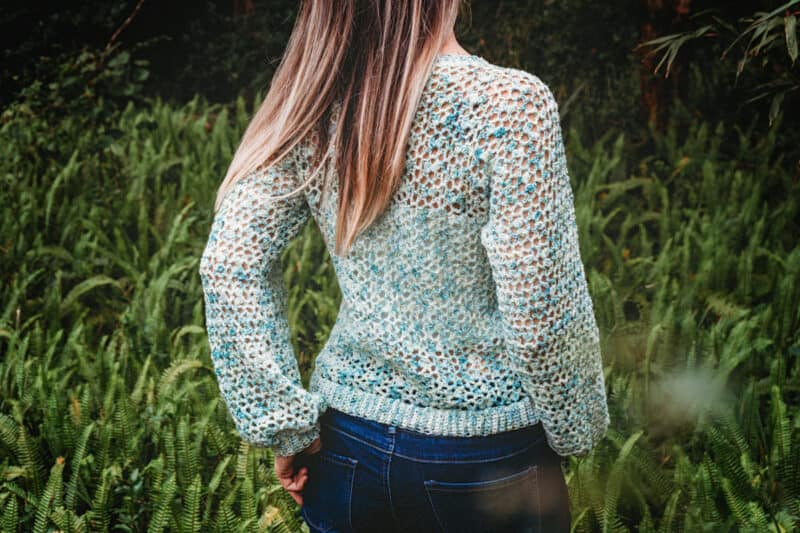
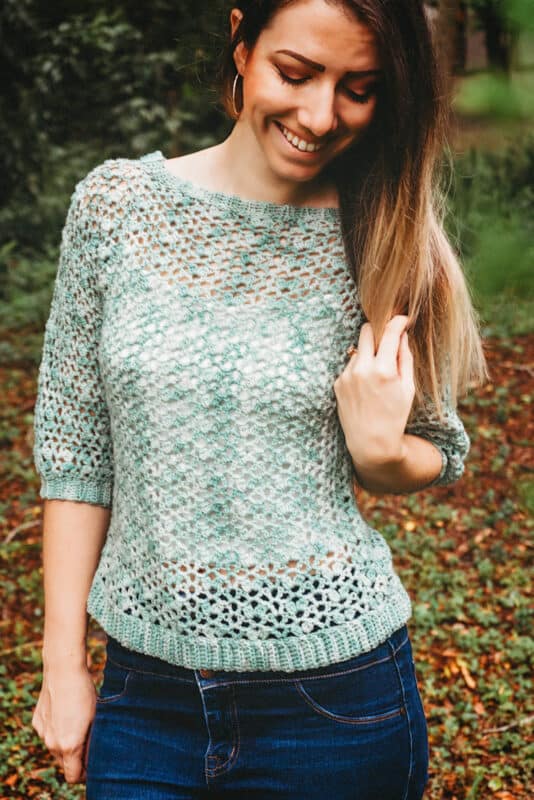
I just couldn't decide which I liked more, Muse Hand Painted Fingering or Stroll Tonal Fingering. So I made a top in each! I also adjusted the length of the arms to mix up the style. Crafting peace right there. And if you like creating garments where you don't have to work in the round, you might also like the The Lacy Key Largo Top, the Honeycomb Crochet Tank Top Pattern, or the Summer Crochet Beginner Tank Top.
Crochet Lace Sweater Supplies
Crochet Hook:
H (5mm) & G (4mm) for ribbing, or hook size to obtain gauge


Notions:
Removable stitch markers if needed
Yarn needle to weave in ends
Scissors
Carry essentials in one of these Everyday Tote Bags.
Yarn:
WeCrochet Muse Hand Painted Fingering
75% Superwash Merino Wool, 25% Nylon, 423yds/100g
Colorway: Mystical Speckle
2 (3, 3, 3, 3) (4, 4, 4, 5) Hanks
OR
WeCrochet Stroll Tonal Fingering
75% Superwash Merino Wool, 25% Nylon,
462yds/100g
Colorway: Eucalyptus
2 (3, 3, 3, 3) (4, 4, 4, 5) Hanks
Yardage:
Extra Small: 825yds (732m)
Small: 900yds (777m)
Medium: 1180yds (914m)
Large: 1120yds (1006m)
1X: 1245yds (1120m)
2X: 1370yds (1234m)
3X: 1495yds (1349m)
4X: 1620yds (1463m)
5X: 1745yds (1577m)
Abbreviations/Stitches:
blo -back loop only
ch -chain
cl st -Cluster Stitch
dc - double crochet
est st pat - established stitch pattern
sc - single crochet
Stsc - stacked single crochet
st(s) -stitch(es)
Gauge:
18 sts by 7.5 rows = 4x4” in st pattern from the front body in multiples of 8 + 2
Skill Level:
Beginner Garment/Intermediate
Size:
Finished Bust Sizes
Extra Small: 30” (76 cm)
Small: 34” (86 cm)
Medium: 38” (97 cm)
Large: 42” (107 cm)
1X: 46” (117 cm)
2X: 50” (127 cm)
3X: 54” (137 cm)
4x: 58” (147 cm)
5x: 62” (158 cm)
*This garment has approx.
2” (5 cm) of ease.
Notes:
Sizes are written as: xs (s, m, l, 1x) (2x, 3x, 4x, 5x) and measurements include 2 inches of ease. Yardage is calculated for the long sleeve size.
This lace crochet summer top is worked flat and then seamed down the arms and sides. Then ribbing is crocheted around top neck, arms, and bottom of the top.
This pattern substitutes a traditional chain 2 on the edges for a Stacked Single Crochet.
Special Stitches:
Cluster: Yarn over, insert hook into stitch or space, yarn over, draw up a loop, yarn over, draw through 2 loops. Repeat from * to * two more times. (4 loops on hook). Yarn over and pull through all 4 loops on the hook.
Cluster V: (cl st, ch 3, cl st)
Dc V: (dc, ch 2, dc)
Stacked Single Crochet (Stsc): This can also be substituted with a chain 2 if desired. Do not chain, insert hook into next stitch, yo, pull up a loop, yo and pull through both loops, insert hook in the vertical bar below, yo, pull up a loop, yo and pull through both loops on the hook.
Crochet Top Video Instruction:
Relax & Crochet
Upgrade to the Printable PDF
Beautifully formatted to print and relax while crocheting. The paid pattern includes:
The Crochet Muse Sweater Ad-free PDF can be purchased on Etsy or Ravelry.
Crochet Summer Top Written Pattern
To Unlock Exclusive Subscriber Content click the Box below and join for free by simply adding your email and creating a password! If you are having troubles, reset your password or login to the Grow Publisher Portal.
I'm thrilled to share this amazing crochet pattern with you, many patterns on my blog are absolutely free! I kindly request that you don't copy and paste or distribute this pattern. Prefer an ad-free experience? Buy a digital PDF pattern for a small fee from one of my online stores for a seamless crafting journey. I appreciate your support and readership. You are the reason I can keep doing what I love and sharing it with others. So, thank you from the bottom of my yarn-loving heart!
Disclosure: This post contains affiliate links, meaning I get a commission if you decide to make a purchase through my links at no cost to you.Setup: Length just below the elbow: ch 47 Length to wrist: ch 87 These chains are for adding the sleeves, they will be placed to the left and the right of the body. *Note: If you want to change your sleeve length adjust by chaining in multiples of 8 + 7.
Row 22: With the WS facing, and after chaining the desired amount of chains for the sleeves, treat the first two Dc sts along the body edge as a V-st and place a Dc V between them, *Dc V in the next ch space*; repeat from * to * across the body section until the last 2 dc sts. Treat the last two Dc sts along the body edge as a V-st and place a Dc V between them. Ch the same number of chains as in the beginning of the row, turn.
Row 23: In the first ch from the hook Stsc, dc in the same sts, *skip 3, Cluster V in next, skip 3, Dc V in next*; repeat from * to * across until the body section. Skip the last 2 chains and the first dc stitch on the body, Dc V into the chain space. Repeat the est st pattern across the body portion until the next chain section. Skip the last dc and 2 ch sts, **Cluster V in next, skip 3, Dc V in next**; repeat from ** to ** across until the last st, 2 dc in the last, turn.
Repeats: Repeat rows 2-3 of the Front Body until there are a total of 12 (13, 14, 15, 16) (17, 18, 19, 19) arm rows, this will include row 22.
Making space for the neck (Right Side)
Setup: Locate the center V stitch on the top and mark it. Count 6 Vs to the right of the center and mark it. Count 6 Vs to the left of the center and mark it. Remove the center marker but leave the left and the right markers. This will mark the 11 center Vs stitches which will help create the opening for the neck.
Row 1: Work in the est st pattern until the first marker, 2 dc in marker and turn. Note: your last V stitch might be a dc V stitch and that’s okay, simply work each row keeping it consistent with the previous rows of V stitch pattern, turn.
Rows 2-3: Continue to work in the est st pat, Rows 2-3, and matching up to what was done on the rows below. The cluster stitches will line up vertically. After row 4 fasten off yarn.
Making space for the neck (Left Side)
Setup: Attach yarn by slip stitching into the space with the left stitch marker.
Row 1: Stsc and dc into the stitch marker space, continue to work in the est st pat across the row ending with 2 dc in the last sts, turn.
Rows 2-4: Continue to work in the est st pat. Chain 46 and slip stitch to the first dc st on the other side of the neck opening, fasten off.
Arms Continued
Setup: With right side facing, attach yarn to the right side of the piece.
Row 1: Start to work in the est st pattern until the neck opening. Treat the 2dc stitches on each side of the neck opening as a V stitch and work between them in pattern as follows: For Even Row Count On Arms (xs, m, 1X, 3X): Cluster V in-between the 2dc, skip the next dc and 2 chains, *Dc V, skip 3 chains, Cluster V, skip 3 chains*; repeat from * to * until the next 2dc. Skip the remaining chains and sl st and work a Cluster V in-between the 2 dc. Work the rest of the row in est st pat, turn. For Odd Row Count On Arms (s, l, 2X, 4X, 5X): Dc V in-between the 2dc, skip the next dc and 2 chains, *Dc V in the next ch space*; repeat from * to * until the last st, 2 dc in the last, turn.
Repeats: Continue to work in est st pattern for 12 (13, 14, 15, 16) (17, 18, 19, 19) rows, fasten off.
Back Body
Row 1: This will work the middle section just the same as the front. With the right side facing skip 47 sts for length just below the elbow and 87 sts for length to the wrist, join yarn. For Even Row Count On Arms (xs, m, 1X, 3X): Stsc and dc in the first st, Cluster V in next ch space, Dc V in the next ch space*; repeat from * to * until the last ch space, Cluster V in ch space, 2 dc in the last st, turn. For Odd Row Count On Arms (s, l, 2X, 4X, 5X): Stsc and dc in the first st, *Dc V in the next ch space*; repeat from * to * until the last st, 2 dc in the last, turn. Stitch count: 17 (19, 21, 23, 25) (27, 29, 31, 33) V stitches plus 2dc in each side.
Repeats: Continue to work in est st pattern for until there are a total of 21 rows (or matches the amount of rows on front body), fasten off yarn.
Seaming
At this point, I suggest blocking flat to make seaming easier. Fold the piece in half with the right sides facing. Use your yarn needle to seam from the bottom sides, up to the arms, and then across the arms on each side. Now it should have the shape of a sweater.
Body Bottom Rib
Row 1: With the G hook join along a bottom side seam and ch 8, sc in second chain from hook and across, slip stitch two stitches on the body bottom edge, turn.
Row 2: Skip the 2 bottom edge slip sts, in blo sc 7, turn. (7sts)
Row 3: Ch 1, in blo sc 7, sl st into the next two stitches from body bottom edge, turn.
Row 4: Repeat rows 2-3 ribbing around the body’s bottom edge. To join the edges together either fasten off and seam the beginning edge to the ending edge with a tapestry needle. Or sc through the blo from the ending edge and the stitch from the beginning edge at the same time.
Sleeve Ribbing
Row 1: With the G hook join yarn at the seam on the sleeve and ch 8, sc in second chain from hook and across, sl st one stitch per edge row on the sleeve, turn.
Row 2: Skip the 2 arm edge slip sts, in blo sc 7, turn. (7sts)
Row 3: Ch 1, in blo sc 7, sl st into the next 2 sts (one stitch per edge row on the sleeve), turn.
Repeats: Repeat rows 2-3 ribbing around the arm edge. To join the edges together either fasten off and seam the beginning edge to the ending edge with a tapestry needle. Or sc through the blo from the ending edge and the stitch from the beginning edge at the same time.
Neck Ribbing
Row 1: With the G hook join yarn at the side of the neck and ch 6, sc in second chain from hook and across, sl st 2 from the neck edge, turn. Note: for slip stitching around the neck, we will sl st one stitch per edge row on the edges and every other stitch on the front and back.
Row 2: Skip the 2 neckline edge slip sts, in blo sc 5, turn. (5sts)
Row 3: Ch 1, in blo sc 5, sl st into the next 2 sts (one stitch per edge row on the edges and every other stitch on the front and back), turn.
Repeats: Repeat rows 2-3 ribbing around the neck edge. To join the edges together either fasten off and seam the beginning edge to the ending edge with a tapestry needle. Or sc through the blo from the ending edge and the stitch from the beginning edge at the same time.

Finishing & Caring for Your Summer Top
Fasten off and weave in all ends, and enjoy your new crochet summer top. And if you want to expand your crochet wardrobe, come create the Long Summer Crochet Duster Free Pattern or the Queen Bee Crochet Tank Top Pattern
Caring for delicate lacy crochet garments, such as the Muse Crochet Summer Top, requires attention to detail and gentle handling. By following some tips provided, including hand-washing with mild detergent, reshaping while damp, and drying flat, you can ensure the longevity and beauty of your creation. It's not a good idea to hand your garment because it could cause some unwanted stretching.
Additionally, storing your garment properly, away from direct sunlight and potential snagging objects, will help preserve its delicate structure. Embracing these care practices not only maintains the integrity of your crochet masterpiece but also allows you to enjoy its beauty for many seasons to come.
Check out some of my roundups for inspiration!
Crafting Your Way to the Best Lacy Crochet Patterns
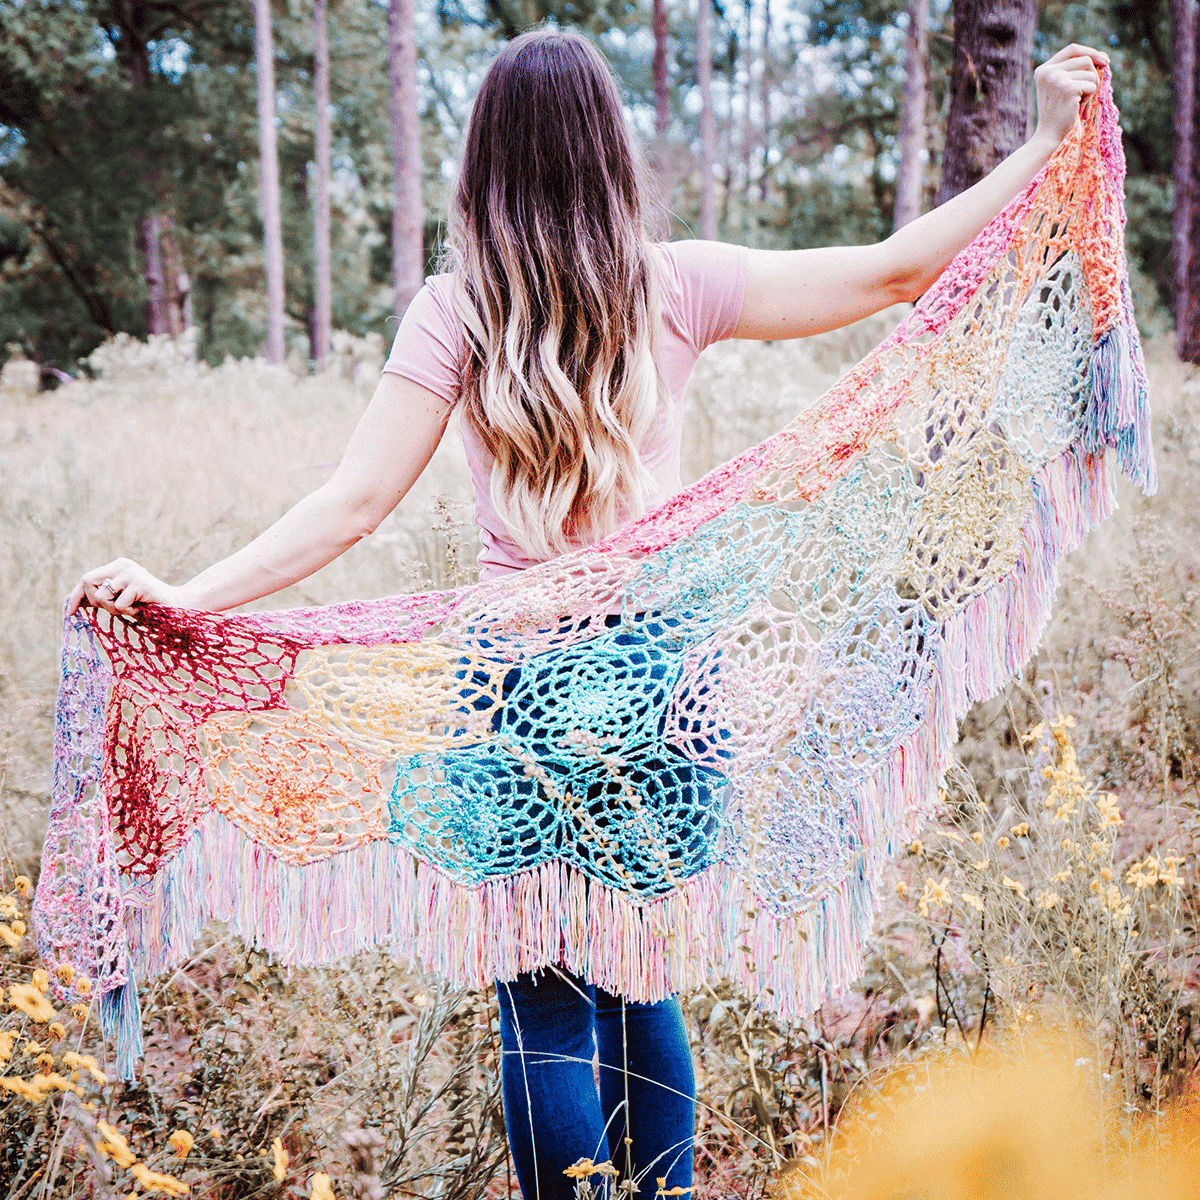
Stylish Triangle Shawls Crochet Patterns For All Year Long
Well That Was Fun! What's Next?