

The first time I made these crochet mushrooms, I was supposed to be prototyping a basket. The Herrschners Worsted 8 in Aran was already on my hook, and I thought, just one quick swatch of the Wheat Stitch in the round before I started to get back into the swing of things. A few hours later, I had a mushroom. Then I made a second one because the first one needed a friend. Then I crocheted the little fern because it felt wrong to leave them without something green. And just like that, I had a crochet mushroom amigurumi pattern ready to go. Sometimes, this is how it goes. (And I’m not complaining.)
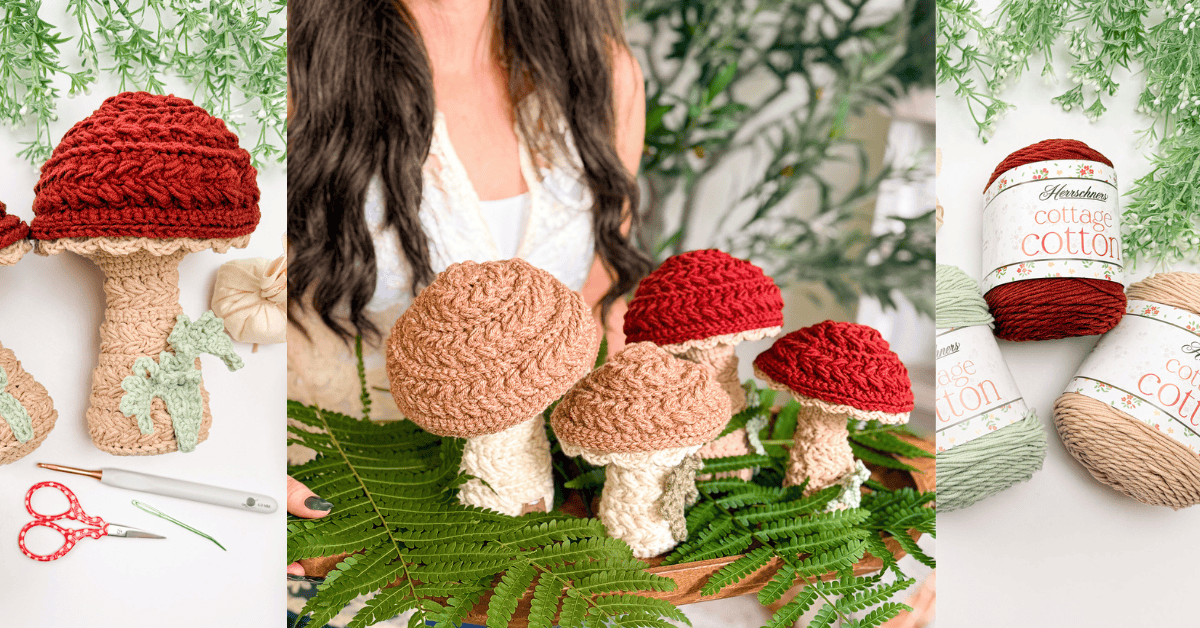
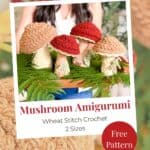
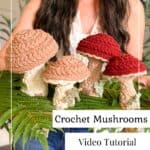
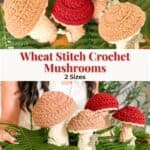
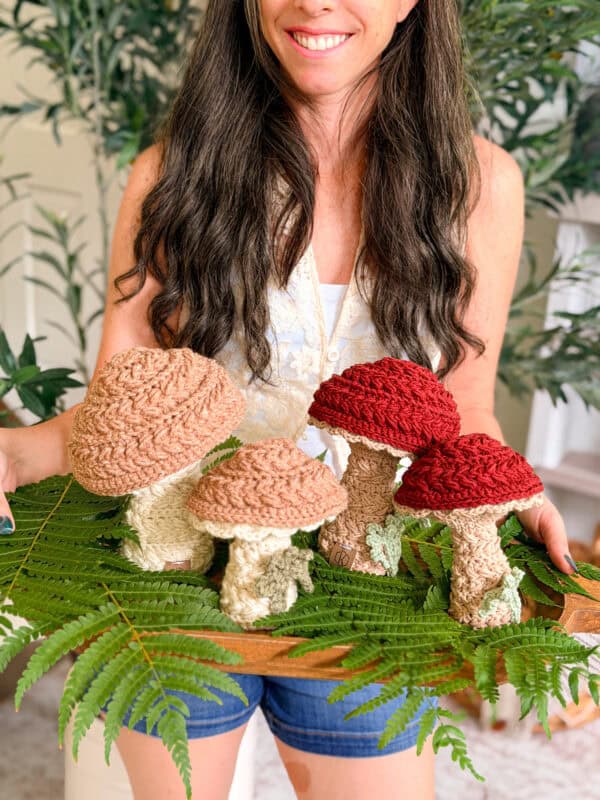
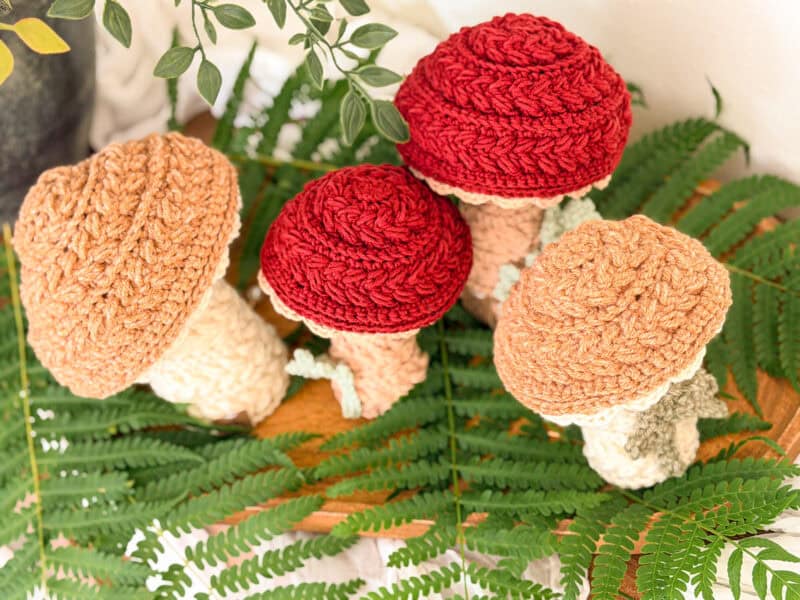
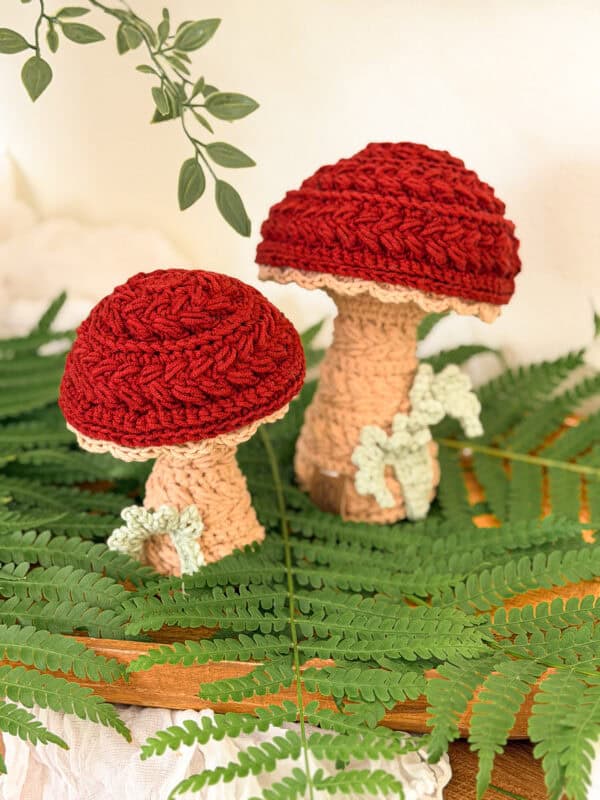
This crochet mushroom amigurumi pattern gives you a textured woodland accent piece for shelves, trays, or seasonal vignettes, made from two pieces that join into one seamless mushroom. The base works from the bottom up with a scalloped edge, and the cap works top-down in the signature Wheat Stitch™, giving it that braided, textured look you’ve seen across the pattern family. The two pieces join with a slip-stitch seam, no sewing required, and each mushroom finishes with a crocheted fern accent tucked at the base. The pattern comes in two sizes, Small (5.5″ tall x 4.5″ wide) and Large (7″ tall x 6″ wide), and changing yarn weight shifts the finished size if you want to go smaller or bigger.
Disclosure: This post contains affiliate links. Please read my disclosure for more info.
Before You Hook: Crochet Pattern Details
🧶 Yarn Used: Herrschners Worsted 8 or Herrschners Cottage Cotton
⚖️ Yarn Weight: Worsted
🧵 Featured Stitch: Wheat Stitch™
🪝 Hook Size: US G (4.0mm) Crochet Hook
📏 Sizes: Small (5.5″ tall x 4.5″ wide) and Large (7″ tall x 6″ wide)
🩷🩷🩷🤍 Difficulty level: Intermediate
🕐 Approx Crochet Time: 3 to 5 hours per mushroom (size and yarn weight dependent)
🏷️ Project Type: A textured amigurumi home decor set perfect for woodland-style shelf displays and seasonal fall vignettes.
Save for Later • Get a Summary • Pick Up Where You Left Off
Why You’ll Love the Wheat Stitch Mushrooms
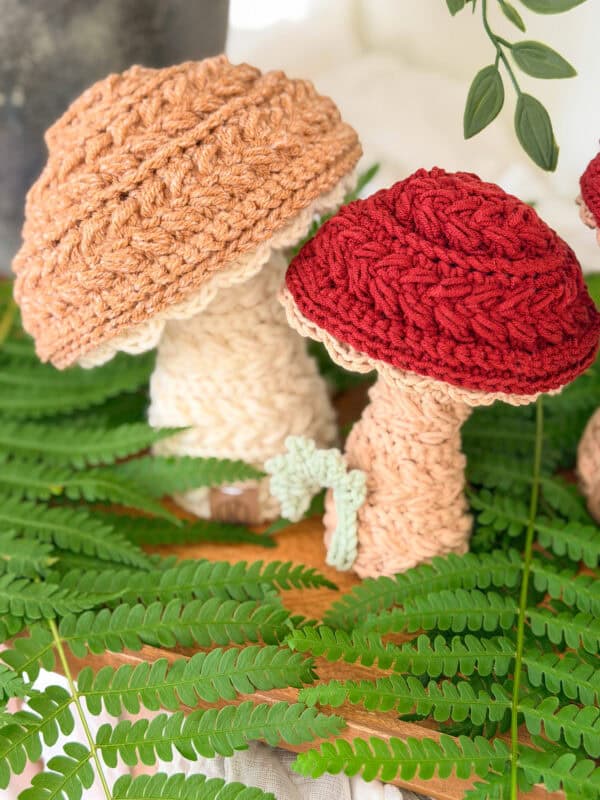
The cap texture is the whole show. The Wheat Stitch creates a row of raised, braided puffs that look like they belong in a botanical illustration rather than a worsted-weight amigurumi. It photographs beautifully from any angle, which matters if you’re making these for a shelf display or a craft fair table.
The seamless join is genuinely satisfying. You work the base and cap separately, then slip-stitch them together through matching loops so the seam disappears into the fabric. No sewing, no weaving in extra ends from an assembly step. It just closes.
The fern is a small detail that makes a big difference. A two-row crocheted fern tucks in at the base and adds enough green to make the finished mushroom read as a complete little scene rather than just a stuffed object.
They’re fast to make in pairs. The large mushroom uses about 150 yards total. The small uses 72. Most worsted-weight acrylic skeins have 400 to 500 yards, which means one skein covers a pair with yarn left over. That makes these genuinely economical to make in multiples, and a set of three or four in mixed colorways is where they really shine for display.
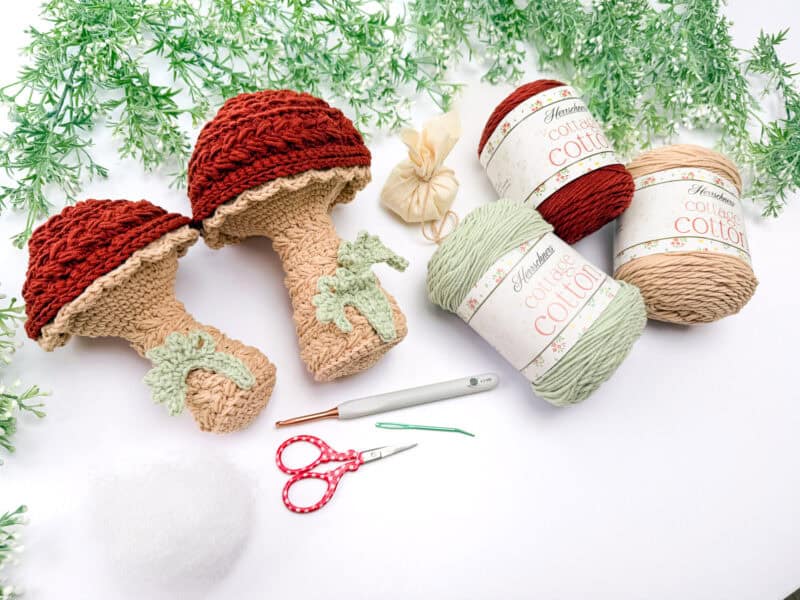
Wheat Stitch Mushroom Supplies
Yarn
Herrschners Worsted 8
100% Acrylic, 489yds/226g
or
Herrschners Cottage Cotton
60% Cotton/40% Acrylic, 207yds/100g
Yarn Quantities
Large Mushroom: 150 yds total
Base: 80 yds; Top: 70 yds
Small Mushroom: 72 yds total
Base: 48 yds; Top: 24 yds
Crochet Hook
Size US G (4.0mm) Crochet Hook or hook to obtain gauge.
Notions
Scissors
Yarn Needle
Removable Stitch Marker
Fiberfill
Stuffing Beads (Optional)
Be sure to check out the full pattern tips below
Yarn Substitutions
Brava Worsted (100% Premium Acrylic, 218yds/100g)
Red Heart Super Saver (100% Acrylic, 389yds/150g)
Mary Maxim Maximum Value (100% Acrylic, 474yds/227g)
Any worsted-weight yarn with good stitch definition will work. Avoid yarns with a lot of halo or fuzzy texture because the Wheat Stitch puffs will lose their definition in the fuzz.
Remember always to check the gauge and drape when substituting yarns.
Skill Level
You need to be comfortable working in the round, using a magic ring, and following a stitch pattern that alternates between back-loop single crochets and puff stitches. The Wheat Stitch has a 4-round repeat that becomes automatic after a few inches. If you’ve made any other Wheat Stitch pattern, this one will feel familiar fast. If this stitch is new to you, the video tutorial walks through it in detail before the pattern begins. You can also check out the Wheat Stitch tutorial post for a standalone walkthrough. For general skill-level guidance, the crochet skill levels post breaks down what “intermediate” means in practice.
Sizing & Finished Measurements
The pattern includes two sizes worked with the same G (4.0mm) hook and worsted-weight yarn.
- Small: 5.5″ tall x 4.5″ wide
- Large: 7″ tall x 6″ wide
Changing the yarn weight changes the finished size. Using bulky yarn with the same hook will give you a larger, chunkier mushroom. Using DK weight will give you a more delicate result. The Wheat Stitch works in any weight; you just need to go down a hook size when switching to a lighter yarn to keep the fabric firm enough for stuffing, and you might need to go up a hook size or two when using a bulkier yarn.
Abbreviations
blo – back loop only
ch – chain
dc – double crochet
flo – front loop only
RS/WS – Right Side/Wrong Side
sc – single crochet
sc2tog – single crochet two together
sl st – slip stitch
st(s) – stitch(es)
Gauge
12 sts and 17 rows = 4″ by 4″in stitch pattern repeat.
Gauge is not critical for this pattern.
Tips
How to Crochet A Gauge Swatch
- Working a gauge swatch will let you know if you will have the correct sizing for this pattern. It will also help you practice the stitches used in this project and improve your stitch work for a flawless look.
- Are you struggling to match the gauge? Check out the blog post on What is Crochet Gauge and How To Fix It
Special Stitches Used in This Pattern
Puff Stitch: Yarn over and insert your hook into the stitch/space. Yarn over again and pull up a long loop. Yarn over and insert your hook into the same stitch/space. Yarn over again and pull up a long loop (5 loops on the hook). Yarn over and pull through the first 4 loops, yarn over and pull through the remaining loops.
Invisible sc2tog: Insert your hook into the front loop of the first st, and then insert into the front loop of the second st (3 loops on the hook). Yarn over and pull through both front loops (2 loops on the hook), yarn over and pull through the remaining loops on the hook.
The Wheat Stitch: What It Is and Why It Works Here
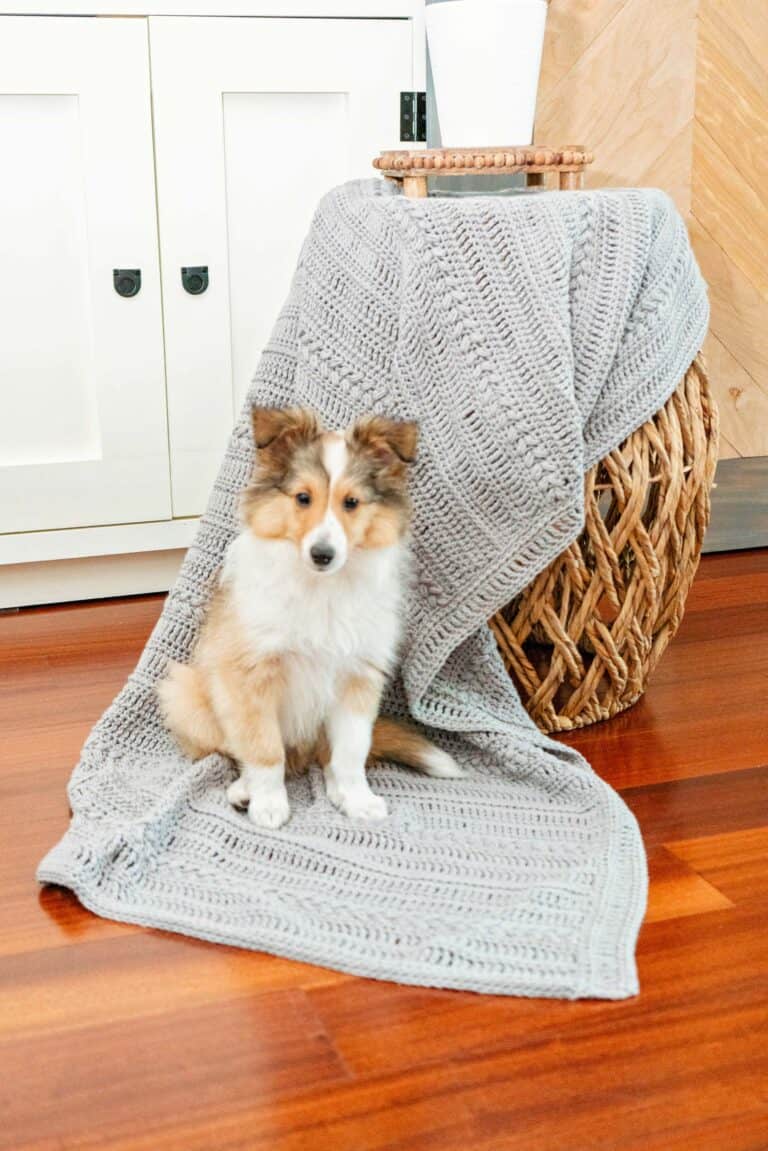
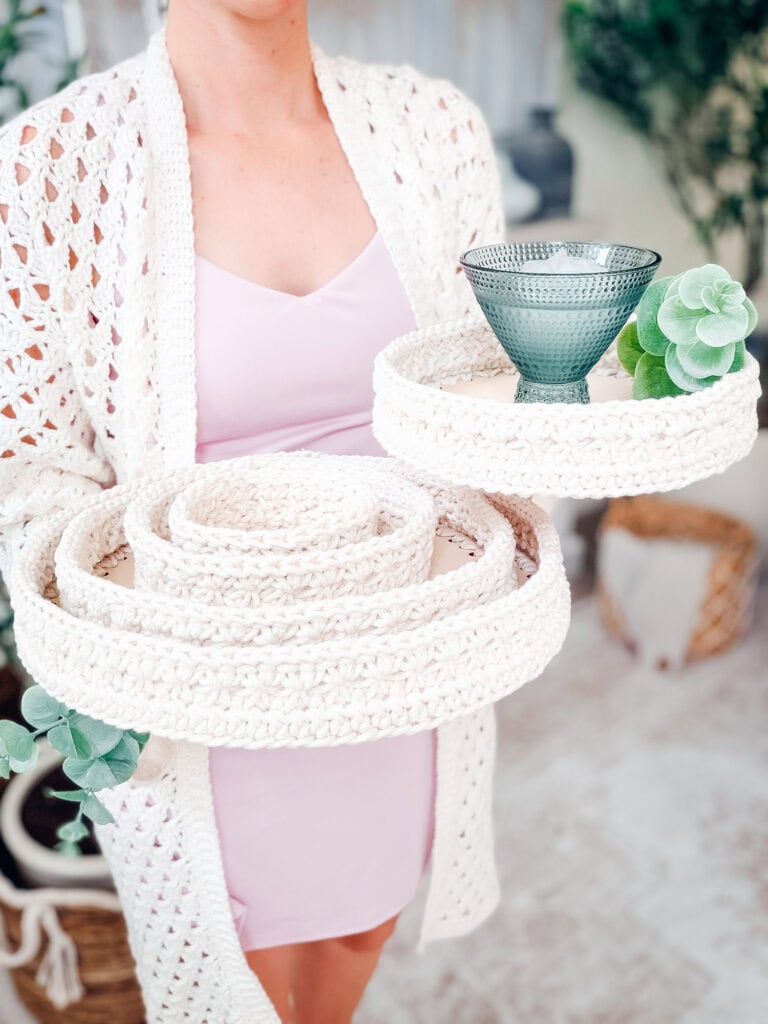
The Wheat Stitch™ is a two-round repeat built from back-loop single crochets and a modified puff stitch worked into the skipped stitch. The puffs lean diagonally across the fabric, creating a raised, overlapping texture that resembles braided wheat or woven basketry. On flat projects like the Wheat Stitch Nesting Baskets or the Braided Wheat Stitch Blanket, it reads as a geometric pattern. On the rounded dome of a mushroom cap, it creates something that looks genuinely organic, like the cap has natural ridges and depth.
This crochet mushroom pattern is different from most others you’ll find, which use plain single crochet worked in continuous rounds. Single crochet amigurumi is smooth and even, which is exactly right for many projects. But for a mushroom cap, that smooth surface works against you visually. The Wheat Stitch gives you instant surface interest without embroidery or added embellishments.

Important Pattern Notes
How the Wheat Stitch Mushrooms Are Made
The construction works in three distinct sections: the base, the cap, and the joining step. The final detail is the little fern.
The base starts at the bottom with a magic ring and expands outward in classic amigurumi fashion. Once the base reaches full width it begins working upward into the Wheat Stitch body of the mushroom. Decreases taper the body inward toward the neck, and then increases flare it back outward to create the wide mushroom skirt. The skirt finishes with a round of scallops using back-loop double crochets that give the mushroom its characteristic ruffled edge. The base is then set aside with the top open.
The cap starts at the top of the dome, also from a magic ring, and expands outward using back-loop single crochets and Wheat Stitch rounds. The shaping curves the cap into a dome and then pulls the edge back in slightly toward the rim, which is the key structural detail that lets the cap sit naturally over the base without flopping open. You work the cap until the stitch count exactly matches the open rim of the base, at which point the join happens seamlessly.
The join is a slip-stitch seam worked through the back loop of the cap and the front loop of the base simultaneously. As you work around, you pause to finish stuffing, then complete the seam. The cap edge folds slightly over the base, which is the classic mushroom silhouette. If you want a more pronounced overlap, you simply add less stuffing to the top section.
The fern is a two-row piece: a foundation chain followed by a series of chain loops slip-stitched at intervals to create fronds. The large fern uses a longer starting chain and longer loop lengths than the small version. It attaches at the base of the finished mushroom and tucks naturally under the skirt edge.
Stuffing Your Mushroom: How to Get the Shape Right
Amigurumi stuffing is one of those things where less is more, up to a point. The goal is a firm but not tight fabric, with the shape holding naturally without bulges or gaps showing between stitches. Here’s what works specifically for these mushrooms.
For the base: stuff it moderately firm. You want the mushroom to stand upright without wobbling, but overstuffing makes the bottom sphere too round, losing the tapered neck shape. If you want the mushroom to stay very upright and have a slight weighted stability, this is where the optional stuffing beads come in. Place them in the very bottom of the base before adding fiberfill on top. They settle in the base and lower the center of gravity so the mushroom sits solidly without tipping. This is especially helpful for the large size.
For the cap: use very little stuffing, or none. The cap dome holds its shape solely due to the crocheted structure. Adding stuffing to the cap mostly just prevents the top from folding in on itself, which is only an issue if you’re using a very thin yarn. If you want the cap to overlap the base more dramatically, use no stuffing in the cap at all and let the fabric drape naturally over the top of the base.
The most common stuffing mistake in amigurumi generally is overstuffing the neck area. Because the base narrows to a neck before flaring out again, it’s tempting to push stuffing into every space. Don’t. Let the neck be the narrowest point it wants to be. That narrowing is what gives the mushroom its silhouette.
Displaying Your Finished Mushrooms
A single Wheat Stitch Mushroom is charming. A grouping of three or more is the thing people actually stop and look at. They read as a family or a scene in a way that single amigurumi don’t, and the size variation between the small and large versions adds enough visual hierarchy to make the arrangement feel intentional rather than random.
For a year-round display, a wooden tray or cutting board is the natural base. Nestle the mushrooms with trailing faux greenery, a few smooth river stones, or a small jar of dried botanicals. The Wheat Stitch texture and earthy colorways draw directly from cottage-core and woodland aesthetics, translating well into any neutral home interior.
For fall specifically, cluster the mushrooms with mini pumpkins, acorns, and a few dried seed pods on a tiered tray. The Merlot colorway, in particular, immediately reads as autumn. The natural Aran or Pale Oak colorway pairs well with terracotta and rust tones.
If you want the mushrooms to sit outside on a covered porch or in a potting shed for seasonal display, the Herrschners Cottage Cotton version holds up better to humidity than the pure acrylic version. Acrylic is generally fine for indoor display, but cotton has better moisture resistance for transitional spaces.
You can even try using thinner yarn to create smaller mushrooms to attach to a Wheat Stitch Wreath for your door or walls!
French knots or small embroidered speckles scattered across the cap give the classic toadstool look and take only a few minutes to finish. Use a contrasting yarn color, keep the knots small, and distribute them unevenly for a more naturalistic appearance.
Wheat Stitch Mushroom FAQs
What yarn is best for a crochet mushroom pattern?
For the Wheat Stitch Mushrooms specifically, you want a worsted-weight yarn with good stitch definition, meaning a smooth or lightly twisted yarn rather than a fuzzy or halo yarn. The Wheat Stitch puff structure is the whole point of this design, and that texture disappears into fuzz. Herrschners Worsted 8 (acrylic) gives a soft, slightly warm finish. Herrschners Cottage Cotton gives crisper definition and a bit more firmness. For other crochet mushroom patterns that use simple single crochet, you have more flexibility, and bulky plush yarns can be genuinely beautiful for oversized mushroom styles.
How do I stuff amigurumi so it holds its shape?
The key is to stuff in layers as you go rather than all at once at the end. For the Wheat Stitch Mushrooms, the pattern guides you to pause during the joining step to finish stuffing. Use polyester fiberfill and pull it apart into loose, airy pieces before inserting rather than pushing in dense clumps, which creates lumps. Stuff to a firm-but-not-hard feel. For the base section, stuffing beads at the bottom adds weight and stability. For the cap, use minimal stuffing or none at all. The fabric structure holds the dome shape without help.
What skill level is needed for this pattern?
Intermediate. The Wheat Stitch is a two-round repeat that most crocheters with some project experience pick up within the first inch. The construction involves working in the round, shaping with increases and decreases, and a slip-stitch joining method that is clearly explained in the video. If you’re comfortable making amigurumi with plain single crochet and want to level up to textured stitchwork, this is a good next project.
How do I make crochet mushrooms stand up on their own?
Three things help. First, stuff the base section firmly enough that the bottom hemisphere is round and stable, not floppy. Second, add optional stuffing beads to the very bottom of the base before adding fiberfill. The beads lower the center of gravity and anchor the mushroom upright, much like a weighted base on a figurine. Third, keep the cap section lightly stuffed or unstuffed so the weight stays in the lower half rather than making the mushroom top-heavy. The large size benefits most from stuffing beads.
Can I sell finished items made from this pattern?
Yes. The Wheat Stitch Mushroom pattern allows finished item sales on a small scale, and credit to Briana K Designs is appreciated but not required. The pattern itself may not be copied, shared, or redistributed.
What is the Wheat Stitch in crochet?
The Wheat Stitch is a two-round repeat that alternates back-loop single crochets with modified puff stitches worked into skipped stitches. The puffs lean diagonally, creating a raised, braided texture across the fabric surface. It’s used across the full Briana K Designs pattern family for baskets, bags, home accessories, and amigurumi. For a complete stitch tutorial with step-by-step photos and a video, visit the Wheat Stitch tutorial page.
How long does it take to crochet these mushrooms?
A small mushroom takes approximately 1 to 2 hours to grow. A large mushroom runs 2 to 5 hours depending on your tension and how familiar you are with the Wheat Stitch. The fern accent adds another 15-20 minutes. Your yarn choice will make a difference, too. The Wheat Stitch is a rhythmic stitch, so time passes quickly once you’re in it.
Subscribe, Like & Watch on YouTube
Relax & Crochet with NO Ads
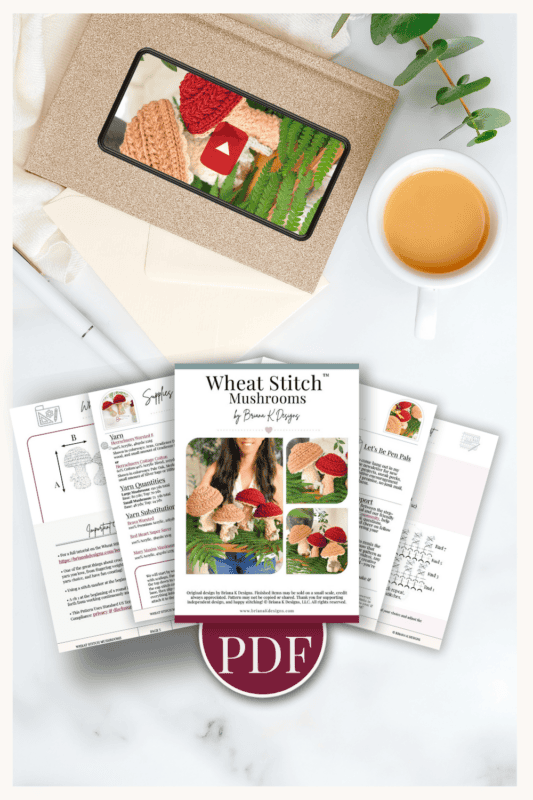
Upgrade to the Printable PDF
Beautifully formatted to print and take with you anywhere. The paid pattern includes:
Click the box below to unlock this exclusive subscriber content for free. Add your email and create a password. If you are having trouble, reset your password or log in to the Grow Portal.
I’m thrilled to share this amazing crochet pattern with you! Please don’t copy, paste, or distribute this pattern. Prefer an ad-free experience? Purchase a digital PDF file for a small fee from one of my online stores. I appreciate your support and readership. You are why I can keep doing what I love and sharing it with others. Thank you from the bottom of my heart.
Wheat Stitch Mushrooms Pattern Instructions
Rnds 7-8:
Ch 1, skip the first st, sc in next, work a puff st into the skipped st, *skip the next st, sc in next, work a puff st into the skipped st; repeat from * around, join and turn.
Rnd 9:
Repeat Rnd 6.
Rnd 10:
Ch 1, *blo sc2tog, sc 4; repeat from around, join and turn. | 20 sts
Rnds 11-12:
Repeat Rnds 7-8.
Rnd 13:
Ch 1, *blo sc2tog, sc 3; repeat from * around, join and turn. | 16 sts
Rnd 14:
Repeat Rnd 6.
Rnd 15:
Repeat Rnd 7.
Rnd 16:
Repeat Rnd 8, but do not join or turn at the end of the rnd.
Rnd 17 (RS):
*2 sc in next, sc 3; repeat from * around, do not join and work continuously. | 20 sts
Rnd 18:
Ch 1, *2 sc in next, sc 4; repeat from * around. | 24 sts
Rnd 19:
Ch 1, *2 sc in next, sc 3; repeat from * around. | 30 sts
Rnd 20:
Ch 1, *2 sc in next, sc 4; repeat from * around. | 36 sts
Rnd 21:
Ch 1, *2 sc in next, sc 5; repeat from * around. | 42 sts
Rnd 22:
Ch 1, *sc 3, 2 sc in next, sc 3; repeat from * around. | 48 sts
Rnd 23:
Ch 1, *2 sc in next, sc 7; repeat from * around. | 54 sts
Rnd 24:
Ch 1, *sc 4, 2 sc in next, sc 4; repeat from * around. | 60 sts
Rnd 25:
Ch 1, sc in each st around, then sl st to the next st and turn.
Rnd 26:
Ch 1, *skip 1, blo 4 dc in next, skip 1, blo sl st in next; repeat from * around; join and fasten off. | 75 sts
Join The Kindest Community
Join our vibrant community of crafters on Facebook today. Whether you enjoy crafting with others or simply have burning questions, we’ve got you covered – join us now!
Large Mushroom Bottom
G (4.0mm) Hook – Use a stitch marker to keep track of the beginning of each round.
Rnd 1:
In a Magic Ring, ch 1 (turning ch does not count as a st here or throughout), sc 6, do not join and work continuously. | 6 sts
Rnd 2:
2 sc in each st around. | 12 sts
Rnd 3:
*2 sc in first, sc in next; repeat from * around. | 18 sts
Rnd 4:
*2 sc in first, sc in the next 2; repeat from * around. | 24 sts
Rnd 5:
*2 sc in first, sc in the next 3; repeat from * around. | 30 sts
Rnd 6:
*2 sc in first, sc in the next 4; repeat from * around, join and turn. | 36 sts
Rnd 7 (WS):
Ch 1, flo sc in each st around, join and turn. | 36 sts
Rnd 8 (RS):
Ch 1, blo sc in each st around, join and turn.
Rnds 9-10:
Ch 1, skip the first st, sc in next, work a puff st into the skipped st, *skip the next st, sc in next, work a puff st into the skipped st; repeat from * around, join and turn.
Rnd 11:
Repeat Rnd 8.
Rnd 12:
Ch 1, *blo sc2tog, sc 7; repeat from * around, join and turn. | 32 sts
Rnds 13-14:
Repeat Rnds 9-10.
Rnd 15:
Ch 1, *blo sc2tog, sc 6; repeat from * around, join and turn. | 28 sts
Rnd 16:
Ch 1, *blo sc2tog, sc 5; repeat from * around, join and turn. | 24 sts
Rnds 17-18:
Repeat Rnds 9-10.
Rnd 19:
Repeat Rnd 8.
Rnd 20:
Ch 1, *blo sc2tog, sc 4; repeat from * around, join and turn. | 20 sts
Rnd 21:
Repeat Rnd 9.
Rnd 22:
Repeat Rnd 10, but do not join or turn at the end of the rnd.
Rnd 23 (RS):
*2 sc in next, sc 3; repeat from * around, do not join and work continuously. | 25 sts
Rnd 24:
Ch 1, *sc 2, 2 sc in next, sc 2; repeat from * around. | 30 sts
Rnd 25:
Ch 1, *2 sc in next, sc 4; repeat from * around. | 36 sts
Rnd 26:
Ch 1, *2 sc in next, sc 5; repeat from * around. | 42 sts
Rnd 27:
Ch 1, *sc 3, 2 sc in next, sc 3; repeat from * around. | 48 sts
Rnd 28:
Ch 1, *2 sc in next, sc 7; repeat from * around. | 54 sts
Rnd 29:
Ch 1, *sc 4, 2 sc in next, sc 4; repeat from * around. | 60 sts
Rnd 30:
Ch 1, *2 sc in next, sc 9; repeat from * around. | 66 sts
Rnd 31:
Ch 1, *sc 5, 2 sc in next, sc 5; repeat from * around. | 72 sts
Rnd 32:
Ch 1, sc in each st around, then sl st to the next st and turn.
Rnd 33:
Ch 1, *skip 1, blo 4 dc in next, skip 1, blo sl st in next; repeat from * around; join and fasten off. | 90 sts
Mushroom Tops
Rnd 1:
In a Magic Ring, ch 1, sc 12, join and turn. | 12 sts
Rnd 2:
Ch 1, 2 blo sc in each st around, join and turn. | 24 sts
Rnds 3-4:
Ch 1, skip the first st, sc in next, work a puff st into the skipped st, *skip the next st, sc in next, work a puff st into the skipped st; repeat from * around, join and turn.
Rnd 5:
Ch 1, 2 blo sc in first, blo sc in next, *2 blo sc in next, blo sc in next; repeat from * around, join and turn. | 36 sts
Rnd 6:
Ch 1, 2 blo sc in first, blo sc in the next 2 sts, *2 blo sc in next, blo sc in the next 2 sts; repeat from * around, join and turn. | 48 sts
Rnds 7-8:
Repeat Rnds 3-4.
Rnd 9:
Ch 1, 2 blo sc in first, blo sc in the next 3 sts, *2 blo sc in next, blo sc in the next 3 sts; repeat from * around, join and turn. | 60 sts
Size Small: Skip to Joining
Continue for Large Mushroom
Rnd 10:
Ch 1, 2 blo sc in first, blo sc in the next 4 sts, *2 blo sc in next, blo sc in the next 4 sts; repeat from * around, join and turn. | 72 sts
Rnds 11-12:
Repeat Rnds 3-4. Go to Joining.
Joining
Prep: If placing weight at the bottom of the mushroom, go ahead and put it in now. Begin filling the bottom with a little fiberfill. Remember, when we are doing amigurumi, we do not want to overstuff. We can stuff a little bit more before we completely close.
Placing the mushroom cap on the base, we are going to single crochet. The two pieces together.
Insert your hook into the blo of the top of the mushroom piece and then insert your hook through the flo of the bottom of the mushroom piece. Yarn over and pull through the first two loops on the hook. Yarn over and pull through two to complete the sc that joins these pieces together. Repeat this around until you have a couple of inches left to join, and then pause. Finish stuffing, then continue your work all the way around, joining these pieces. If you want the top of your mushroom to fold over the base a little, you do not want to put much stuffing in the top at all.
Small Fern
Row 1:
Ch 13, sc in second ch from the hook and across, turn. | 12 sts
Row 2:
Ch 5, sl st into the first st, (ch 5, sl st into the next st) twice, (ch 6, sl st into the next st) twice, (ch 7, sl st into the next st) twice, leave the remaining sts unworked, fasten off, and weave in ends.
Large Fern
Row 1:
Ch 17, sc in second ch from the hook and across, turn. | 16 sts
Row 2:
Ch 5, sl st into the first st, (ch 5, sl st in to the next st) twice, (ch 6, sl st into the next st) twice, (ch 7, sl st into the next st) twice, (ch 8, sl st into the next st) twice, leave the remaining sts unworked, fasten off and weave in ends.
Finishing
Once everything is joined, weave in all your ends with a yarn needle so they will stay hidden and secure, then snip the tails close so nothing peeks out.
I started these mushrooms as a test stitch and ended up with a whole little woodland family on my studio shelf. Make them in earthy neutrals, rich burgundy, or whatever colorway is living rent-free in your stash right now. They’re small enough to be a quick win and textured enough to feel like a proper project.
More Crochet Patterns You’ll Love
If you enjoyed the Wheat Stitch texture, these amigurumi patterns use the same stitch family:
🥂 Cheers, and happy crocheting!
Well, That Was Fun! What’s Next?