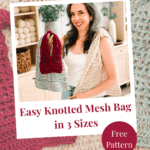
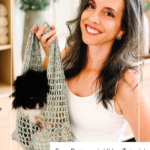
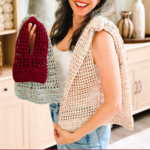
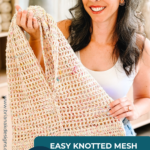
The first time I tied the knot on this knotted mesh crochet bag, I pulled it tight. Really tight, the way you would cinch a shoelace. That was the wrong instinct. A knot pulled that hard flattens the soft round shape at the top of the bag, and once it sets, you are not getting it back out.
Disclosure: This post contains affiliate links. Please read my disclosure for more info.
So the whole trick to this free crochet bag pattern turned out to be restraint. Snug the knot up until it holds its shape, then stop. That is the hardest part, and it takes about four seconds.
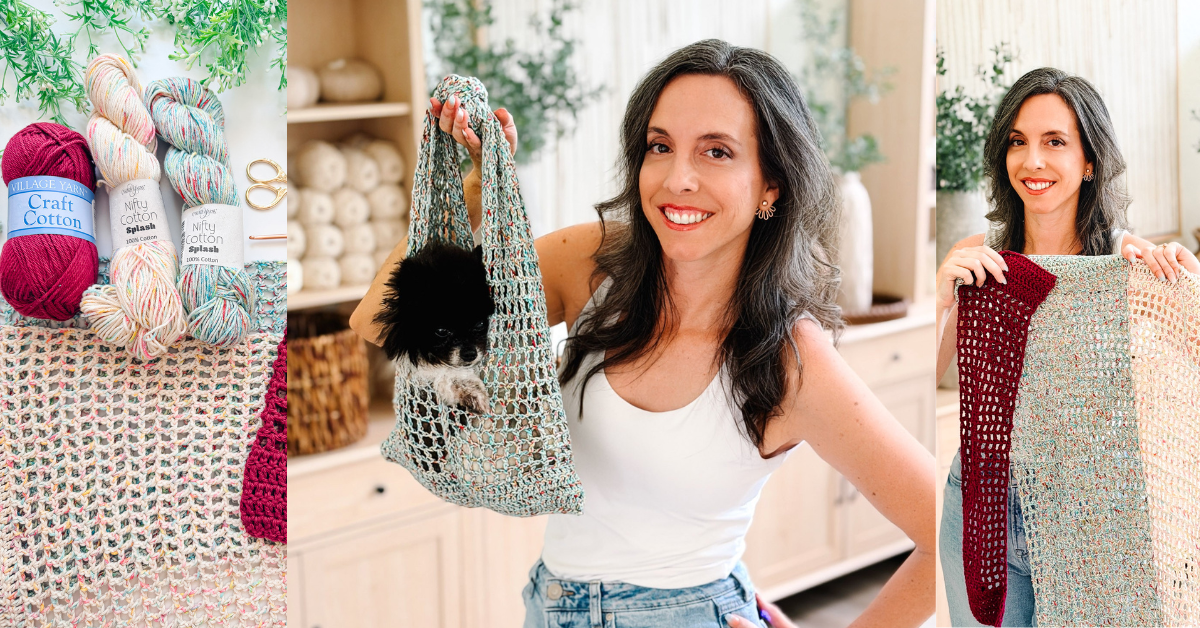
Everything before it is one flat rectangle. Solid double crochet bands at each end, an airy mesh through the middle, worked back and forth with a turn at the end of every row. No working in the round. No increases to count. You block it, tie the knot at the center, fold it in half, and seam up the sides. The knot becomes the handle and doubles as the closure, as letting the mesh gather beneath it cinches the bag shut on its own.
Before You Hook: Knotted Mesh Crochet Bag Pattern Details
🧶 Yarn Used: Cascade Yarns Nifty Cotton Splash (100% cotton, 185yds/100g)
⚖️ Yarn Weight: Worsted, #4
🧵 Featured Stitch: Simple mesh stitch (dc, ch 1, sk 1)
🪝 Hook Size: US G (4.0mm) Crochet Hook, or hook to obtain gauge
📏 Sizes: Three sizes. Width 6 (11½, 16½) inches x Height 10 (14, 19½) inches
🩷🩷🤍🤍 Difficulty level: Easy
🕐 Approx Crochet Time: About 2 hours for the Small, and 7 to 8 hours for the Large, plus blocking and seaming
🏷️ Project Type: An easy crochet bag worked as one flat rectangle, made in three sizes for carrying projects, running errands, and lightweight beach days.
Save for Later • Get a Summary • Pick Up Where You Left Off
Why You’ll Love This Knotted Mesh Bag
- Two seaming methods are written out, one with a hook and one with a needle, so you can use whichever you like better.
- One rectangle, one knot, two side seams. There is no shaping, no strap to make separately, and no hardware.
- The mesh section is a two-row repeat, so it is the kind of project you can work on while half-watching something.
- Three sizes that genuinely do different jobs. One for your current project, one for errands, one for the beach.
- The open fabric means you can see what is inside without digging, and sand and crumbs fall straight through it.
- It folds down to almost nothing, so it lives in a purse or a glove box until you need it.
Knotted Mesh Bag Pattern Supplies
Yarn
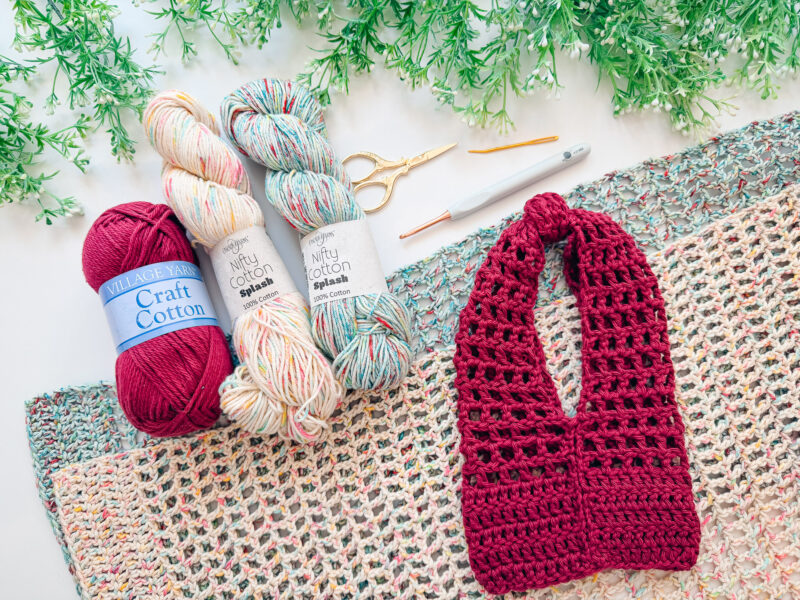
Cascade Yarns Nifty Cotton Splash, 100% Cotton, 185yds/100g, #4 Worsted Weight.
Cotton is doing real work here, and it is worth staying with it. It keeps the mesh open instead of collapsing, does not mind getting wet, and will not stretch the way a slippery acrylic does when the bag is loaded.
Yarn Quantities
80 (222, 416) yds
1 (2, 3) skeins
Crochet Hook
Size US G (4.0mm) Crochet Hook or hook to obtain gauge.
Notions
Scissors
Yarn Needle
Removable Stitch Marker
Blocking Mat
Blocking Pins
Be sure to check out the full pattern tips below
Yarn Substitutions
Premier Home Cotton, 85% Recycled Cotton/15% Polyester, 131yds/75g
Village Yarn Craft Cotton, 100% Cotton, 115yds/71g
Lily Sugar’n Cream, 100% Cotton, 120yds/71g
Crochet.com Dishie, 100% Cotton, 190yds/100g
Remember always to check the gauge and drape when substituting yarns.
Skill Level
If you can chain and double crochet, you can make this bag. The only unfamiliar piece for most makers is the stacked single crochet at the start of each row, and it is shown slowly in the video.
Sizing & Finished Measurements
Three sizes. Width 6 (11½, 16½) inches x Height 10 (14, 19½) inches
Abbreviations
ch – chain
ch-sp – chain space
dc – double crochet
rep – repeat
sl st – slip stitch
st(s) – stitch(es)
Stsc – stacked single crochet
Gauge
9 sts and 7 rows = 4″ by 4″ in the mesh stitch pattern, blocked.
Not critical for this pattern.
Tips
How to Crochet A Gauge Swatch
- Working a gauge swatch will let you know if you will have the correct sizing for this pattern. It will also help you practice the stitches used in this project and improve your stitch work for a flawless look.
- Are you struggling to match the gauge? Check out the blog post on What is Crochet Gauge and How To Fix It
Special Stitches Used in This Pattern
Stsc, stacked single crochet: Do not chain at the beginning of the row. Insert your hook into the first stitch, yarn over, and pull up a loop. Yarn over and pull through both loops on the hook. This will now look similar to a single crochet stitch, but you are not done yet. Insert your hook into the vertical bar below, yarn over, and pull up a loop. Yarn over and pull through both loops on the hook.
If it is new to you, here is the full Stacked Single Crochet tutorial, and it is also demonstrated in the video.
Important Pattern Notes
How the Knotted Mesh Bag is Made
You work one long flat panel. It opens with a solid band of double crochet, transitions into the mesh for the long middle stretch, and closes with a second solid band that mirrors the first. The panel is turned at the end of every row, so you are never working in the round and never counting an increase.
Then you block it, lay the panel flat, gather it loosely across its width at the center row, and tie a single overhand knot there. The mesh does most of the gathering for you.
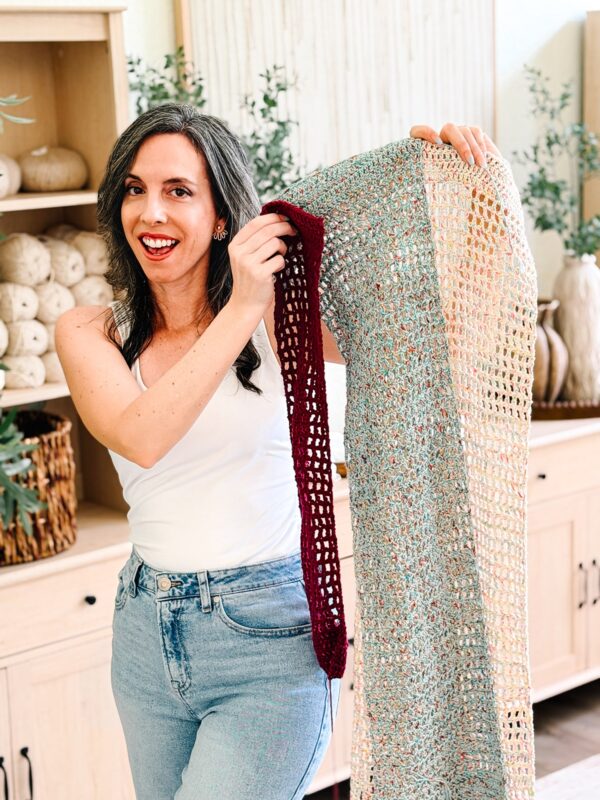
From there you fold the panel in half so the foundation chain edge meets the final row edge, which puts the knot at the top and lands both solid bands together at the bottom. You seam the sides partway up and leave the rest open, and that opening is how you get your hand and your things in and out. A seam across the base joins the two solid bands into one sturdy, double-thickness bottom, which keeps the bag from sagging into a sack when it is full.
Which Size Should You Make?
This is the part worth reading before you pick your yarn, because the three sizes are not really the same bag scaled up and down. They do three different jobs, and the one you want depends entirely on what you plan to put in it.
One thing to say plainly up front, because it will save you a disappointment. This is a lightweight bag. Mesh is airy by design, and airy fabric is happiest carrying bulky, lightweight items rather than heavy, dense ones. All three sizes are brilliant for that. None of them is a hauling bag.
Small, a Project Bag for Whatever You’re Currently Making
6 inches wide by 10 inches tall, one skein, and about two hours of hooking.
This is the one I reach for most, and it is the size that surprised me. A ball of yarn, a hook, and a stitch marker fit perfectly, and because the fabric is open, you can see exactly which project is in which bag without opening any of them. If you keep more than one thing on the hook at a time, that alone is worth making a few of these.
It also makes a lovely gift bag. Put a candle and a bar of soap in it and the bag is part of the present.
Medium, the Everyday Errand Bag
11½ inches wide by 14 inches tall, two skeins.
This is the size that lives in your car. It slips over your wrist, holds a water bottle and a few things from the shop, and folds down to almost nothing when it is empty. It is the right answer for a quick run where you want one free hand and do not want to think about it.
Large, the Beach and Market Size
16½ inches wide by 19½ inches tall, three skeins.
Here is where I want to be honest with you: I made this size with a hook a step larger than the pattern calls for, which gives you a roomier bag than you would get if you worked it as written. It still is not a bag for towels and beach toys. If that is what you need, this is not the pattern.
What it is very good at is the smaller half of a beach day. Sunscreen, sunglasses, a book, a water bottle, a phone in a pouch, the flip-flops you took off. Sand falls straight through the mesh rather than collecting at the bottom seam, which is the genuinely useful thing about taking an open bag to the beach at all.
It works the same way at a farmers market for produce and lightweight shopping. Just do not plan on it carrying anything dense, and check your stash before you start, because it takes noticeably more yarn than the jump from Small to Medium would suggest.
If what you actually want is a structured tote with two shoulder straps that stands up on its own, this is not that bag, and that is fine. Make the Willow Mesh Crochet Market Bag instead. It is worked bottom-up in the round, with a solid base and crocheted handles. This one trades that structure for the ability to fold flat and disappear into a glove box.
What the Open Mesh Is Actually Good For
Mesh is not just a look. It changes what the bag is useful for, in three fairly specific ways.
You can see inside it. That sounds minor until you have four project bags on a shelf and you can tell at a glance which one has the half-finished sweater in it. No opening, no digging, no unpacking the wrong one.
Loose bits fall out instead of collecting. Sand is the obvious case, and it is why an open bag beats a solid one at the beach. In a solid bag, sand settles into the bottom seam and stays there until you turn the whole thing inside out over a bin at home. In mesh, it sifts straight through while you are still walking back to the car. Crumbs and stray yarn ends behave the same way.
Air moves through it. A damp swimsuit or a wet cover-up in a solid bag sits in its own puddle and smells by morning. Mesh lets everything breathe from all sides, so hang the bag on a hook when you get home, still loaded, and it will be dry by evening.
The tradeoff is that genuinely small things can slip through, which is worth knowing before you pack. Keys, lip balm, and earbuds want a zip pouch inside the bag rather than loose in the mesh. A book, a water bottle, sunglasses, and a ball of yarn are all fine on their own.
Will a Cotton Bag Stretch Out When It’s Full?
Some, yes, and the pattern is built with that in mind.
Any crocheted bag gives a little under load, and cotton gives more when it is wet. That is not a flaw so much as a matter of physics. What matters is where the bag gives. The two solid double-crochet bands meet at the base and are seamed together, which creates a double layer of dense fabric at the exact point that carries all the weight. The stretch happens up in the mesh body, where it just means the bag opens out to hold more, and the base stays put.
A few things help. Keep your slip stitches loose when you seam so the seam does not pull tighter than the fabric around it, because a tight seam is where a bag actually fails. Stay with cotton or a cotton blend rather than a slippery acrylic. And do not hang a fully loaded wet bag from the knot for hours, which is the one thing that will pull the mesh long in a way that does not fully recover.
Blocking the Panel, and Why You Shouldn’t Skip It
Blocking is not optional on this one, and it is not a finishing step either. It happens in the middle of the process, before you tie the knot and before you seam, and doing it in that order is what makes the rest go smoothly.
Wet-block the panel and pin it out to the pattern measurements, gently opening the mesh without overstretching it. Leave it pinned until it is completely dry so the shape sets while the fibers cool.
Two things come out of that. The mesh opens up and stays open, which is the whole look of the bag. And the panel lies flat with even row ends, which makes lining up the side seams dramatically easier than matching rows on a curling, unblocked piece of fabric.
If you have never blocked anything before, the full walkthrough is in All About Blocking Your Crochet Projects.
How to Carry and Close the Bag
Slip your hand through the opening under the knot, and to close it, let the mesh gather up underneath and the bag cinches shut on its own. No drawstring, no button, nothing to break. That soft close works just as well away from the beach, for farmers markets and grocery runs, as a project bag with room for yarn and tools, or hanging on a hook at home holding produce.
Caring for Your Knotted Mesh Bag
Shake it out first, while it is empty and while you are still outside. If it has been anywhere near sand, this one step saves you the most trouble.
If it has been in saltwater, rinse it in cool, fresh water before it dries, because salt crystals left in the fibers make cotton feel stiff and scratchy. Sunscreen is the other one to catch early. Oil-based sunscreen stains cotton, and it sets over time, so treat a spot the same day rather than the next weekend.
For a real wash, cool water and a gentle cycle in a mesh laundry bag is fine, or hand wash if you would rather. Lay it flat to dry rather than hanging it wet, since a wet bag hanging by the knot is exactly the load that pulls the mesh out of shape. If it looks a bit relaxed after a few outings, pin it back out to size and let it dry, and it will come back.
Knotted Mesh Crochet Bag FAQs
How much does the Large size actually hold?
Enough for a light day out, and not enough to be your only bag on a heavy one. Realistically, it takes sunscreen, sunglasses, a book, a water bottle, a phone, and a pair of flip-flops with room to spare. It does not take a rolled beach towel, toys, and a cooler, and I would rather tell you that now than have you finish three skeins expecting otherwise. I made this size with a hook one step up from the pattern, which produces looser, slightly roomier fabric, and it is still a lightweight bag by nature. Mesh carries bulky and light beautifully. Heavy and dense is not what it is for.
What is the best yarn for this bag?
Cotton, or a cotton blend, and it is not a close call. Cotton holds its shape when it gets wet, dries reasonably fast, and does not have the slippery stretch that acrylic does under load. It also washes well, which matters for a bag that will get sunscreen on it or sit in the bottom of a car. Acrylic will technically work if it is what you have, but it will stretch more, it will not absorb water, and the bag will not hold its shape as well over a season. A worsted weight cotton at a #4 is the sweet spot for this pattern, heavy enough that the mesh stays open and light enough that the finished bag weighs nothing on its own.
Can I make this bag bigger or smaller than the three sizes?
Yes, and it is one of the easiest patterns to resize because it is a rectangle. Chain any odd number of stitches to adjust the width, then work an odd total number of rows so there is a true center row to tie the knot on. That is the only rule. The odd row count is what matters most, because if you land on an even number, there is no single center row, and the knot will sit slightly off-balance, with one side of the bag a touch longer than the other. Add rows for a deeper bag, add chains for a wider one, and keep in mind that going up a size uses noticeably more yarn than you might expect.
How does the bag stay closed?
The knot does it. When you let the mesh gather up underneath the knot, the opening cinches shut on its own, so there is no drawstring, no button, and no closure to make. It is a soft close rather than a locked one, which is right for a cover-up and a water bottle and less right for loose keys and phones. Tuck small valuables into a zip pouch inside the bag and let the mesh do its thing with everything else.
Is this a good pattern for a beginner?
It is a good second- or third-project. The stitches are chain and double crochet, the mesh is a two-row repeat, and there is no shaping to follow, which removes most of what makes patterns intimidating early on. The two newer skills are the stacked single crochet at the start of each row and the seaming at the end, both of which are walked through in the video. If you have made a scarf, you have already done harder counting than this bag asks for.
How long does it take to make?
The Small comes together in about two hours of hooking, making it a genuinely one-evening project. The Large is closer to seven or eight hours because it is more than five times the yardage. Add drying time on top for all three sizes, since the panel is blocked partway through. Plan on finishing the bag the day after you finish crocheting.
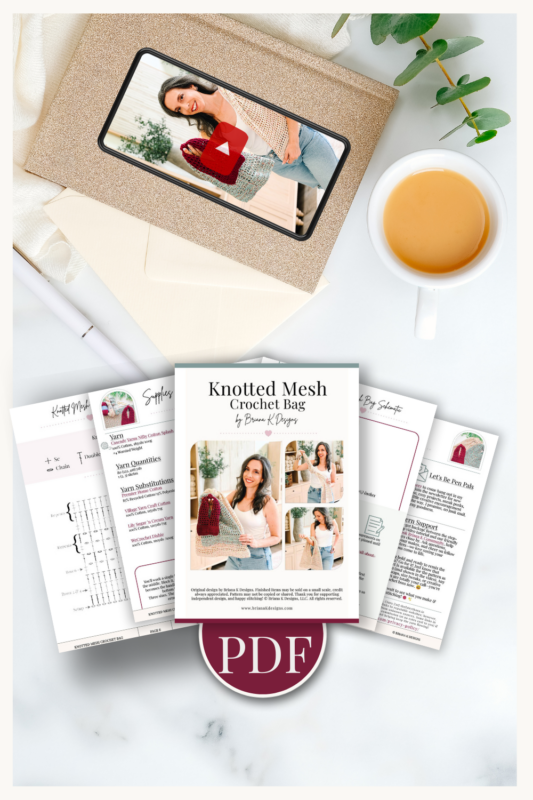
Subscribe, Like & Watch on YouTube
Relax & Crochet with NO Ads
Upgrade to the Printable PDF
Beautifully formatted for printing and taking with you anywhere. The paid pattern includes:
Add your email in the box below to unlock this pattern to view on the blog for free. I’m thrilled to share this amazing crochet pattern with you! Please don’t copy, paste, or distribute this pattern. Prefer an ad-free experience? Purchase a digital PDF file for a small fee from one of my online stores. I appreciate your support and readership. You are why I can keep doing what I love and sharing it with others. Thank you from the bottom of my heart.
Printable Version
This pattern is free to read here on the blog. The ad-free printable PDF is available in the Briana K Designs shop on Etsy and Ravelry.
brianakdesigns.com
Knotted Mesh Crochet Bag Written Pattern
Rows 8 to 38 (8 to 58, 8 to 80): Repeat Row 7. | 11 (22, 33) sts and 10 (21, 32) ch-1 sps
Panel, Top Band
Row 39 (59, 81): Stsc in first st, *dc in next ch-1 sp, dc in next st; rep from * across, turn. | 21 (43, 65) sts
Rows 40 to 43 (60 to 63, 82 to 85): Stsc in first st, dc in each st across, turn. | 21 (43, 65) sts
Do not fasten off if you plan to slip stitch the seam, which is the preferred method. You will use this working yarn to begin your first side seam. Slip a removable stitch marker through the loop to keep it secure while you block and knot the panel.
If you plan to mattress seam, fasten off now, leaving a tail of about 40″ for seaming.
Weave in your beginning end.
Blocking
Wet block the panel and pin it out to 6 (11½, 16½)” wide by 24½ (36, 48½)” long. Let it dry completely before you go any further. This will make seaming easier and give it a polished look.
Tying the Knot
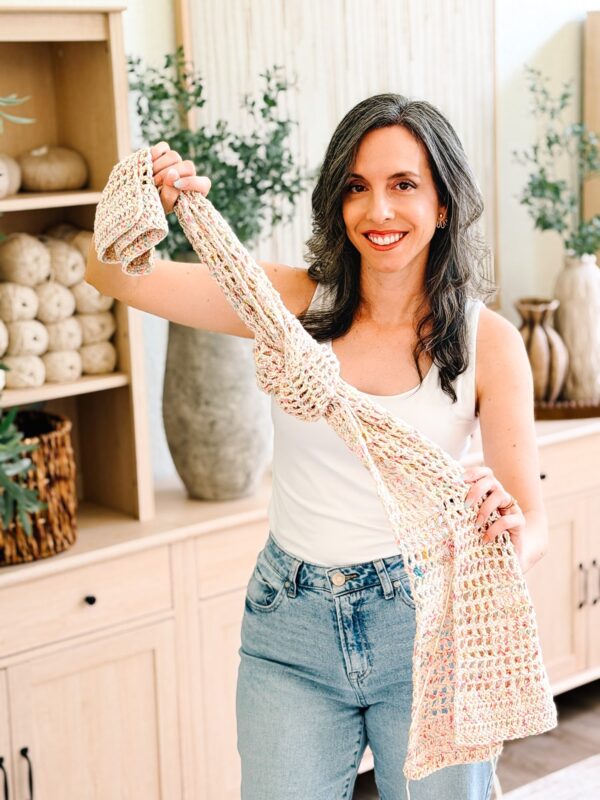
Lay the blocked panel flat on a table, with the long edges running top to bottom.
Find the center row of your panel. That is Row 22 (32, 43).
Gather the panel loosely across its width at that center row, bunching it into a soft bundle rather than a flat fold. The mesh will do most of this work for you.
Tie a single overhand knot at the gathered center. Snug it up until it holds its shape, then stop. A knot pulled too tight loses the soft round shape at the top of the bag, and it is very hard to loosen once it is set.
Adjust the gathers so they sit even on both sides of the knot.
Join The Kindest Community
Join our vibrant community of crafters on Facebook today. Whether you enjoy crafting with others or simply have burning questions, we’ve got you covered – join us now!
Assembly
Bring the two short ends of the panel together so the foundation chain edge meets the final row edge. The knot sits at the top, and the two solid bands sit together at the bottom.
Line up the side edges. You will be seaming row end to row end, matching Row 1 to Row 43 (63, 85), Row 2 to Row 42 (62, 84), and so on up toward the knot.
There are two ways to seam this bag. Slip stitch seaming is my preferred method. It is faster, it gives the bag a sturdier edge, and you work it with your hook instead of a needle. A hand-sewn alternative, the mattress stitch, is included if you prefer an invisible seam. Both are shown in the video tutorial.
Side Seams
Seam the first 8 (12, 16) rows up from the bottom edge on each side, using whichever method you prefer below. Fasten off and weave in the end, then join your yarn at the bottom edge of the second side and work it the same way.
Leave the remaining row ends at the top of each side unseamed. That is your opening.
Crocheted seam, slip stitch (preferred): Your working yarn is already at the bottom corner of one side, right where you need it. Hold the two layers together with the side edges lined up. Insert your hook through both layers at the bottom edge, and slip-stitch the two layers together, working up the side and lining up the rows as you go. Keep your slip stitches loose so the seam does not pull in tighter than the fabric.
Hand-sewn seam, mattress stitch (alternative): Using the 40″ tail and a tapestry needle, mattress stitch the side seam starting at the bottom edge and working up.
Base Seam
Turn the bag so the bottom edge is toward you, then lay it flat with the two side seams at the outer edges.
Join yarn at one side seam and work across the bottom, joining the foundation chain edge to the top of the final row, 21 (43, 65) sts to 21 (43, 65) sts. Work through both layers and keep your tension even so the base does not draw in.
Crocheted seam, slip stitch (preferred): Slip stitch through both loops of both layers, lining up the stitches one for one.
Hand-sewn seam, whipstitch (alternative): Whipstitch through both loops.
Fasten off and weave in all ends.
Final Shaping
Give the bag a light steam or a quick spritz and press the base flat with your hands so it sits square. Let it dry.
More Crochet Patterns You’ll Love
If this one is your speed, these are the ones to make next.
🥂 Cheers, and happy crocheting!
Hook down? Not so fast…
I’d Love to See Yours!
You made something beautiful. Here’s how to keep it, show it off, and inspire the next maker.

What should you make next?
Keep the hook movingReaders Are Loving
 Reed Crossover Stitch
 Petal Loop Keychain
 Wine Glass Cover
 Wheat Stitch Reindeer