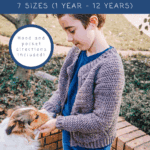
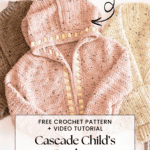
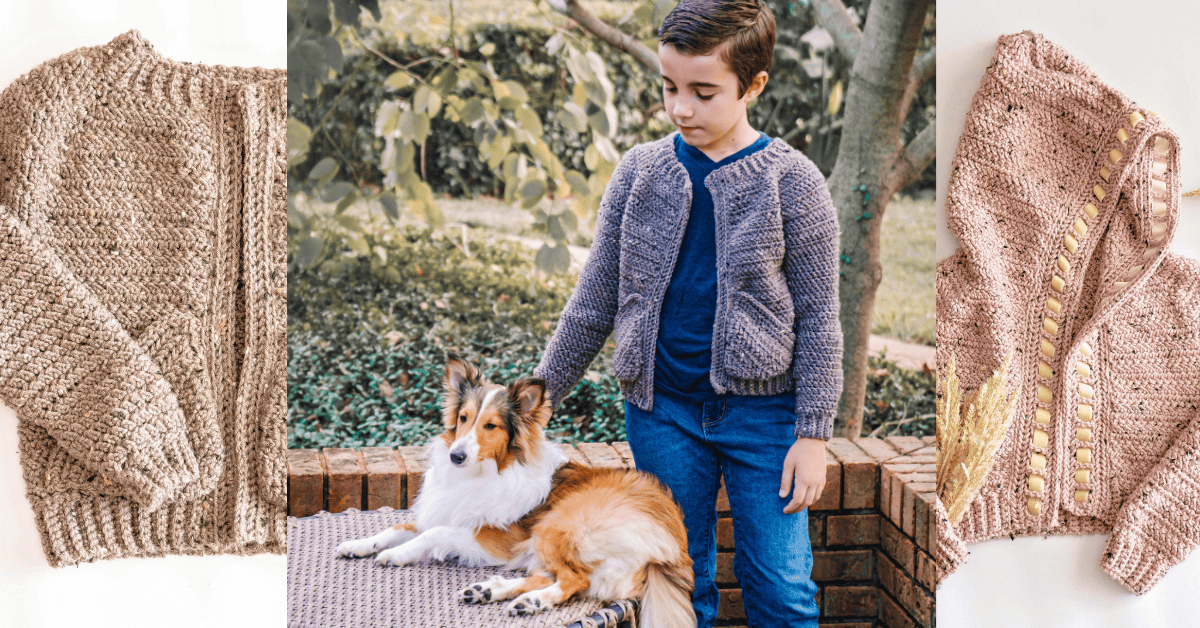
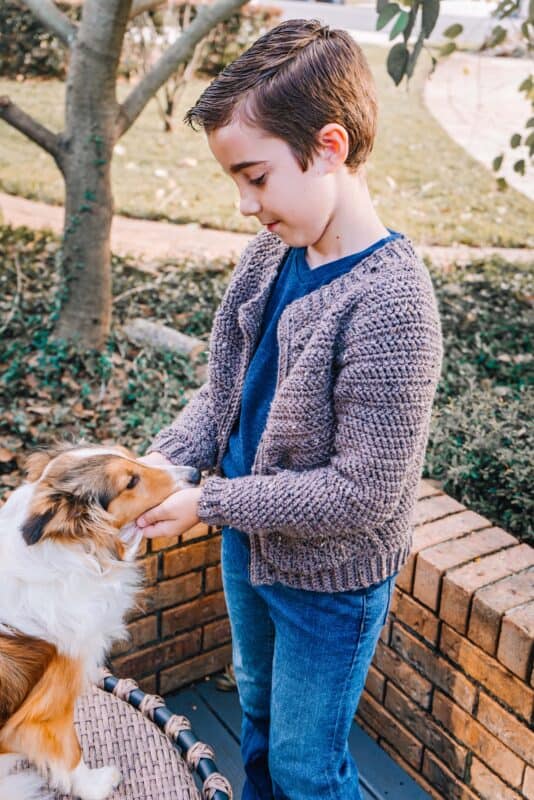
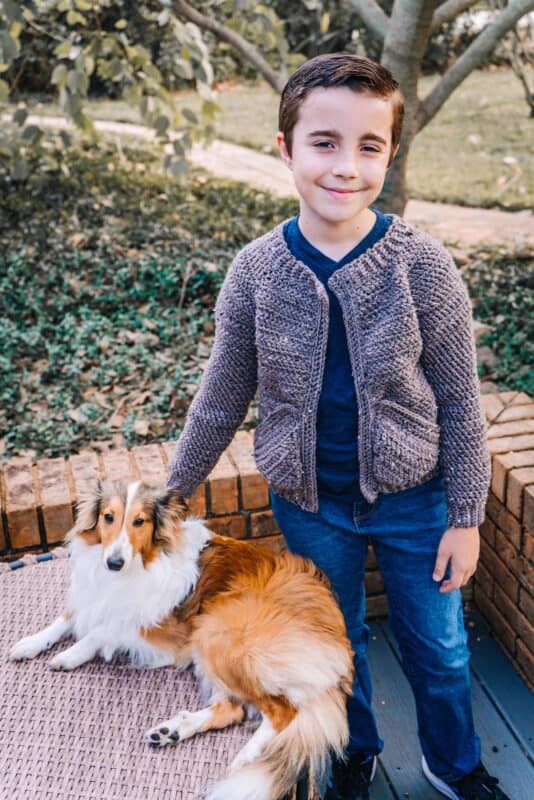
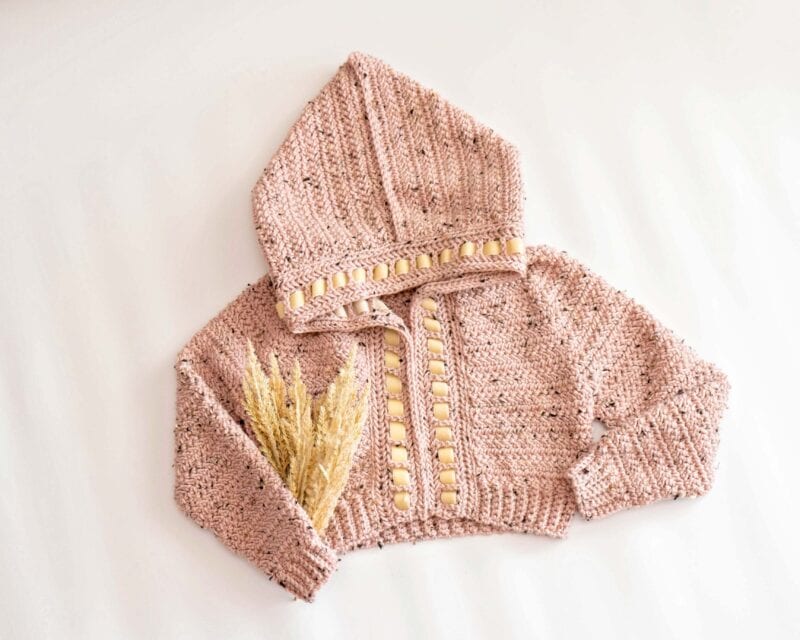
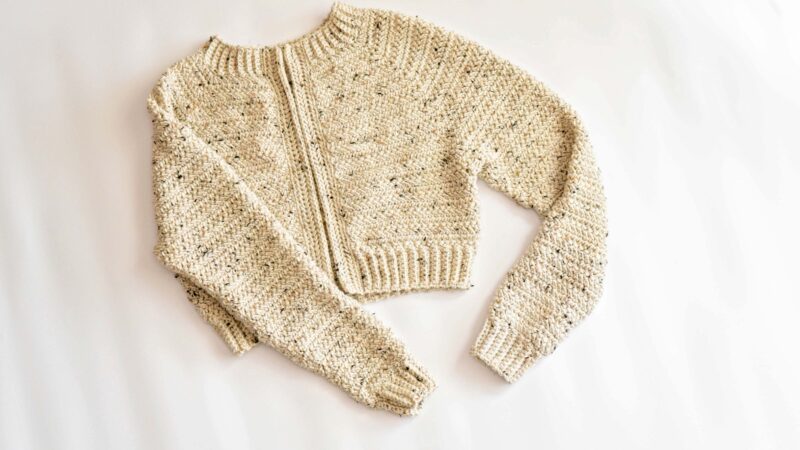
The Cascade Child Crochet Cardigan is a cozy, classic layering piece designed to grow with your favorite little humans. With its timeless silhouette and comfortable fit, this cardigan is perfect for everyday wear, special occasions, and everything in between — from playground adventures to family photos.
Disclosure: This post contains affiliate links. Please read my disclosure for more info.
Designed with practicality and creativity in mind, this child-size crochet cardigan features a top-down raglan construction that allows you to customize the fit and length as you stitch. Whether you’re making a lightweight layer for mild weather or a cozy cardigan for cooler days, this pattern offers the flexibility to create something truly special.
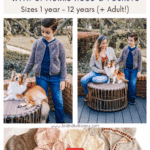
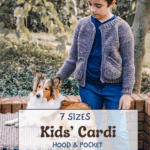
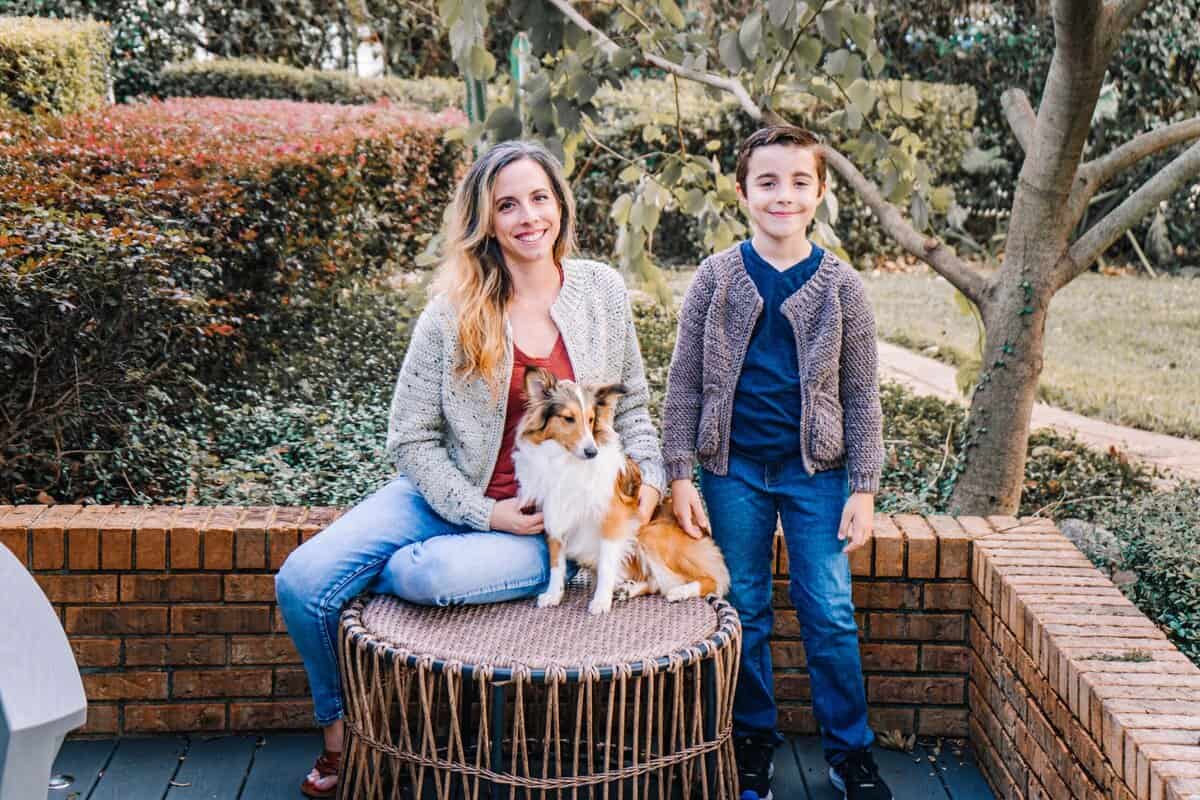
With sizes included from 1 year through 12 years, the Cascade Child Cardigan is a go-to pattern for handmade gifts, sibling sets, and building a wardrobe full of thoughtful, handmade pieces kids will love to wear. An adult version is also available for Mommy & Me matching styles!
Cascade Child Crochet Cardigan Supplies
Crochet Hook:
Notions:
Removable stitch markers if needed
Yarn needle to weave in ends
Scissors
Blocking Mats and Pins (optional)
Yarn:
WeCrochet Brava Tweed Worsted
97% Premium Acrylic, 3% Viscose; 218yds/100g
Yarn Substitutions:
Mary Maxim Natural Alpaca Tweed – 77% Acrylic, 20% Alpaca, 3% Viscose; 262yds/100g
Herrschners Worsted 8 Heathers – 100% Acrylic, 489yds/226g
Big Twist Tweed – 97% Acrylic, 3% Polyester; 382yds/170g
Yardage:
Yardage will vary depending on the cardigan construction choices and modifications. Add 25% more yardage to the hood and adjust the length accordingly. Yardage given is based on the waist-length cardigan.
520 (600, 700, 850, 1000) (1150, 1350, 1450) yds
3 (3, 4, 4, 5) (6, 7, 7) skeins
What you’ll love about this pattern.
👕 Top-down raglan construction — no seams, easy try-on as you go.
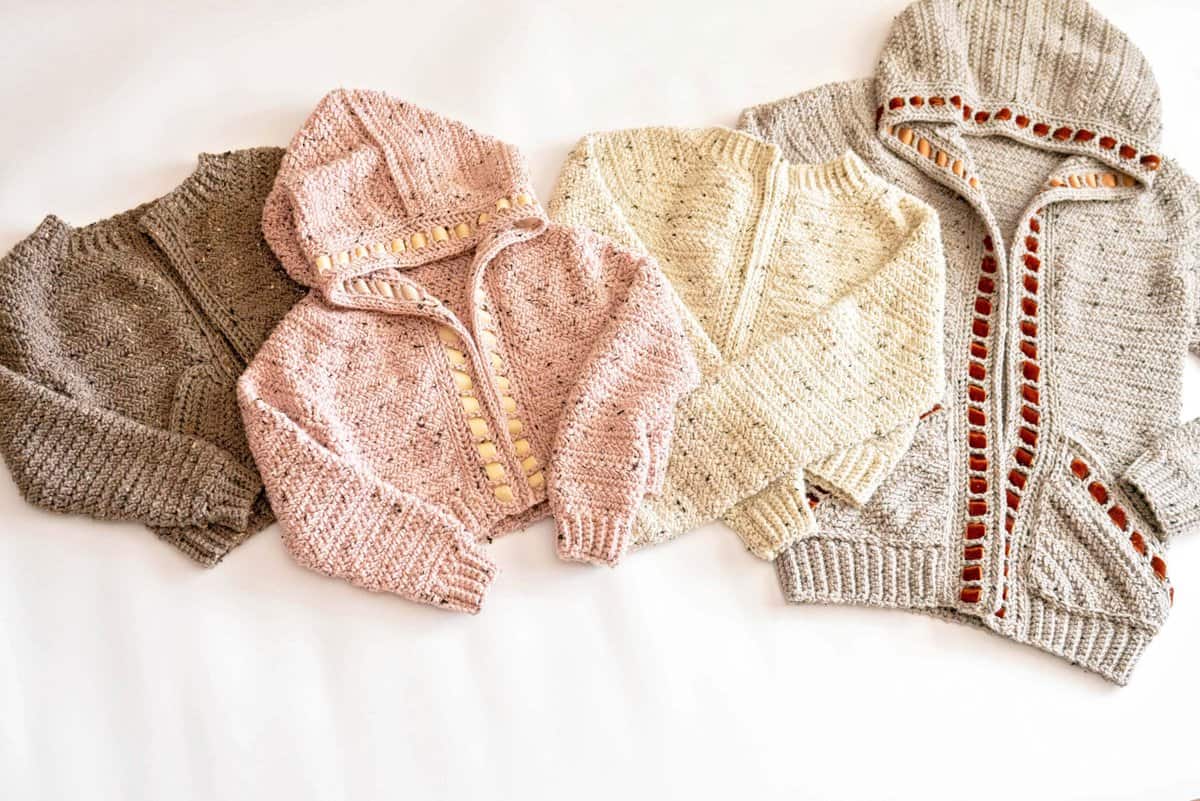
💡 Customizable length and style — make it cropped, classic, or cozy! Add a hood or pockets, too!
🧒 Comfort-first design — perfect for kids’ playtime and layering.
Abbreviations/Stitches:
blo- back loop only
ch – chain
dc – double crochet
flo – front loop only
hbdc – herringbone double crochet
hsc – herringbone single crochet
MC – Magic Circle
Reverse hdc
Reverse sc
RS – right side
Stsc – stacked single crochet
st(s) – stitch(es)
Tr – treble crochet
WS – wrong side
YO – yarn over
Gauge:
11 sts x 8 rows = 4×4 inches in hbdc
Skill Level:
Intermediate
Size:
1Y (2Y, 4Y, 6Y) (8Y, 10Y, 12Y)
To fit approximate chest: 25 (27, 27.5, 30) (31.5, 33, 34)”
Bust measurement without ease; finished garment has a 2-3” ease.
Notes:
- How to Determine the Best Fit: Use bust measurements to determine size. Due to the 2-3” of ease, this garment will be a bit oversized. For a more fitted garment, consider going down a size.
- Starting chains are not used in the body of this pattern. Instead, we will use the Stacked Single Crochet (see Special Stitches).
- The ch 1 at the beginning of a row does not count as a stitch.
- Work the first row of sts in the back humps of the starting chain.
- Using a stitch marker at the beginning of each row is recommended.
- The instructions and stitch counts are given for the smallest size, with the larger sizes in brackets ( ). Before you dive into your project, take a moment to identify the stitch and row counts that match the size you’re making. By highlighting or marking them, you’ll save time and effort later on. Trust us, this small step will make a big difference in your crochet journey!
A Note About Ribbing Gauge:
Ribbing can be fickle when it comes to matching gauges. I find that crocheters can vary widely in tension. Find the right tension for you by going up or down a crochet hook size. The Ribbing will create a more fitted appearance, just maintain consistent tension. If tension is too tight, fabric might pucker, to avoid this keep a loose tension or use a larger hook.
Cascade Crochet Cardigan Video Tutorial:

Special Stitches:
Stacked Single Crochet (Stsc): Do NOT chain, insert hook into next stitch, yo, pull up a loop, yo and pull through both loops, insert hook in the vertical bar below, yo, pull up a loop, yo and pull through both loops on hook.
Stacked Double Crochet (Stdc): Do NOT chain, insert hook into next stitch, yo, pull up a loop, yo and pull through both loops, (insert hook in the vertical bar below, yo, pull up a loop, yo and pull through both loops on hook) twice.
Herringbone Double Crochet (Hbdc): YO and insert hook into the stitch, YO and pull up a loop and pull through the first loop on the hook, YO and pull through one loop on the hook, YO and pull through the remaining two loops on the hook.
Herringbone Single Crochet (Hsc): insert the hook through the vertical bar of the previous single crochet stitch, insert into the next stitch and pull up a loop, yarn over and pull through all three loops on the hook.
Reverse sc: bring the working yarn towards the front of your work and insert the crochet hook into the first stitch from the back to the front (working in reverse), yarn over, pull up a loop to the back, yarn over, and pull through both loops on the hook.
Reverse Hsc: insert the hook through the vertical strand on the backside of work from right to left, insert the hook into the next stitch from back to front (working in reverse), yarn over, pull up a loop to the back, yarn over and pull through all three loops on the hook.
How to have straight edges with the Hbdc stitch:
If straight crochet edges make your crochet heart happy, here is a modification of the last stitch of the hbdc sts in rows. This technique can be used for this cardigan to achieve a lovely fabric.

❓FAQs — Cascade Child Crochet Cardigan
Q: What skill level is this pattern for?
A: This pattern is ideal for confident beginners to intermediate crocheters who are familiar with basic increases and working in rows.
Q: Can I customize the length or sleeves?
A: Yes! Because this is worked top-down, you can try it on as you go and adjust the body or sleeve length any time.
Q: What yarn should I use?
A: Any worsted-weight yarn works beautifully — pick colors that match your child’s wardrobe or seasonal style.
Q: Is there an adult version?
A: YES! The Adult-Sized Cascade Cardigan comes in 9 sizes (XS-5X)! Perfect for those Mommy & Me matching moments!
Construction
The Cascade Child Crochet Cardigan pattern uses a top-down raglan neckline and is worked flat in rows — meaning no sewing seams and easier fit adjustments as you crochet:
- Neckline & Yoke: Start at the neckline and crochet the raglan increases into the yoke.
- Divide for Sleeves & Body: Once your yoke is complete, you’ll separate the front panels from the back panel and continue working in rows.
- Work the body: Crochet down to your desired cardigan length.
- Add Sleeves: Sleeves can be worked as short sleeves or quarter-length sleeves. Simply stop when the sleeves are the desired length.
- Finishing Touches: Add an option hood or pockets, finish with a simple ribbing trim, then weave in all ends and block!
Looking for more child-sized sweaters? Check out the Cuff-to-Cuff Sweater (and the coordinating baby pants), the Autumn Wheat Child Sweater, and the Everyday Crochet Sweater!

Click the box below to unlock this exclusive subscriber content for free. Add your email and create a password. If you are having trouble, reset your password or log in to the Grow Portal.
I’m thrilled to share this amazing crochet pattern with you! Please don’t copy, paste, or distribute this pattern. Prefer an ad-free experience? Purchase a digital PDF file for a small fee from one of my online stores. I appreciate your support and readership. You are why I can keep doing what I love and sharing it with others. Thank you from the bottom of my heart.
Cascade Child Crochet Cardigan – Written Pattern Instructions
Neck & Yoke
Using an I (5.5mm) hook
Ch 52 (56, 60, 64) (64, 66, 68)
Row 1 (RS):
Working in the back humps of the chains, Stsc in first st from the hook, Hbdc in the next 6 (7, 7, 7) (7, 8, 8) sts, 2 Hbdc in each of the next 2 sts, mark the space between the two increases, Hbdc in the next 8 (8, 10, 12) (12, 11, 12) sts, 2 Hbdc in each of the next 2 sts, mark the space between the two increases, Hbdc in the next 14 (16, 16, 16) (16, 18, 18) sts, 2 Hbdc in each of the next 2 sts, mark the space between the two increases, Hbdc in the next 8 (8, 10, 12) (12, 11, 12) sts, 2 Hbdc in each of the next 2 sts, mark the space between the two increases, Hbdc in the next 6 (7, 7, 7) (7, 8, 8) sts, dc in last, turn. | 60 (64, 68, 72) (72, 74, 76) sts
Repeats:
Repeat Increasing Row (instructions below) for 3 (2, 1, 4) (3, 4, 5) more rows, then go to Yoke Increasing Continued (see below). | 84 (80, 76, 104) (96, 106, 116) sts
Yoke Increasing Continued:
Alternate an Increasing Row and a Non-Increasing Row for 4 (6, 8, 6) (8, 8, 8) more rows. At this point, there are 8 (9, 10, 11) (12, 13, 14) total rows for the Neck & Yoke; do not fasten off. | 100 (104, 108, 128) (128, 138, 148) sts
How To Increase or Not Increase:
Increasing Row:
Stsc in first st, [Hbdc to one stitch before the marker, 2 Hbdc in the next 2 sts, mark the space between the two increases] four times, Hbdc to the last st, dc in last, turn. Each row will increase by 8 sts.
Non-increasing Row:
Stsc in first st, Hbdc to the last st (moving the stitch markers up a row between sts), dc in last, turn. St count will be the same as previous row.
Split the Body & Sleeves
This row will create the armholes and stitches for the body. The armholes will be worked later, after the body stitches are done.
Continue with I (5.5mm) hook.
Row 1 (WS):
Stsc, Hbdc 13 (14, 14, 16) (16, 18, 19), ch 2 (2, 4, 2) (4, 3, 2), skip 22 (22, 24, 30) (30, 31, 34) sts, Hbdc 28 (30, 30, 34) (34, 38, 40), ch 2 (2, 4, 2) (4, 3, 2), skip 22 (22, 24, 30) (30, 31, 34) sts, Hbdc 13 (14, 14, 16) (16, 18, 19), dc in last, turn. | 60 (64, 68, 72) (76, 82, 84) body sts
Body Continued
Row 1:
Stsc in first st, Hbdc across until the last st (including the chain sts), dc in last, turn. | 60 (64, 68, 72) (76, 82, 84) sts
Row 2:
Stsc in first st, Hbdc across until the last st, dc in last, turn.
Repeats:
Repeat Row 2 until there is a total of 4 (4, 5, 5) (7, 7, 7, 7) rows for a cropped cardigan, 8 (8, 10, 10) (10, 12, 14, 16) rows for a mid-length cardigan, or 12 (12, 16, 16) (18, 20, 20) rows for a longer cardigan. Do not fasten off.
This can be adjusted to be any length by crocheting more or fewer rows.
Bottom of Cardigan Ribbing
The ribbing will be worked in rows and joined along the bottom edge of the cardigan as you crochet.
Continue with I (5.5mm) hook
Row 1:
Ch 8 (8, 8, 8) (9, 9, 9), sc in second chain from hook and across to body of cardigan, sl st the next 2 sts on the bottom body edge (these do not count as sts), turn. | 7 (7, 7, 7) (8, 8, 8) sts
Row 2:
Skip the 2 sts from the body edge, blo sc in each st across to the last st, sc in both loops of the last st, turn. | 7 (7, 7, 7) (8, 8, 8) sts
Row 3:
Ch 1 (does not count as a stitch), sc through both loops of the first st, blo sc in each st across, sl st the next 2 sts along the bottom body edge, turn.
Repeats: Repeat Rows 2-3 around the bottom of the cardigan body. Fasten off and weave in ends.
Cardigan Sleeves
Sleeves can be worked as short sleeves or quarter-length sleeves. Simply stop when the sleeves are the desired length.
Continue with I (5.5mm) hook
Rnd 1 (WS):
Join yarn to the center underarm, Stsc in first, work the remaining 23 (23, 27, 31) (33,33, 35) sts around in Hbdc, join and turn. | 24 (24, 28, 32) (34, 34, 36) sts
Please note, there will be holes under the arms after this rnd, these can be stitched closed with the tail end of the yarn.
Rnd 2 (Dec Rnd):
Stsc, dc2tog, work in Hbdc to the last two sts in round, dc2tog, join and turn. 2 sts decreased. | 22 (22, 26, 30) (32, 32, 34) sts
Non-Dec Rnd:
Stsc, Hbdc in remaining sts around, join and turn.
Repeats:
1Y: [Work Non-Dec Rnd for 3 rounds, work Dec Rnd for 1 round] 2 times. Then work Non-Dec Rnd 6 times for a total of 14 rnds for the arms. | 18 sts
2Y: [Work Non-Dec Rnd for 5 rounds, work Dec Rnd for 1 round] 2 times. Then work Non-Dec Rnd 4 times for a total of 16 rnds for the arms. | 18 sts
4Y: [Work Non-Dec Rnd for 3 rounds, work Dec Rnd for 1 round] 3 times. Then work Non-Dec Rnd 6 times for a total of 18 rnds for the arms. | 20 sts
6Y: [Work Non-Dec Rnd for 3 rounds, work Dec Rnd for 1 round] 4 times. Then work Non-Dec Rnd 4 times for a total of 20 rnds for the arms. | 22 sts
8Y: [Work Non-Dec Rnd for 3 rounds, work Dec Rnd for 1 round] 5 times. There is a total of 22 rnds for arms. | 22 sts
10Y: [Work Non-Dec Rnd for 3 rounds, work Dec Rnd for 1 round] 5 times. Then work Non-Dec Rnd 4 times for a total of 24 rnds for the arms. | 22 sts
12Y: [Work Non-Dec Rnd for 3 rounds, work Dec Rnd for 1 round] 5 times. Then work Non-Dec Rnd 6 times for a total of 26 rnds for the arms. | 24 sts
Do not fasten off and go to Cuff Ribbing.
Cuff Ribbing
With H (5.0mm) hook
Row 1:
Ch 8, sc in second chain from hook and across to sleeve, sl st 2 sts along the arm edge (these do not count as sts), turn. | 7 sts
Row 2:
Skip the two sts from the sleeve, in blo sc in each st across until the last st, sc in both loops of the last st, turn. | 7 sts
Row 3:
Ch 1 (does not count as a stitch), sc through both loops of the first st, blo sc in each st across, sl st 2 sts along the sleeve, turn.
Repeats:
Repeat Rows 2-3 around the bottom of the arm. Join last row to beginning row by slip stitching through blo of first and last row at the same time with the WS facing.
Repeat Arm & Cuff for the second arm.
Hooded Option
With I (5.5mm) hook
Row 1:
With the WS of the neckline facing, attach the yarn to the first stitch in the row. Stsc in first st, Hbdc across until the last st, dc in last, turn.
Rows 2-21 (23, 25, 25) (27, 27, 27):
Stsc in first st, Hbdc across until the last st, dc in last, turn.
The height of the hood can be adjusted by crocheting more/fewer rows.
Joining the Hood Together:
With the RS facing, fold the hood in half, sl st each side of the hood together across the top opening as follows: insert your hook into the flo of the stitch closest to you, and through the blo of the stitch farthest away from you, yo, pull through all the loops on the hook.
Front Trim for Hooded Option
With I (5.5mm) hook.
Set Up: Join the yarn at the bottom left corner of the cardigan front opening. Slip stitch across the opening (including the hood) by placing 1 sl st per sc row, and 3 sl sts per 2 Hbdc rows, and the ending stitch count should be a multiple of 4 + 3.
Row 1 (WS):
Ch 1, working in the flo of the sl sts, reverse hsc in each stitch across, turn.
Row 2 (RS):
Ch 1, hsc in each stitch across for the RS row, turn.
Row 3:
Ch 3 (or Stdc), Tr in next, *ch 1, skip 1, Tr 1*; repeat from * to * until the last st, Tr in last, turn.
Row 4:
Repeat Row 2.
Row 5:
Ch 1, reverse hsc across for the RS row, fasten off at the end of the row.
If desired, weave a ribbon through the Tr sts on Row 3 (see video).
Non-Hooded Neck Trim
With the RS facing, attach the yarn to the top left corner of the neck.
With I (5.5mm) hook
Row 1:
Ch 6, sc in second chain from hook and across to body of cardigan, sl st the next 2 sts on the top neck edge (these do not count as sts), turn. | 5 sts
Row 2:
Skip the 2 sts from the neck edge, in blo sc in each st across until the last st, sc in both loops of the last st, turn. | 5 sts
Row 3:
Ch 1 (does not count as a stitch), sc through both loops of the first st, blo sc in each st across, sl st the next 2 sts along the neck edge, turn.
Repeats:
Repeat Rows 2-3 around the neck edge. Do not fasten off and go to Front Trim.
Front Trim for Non-Hooded Option
Continue with I (5.5mm) hook
Set Up: Continue to slip stitch down the front RS edge of the cardigan, placing 3 sl sts per 2 rows, turn.
Row 1 (WS):
Ch 1, in the flo, sc in first, reverse hsc across for the remaining sts in the row, turn.
Row 2 (RS):
Ch 1, sc in first, hsc across for the remaining sts in the row, turn.
Row 3:
Ch 1, sc in first, reverse hsc across for the remaining sts in the row, fasten off at the end of the row.
For the other front side of the cardigan, start by joining the yarn and slip stitching across the row with the RS facing. Repeat Set Up – Row 3 above.
Pockets – Optional (Make 2)
With I (5.5mm) hook.
Row 1 (RS):
Inside MC: Stsc, Hbdc 3, pull ring closed, turn. | 4 sts
Row 2 (WS):
Stsc and Hbdc in first, Hbdc in next, 2 Hbdc sts in each of the next 2 sts, turn. | 7 sts
Row 3:
Stsc and Hbdc in first, Hbdc until the last st in the row, 2 Hbdc in last, turn. | 9 sts
Rows 4-8:
Repeat Row 3. For the rest of the pocket section, the stitch count will increase by 2 sts per row.
Rows 9-10:
2 Hsc sts in the first, hsc to the last st, 2 Hsc sts in the last, turn.
Row 11:
This row is for adding a ribbon trim. If a ribbon is not being added, then crochet this row in hsc. Ch 3 (or Stdc) and Tr in the first, (Tr 1, ch 1, skip 1) until the last 2 sts, Tr 1 in the next, 2 Tr in the last, turn.
Row 12-13:
Repeat Rows 9-10.
Rotate the pocket to the right and sl st down the first row edge, ch 1 at the point, and sl st up the opposite row edge, fasten off, leaving a long tail. Block the pockets, then use a tapestry needle to sew the pockets to the side of the cardigan.
Finishing
Block, weave in any ends, and enjoy wearing!
The Cascade Child Crochet Cardigan is fun, wearable, and endlessly customizable. Whether you’re making it for a favorite mini-person, a gift, or a matching set, this pattern pairs simplicity with impressive results — perfect for crocheters who want cozy, handmade style without complicated steps.
Check out some of my other cardigan patterns!
Autumn Wheat Beginner Cardigan
Gemstone Granny Cardi
Hummingbird Cardigan
Get Comfy Cardigan
Seabird Mosaic Cardi
Well, That Was Fun! What’s Next?