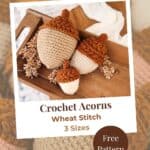
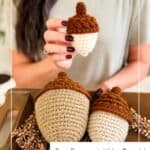
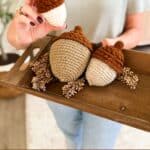

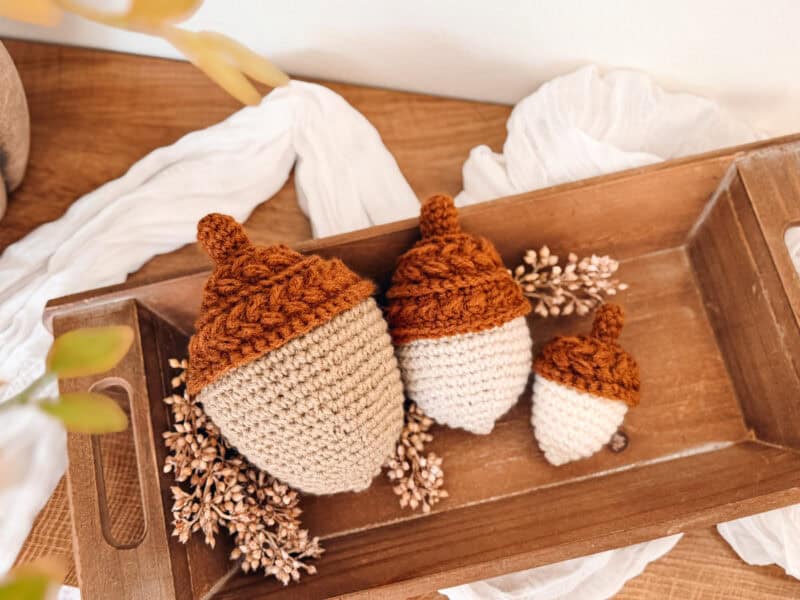
In most crochet acorn patterns, there’s a moment where you put the hook down and pick up a tapestry needle. That’s the part I wanted gone. This one’s worked in one piece, stem and all, so the acorn comes off your hook finished.
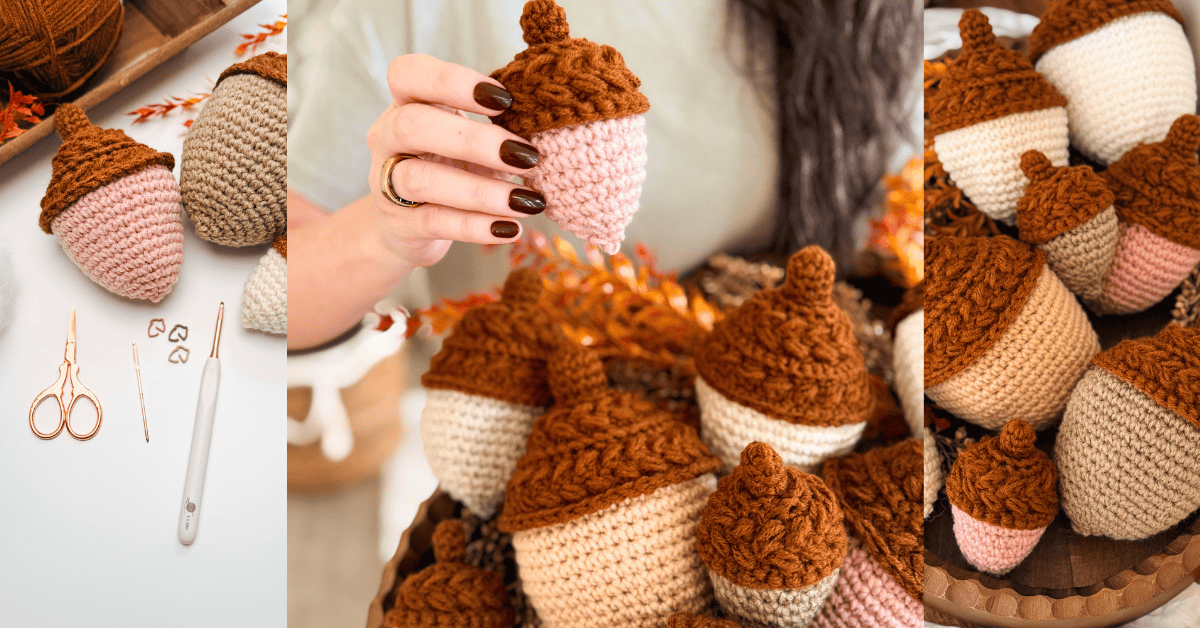
Disclosure: This post contains affiliate links. Please read my disclosure for more info.
The decrease rounds are what I fussed over longest. If every decrease sits directly over the one below it, they line up into a ridge down the side of the nut, even with plain stitches in between. So I shifted every other round to keep them apart through the widest part of the taper, which is the part you actually see. That’s why some decrease rounds open with a stitch or two of plain single crochet, and some open right on the decrease.
I made these in worsted weight on a G hook, which is smaller than I’d normally reach for with that yarn. A loose fabric lets the stuffing show through, and you can’t fix that later. All three sizes are here on the blog, and the small one takes 18 yards, so this is very much a scrap project. Add a Pumpkin Spice Trio or some Petal Loop Pumpkins for a stunning fall centerpiece! For fall party flair, use coordinating colors to make some Wheat Stitch Wine Glass Covers!
Before You Hook: Crochet Pattern Details
🧶 Yarn Used: Herrschners Worsted 8 (100% Acrylic, 489yds/226g)
⚖️ Yarn Weight: #4 Worsted Weight
🧵 Featured Stitch: Wheat Stitch™
🪝 Hook Size: US G (4.0mm) Crochet Hook, or hook to obtain gauge
📏 Sizes: 3 Sizes
🩷🩷🤍🤍 Difficulty level: Easy
🕐 Approx. Crochet Time: About 45 minutes for a Small, up to about 2 hours for a Large
🏷️ Project Type: Fall home decor you can make from scraps, a bowl filler and table centerpiece that keeps working from September through the holidays.
Save for Later • Get a Summary • Pick Up Where You Left Off
Why You’ll Love This Crochet Acorn Pattern
- An optional weighted bottom keeps the pile where you put it.
- No sewing and no assembly. The stem, the cap, and the nut are all one continuous piece.
- Three sizes, and the stitch counts never change between them, so once you’ve made one, you’ve made all three.
- The cap has real texture instead of a plain single crochet dome.
- Scrap-friendly. 18 yards for a small, 42 yards for a large, split across two colors.
- The PDF includes six colorways, including one with no orange or red.
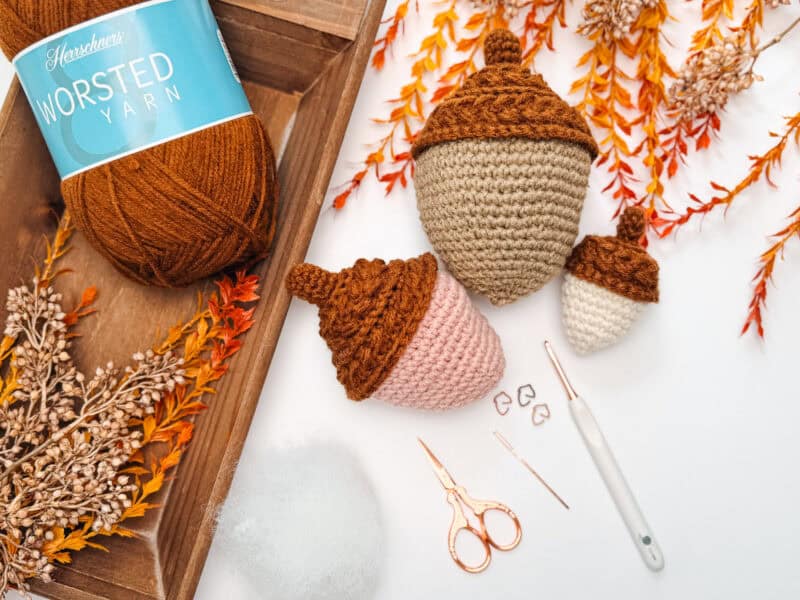
Wheat Stitch Crochet Acorn Pattern Supplies
Yarn
Herrschners Worsted 8
100% Acrylic, 489yds/226g
Two colors per acorn. Color A is the stem and the cap; Color B is the nut.
Yarn Quantities
Small: 18 yds total, Color A 7 yds and Color B 11 yds
Medium: 30 yds total, Color A 12 yds and Color B 18 yds
Large: 42 yds total, Color A 17 yds and Color B 25 yds
Crochet Hook
Size US G (4.0mm) Crochet Hook or hook to obtain gauge.
Notions
Scissors
Yarn Needle
Removable Stitch Marker
Fiberfill
Optional: poly pellets or dried beans for a weighted bottom
Be sure to check out the full pattern tips below
Yarn Substitutions
Brava Worsted, 100% Premium Acrylic, 218yds/100g
Mary Maxim Maximum Value, 100% Acrylic, 474yds/227g
Lion Brand Pound of Love, 100% Acrylic, 1,020yds/454g
Remember always to check the gauge and drape when substituting yarns.
Skill Level
Easy – Advanced Beginner. You need to work in the round, single crochet, increase, decrease, and keep a stitch count. The puff stitch and the split loop round are the only two things here that might be new, and both are in the video.
Sizing & Finished Measurements
Measurements are from base to tip, including the stem.
- Small: 2.5 inches wide by 3.75 inches tall
- Medium: 3.75 inches wide by 6 inches tall
- Large: 4.5 inches wide by 7 inches tall
Those are the measurements you get with worsted weight and a G hook. Here’s the useful part: the stitch counts are the same no matter what yarn you use. Go bulkier with a bigger hook, and every acorn grows. Go finer with a smaller hook, and they shrink right down. You aren’t resizing the pattern. You’re changing the yarn and letting the acorn follow, so a worsted small and a chunky small are the same 18 rounds.
Use Any Yarn Weight You Like
You don’t have to use worsted weight for this crochet acorn pattern. Any yarn weight works, as long as you pair it with a hook that gives you a firm fabric, and the stitch counts stay exactly the same no matter what you reach for.
That’s the easiest way to change the size. A lighter yarn with a smaller hook gives you little acorns, and a bulky yarn with a bigger hook gives you oversized ones, all from the same three sets of instructions. A worsted small and a chunky small are the same 18 rounds. They just finish at different sizes.
Mixing weights in one bowl works too, if you want more variation in a pile than three sizes in a single yarn will give you.
Abbreviations
blo/flo – back loop only/front loop only
ch – chain
Rnd(s) – Round(s)
RS/WS – Right Side/Wrong Side
sc – single crochet
sc2tog – single crochet 2 together
sl st – slip stitch
st(s) – stitch(es)
Gauge
Gauge isn’t critical for this one, which is a nice change. What matters is that your fabric is tight enough that the stuffing doesn’t peek through. Hold your swatch up to a window, and if you can see light through it, go down a hook size.
Tips
How to Crochet A Gauge Swatch
- Working a gauge swatch will let you know if you will have the correct sizing for this pattern. It will also help you practice the stitches used in this project and improve your stitch work for a flawless look.
- Are you struggling to match the gauge? Check out the blog post on What is Crochet Gauge and How To Fix It
Special Stitches Used in This Pattern
Puff Stitch
Yarn over and insert your hook into the st. Yarn over and pull up a long loop. Yarn over and insert your hook into the same st. Yarn over and pull up a long loop; 5 loops on the hook. Yarn over and pull through the first 4 loops, yarn over and pull through the remaining loops.
Wheat Stitch
This is the cap texture. A skipped st, a sc, then a puff worked back into the st you skipped, so the puff sits on top of the sc and leans over like a grain of wheat. It’s written out in full every time it appears in this pattern, so there’s nothing extra to memorize. If you want to see the stitch built up slowly, with photos and video, that lives in How to Crochet The Wheat Stitch.
Invisible sc2tog
Insert your hook into the front loop of the first st, then into the front loop of the second st, 3 loops on the hook. Yarn over and pull through both front loops; 2 loops on the hook. Yarn over and pull through the remaining loops. Use this anywhere the pattern says sc2tog.
Invisible Join
Cut your yarn and pull the tail through the last loop. Thread it on a tapestry needle, skip the first st of the rnd, and insert the needle under both loops of the next st. Come back down through the center of the last st you made, then pull to match the height of the sts around it.

Important Pattern Notes
How the Acorns Are Made
The whole acorn is one piece, stem and all. Those first few plain rounds, worked in a handful of stitches, make up the stem. Start at the tip inside a magic ring, work down, and the cap opens out from there.
Then comes the part that makes this work. At the widest point of the cap, you work one round into one set of loops only, either the front loops or the back loops depending on which size you’re making, and then you fasten off. The other set of loops stays there untouched.
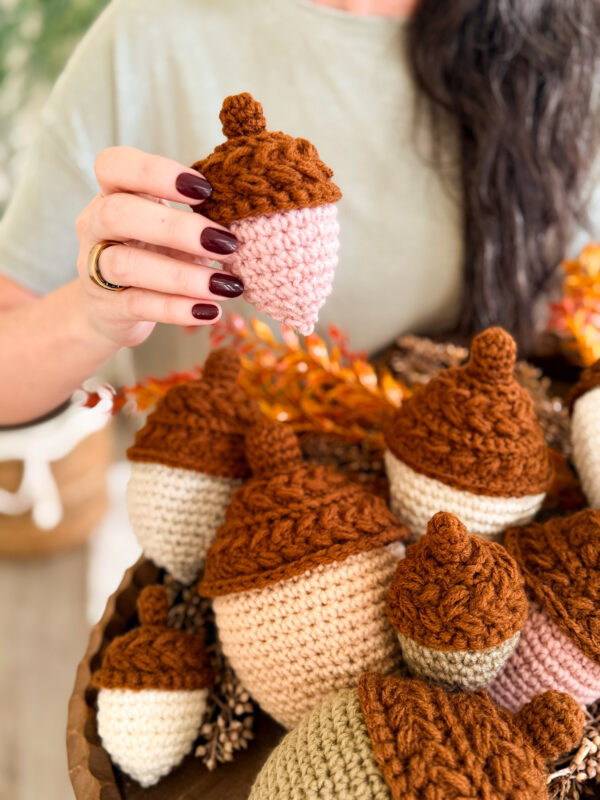
You go back to that round and work into the loops you left behind. The loops you used first become the flared brim of the cap, standing proud of the nut, and the nut grows out from underneath in your second color. That’s the whole trick, and it’s why there’s no seam anywhere and no cap to sew on afterward.
From there, you stop joining, work in a continuous spiral, stuff as you go, and close up the bottom with a tail run through the front loops. Start stuffing before the opening gets small, because shaping a nut through a 16-stitch hole is much easier than through an 8-stitch one.
Choosing Your Acorn Colors
Any colors you like will work here. Natural browns and tans if you want them to look like the ones under the tree in your yard, or hot pink and neon orange if that’s what’s in your stash and what makes you smile. The texture does the heavy lifting either way, so there’s no wrong answer.
If you’d rather start from something already worked out, the PDF has six full colorways laid out for you, with every shade named and each set shown at all three sizes.
And if you’d rather build your own, the Briana K app has a Color Plotter for this pattern. You can try your colors on the acorns and see the whole set together before you wind a single ball, which beats working out how a combination reads after you’ve already bought the yarn.
Crochet Acorn Pattern FAQs
How much yarn does one crochet acorn take?
Very little, which is the appeal. A small acorn takes 18 yards total, a medium takes 30, and a large takes 42, and each of those is split across two colors. Nine acorns, three of each size, come to roughly 270 yards. A single 489-yard skein of worsted in your cap color will cover the caps and stems for well over a dozen acorns, so in practice, you buy the cap color and use whatever’s already in your basket for the bodies.
Can I make these in cotton or a chunky yarn?
Yes to both. Cotton gives you a crisper, more defined puff and holds its shape nicely, though it’s less forgiving if your tension wanders. Chunky gives you a softer, rounder cap texture, because the puffs blur together as the yarn gets thicker. Whatever you choose, the only thing to watch is keeping your fabric tight enough to hide the stuffing, so go down a hook size from whatever the yarn band suggests.
What can I use instead of fiberfill stuffing?
Yarn scraps work, and they’re free, though they can leave lumps that show through the fabric, so pull them apart before you push them in. Cotton balls work for the small size. I’d avoid rice or anything organic for the main body of the nut, since it can attract pests, and these are going to sit out for months at a time. Use poly pellets only for the bottom for weight, not as your main stuffing.
Are crochet acorns safe for babies or pets?
No, and I want to be clear. These are decor, not toys. They’re stuffed firmly, the stem is a small protrusion, and the optional poly pellets are a serious choking hazard if the fabric is ever chewed through. If you want something a small child will handle, skip the pellets entirely, use a safe stuffing, and understand that a firmly stuffed acorn still isn’t a tested toy.
Can I sell acorns I make from this pattern?
Yes, on a small scale. Sell the finished acorns at your craft fair or in your shop, and credit to Briana K Designs is always appreciated, never required. You can’t copy, share, or resell the pattern itself, and please don’t film your own tutorial for it. Small scale means handmade by you, not sent out to a production facility.
How do I stop the stem from leaning?
Roll it firmly between your fingers. The stem is only a handful of stitches worked over a few rounds, so it holds whatever shape you leave it in, and it usually comes off the hook with a slight lean because of how the rounds join. Roll it between your finger and thumb for 30 seconds to straighten it out, and it stays put. Do the same with the whole nut between your palms to even out the stuffing and round it off.
Do I have to use the invisible join and the invisible sc2tog?
No, but they’re doing real work here. A standard slip stitch join leaves a visible bump right where the cap brim meets the nut, which is the most looked-at part of the whole acorn. A standard sc2tog leaves a small hole, and on a stuffed piece, a hole is somewhere the fiberfill shows. If you’re new to either one, work a small acorn the ordinary way first to learn the shape, then use the invisible versions on the ones you actually want to display.
Subscribe, Like & Watch on YouTube
Relax & Crochet with NO Ads
Upgrade to the Printable PDF
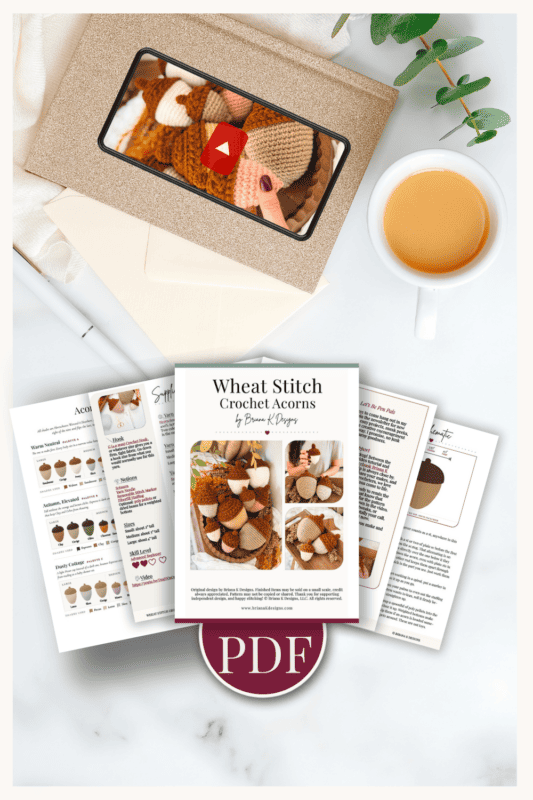
Beautifully formatted to print and take with you anywhere. The paid pattern includes:
Add your email in the box below to unlock this pattern to view on the blog for free. I’m thrilled to share this amazing crochet pattern with you! Please don’t copy, paste, or distribute this pattern. Prefer an ad-free experience? Purchase a digital PDF file for a small fee from one of my online stores. I appreciate your support and readership. You are why I can keep doing what I love and sharing it with others. Thank you from the bottom of my heart.
Printable Version
This pattern is free to read here on the blog. The ad-free printable PDF is available in the Briana K Designs shop on Etsy and Ravelry.
brianakdesigns.com
Wheat Stitch Crochet Acorns Written Pattern
Rnd 6 (RS): Ch 1, blo 2 sc in each st around, join and turn. | 24 sts
Rnds 7 and 8: Ch 1, skip the first st, sc in next, work a puff st into the skipped st, *skip the next st, sc in next, work a puff st into the skipped st; repeat from * around, join and turn. | 24 sts
Rnd 9 (WS): Ch 1, blo sc in each st around, join. | 24 sts
Fasten off with an invisible join and weave in the end.
The Nut, with Color B
Rnd 10 (RS): Turn. With Color B, go back to Rnd 8, the rnd you just worked into, and use the loops you left free this time. The loops you already used become the flared edge of the cap, and the nut grows out from underneath. Join with sl st near the seam, sc in each st around. Do not join. Work in continuous rnds from here. | 24 sts
Rnds 11 and 12: Sc in each st around. | 24 sts
Rnd 13: Sc in the first 2 sts, *sc2tog, sc in the next 4 sts; repeat from * to the last 4 sts, sc2tog, sc in the last 2 sts. | 20 sts
Start stuffing now and keep adding as you go. It is a lot easier to shape while the opening is still wide.
Rnd 16: Sc in the first st, *sc2tog, sc in the next 2 sts; repeat from * to the last 3 sts, sc2tog, sc in the last st. | 12 sts
Rnd 17: *Sc2tog, sc in the next st; repeat from * around. | 8 sts
Rnd 18: Sc2tog around. | 4 sts
Fasten off leaving a long tail. Thread the tail onto your tapestry needle and run it through the front loop only of each remaining st around. Pull snug to close, then weave in your end.
How to Style a Bowl of Crochet Acorns
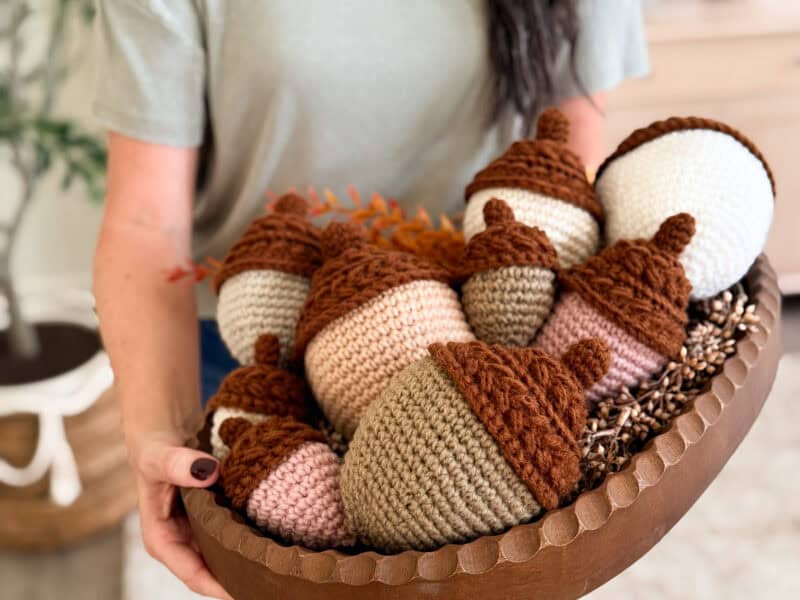
Nine is the number I keep coming back to. Three large, three medium, and three small fill a standard dough bowl or a wide-footed compote, with nothing balancing on top of anything else.
Weight the bottoms. It’s the single biggest difference between a pile that holds its arrangement and a pile that slumps into a heap by the second day. A spoonful of poly pellets in the bottom of the nut, before you close it up, is enough. Dried beans or rice work too, though I’d keep those away from anywhere damp.
Sizes go in clusters, not in a gradient. Grouping two or three of the same size together, then jumping to a different size, reads as natural. A tidy row running large to small reads as a display.
Let the large ones lie down. An acorn on its side, with the stem pointing toward the viewer, shows off the cap texture far better than one standing upright, where you only see the top of the cap.
For a fuller table, these sit well alongside other textured pieces. There are more in Fall Crochet Patterns if you want to build the whole thing out.
Medium Acorn
The Cap, with Color A
Rnd 1 (RS): Inside a Magic Ring, sc 8, join. | 8 sts
Rnds 2 to 4: Ch 1, sc in each st around, join. | 8 sts
Rnd 5: Ch 1, sc in each st around, join and turn. | 8 sts
Rnd 6 (WS): Ch 1, blo 2 sc in first, blo sc in the next st, *blo 2 sc in next, blo sc in the next st; repeat from * around, join and turn. | 12 sts
Rnd 7: Ch 1, blo 2 sc in each st around, join and turn. | 24 sts
Join The Kindest Community
Join our vibrant community of crafters on Facebook today. Whether you enjoy crafting with others or simply have burning questions, we’ve got you covered – join us now!
Rnds 8 and 9: Ch 1, skip the first st, sc in next, work a puff st into the skipped st, *skip the next st, sc in next, work a puff st into the skipped st; repeat from * around, join and turn. | 24 sts
Rnd 10: Ch 1, blo 2 sc in first, blo sc in next, *blo 2 sc in next, blo sc in next; repeat from * around, join and turn. | 36 sts
Rnd 11: Ch 1, blo sc in each st around, join and turn. | 36 sts
Rnd 12: Ch 1, skip the first st, sc in next, work a puff st into the skipped st, *skip the next st, sc in next, work a puff st into the skipped st; repeat from * around, join and turn. | 36 sts
Rnd 13 (RS): Ch 1, flo sc in each st around, join. | 36 sts
Fasten off with an invisible join and weave in the end.
The Nut, with Color B
Rnd 14 (RS): Do not turn. With Color B, go back to Rnd 12, the rnd you just worked into, and use the loops you left free this time. The loops you already used become the flared edge of the cap, and the nut grows out from underneath. Join with sl st near the seam, sc in each st around. Do not join. Work in continuous rnds from here. | 36 sts
Rnds 15 to 18: Sc in each st around. | 36 sts
Rnd 19: Sc in the first 2 sts, *sc2tog, sc in the next 4 sts; repeat from * to the last 4 sts, sc2tog, sc in the last 2 sts. | 30 sts
Rnds 20 and 21: Sc in each st around. | 30 sts
Rnd 22: *Sc2tog, sc in the next 3 sts; repeat from * around. | 24 sts
Rnd 23: Sc in each st around. | 24 sts
Start stuffing now and keep adding as you go. It is a lot easier to shape while the opening is still wide.
Rnd 24: Sc in the first st, *sc2tog, sc in the next 2 sts; repeat from * to the last 3 sts, sc2tog, sc in the last st. | 18 sts
Rnd 25: *Sc2tog, sc in the next st; repeat from * around. | 12 sts
Rnd 26: Sc2tog around. | 6 sts
Fasten off leaving a long tail. Thread the tail onto your tapestry needle and run it through the front loop only of each remaining st around. Pull snug to close, then weave in your end.
Large Acorn
The Cap, with Color A
Rnd 1 (RS): Inside a Magic Ring, sc 10, join. | 10 sts
Rnds 2 to 4: Ch 1, sc in each st around, join. | 10 sts
Rnd 5: Ch 1, sc in each st around, join and turn. | 10 sts
Rnd 6 (WS): Ch 1, blo 2 sc in first, blo sc in the next 4 sts, *blo 2 sc in next, blo sc in the next 4 sts; repeat from * around, join and turn. | 12 sts
Rnd 7: Ch 1, blo 2 sc in each st around, join and turn. | 24 sts
Rnds 8 and 9: Ch 1, skip the first st, sc in next, work a puff st into the skipped st, *skip the next st, sc in next, work a puff st into the skipped st; repeat from * around, join and turn. | 24 sts
Rnd 10: Ch 1, blo 2 sc in first, blo sc in next, *blo 2 sc in next, blo sc in next; repeat from * around, join and turn. | 36 sts
Rnd 11: Ch 1, blo 2 sc in first, blo sc in the next 2 sts, *blo 2 sc in next, blo sc in the next 2 sts; repeat from * around, join and turn. | 48 sts
Rnds 12 and 13: Repeat Rnds 8 and 9. | 48 sts
Rnd 14 (WS): Ch 1, blo sc in each st around, join. | 48 sts
Fasten off with an invisible join and weave in the end.
The Nut, with Color B
Rnd 15 (RS): Turn. With Color B, go back to Rnd 13, the rnd you just worked into, and use the loops you left free this time. The loops you already used become the flared edge of the cap, and the nut grows out from underneath. Join with sl st near the seam, sc in each st around. Do not join. Work in continuous rnds from here. | 48 sts
Rnds 16 to 20: Sc in each st around. | 48 sts
Rnd 21: Sc in the first 3 sts, *sc2tog, sc in the next 6 sts; repeat from * to the last 5 sts, sc2tog, sc in the last 3 sts. | 42 sts
Rnd 22: Sc in each st around. | 42 sts
Rnd 23: *Sc2tog, sc in the next 5 sts; repeat from * around. | 36 sts
Rnd 24: Sc in each st around. | 36 sts
Rnd 25: Sc in the first 2 sts, *sc2tog, sc in the next 4 sts; repeat from * to the last 4 sts, sc2tog, sc in the last 2 sts. | 30 sts
Start stuffing now and keep adding as you go. It is a lot easier to shape while the opening is still wide.
Rnd 26: Sc in each st around. | 30 sts
Rnd 27: *Sc2tog, sc in the next 3 sts; repeat from * around. | 24 sts
Rnd 28: Sc in the first st, *sc2tog, sc in the next 2 sts; repeat from * to the last 3 sts, sc2tog, sc in the last st. | 18 sts
Rnd 29: *Sc2tog, sc in the next st; repeat from * around. | 12 sts
Rnd 30: Sc2tog around. | 6 sts
Fasten off leaving a long tail. Thread the tail onto your tapestry needle and run it through the front loop only of each remaining st around. Pull snug to close, then weave in your end.
Get the Ad-Free PDF and the App Version
All three sizes are free right here on the blog. If you’d rather have it without ads, the PDF is a tidy printable layout with an Easy Print option for when you’re short on ink, plus six colorway pages with every shade named.
The PDF also includes an unlock code for the Briana K app, where the pattern keeps your place round by round, and the Color Plotter lets you try your colors before you buy any yarn.
Buy the ad-free PDF on Etsy or on Ravelry.
More Crochet Patterns You’ll Love
If you’re decorating the whole table this fall, here’s what else is on the blog to go with them.
🥂 Cheers, and happy crocheting!
Hook down? Not so fast…
I’d Love to See Yours!
You made something beautiful. Here’s how to keep it, show it off, and inspire the next maker.

What should you make next?
Keep the hook movingReaders Are Loving
 Wheat Stitch Bunny
 Wheat Stitch Snail
 Wheat Stitch Heart
 Wheat Stitch Snowman