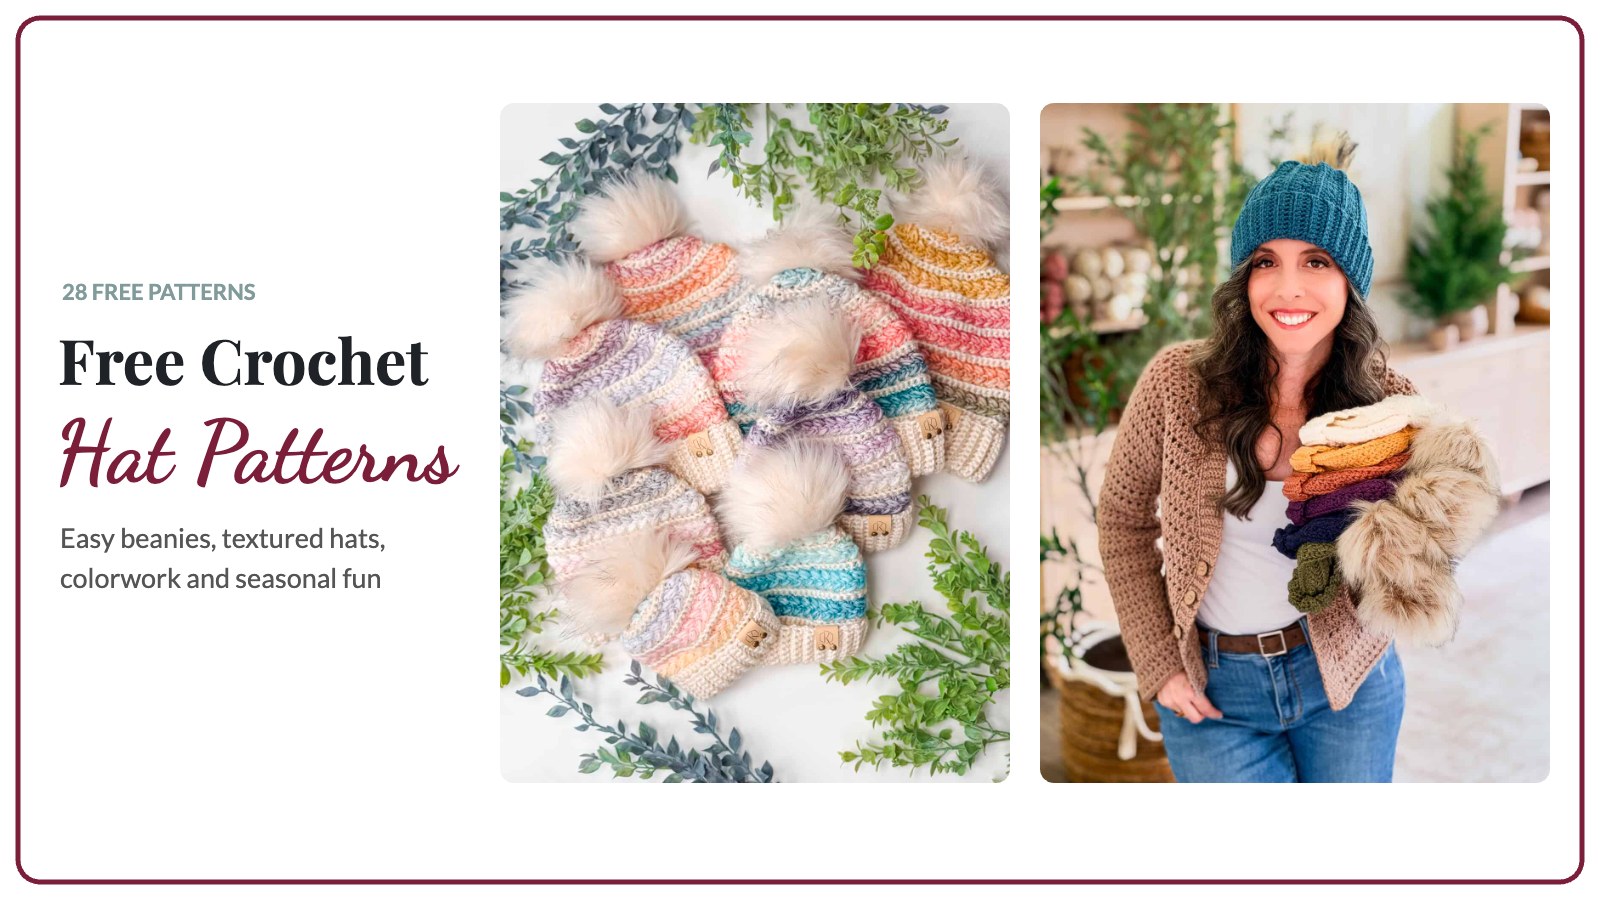
Hats are my favorite thing to crochet the second the weather turns. They are quick, they make the best gifts, and they are the perfect way to try a new stitch without committing to a whole blanket. I have been designing crochet patterns since 2014, and over the years my hat collection has grown into 28 free patterns, from easy beginner beanies to textured Wheat Stitch hats, colorwork, cables and a few just-for-fun designs.
Every hat below is free to make right here on the blog. For each one I have listed the skill level, yarn, hook, sizes, yardage and how it is constructed, plus my favorite tip, so you can pick the right hat for your time, your stash and your skills.
Quick Picks: Which Crochet Hat Should I Make?
- Brand new to crochet hats: the Autumn Wheat Easy Flat Hat (worked flat, no rounds) or the Mellow Texture Beanie.
- Fastest hat: the Macchiato Beanie in bulky yarn, only about 125 yards for an adult.
- Matching hats for the whole family: the Wheat Stitch Beanie and Petal Loop Beanie, both in 8 sizes from newborn to adult large.
- Baby and preemie gifts: the Juniper Hat, with 10 sizes starting at preemie.
- Hats for men: the Pine Fair Isle Hat (it includes a men’s size), the Houndstooth Beanie or the EHDC Beanie.
- Looks knit, but it’s crochet: the Knit Purl Hat or the Enchanted Hat.
- First colorwork project: the Houndstooth Beanie or the Mosaic Ridge Hat.
- Ready for a challenge: the cabled Frost Swirl Hat.
- Halloween and Christmas: the Witch Hat and the Santa and Elf Hat.
- Summer: the Wheatfield Sun Hat in cotton.
Easy Crochet Hats for Beginners
New to hats? Start here. These use simple stitches and clear videos, and a couple are worked flat, so you never have to join a round.
1. Autumn Wheat Easy Flat Hat
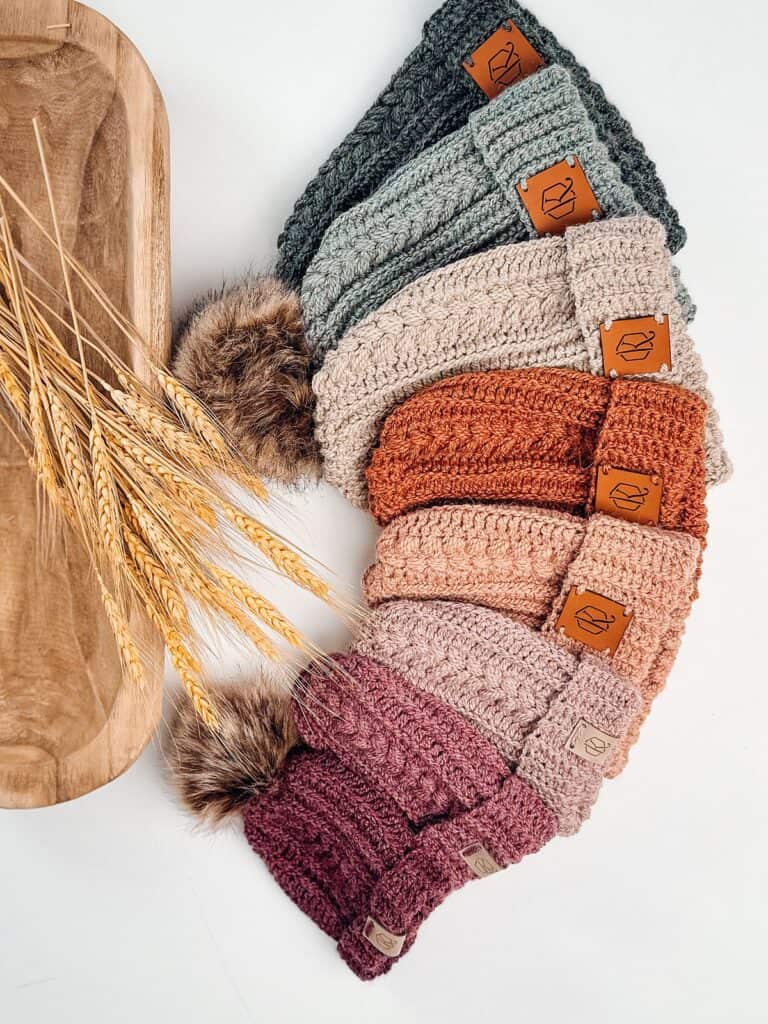
If working in the round makes you sweat, this is your hat. You crochet one flat piece side to side, seam it, and close the top with the starting tail. That’s it. The ribbing gets worked right alongside the body as you go, so there’s no separate brim to fuss with, and the half double crochet in the third loop gives you a lovely knit-like ridge. I sized it from newborn all the way to adult large, so one pattern covers the whole family, and it makes a great quick gift or market item. It’s designed with about 3 inches of negative ease for a snug, cozy fit. My best tip: check your gauge before you start, because yarn thickness can vary from color to color. If it comes out small, just add rows (keep the count even for toddler). Pop a pompom on top if you like.
- Skill level: Advanced Beginner
- Yarn: Crochet.com Upcycle Worsted (#4 worsted)
- Hook: US H (5.0mm)
- Sizes: Newborn to Adult Large (8 sizes)
- Yardage: 70 to 205 yds
- Construction: Worked flat side to side in rows, then seamed
- Video tutorial: Yes
Get the free Autumn Wheat Easy Flat Hat pattern
2. Mellow Texture Beanie
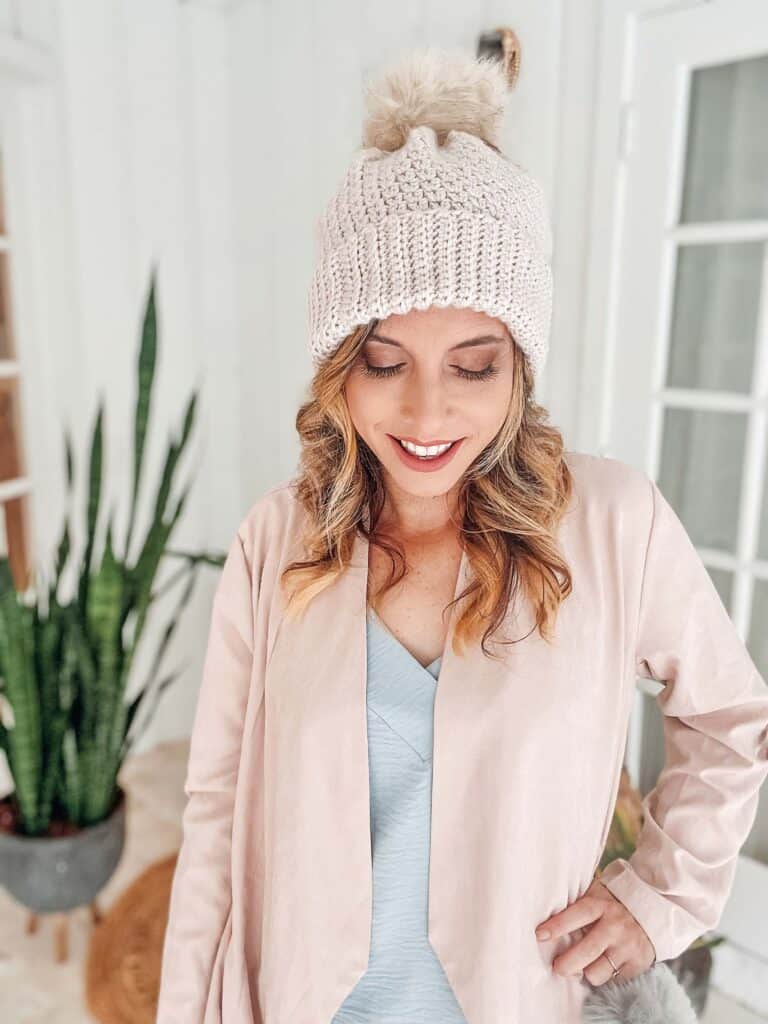
This is my go-to beanie when someone tells me they’re brand new to hats. The star is the extended single crochet, which sits right between a half double and a double in height, so the fabric works up fast but still looks soft and textured. You start with a ribbed brim worked flat in the back loops, join it, then pick up stitches and crochet the body in continuous rounds before decreasing at the top. One skein of Mellowspun DK makes any size, newborn through large adult. It’s gender neutral, great for last-minute gifts and charity donations alike. Want it fitted? Work fewer body rounds. Want slouch? Add a few before you decrease. And if you’re swapping yarns, measure your brim width with a tape instead of counting stitches, then adjust the row count to a multiple of 6 so the decreases work out.
- Skill level: Easy (Beginner Crocheter)
- Yarn: Mary Maxim Mellowspun DK (#3 DK)
- Hook: US G (4.0mm) brim, 4.5mm body
- Sizes: Newborn to Large Adult (6 sizes)
- Yardage: 105 to 275 yds
- Construction: Ribbed brim worked flat and joined, body worked in the round, bottom up
- Video tutorial: Yes
Get the free Mellow Texture Beanie pattern
3. Macchiato Beanie

Think of this one as your coffee date hat: cozy, quick and a little fancy. The Macchiato works up in bulky Wonderfluff, a baby alpaca blend that feels like a cloud, so even the adult size takes only about 125 yards. It’s worked top down in joined rounds, and you turn at the start of each round, alternating half double crochet in the back and front loops for that rich, woven texture. The ribbing is worked sideways in rows right onto the body. There’s an optional puff stitch round if you want extra detail, and you can add one pompom or even two. It’s unisex and a great next step for beginners who are ready to level up. My tip: aim for a finished hat 1 to 2 inches smaller than the head for a snug fit, and don’t stretch it while blocking.
- Skill level: Advanced Beginner
- Yarn: Crochet.com Wonderfluff Bulky (#5 bulky)
- Hook: US J (6.0mm)
- Sizes: Baby to Adult (5 sizes)
- Yardage: 80 to 125 yds
- Construction: Worked in the round, top down, with ribbing worked in rows perpendicular to the body
- Video tutorial: Yes
Get the free Macchiato Beanie pattern
4. EHDC Between Stitches Beanie
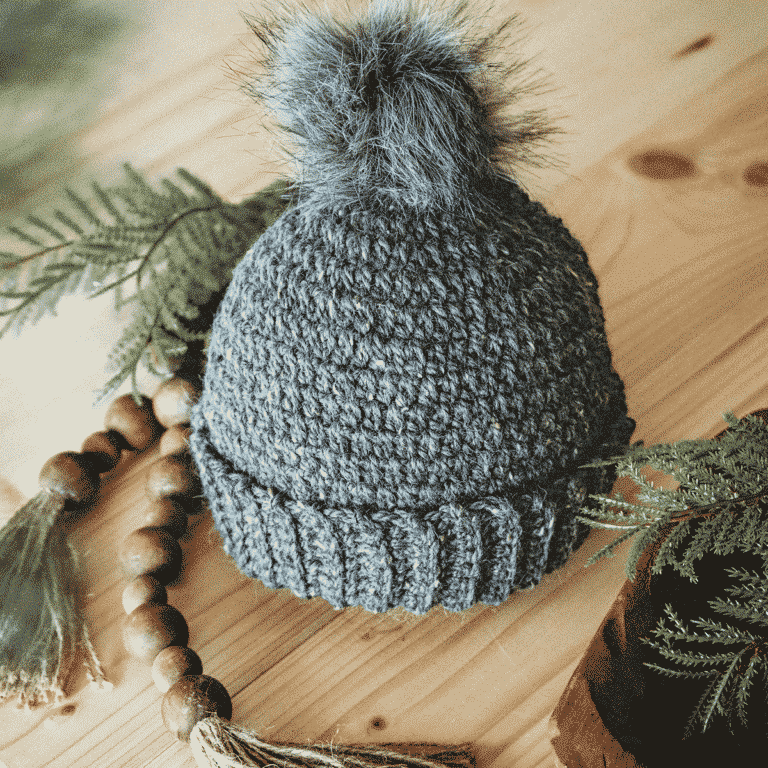
This hat proves that a tiny change in where you put your hook can make a big difference. Instead of working into the top of each stitch, you work extended half double crochet in the spaces between stitches from the round below, which gives a dense, tweedy texture that looks way more complicated than it is. I shaped it top down in rounds, then finished with a back loop single crochet ribbing worked in rows around the bottom and joined. One ball of City Tweed covers every size from newborn to adult, so it’s a smart stash pick for gifting. Beginners will feel right at home, and more experienced crocheters will still enjoy the rhythm. A stacked single crochet starts each round for a neater seam. When you join the ribbing, slip stitch through the back loops of the first and last rows for an almost invisible join.
- Skill level: Easy/Beginner
- Yarn: Crochet.com City Tweed (Aran / heavy worsted)
- Hook: US H (5.0mm)
- Sizes: Newborn to Adult (5 sizes)
- Yardage: 95 to 150 yds
- Construction: Worked in the round, top down, with ribbing worked in rows around the bottom
- Video tutorial: Yes
Get the free EHDC Between Stitches Beanie pattern
5. Block Stitch Chunky Hat

The Block Stitch is a clever twist on the granny stitch, mixing double crochet, single crochet and stacked single crochet into chunky little blocks that look amazing in two colors. I worked the brim flat first, joined it, then built the body in rounds from the bottom up and decreased to close. You get two brim choices: a tall fold-up brim worked in the back loops, or a shorter brim that saves yarn. There’s also a gathered-top option if you prefer that look. With seven sizes from newborn to large adult, it’s easy to make a whole family set, and it’s easy for beginners while still fun for seasoned hookers. The video comes in two parts, so you can follow along step by step. Tip: fewer rounds give a snug fit, more rounds give you slouch, so try it on as you go.
- Skill level: Advanced Beginner
- Yarn: Muse Aran (#4 Aran)
- Hook: US G+ (4.5mm) brim, US H (5.0mm) body
- Sizes: Newborn to Large Adult (7 sizes)
- Yardage: 80 to 180 yds
- Construction: Brim worked flat and joined, body worked in the round, bottom up
- Video tutorial: Yes
Get the free Block Stitch Chunky Hat pattern
6. Knit Purl Hat

Want a hat that looks hand knit but is totally crochet? This one uses double slip stitch and split single crochet to mimic knit and purl stitches, and the result is so convincing. It’s worked bottom up: the brim is crocheted flat, joined, and then the body goes in the round until you weave through the front loops of the last round and pull it closed. You get two ribbing options, a double slip stitch version or a single crochet version, and sizes from newborn to adult. The stitch is relaxing and rhythmic once you find your groove, which makes it great for beginners and anyone who wants to zone out with a show. Just know the fabric has a flat, draped feel and isn’t as stretchy as a traditional rib. My tip: you can skip the chain 1 at the start of the ribbing rows.
- Skill level: Easy/Beginner
- Yarn: Crochet.com Swish Worsted (#4 worsted)
- Hook: US H (5.0mm)
- Sizes: Newborn to Adult (5 sizes)
- Yardage: 105 to 250 yds
- Construction: Brim worked flat and joined, body worked in the round, bottom up
- Video tutorial: Yes
Get the free Knit Purl Hat pattern
7. Juniper Knit-Look Hat
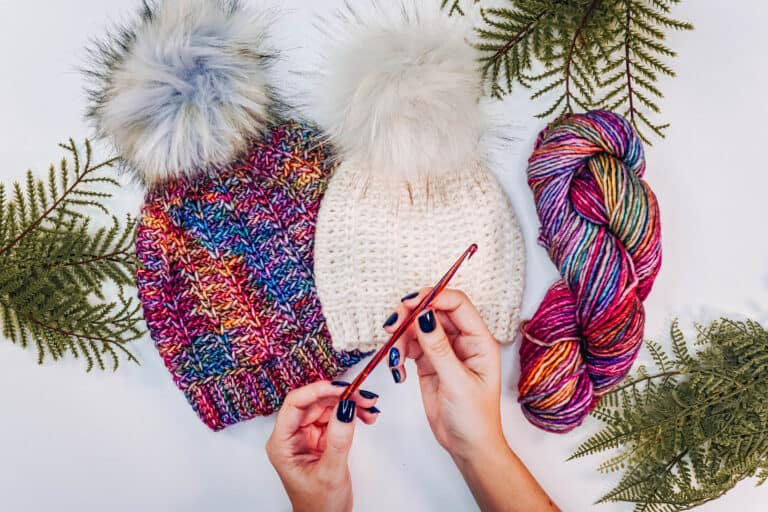
If you’ve been curious about knit-look crochet, start right here. The Juniper uses the split single crochet, also called the waistcoat stitch, in a simple 4-stitch repeat that looks just like knitting. You crochet the ribbing in rows, join it, then work the body in continuous rounds from the bottom up, so there’s no chain 1 and no visible seam to fight with. With ten sizes from preemie to adult large, it’s a dream for baby gifts and grown-up hats alike, and it barely uses any yarn. The hand-painted merino makes the stitches glow. My biggest tip: keep a loose tension, because tight split single crochet is hard to work into. Pop a stitch marker on the first stitch of each round and move it up as you go. Add a faux fur pompom if you want a little extra.
- Skill level: Easy Beginner
- Yarn: Muse Hand Paint
- Hook: US I (5.5mm) and US J (6.0mm)
- Sizes: Preemie to Adult Large (10 sizes)
- Yardage: 64 to 140 yds
- Construction: Worked in rounds, bottom up, with ribbing worked in rows and joined
- Video tutorial: Yes
Get the free Juniper Knit-Look Hat pattern
Textured Crochet Beanies
Texture is where crochet really shines. These are my favorite stitch-forward hats, including my signature Wheat Stitch.
8. Wheat Stitch Beanie
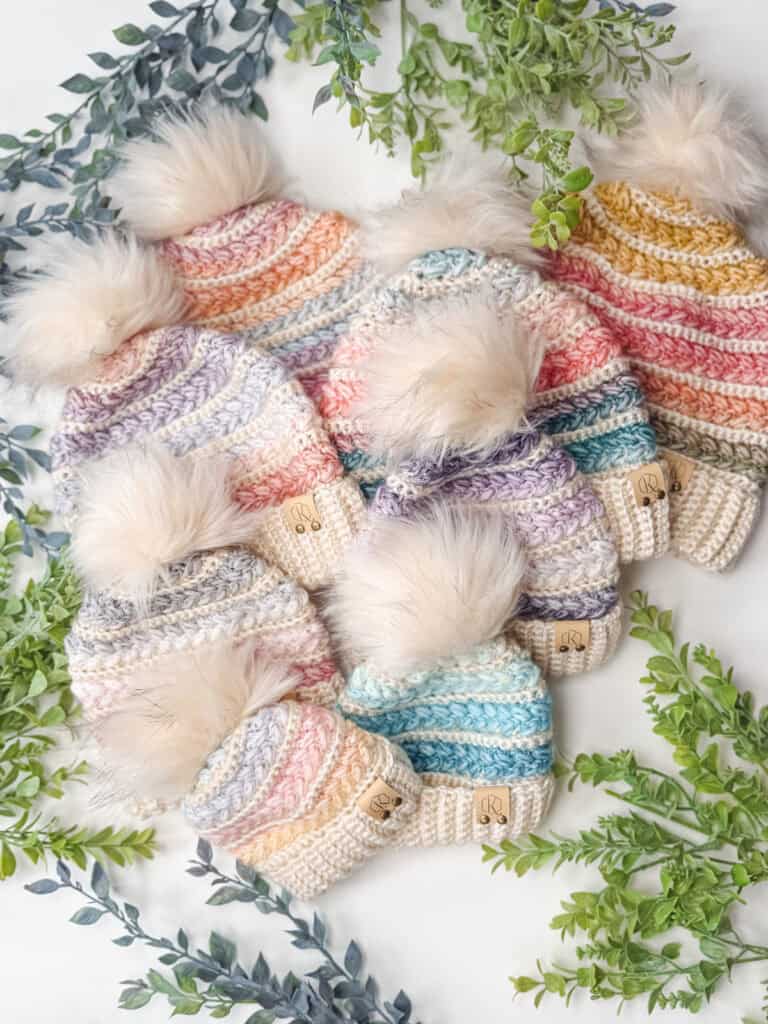
This is the beanie that shows off the Wheat Stitch at its best: neat rows of puffs that look like little bundles of wheat stacked around the hat. The brim is worked flat in rows and joined into a loop, then the body goes round and round from the bottom up before the crown decreases. You get a soft, stretchy ribbed fold-up brim, and the hat is designed with about 2 to 3 inches of negative ease so it hugs your head. Eight sizes run from newborn to adult large, so it’s perfect for matching family hats, gifts or market prep. Adult sizes take a few evenings, babies go much faster. My favorite trick: don’t fasten off between colors. Just carry the yarn up the inside. Want it taller or slouchy? Add rounds in multiples of 4 before you start the decreases.
- Skill level: Advanced Beginner
- Yarn: Herrschners Supreme (MC) and Soho Playful (CC) (#4 worsted)
- Hook: US G (4.0mm) and US H (5.0mm)
- Sizes: Newborn to Adult Large (8 sizes)
- Yardage: 105 to 280 yds
- Construction: Brim worked flat and joined, body worked in the round, bottom up
- Time: A few evenings for adult sizes; baby sizes faster
- Video tutorial: Yes
Get the free Wheat Stitch Beanie pattern
9. Snowy Wheat Puff Hat

Picture fresh snow on a field of wheat and you’ve got this hat. It’s one flat rectangle worked side to side, so if rounds make you nervous, you’re covered. The Wheat Stitch puffs build a gorgeous raised texture, and the ribbing and crown decreases get worked together as you go. When you’re done, you seam it and close the top with the starting tail. You can choose a regular brim or a taller fold-up brim, and every size from newborn to adult large is included, which makes it a great pick for gifts, donations and craft fairs. Brim and body can be different colors, and you can switch without fastening off. My tip: keep those back loop single crochet ribbing stitches loose, so the hat stretches on easily. Work your first row into the back bumps of the chain for a clean edge.
- Skill level: Advanced Beginner
- Yarn: Lion Brand Color Theory (#4 worsted)
- Hook: US H (5.0mm)
- Sizes: Newborn to Adult Large (8 sizes)
- Yardage: 70 to 275 yds
- Construction: Worked flat side to side in rows, then seamed
- Video tutorial: Yes
Get the free Snowy Wheat Puff Hat pattern
10. Petal Loop Beanie
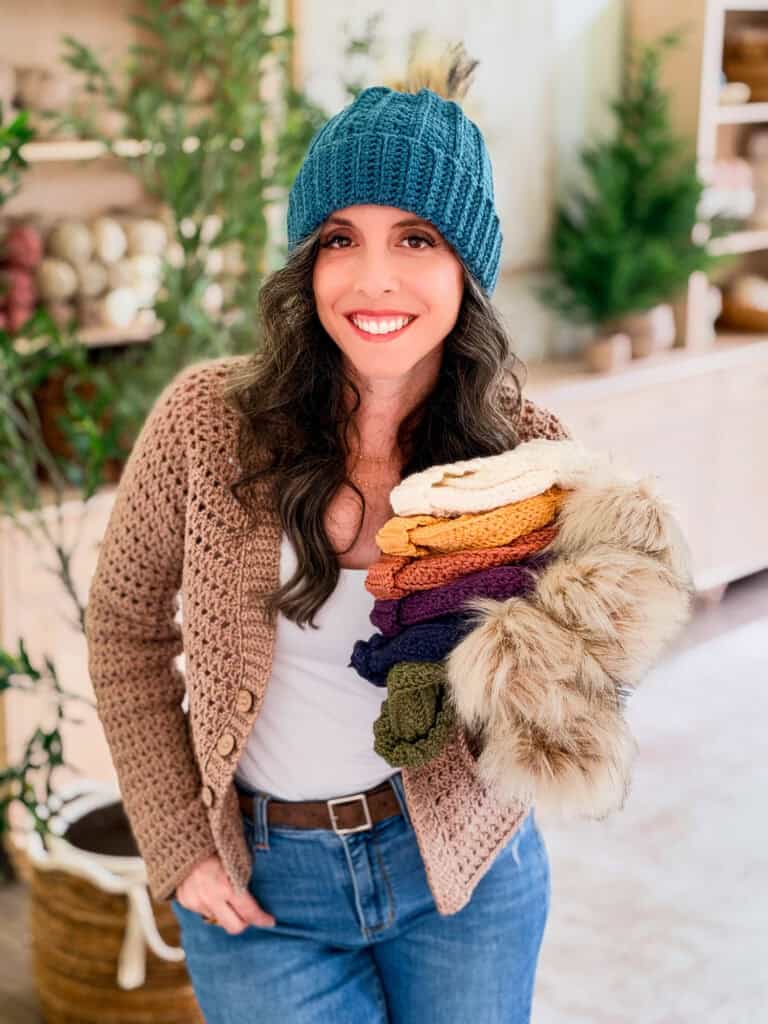
The Petal Loop Stitch makes little petal shapes all over the hat, and once you see it come together you’ll want to make a whole stack. The hat is worked flat side to side in rows with the ribbing built right into every row, so there’s no separate brim and no increases or decreases at all. When the piece is long enough, you join it into a tube and cinch the crown closed with the tail. Choose a regular brim or a taller fold-up brim, and pick from eight sizes from newborn to adult large so everyone in the family gets one. A newborn hat takes about one to two hours. It’s rated intermediate, mostly because of the special petal stitches. My tip: keep your back loop single crochets loose so the ribbing fits nicely, and work the foundation chain in the back humps.
- Skill level: Intermediate
- Yarn: Premier Anti-Pilling Select (#4 worsted)
- Hook: US H (5.0mm)
- Sizes: Newborn to Adult Large (8 sizes)
- Yardage: 80 to 265 yds
- Construction: Worked flat side to side in rows, joined into a tube, crown cinched closed
- Time: About 1 to 2 hours for Newborn; longer for larger sizes
- Video tutorial: Yes
Get the free Petal Loop Beanie pattern
11. Wheat Stitch Sweetheart Hat

Hearts and puffs in one hat? Yes, please. The Sweetheart Hat pairs the Wheat Stitch with simple colorwork heart motifs, so it’s sweet for Valentine’s Day but cozy enough to wear all winter. You work it flat in rows, seam it into a tube and gather the top, which keeps the colorwork easy to manage. There’s a regular brim or a fold-up brim, and eight sizes from newborn to adult large, so you can make matching hats for the kids and yourself. It does lean slouchy, so if you want it shorter, take chains off the beginning in multiples of 2. If you can work Wheat Stitch in rows and change colors, you’re ready. My color change tip: on the last yarn over before the switch, grab the new color and pull through. And keep the ribbing loose, or the hat won’t fit well.
- Skill level: Intermediate
- Yarn: Herrschners Supreme Worsted (#4 worsted)
- Hook: US H (5.0mm)
- Sizes: Newborn to Adult Large (8 sizes)
- Yardage: 70 to 275 yds
- Construction: Worked flat in rows, seamed into a tube, top gathered
- Video tutorial: Yes
Get the free Wheat Stitch Sweetheart Hat pattern
12. Quilted Lattice Hat

This hat has a puffy, quilted texture that looks like it belongs on a cozy duvet. The Quilted Lattice Stitch is adapted from a classic knitting stitch in Barbara Walker’s treasury, and I translated it into crochet with single crochet in the back loop and slip stitches. You work it in rows, join it into a tube with a mock-stitch seam, crochet a brim on one end and gather the top closed. It comes in one adult size, and the brim stretches to fit heads from 19 to 23 inches. You work from two balls with one carried along the front, so it’s lovely in one color or two. Finish with a fur pompom if you like. My tip: on the rows where you carry the second yarn, give the edge a gentle tug at the end to keep your tension relaxed.
- Skill level: Advanced Beginner
- Yarn: Malabrigo Rios
- Hook: US H (5.0mm)
- Sizes: One size, adult (fits 19 to 23 in heads)
- Yardage: About 300 yds
- Construction: Worked flat in rows, seamed into a tube, brim added, top gathered
- Video tutorial: Yes
Get the free Quilted Lattice Hat pattern
13. Enchanted Cable Hat
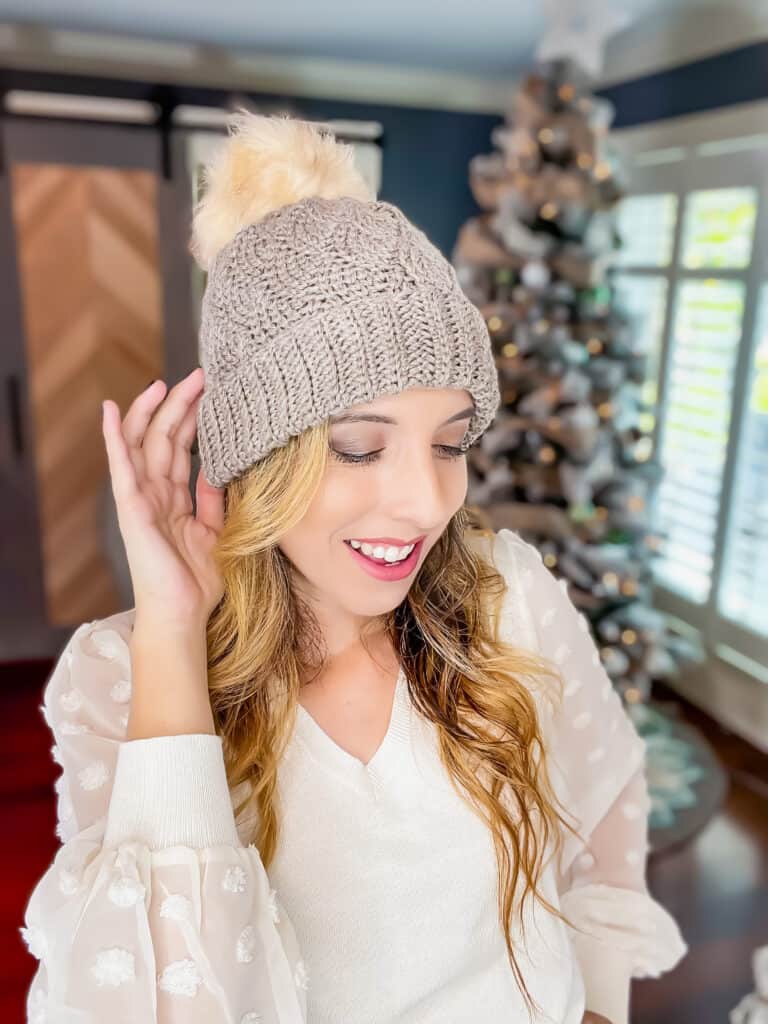
This hat feels a little bit like magic. The Enchanted Hat uses split single crochet to build mock knit cables, so you get that classic cabled sweater look with simple knit look-alike stitches. You start with a ribbed brim worked flat in the back loops, join the short edges, then crochet the body in continuous rounds from the bottom up and cinch the top closed. Six sizes run from newborn to large adult, and there’s a knitter-style chart included if you like to follow along visually. Want a bun hat? Stop at round 7 and work single crochet around elastic. It’s rated intermediate, but the stitches themselves are simple. My tip: pull your split single crochet loop up a bit higher than usual so the V has room for the next round. If your hands start to hurt, your tension is too tight.
- Skill level: Intermediate
- Yarn: Crochet.com Swish Worsted (#4 worsted)
- Hook: US G (4.0mm) brim, US H (5.0mm) body
- Sizes: Newborn to Large Adult (6 sizes)
- Yardage: 105 to 275 yds
- Construction: Ribbed brim worked flat and joined, body worked in continuous rounds, bottom up
- Video tutorial: Yes
Get the free Enchanted Cable Hat pattern
14. Frost Swirl Cable Hat
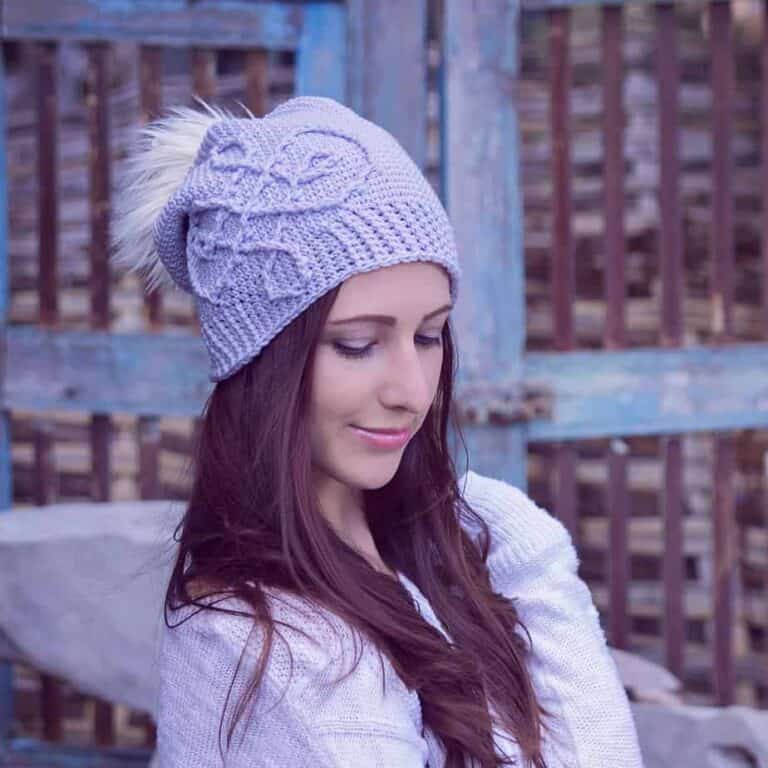
Ready for a showstopper? The Frost Swirl hat is covered in cabled infinity swirls made with crossed stitches, front and back post stitches and front float stitches. It’s the kind of hat people stop you on the street to ask about. It’s worked in the round from the top down with slip stitch joins, and finishes with a ribbed band of alternating post stitches at the bottom. Four sizes run from child to large adult. This one is rated intermediate to advanced, so it’s perfect when you’re ready to stretch your cable skills. I top mine with a faux fur pompom, and there’s even a little trick for cutting the fur using a cereal bowl. My tip: if your cables feel too tight or too loose, add or remove one yarn over per floating stitch. Using the hook-over-yarn method for single crochet keeps your seams straight.
- Skill level: Intermediate / Advanced
- Yarn: Cleckheaton Australian Superfine Merino (find a substitute with my Yarn Swap tool)
- Hook: US J (6.0mm)
- Sizes: Child to Large Adult (4 sizes)
- Yardage: 190 to 275 yds
- Construction: Worked in the round, top down
- Video tutorial: Yes
Get the free Frost Swirl Cable Hat pattern
Colorwork Crochet Hats
Granny diamonds, houndstooth, mosaic and Fair Isle. These are perfect for using up leftover yarn and trying a new technique on a small project.
15. Houndstooth Beanie
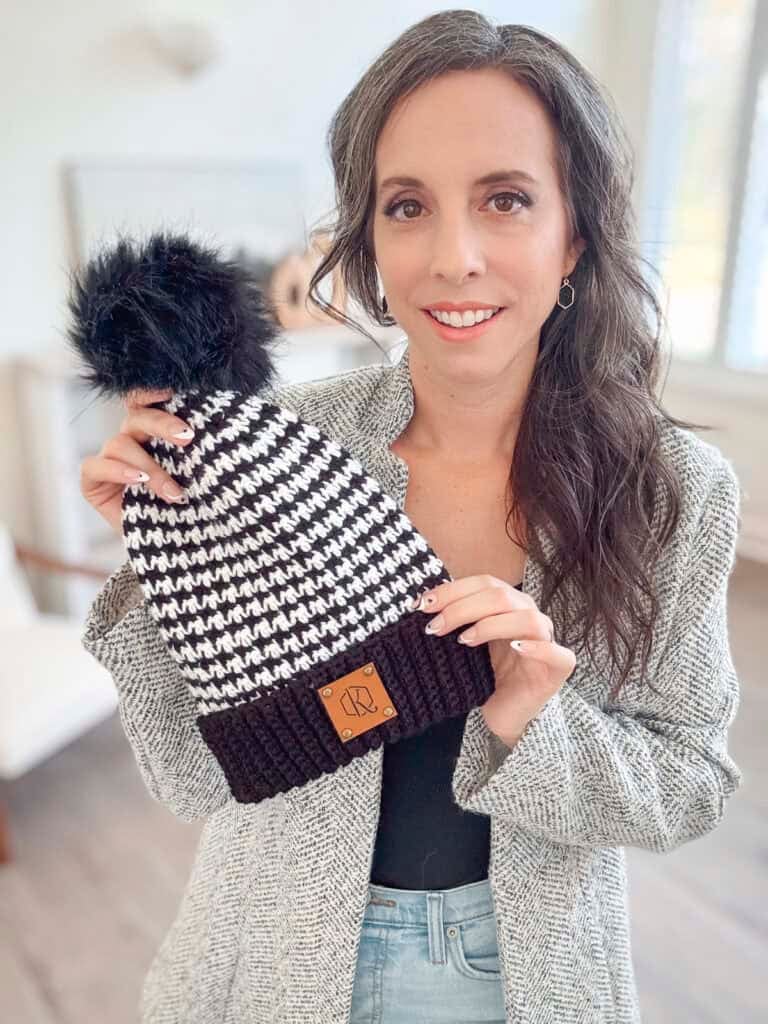
Houndstooth always looks so polished, and here’s the secret: it’s just single and double crochet. You alternate colors every other round and carry the yarn along, so the classic check builds itself without any tricky charts. The ribbed brim is worked in rows, joined, then the body goes in the round from the bottom up. Six sizes cover newborn to large adult, which makes it a great gift for literally anyone, from a new baby to the grown-ups on your list. Choose a fold-up brim if you want extra warmth (it takes one more ball) or a regular brim to save yarn. You can also gather the top for a different look. My tip: add or remove rounds to change the length, and check gauge and drape if you swap yarns. The two-part video walks you through it.
- Skill level: Advanced Beginner
- Yarn: Mary Maxim Mellowspun
- Hook: US G (4.0mm) and US G+/7 (4.5mm)
- Sizes: Newborn to Large Adult (6 sizes)
- Yardage: 95 to 270 yds
- Construction: Ribbed brim worked in rows and joined, body worked in the round, bottom up
- Video tutorial: Yes
Get the free Houndstooth Beanie pattern
16. Diamond Granny Stitch Hat
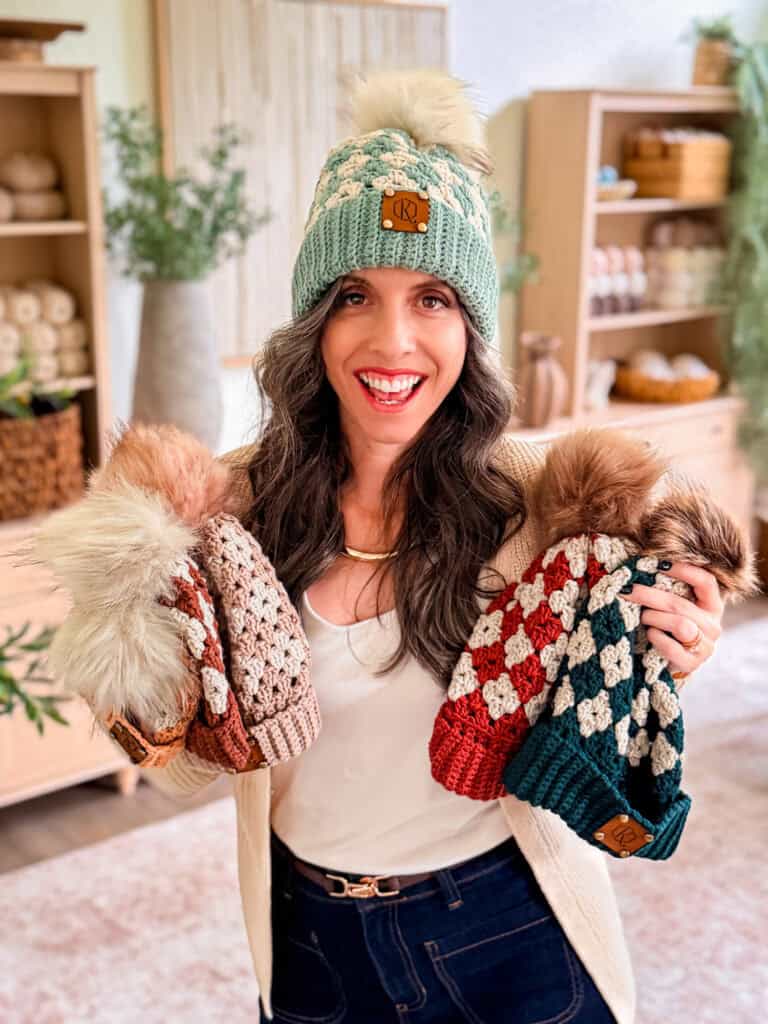
Granny stitch on a hat? Absolutely, and this one turns it into crisp diamond colorwork that pops in two colors. You start with a ribbing, work along its edge, join and keep going in the round from the bottom up. Each round begins with a stacked single crochet, which keeps the start neat, and the top closes by weaving through the front loops of the final double crochets. Six sizes cover newborn through large adult, so it’s a fun way to dress the whole family or make a gift that looks way fancier than the effort. If you’ve done basic granny stitch, the colorwork will feel like a natural next step. My tip: highlight the counts for your size before you start, since larger sizes are in brackets. And if you add a pompom, take it off before washing in cool water and lay the hat flat to dry.
- Skill level: Intermediate
- Yarn: Lion Brand Color Theory
- Hook: US G (4.0mm) ribbing, US H (5.0mm) body
- Sizes: Newborn to Large Adult (6 sizes)
- Yardage: 105 to 275 yds
- Construction: Ribbing worked first, then joined and worked in the round, bottom up
- Video tutorial: Yes
Get the free Diamond Granny Stitch Hat pattern
17. Gemstone Hues Beanie
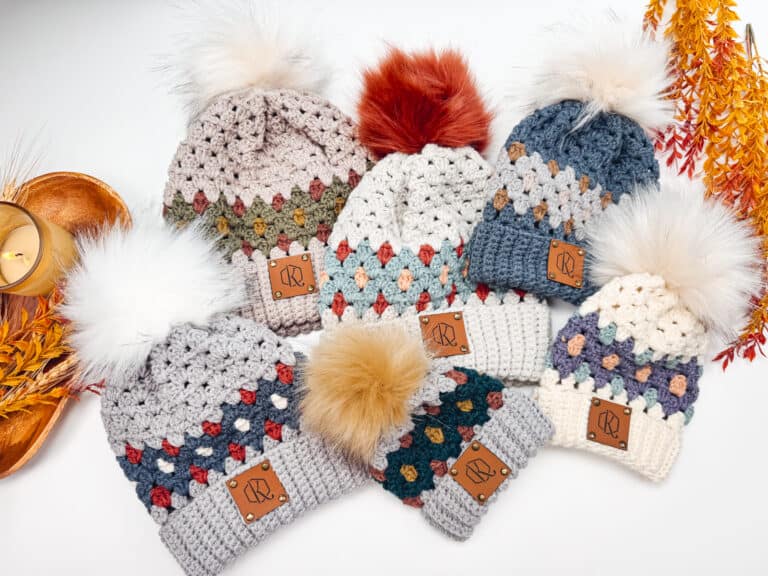
This one is all about color. The Gemstone Hues beanie uses granny stitch colorwork to form rows of jewel-toned diamonds, and choosing your palette is half the fun. It’s worked bottom up: you crochet the ribbing first, work along its edge, join, then keep going in rounds. A stacked single crochet at the start of each round keeps things tidy. Six sizes run from newborn to large adult, so it’s a happy gift for little ones and grown-ups, and a fun way to use up favorite colors. If you’re new to colorwork, the granny stitch is a forgiving place to begin, and the video helps a lot. My tip: try a neutral center color with brighter diamonds so the gems really sparkle, or swap in a holiday palette for a seasonal look. Make a gauge swatch first, especially if you’re changing yarns.
- Skill level: Intermediate
- Yarn: Lion Brand Color Theory
- Hook: US G (4.0mm) and US H (5.0mm)
- Sizes: Newborn to Large Adult (6 sizes)
- Yardage: 112 to 292 yds
- Construction: Ribbing worked first, then joined and worked in rounds, bottom up
- Video tutorial: Yes
Get the free Gemstone Hues Beanie pattern
18. Mosaic Ridge Hat

If you’ve wanted to try overlay mosaic crochet without committing to a whole blanket, this hat is the perfect sampler. A solid main color pairs with Prism, a slow ombre yarn, so the mosaic ridges shift color as you go with zero extra effort. You start with a ribbed brim, work along its edge, then build the body in the round from the bottom up, mixing mosaic double crochet with extended half double crochet before decreasing at the top. Six sizes cover newborn to large adult, and it works up quickly, which makes it great for gifts, craft fairs and charity. My tip: don’t fasten off between color changes. Just carry the unused color inside the work. For the adult sizes, you can add or skip rounds in the extended half double crochet section to make it more fitted or more slouchy.
- Skill level: Intermediate
- Yarn: Mary Maxim Mellowspun and Mary Maxim Prism
- Hook: US G (4.0mm) and US H (5.0mm)
- Sizes: Newborn to Large Adult (6 sizes)
- Yardage: 90 to 230 yds
- Construction: Ribbed brim first, then worked in the round, bottom up
- Video tutorial: Yes
Get the free Mosaic Ridge Hat pattern
19. Fair Isle Crochet Hat
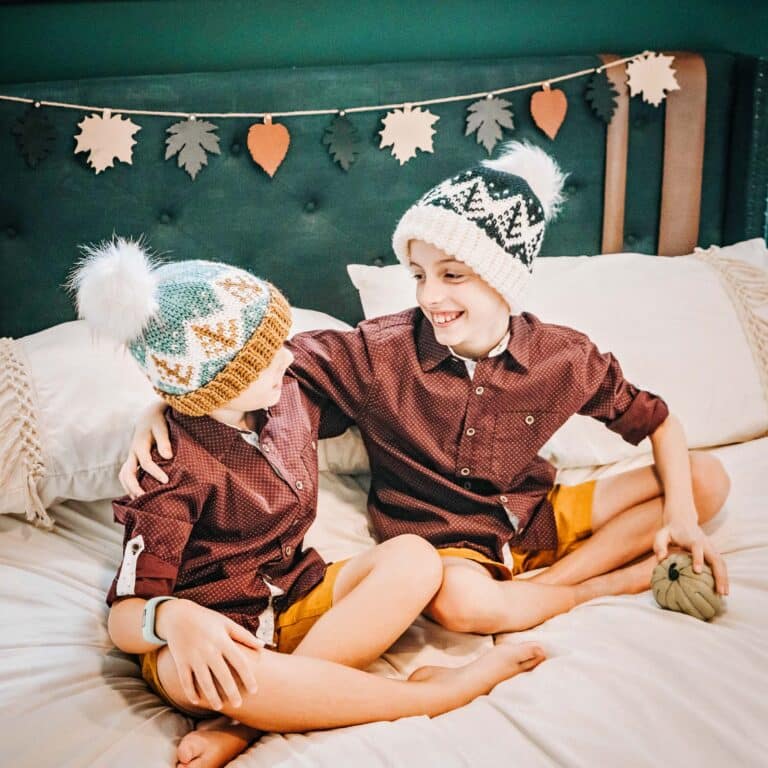
This is the hat I point people to when they want that classic Nordic sweater look in crochet. The Fair Isle pattern is worked in split single crochet, also called the waistcoat stitch, so the colorwork reads just like knitting. You work it in rounds from the top down, then finish with a back loop single crochet ribbing worked in rows around the bottom and joined. Sizes run from baby to adult. Wool of the Andes is on the lighter side of worsted, and its wool fibers help the colorwork stitches stay put. It’s rated intermediate, but the video makes it very doable for anyone curious about colorwork. My tip: swatch in the round without joining for an accurate gauge. Then keep floats short by never carrying a color more than 3 stitches, and catch the yarn behind a stitch when you need to.
- Skill level: Intermediate
- Yarn: Crochet.com Wool of the Andes Worsted (#4 worsted)
- Hook: US H (5.0mm), US G (4.0mm) optional for ribbing
- Sizes: Baby to Adult (4 sizes)
- Yardage: 95 to 150 yds
- Construction: Worked in rounds, top down, with ribbing worked in rows around the bottom
- Video tutorial: Yes
Get the free Fair Isle Crochet Hat pattern
20. Pine Fair Isle Hat

Little pine trees marching around a hat? It’s basically a winter cabin you can wear. The Pine hat uses Fair Isle colorwork in split single crochet, worked in rounds from the top down, and finishes with a single crochet ribbing worked in rows around the bottom. Sizes run from baby to an adult and men’s size, so it’s a great pick for the guys on your list as well as the kids. You only need one ball of each of three colors for any size. I love it in wool, because wool helps the colorwork stitches hold their place and keeps the hat from stretching out over time. My tip: keep your tension loose so the split single crochets are easy to work into, and pull that second loop up a little higher than you would for a regular single crochet. Short floats, max 3 stitches, keep things neat.
- Skill level: Intermediate
- Yarn: Crochet.com Wool of the Andes (#4 worsted)
- Hook: US G (4.0mm) and US H (5.0mm)
- Sizes: Baby to Adult/Men’s (4 sizes)
- Yardage: 170 to 310 yds total
- Construction: Worked in rounds, top down, with ribbing worked in rows around the bottom
- Video tutorial: Yes
Get the free Pine Fair Isle Hat pattern
21. Forest Brooks Beanie

The Forest Brooks beanie is soft, earthy and so pretty. It pairs sand, sea spray and chestnut colors in a Fair Isle design worked in split single crochet, with yarn carried along the back. You start with a single crochet ribbing worked in rows and joined, then crochet the colorwork body in the round from the bottom up and decrease at the top. Four sizes run from baby to adult L/XL, and the brim stretches comfortably to fit. The merino, alpaca and silk yarn gives it such a soft, luxe feel, which makes it a beautiful handmade gift. It’s rated intermediate, so it’s great once you’ve got a colorwork hat or two under your belt. My tip: there’s no chain 1 at the start of rounds, so pop a stitch marker on the first stitch and move it up each round as you go.
- Skill level: Intermediate
- Yarn: Valley Yarns Northfield
- Hook: US G-6 (4.0mm) ribbing, US H-8 (5.0mm) body
- Sizes: Baby to Adult L/XL (4 sizes)
- Yardage: About 496 yds across 3 colors (one set)
- Construction: Ribbing worked in rows and joined, body worked in the round, bottom up
- Video tutorial: Yes
Get the free Forest Brooks Beanie pattern
22. Diamond Fair Isle Beanie

This beanie has a special place in my heart. I first designed it for a childhood cancer awareness challenge, and it’s a cozy diamond Fair Isle hat that works for everyone from babies to grandparents. The colorwork uses split single crochet, which gives that knit-look fabric, and you work it in continuous rounds from the bottom up after crocheting and joining the ribbing. Five sizes run from baby to XL adult. It isn’t designed specifically as a chemo cap, but it can be worn as one, and if you’re making it for that, choose a really soft yarn. The original yarn has been discontinued, so pick a soft DK that matches gauge. My tips: ribbing can come out tight, so use a larger hook or slip stitch loosely. And don’t pull your carried yarn too tight, or the hat will stretch.
- Skill level: Intermediate
- Yarn: Crochet.com Kindred (discontinued) (#3 DK) (find a substitute with my Yarn Swap tool)
- Hook: US H (5.0mm)
- Sizes: Baby to XL Adult (5 sizes)
- Yardage: 75 to 160 yds
- Construction: Ribbing worked in rows and joined, body worked in continuous rounds, bottom up
- Video tutorial: No
Get the free Diamond Fair Isle Beanie pattern
23. Polka Dot Winter Hat
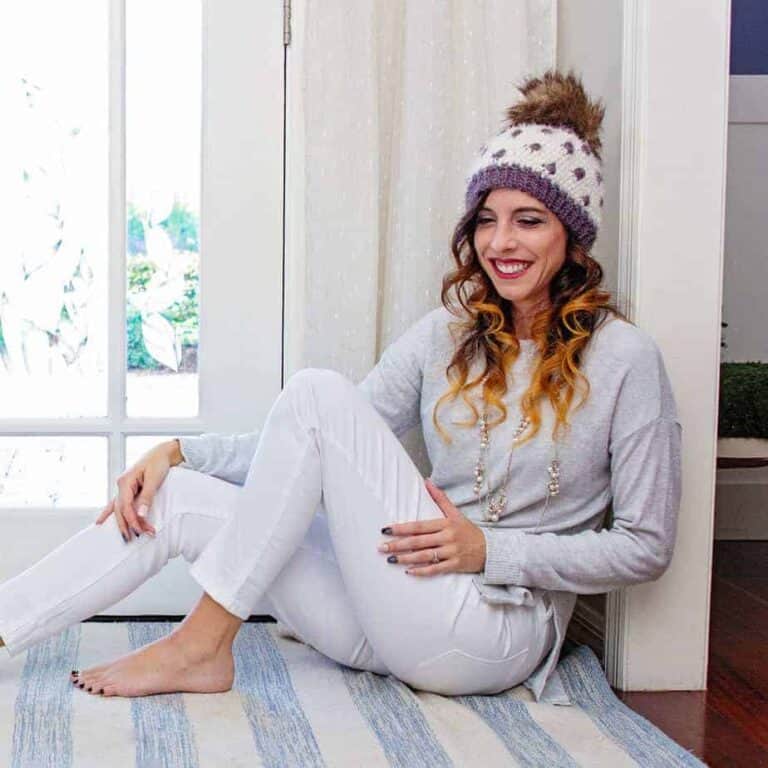
This hat is pure whimsy. Contrasting cluster stitches pop out of a half double crochet background like polka dots, and it just makes people smile. It’s worked in the round from the top down in chunky yarn, so it goes quickly, then you crochet the brim separately in back loop slip stitches and join it on. It comes in one adult size, and the brim stretches to fit heads from 19 to 23 inches. You’ll need just two skeins, one in each color, though you can make the whole thing in one solid color for a more subtle textured look. Top it with a yarn or faux fur pompom, or leave it plain. My tip: use the hook-over method instead of yarn over to keep the seam from traveling. And if your clusters aren’t offsetting each other nicely, adjust your tension a little.
- Yarn: Red Heart Hygge
- Hook: US J (6.0mm)
- Sizes: One size, adult (fits 19 to 23 in heads)
- Yardage: About 290 yds (2 skeins, 145 yds each)
- Construction: Worked in the round, top down, with brim worked separately and joined
- Video tutorial: No
Get the free Polka Dot Winter Hat pattern
24. Fade Two Ways Beanie

Here’s a clever one: the same simple stitch, two totally different looks. The Fade Two Ways beanie is all back loop single crochet, and the magic comes from your color changes, which melt from one shade into the next for a soft ombre fade. Use a self-fading yarn or switch colors yourself, and either way it works. The hat is worked in the round from the top down in bulky yarn, and the slip stitch brim is crocheted separately in rows and joined at the end. It comes in one adult size that stretches to fit 19 to 23 inch heads, and it only takes about 130 yards. It’s a great advanced beginner project and a fun stash buster. My tip: even though the single crochets go in the back loop, join each round through both loops. Using hook over instead of yarn over keeps the seam from traveling.
- Skill level: Advanced Beginner
- Yarn: Caron Pantone or Red Heart Hygge (#5 bulky)
- Hook: US J (6.0mm)
- Sizes: One size, adult (fits 19 to 23 in heads)
- Yardage: About 130 yds
- Construction: Worked in the round, top down, with brim worked separately in rows and joined
- Video tutorial: No
Get the free Fade Two Ways Beanie pattern
Fun and Seasonal Crochet Hats
For holidays, costumes and sunny days.
25. Wheat Stitch Witch Hat
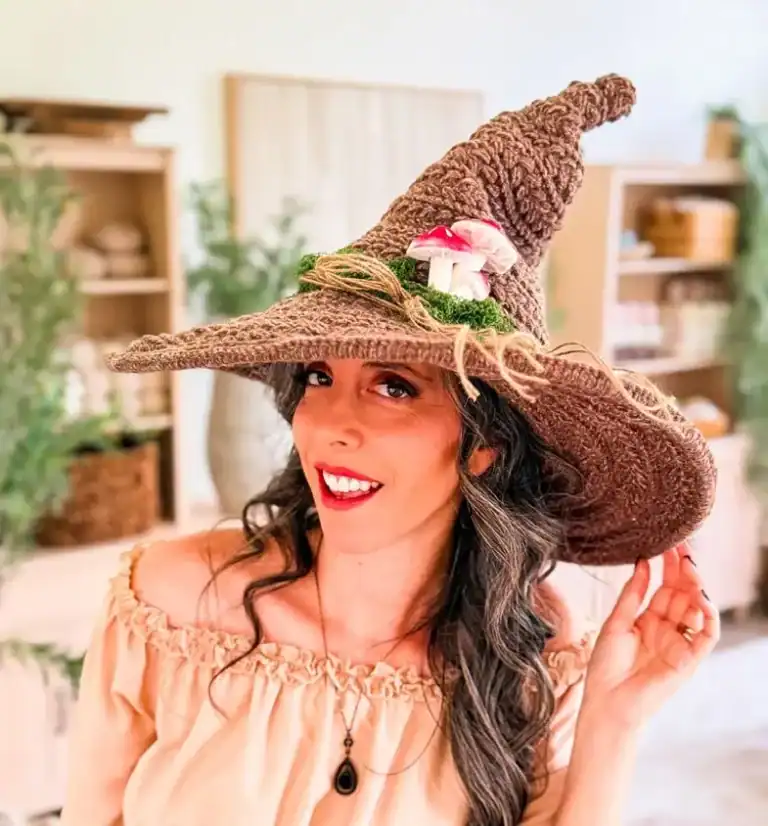
Every family needs a witch hat or eight. This one starts with a magic ring at the point and grows in one seamless piece from the top down, with Wheat Stitch puffs adding gorgeous texture to the cone. The brim gets a support crocheted right into the last round, memory wire for the little sizes and drip tubing for the big ones, so it holds whatever shape you bend it into. Eight sizes run from newborn to adult large, which means matching Halloween costumes for everyone, and the newborn size makes an adorable photo prop. A newborn hat takes about two hours, and the biggest takes about eight. It’s sized with about 2 inches of negative ease at the opening. My tip: row gauge controls how tall your cone gets, so use a hook one or two sizes smaller than the ball band says, and don’t block your swatch.
- Skill level: Intermediate
- Yarn: Herrschners Worsted 8 (#4 worsted)
- Hook: US F (3.75mm) or US G (4.0mm)
- Sizes: Newborn to Adult Large (8 sizes)
- Yardage: 260 to 945 yds
- Construction: Worked in the round, top down, in one piece with no seams
- Time: About 2 hours (Newborn) to about 8 hours (Adult Large)
- Video tutorial: Yes
Get the free Wheat Stitch Witch Hat pattern
26. Wheat Stitch Santa and Elf Hat
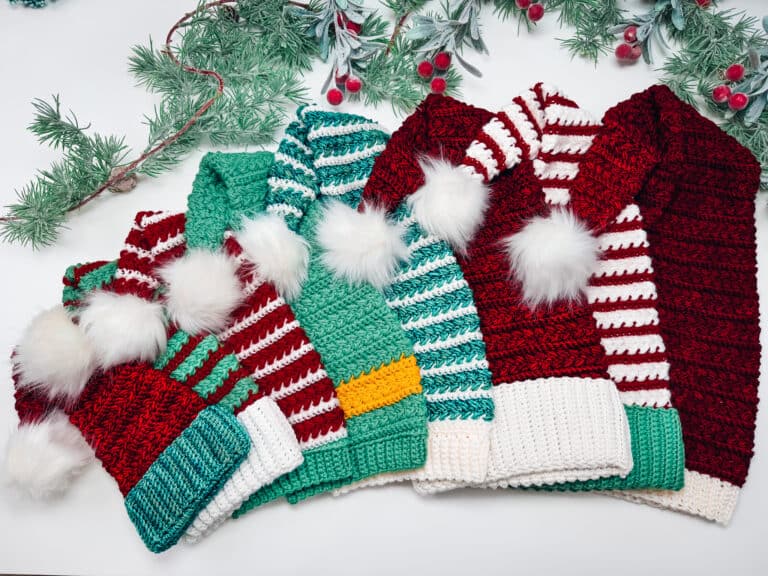
Holiday photos just got a lot cuter. This long stocking hat uses the Wheat Stitch to give a classic Santa or elf hat some serious texture, and you can work it solid or in stripes. The brim is crocheted flat in back loop single crochet rows, joined, and folded up, then the body is worked in rounds from the bottom up and decreased to close. Eight sizes run from newborn to adult large, so matching family sets for Christmas morning are totally doable. It’s sized with about 2 to 3 inches of negative ease so it stays put, and you can add a pompom (or a pompom button) at the tip. My tip: for stripes, change colors every two rounds and carry the unused yarn up the inside instead of fastening off. Want an extra long, floppy hat? Add rounds in multiples of 4 before the decreases.
- Skill level: Advanced Beginner
- Yarn: Berroco Vintage and Malabrigo Rios
- Hook: US G (4.0mm) and US H (5.0mm)
- Sizes: Newborn to Adult Large (8 sizes)
- Yardage: 215 to 525 yds
- Construction: Brim worked flat and joined, body worked in the round, bottom up
- Video tutorial: Yes
Get the free Wheat Stitch Santa and Elf Hat pattern
27. Amanita Mushroom Hat

Little mushrooms all the way around? This hat is pure cottagecore joy. The mushrooms are worked in Fair Isle colorwork with split single crochet, and you can add tiny white French knot dots for that classic toadstool look. It starts with a single crochet ribbing worked in rows and joined, then the body goes in rounds from the bottom up and decreases at the top. Four sizes run from baby to adult L/XL. It’s a sweet pick for baby shower gifts, Halloween costumes or everyday fall wear, and it’s a great first colorwork project for advanced beginners, especially with the video by your side. Charts are included too. My tip: try the hat on after the brim and the first round to check the fit before you go further. And keep your split single crochet loose, or the fabric gets stiff and hard to work into.
- Skill level: Advanced Beginner
- Yarn: Crochet.com Swish DK (#3 DK)
- Hook: US G (4.0mm) and US H (5.0mm)
- Sizes: Baby to Adult L/XL (4 sizes)
- Yardage: 160 to 280 yds
- Construction: Ribbing worked in rows and joined, body worked in rounds, bottom up
- Video tutorial: Yes
Get the free Amanita Mushroom Hat pattern
28. Wheatfield Sun Hat
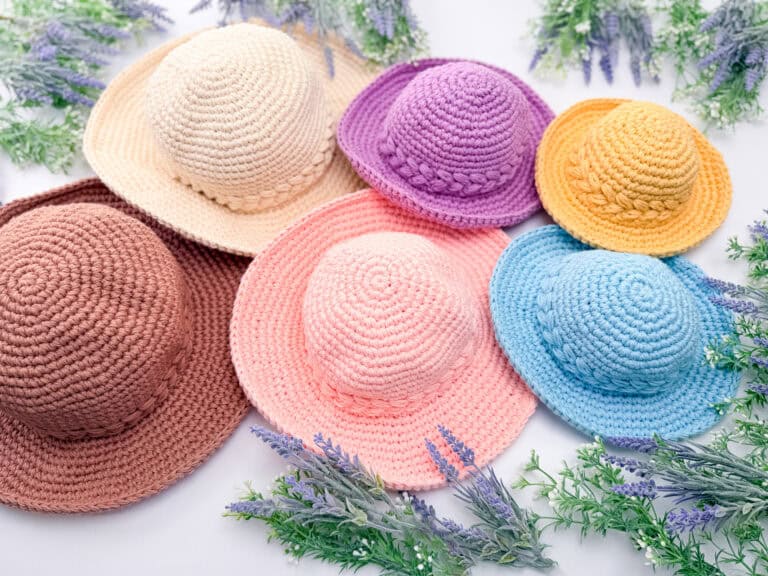
Who says hats are just for winter? The Wheatfield is my summer sun hat, made in cotton held double so the brim keeps its shape in the sunshine. It’s worked top down in continuous rounds from a magic ring with no seams at all, and a two-round Wheat Stitch band circles the crown for a pretty touch of texture. The brim grows outward from there, and you can tuck an optional plastic-coated wire into the final round to make it shapeable. Seven sizes run from newborn to large adult, so matching family sets are easy, and each hat takes about two to five hours. My tip: if you’re between sizes, go up, since cotton has very little stretch. You can also block it slightly larger. Alternate where you place your crown increases for a smoother top, and hand wash it, then lay it flat to dry.
- Skill level: Intermediate
- Yarn: Village Yarn Craft Cotton (held double) (DK / light worsted, held double)
- Hook: US I (5.5mm)
- Sizes: Newborn to Large Adult (7 sizes)
- Yardage: 125 to 454 yds
- Construction: Worked in continuous rounds, top down, no seams
- Time: About 2 to 5 hours, depending on size
- Video tutorial: Yes
Get the free Wheatfield Sun Hat pattern
Crochet Hat Size Chart
Not sure which size to make? Measure around the widest part of the head, just above the eyebrows and ears. Here is the sizing I use for my Wheat Stitch Beanie, which is a great starting point for most of the hats above. Always check the chart in the pattern you pick, since every stitch stretches a little differently.
| Size | Head circumference |
|---|---|
| Newborn | 12 to 14 in |
| Baby | 14 to 16 in |
| Toddler | 16 to 18 in |
| Child | 18 to 20 in |
| Teen | 20 to 22 in |
| Adult Small | 21 to 22 in |
| Adult Medium | 22 to 23 in |
| Adult Large | 23 to 24 in |
About negative ease: most beanies are made a little smaller than the head, usually 1 to 3 inches, so they stretch and stay put. My Wheat Stitch Beanie has about 2 to 3 inches of negative ease. Slouchy hats are the exception, since they are meant to be roomy.
How to Crochet a Hat: The Basics
Every hat in this roundup is built one of two ways. Once you know which one you are making, the pattern makes a lot more sense.
Worked in the round
You start at the brim or the crown and work in rounds, so there is no seam. Use a stitch marker on the first stitch of every round so you never lose your place. If your hat starts at the top, you will begin with a magic ring.
Worked flat and seamed
You crochet a rectangle in rows, seam it into a tube, then gather or decrease the top closed. This is the easiest way to start, because rows are simple to count and you can check your size before you ever seam. My Easy Hat is made this way.
Step by step
- Measure the head and pick your size from the chart above.
- Make a gauge swatch. A tiny change in tension can change the fit by a whole size. Here is how to check and fix your gauge.
- Work the brim. Ribbing gives stretch and a snug fit. Many of my hats have a fold-up brim for extra warmth.
- Work the body in your pattern stitch until the hat reaches the height in your size.
- Close the crown with decreases or by gathering the top. An invisible decrease keeps it smooth.
- Finish by weaving in your ends and adding a pompom if you like. Here is my quick faux fur pompom tutorial.
Free Tools to Help You Make Your Hat
I built these to take the guesswork out of hat making:
- Yarn Amount Calculator: figure out how much yarn you need before you shop, so you never run out at the crown.
- Yarn Swap: can’t find the yarn I used? Type it in and get the best substitutes, plus how many skeins to buy.
- Free Crochet Stitch Counter: keep track of rounds and decreases right on your phone.
- Crochet Time Estimator: see how long a hat will take, so you know what you can finish before gift day.
- Best Crochet Hooks: the hooks I actually use and recommend.
- The Stitch app: many of my patterns also come with an interactive version that tracks your rows for you.
Tips for Crocheting Hats
- Try it on as you go. Hats are quick to adjust before you close the crown.
- Pick a soft yarn. A hat sits right on the forehead, so choose something you would happily wear all day. Worsted weight (#4) is the most popular choice.
- Go up a hook size for slouch. If you want a roomier hat, a bigger hook loosens the fabric.
- Use leftovers. Colorwork and striped hats are perfect stash busters.
- Make a matching set. Pair your hat with a hooded scarf, scarf or mittens in the same stitch.
More Cozy Winter Patterns
- Wheat Stitch Hooded Scarf
- Winter Wheat Sweater Scarf
- Wheat Stitch Scarf
- Wheat Stitch Earwarmer
- Twisted Wheat Earwarmer
- Winter Wheat Flat Mittens
- All of my hat and beanie patterns
Crochet Hat FAQs
What is the easiest crochet hat for beginners?
Start with a hat worked flat, like my Autumn Wheat Easy Flat Hat. You crochet a rectangle in rows, seam it and close the top, so there are no rounds to join. If you want to try working in the round, the Mellow Texture Beanie and Juniper Hat are both rated for beginners.
How much yarn do I need for a crochet hat?
It depends on the size, stitch and yarn weight. Most of my beanies use about 70 to 125 yards for a baby size and about 200 to 300 yards for an adult. Bulky hats like the Macchiato use less, and tall hats like the Witch Hat use a lot more. Every pattern lists the yardage for each size, and my Yarn Amount Calculator can help you plan.
What yarn is best for crochet hats?
Worsted weight (#4) yarn is the most popular choice and what I used for most of the hats above. Pick something soft, since a hat sits right on the forehead. Wool and wool blends are great for colorwork because they hold the stitches in place. For summer hats, cotton keeps things breezy.
What size hook do I use for a crochet hat?
For worsted weight yarn, most of my hats use a US H (5.0mm) hook for the body and a G (4.0mm) for the ribbing, which keeps the brim snug. Bulky yarn hats usually use a J (6.0mm). Always go by your gauge swatch.
How do I know what size crochet hat to make?
Measure around the widest part of the head and match it to the size chart above. Most beanies are made 1 to 3 inches smaller than the head, so they stretch and stay put.
How long does it take to crochet a hat?
Most adult beanies take a few evenings. Baby sizes can take as little as an hour or two, and bulky hats go fastest. Textured, cabled and colorwork hats take a bit longer. My Crochet Time Estimator can give you a closer guess.
Is it better to crochet a hat in the round or flat?
Both work. Flat hats are easier for beginners because rows are simple to count and you can check the size before seaming. Hats worked in the round have no seam and are quicker to finish once you are comfortable with rounds.
How do I make a crochet hat slouchy?
Add a few extra rounds or rows before the crown decreases, or go up a hook size for a looser fabric. Many of the patterns above tell you exactly where to add length.
Can I sell hats I make from these patterns?
Yes! You are welcome to sell hats you make by hand from my patterns. Please do not share or sell the pattern itself.
What should you make next?
Keep the hook movingReaders Are Loving



 Colorwork Tips
 Nettleton Bag
 Gaudi Blanket
 Kids Cape Jacket