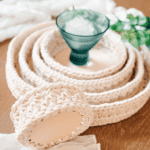


If you love crochet projects that are both beautiful and actually useful, these Petal Loop Stitch Nesting Trays are about to become your new favorite.
This modern crochet nesting tray pattern combines a structured wooden base with the Petal Loop Stitch worked in rounds to create a set of sturdy, stylish trays you’ll reach for every day. Whether you’re organizing your space, styling your home, or making thoughtful handmade gifts, this project delivers the perfect balance of function and design.
These trays work up quickly with a simple, repeatable stitch pattern, making them just as enjoyable to make as they are to use.
For more textured home decor, check out the Wheat Stitch™ Nesting Baskets, the Windowpane Granny Stitch Blanket, and the Crochet-Knit-Purl Pillow.
Disclosure: This post contains affiliate links. Please read my disclosure for more info.
What you’ll love about the Petal Loop Stitch Nesting Trays
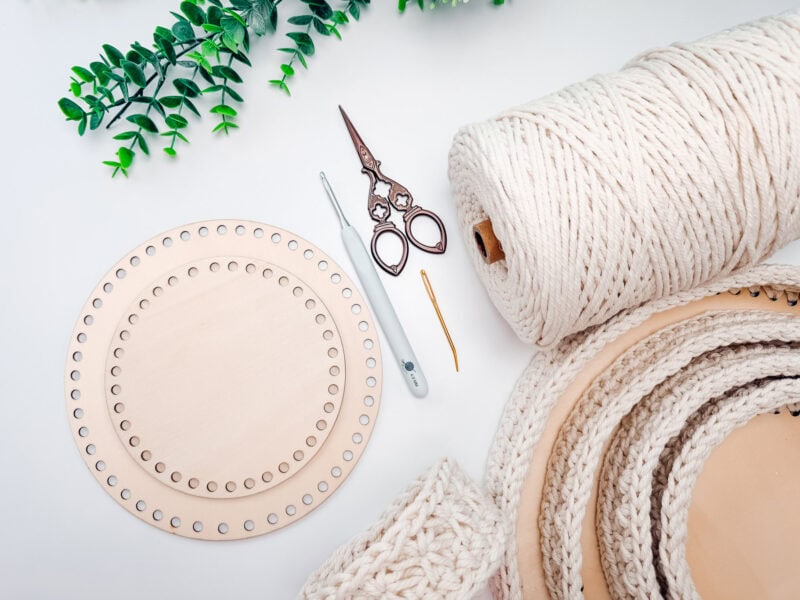
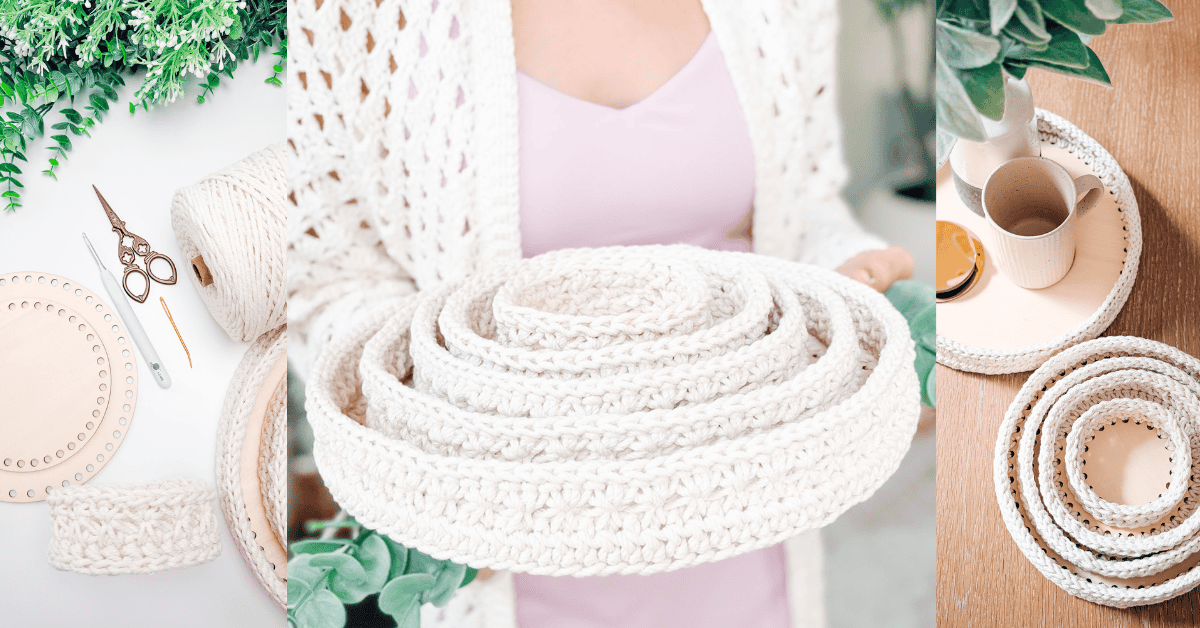
Petal Loop Stitch Crochet Nesting Trays Pattern Supplies
Yarn
3mm Macrame Cord
100% Natural Cotton Rope
Yarn Quantities
20 (35, 45, 60, 70) yds
Yarn Substitutions
Bobbiny Yarn – 3 Ply 3mm, 108yds/400g
Macrame Cord – 3mm x 328yd
If you don’t have macramé cord on hand, you can easily get a similar look and structure by holding two or even three strands of yarn together. This creates a thicker, sturdier fabric that helps the trays hold their shape beautifully—plus, it’s a great way to use yarn from your stash.
For hints and tips on creating a bulky-weight yarn from one skein of worsted-weight, visit this post: https://brianakdesigns.com/bulky-yarn-1-skein/
Remember always to check the gauge and drape when substituting yarns.
Crochet Hook
Size US G (4.0mm) Crochet Hook or hook to obtain gauge.
Notions
Scissors
Yarn Needle
Cat Removable Stitch Marker
5 Wooden Basket Bases
Skill Level
Sizing
5 Sizes
XS (S, M, L, XL)
Abbreviations
blo – back loop only
ch – chain
hdc – half double crochet
RS/WS – right side/wrong side
sc – single crochet
sl st – slip stitch
st(s) – stitch(es)
Stsc – Stacked Single Crochet
Gauge
10 sts and 8 rows = 4″ by 4″ unblocked, in pattern repeat.
Gauge is not critical for this pattern.
How to Crochet A Gauge Swatch
Working a gauge swatch will let you know if you will have the correct sizing for this pattern. It will also help you practice the stitches used in this project and improve your stitch work for a flawless look.
Are you struggling to match the gauge? Check out the blog post on What is Crochet Gauge and How To Fix It
Special Stitches
Stacked Single Crochet (Stsc): Do NOT chain, insert hook into next stitch, yo, pull up a loop, yo and pull through both loops, insert hook in the vertical bar below, yo, pull up a loop, yo and pull through both loops on the hook.
3-Loop-Petal: Insert the hook into the back loop of the previously worked star (or stitch) and pull up a loop. Pull up one loop in each of the next two stitches of the previous row, for a total of four loops on the hook. Yarn over and draw through all four loops to complete the stitch.
Clean Sc: Insert your hook into the left bar of the sc st, then insert into the next row edge space. YO and pull up a loop, then pull through the first loop on the hook. YO and pull through the remaining two loops on the hook.
For a step-by-step tutorial for this straight-edge stitch, visit: How to Crochet a Straight Edge
Construction
These crochet nesting trays are worked in the round, beginning with the wooden base as your foundation. You’ll start by attaching your yarn directly into the pre-drilled holes of the wooden base, working single crochet stitches around to establish the first round. From there, stitches are worked in the Petal Loop Stitch in the round to build the sides of the tray, and then a final round of slip stitches creates a clean, polished edge that complements the modern design.
Looking for more stunning home decor with texture? Check out the Macchiato Coaster, Hello Sunshine Blanket Pillow, and the Wheat Stitch™ Wreaths.
Pattern Notes
- This pattern substitutes a traditional chain 2 on some edges for a Stacked Single Crochet. A ch 1 at the beginning of a single crochet row is unnecessary.
- For striping, work Rows 1 & 2 in one color, and Rows 3 & 4 in a different color. Change colors by yarning over with the new color when making the last stitch of the row before your new color begins. Keep both colors attached and carry the unused yarn up the inside of the tray without fastening off.
- This Pattern Uses Standard US Terminology. I use affiliate links and follow GPSR Compliance: privacy & disclosure policy.
❓ Frequently Asked Questions About the Crochet Nesting Trays
What stitches do I need to know to make this?
🧶 These trays are made with my Petal Loop Stitch, and I have a full, step-by-step tutorial right here: How to Crochet the Petal Loop Stitch.
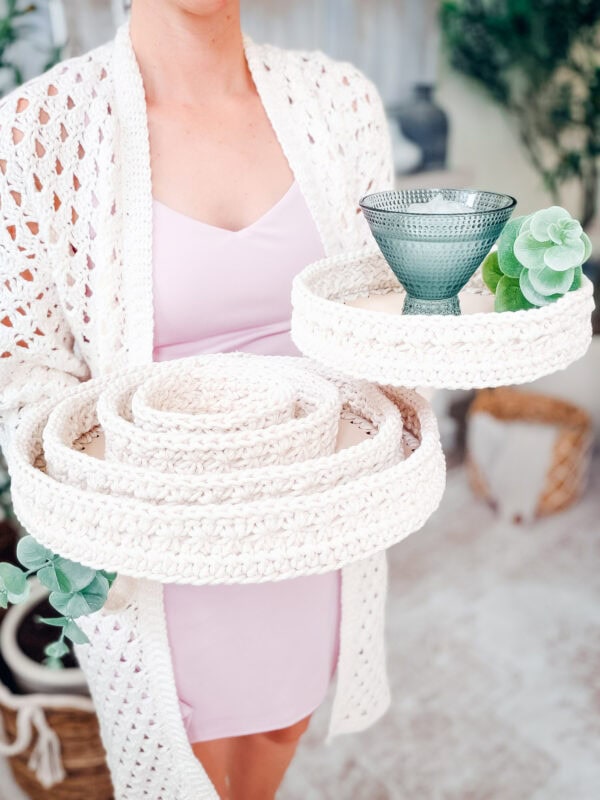
What is a crochet nesting tray?
🧶 Good question! A crochet nesting tray is a structured basket-style project made in multiple sizes that fit inside one another. They are often used for organization, storage, or home decor. These trays are perfect for organizing yarn, holding keys, storing small items, styling shelves, or gifting as a handmade set.
Can beginners make these crochet trays?
🧶 This pattern is best suited for confident beginners or intermediate crocheters, especially those comfortable working in the round and using textured stitches, all while working into a pre-drilled wooden basket base.
What yarn works best for crochet trays?
🧶 Sturdy yarns like macramé cord or multiple strands of cotton yarn work best, as they create a thicker fabric that helps the trays hold their shape.
Do I have to use a wooden base?
🧶 The wooden base is recommended because it provides structure and stability, but similar results can be achieved with a reinforced crocheted base.
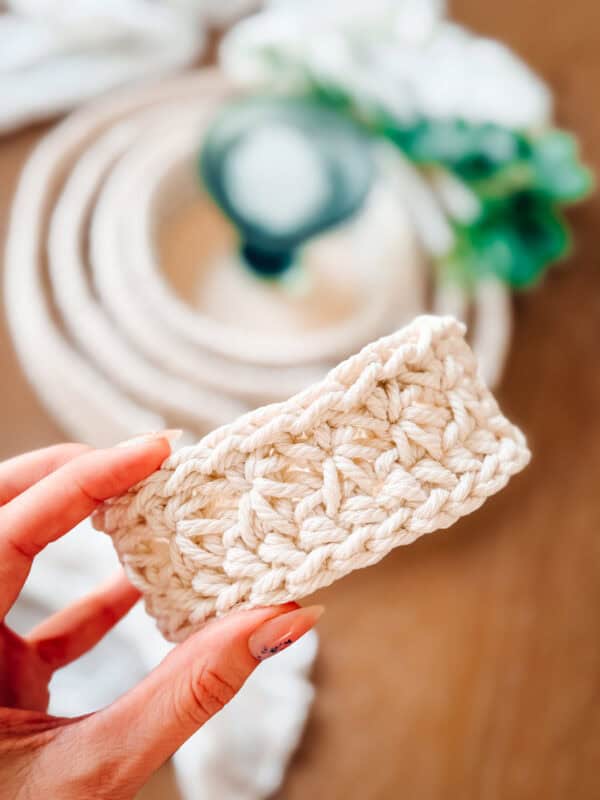
Love Star Stitch? You’ll Be Obsessed with the Petal Loop Stitch
If you’ve ever been drawn to the texture of the crochet star stitch but struggled with tension or stitch placement, the Petal Loop Stitch is perfect for you!
It creates a similarly rich, textured fabric, but many crocheters find it easier to learn and much more rhythmic once established.
Instead of pulling up multiple loops through the eye and across several stitches (including shared stitches that can be confusing to find), the hook placement for the 3-petal stitch rows is simpler, and builds texture in a way that feels more natural as you move across each row.
Subscribe & Like
Video Tutorial for the Petal Loop Stitch Crochet Nesting Trays
Relax & Crochet
Upgrade to the Printable PDF
Beautifully formatted to print and relax while crocheting. The paid pattern includes:
The Ad-Free PDF can be purchased on Etsy or Ravelry.
Click the box below to unlock this exclusive subscriber content for free. Add your email and create a password. If you are having trouble, reset your password or log in to the Grow Portal.
I’m thrilled to share this amazing crochet pattern with you! Please don’t copy, paste, or distribute this pattern. Prefer an ad-free experience? Purchase a digital PDF file for a small fee from one of my online stores. I appreciate your support and readership. You are why I can keep doing what I love and sharing it with others. Thank you from the bottom of my heart.
Petal Loop Stitch Nestin Trays Written Crochet Pattern
Rnd 4:
Ch 1, sc in the first, 2 sc in the next st, *skip 1, 2 sc in the next; repeat from * across until the last 2 sts, skip 1, sc in the last, join and turn.
Rnd 5:
Ch 1, sl st in each stitch around, fasten off, and create an invisible join.
Tips for Success
Working with thicker yarn and a wooden base can feel a little different at first, but once you find your rhythm, it’s smooth stitching from there.
- Loosen your tension. This is the biggest game-changer. Keep your stitches relaxed so your hook can move easily and your fabric doesn’t feel stiff.
- Size up your hook (just to start). If Round 1 feels tight, try going up 0.5–1 mm for the first round, then switch back to your pattern hook.
- Work at an angle. Instead of inserting your hook straight down into the holes, angle it slightly to make it easier to pull up loops.
- Pull up taller loops. Give yourself a little extra height when pulling up loops—this keeps your stitches even and easier to work into on the next round.
- Use a smaller helper hook if needed. If your yarn feels bulky in the holes, use a smaller hook to pull up the loop, then transfer it to your working hook.
- Try multiple strands for structure. Holding two or more strands together can help create a thicker, sturdier fabric that holds its shape beautifully.
- Rotate your work as you go. Turn the base toward you instead of pulling the yarn tightly—this reduces strain on your hands.
- Take breaks when needed. Thicker yarn + smaller hook can be a bit of a workout—give your hands a quick stretch every now and then.
With just a few small adjustments, you’ll be stitching comfortably in no time—and loving the finished result even more.
Finishing
Weave in all ends, taking care to secure them neatly along the textured stitches for a clean, seamless look.
Once complete, these nesting trays are as functional as they are beautiful. Use them individually or stack them together for a coordinated set. They’re the perfect size for holding yarn and tools, organizing everyday essentials, styling shelves, or adding a handmade touch to your space.
Join The Kindest Community
Join our vibrant community of crafters on Facebook today. Whether you enjoy crafting with others or simply have burning questions, we’ve got you covered – join us now!
The Petal Loop Stitch Nesting Trays are the perfect blend of texture, structure, and everyday functionality, making them a standout addition to your crochet projects.
Whether you’re creating something practical for your home, building inventory for markets, or making a thoughtful handmade gift, this pattern is one you’ll come back to again and again.
Once you make one… don’t be surprised if you end up with a full set!
Looking for more quick projects?
Wheat Stitch™ Keychain & Lanyard
Soap Saver Crochet Bag
Circle Leaf Water Bottle Holder
Moss Stitch Washcloth
Easy Envelope Clutch
Cheers, and happy crocheting!
Well, That Was Fun! What’s Next?