



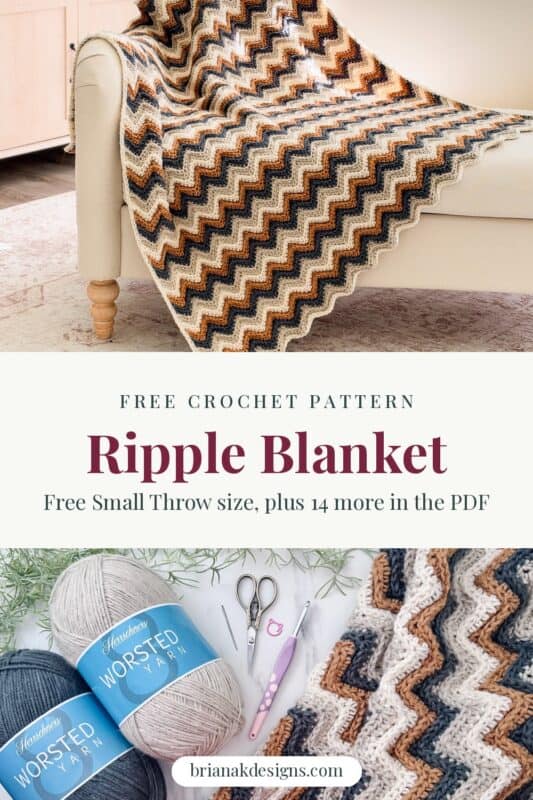
This ripple blanket crochet pattern takes a classic zigzag and gives it a raised, ridged texture you can actually feel. It comes in fifteen sizes, from a tiny lovey all the way up to a King, and the Small Throw size is free right here on the blog. Every size uses the same easy two row repeat, so once it clicks, you can make one for every bed, couch, and baby on your list.
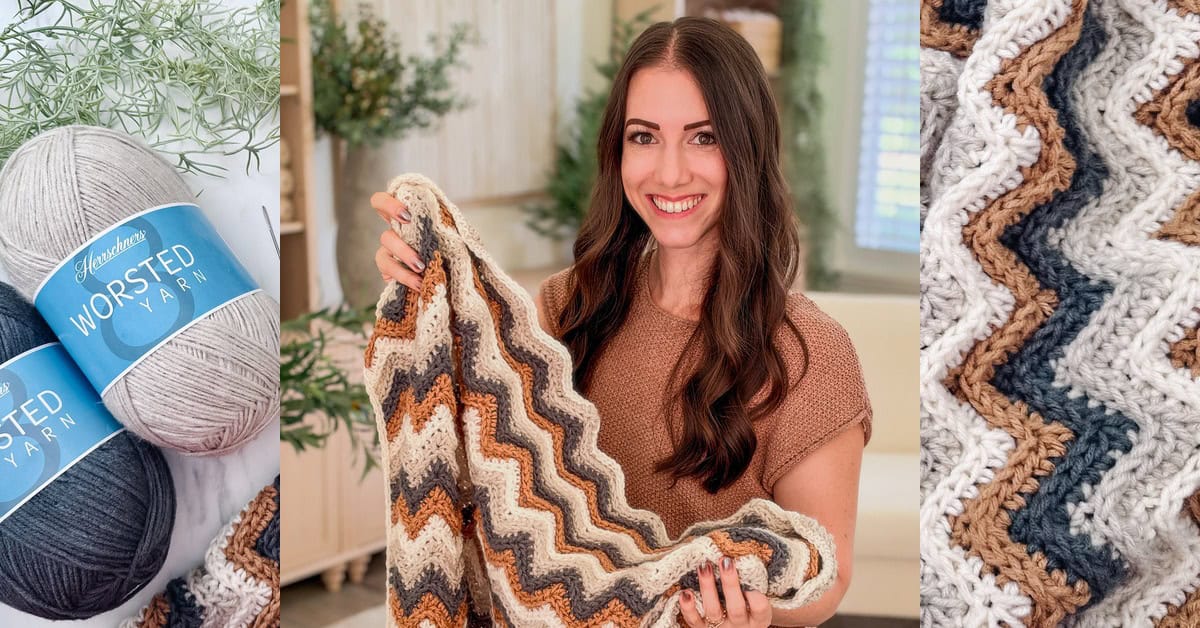
I’ve been waiting to share this one. The Ripple Crochet Blanket is part of my baby sister Kirsten’s very first set of patterns, and I couldn’t be prouder of her. She designed it and crocheted it.
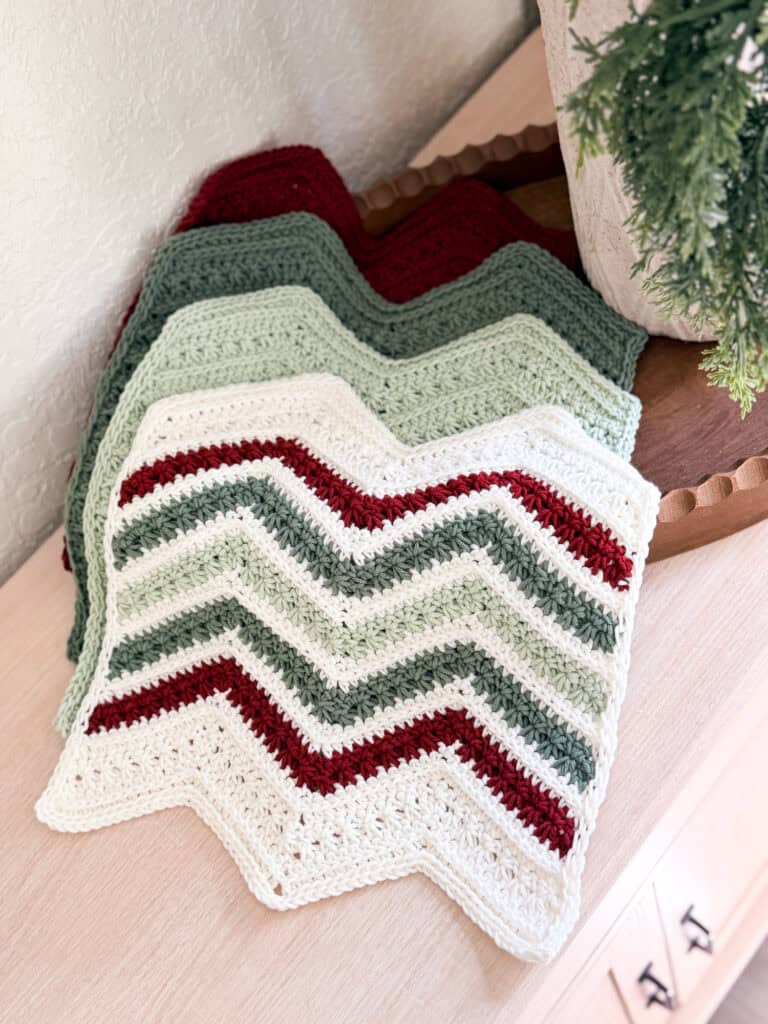
Kirsten has been part of Briana K Designs for a while now, mostly behind the scenes and sometimes in front of the camera. She has a real gift for taking classic stitches and giving them a refined, modern twist, and this ripple is the perfect example. She also designed the matching Ripple Crochet Washcloth, and both of its sizes are free, so if you’d like to learn the stitch on something small before you commit to a blanket, start there.
Every pattern on this blog goes through the same professional tech editing and testing, so you get the same clear instructions you’re used to. I hope you love Kirsten’s ripple as much as I do.
Disclosure: This post contains affiliate links. Please read my disclosure for more info.
Before You Hook: Ripple Crochet Blanket Details
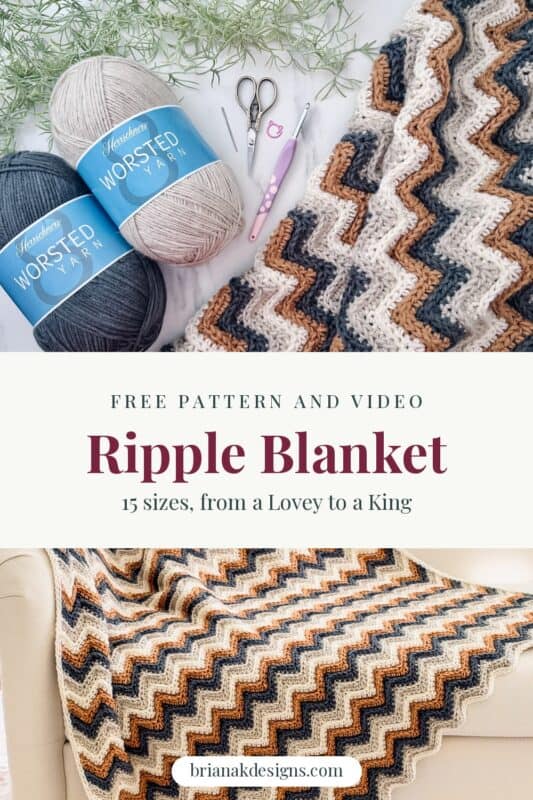
🧶 Yarn Used: Herrschners Worsted 8 (100% Acrylic, 489yds/226g)
⚖️ Yarn Weight: #4 Worsted Weight
🧵 Featured Stitch: Ripple Stitch
🪝 Hook Size: US I (5.5mm) Crochet Hook, or hook to obtain gauge
📏 Sizes: 15 sizes, Lovey to King. The Small Throw is free below, and all 15 sizes are in the PDF.
🩷🩷🤍🤍 Difficulty level: Easy
🕐 Approx. Crochet Time: About 35 to 50 hours for the Small Throw, plus time to weave in ends
🏷️ Project Type: A textured striped ripple blanket that’s easy to learn and easy to size up, from baby blankets to bed sizes.
Save for Later • Get a Summary • Pick Up Where You Left Off
Why You’ll Love This Ripple Blanket
The Ripple Crochet Blanket looks impressive, but it’s built on two simple rows.
- The same two rows, every size. Only your starting chain and row count change.
- Fifteen sizes. Lovey, baby, and stroller sizes, throws, and every bed up to King. The Small Throw is free here.
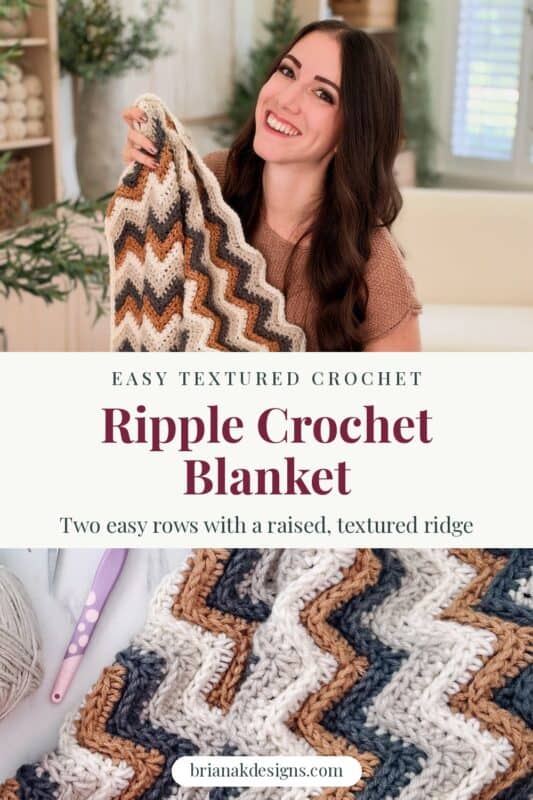
- Real texture. Every wrong-side row goes into the third loop, so a raised ridge runs along every zigzag.
- Stripes made simple. The color changes every two rows, and a full guide below shows when to carry your yarn and when to cut.
- Straight sides, crisp points. A stacked single crochet starts every right-side row, and one round of clean single crochet finishes the edge.
- Help when you need it. A video tutorial is available, and the pattern is in the Briana K app, where you can check off every row.
Ripple Blanket Supplies
Yarn
Herrschners Worsted 8: 100% Acrylic, 489yds/226g, #4 Worsted Weight
Colors shown: Aran, Dark Grey, Pecan, and Sleet
Yarn Quantities
Small Throw: 4,290 yds total
Each color: about 1,073 yds, or 3 balls of Herrschners Worsted 8
The PDF has yardage for all 15 sizes.
Crochet Hook
US I (5.5mm) Crochet Hook, or hook to obtain gauge
Notions
Scissors
Yarn Needle
Removable Stitch Marker
Measuring Tape
Blocking Mats (optional)
Blocking Pins (optional)
Be sure to check out the full pattern tips below
Yarn Substitutions
Any smooth worsted weight acrylic will work for this blanket. These are all good swaps:
- Brava Worsted: 100% Premium Acrylic, 218yds/100g
- Mary Maxim Maximum Value: 100% Acrylic, 474yds/227g
- Bernat Super Value: 100% Acrylic, 426yds/197g
- Big Twist Value: 100% Acrylic, 380yds/170g
Skein sizes vary a lot between these, so count by yards, not balls.
Yarn Amounts
The free Small Throw takes about 4,290 yds total, used evenly across four colors. That’s about 1,073 yds of each color, or 3 balls of each in Herrschners Worsted 8.
The printable PDF has the yardage for all fifteen sizes, from Lovey to King.
If you’re using a yarn with a different yardage, the Yarn Amount Calculator works out how many balls you need, no login needed.
Skill Level
Easy. If you can work a single crochet and a half double crochet, you’re ready. Decreases and the third loop are new for many people, and both are explained below and shown in the video. Crochet Skill Levels Explained walks through every level if you’re not sure where you land.
Ripple Crochet Blanket Size
The free pattern below is for the Small Throw, 53″ x 60″. Width is measured across the center, and length is measured from point to point.
The printable PDF has all fifteen sizes, from Lovey to King, with the full size chart, starting chains, and row counts. Not sure which size you need? The Free Blanket Size Calculator helps you pick.
Crochet Time
Plan on about 35 to 50 hours for the Small Throw, plus time to weave in your ends. Because the color changes every two rows, there are a lot of tails. Your own speed makes a big difference on a project this size, so try the Crochet Time Estimator for an estimate based on how you crochet. It asks for a free account.
Abbreviations
- ch: chain
- hdc: half double crochet
- hdc3tog: half double crochet 3 together
- Rnd: round
- RS/WS: right side/wrong side
- sc: single crochet
- sc3tog: single crochet 3 together
- sl st: slip stitch
- st(s): stitch(es)
- Stsc: stacked single crochet
- yo: yarn over
This pattern uses standard US terminology.
Special Stitches
Stacked Single Crochet (Stsc): Insert your hook into the first stitch, yarn over, and pull up a loop. Yarn over and pull through both loops on the hook. This will look like a single crochet, but you’re not done yet. Insert your hook into the vertical bar below, yarn over, and pull up a loop. Yarn over and pull through both loops on the hook.
hdc3tog: Yo, [insert hook into next st, yo and pull up a loop] 3 times, yo and pull through all 5 loops on hook.
sc3tog: [Insert hook into next st, yo and pull up a loop] 3 times, yo and pull through all 4 loops on hook.
Third Loop: The third loop sits on the back of an hdc, behind the top two loops. Once you turn your work to start a WS row, that third loop is facing you. Tip the top of your work away from you, and you’ll see it as a horizontal bar. Every WS row in this pattern is worked into it, which gives the ripple its texture.
Clean Sc: Ch 1, sc in the first st. *Insert your hook into the left bar of the sc st, then insert into the next row edge space. Yo and pull up a loop, then pull through the first loop on the hook. Yo and pull through the remaining two loops on the hook. Repeat from * around. The full photo tutorial is in How to Get a Clean, Straight Edge on Your Crochet Projects.
Gauge
16 sts and 10 rows in Ripple Stitch = 4″ x 4″, unblocked.
Gauge isn’t critical here. Nothing about a blanket has to fit a body, so if you come out a little tighter or looser, you’ll simply get a slightly smaller or larger blanket. Check it anyway if you want to land close to the finished sizes, so your yardage estimate holds.
Tips
How to Crochet a Gauge Swatch
- Working a gauge swatch will let you know whether you’ll have the correct sizing for this pattern. It will also help you practice the stitches used in this project and improve your stitch work for a flawless look.
- Are you struggling to match the gauge? Check out the blog post What is Crochet Gauge and How to Fix It for Success.
Important Pattern Notes
How It’s Made
The blanket is one piece, worked flat in rows from the bottom edge up. The Ripple Stitch is a two-row repeat. The right side row is half double crochet, with increases that build the peaks and decreases that dip into the valleys. The wrong side row is single crochet worked into the third loop, which pushes a raised ridge up along every zigzag.
In the pictured blanket, the color changes every two rows, so four colors make an eight-row color repeat. One round of clean single crochet around the outside finishes it. There’s no shaping anywhere. If you’d like to practice the stitch first, the Ripple Stitch tutorial walks through a small swatch row by row.
Choosing Your Ripple Blanket Colors
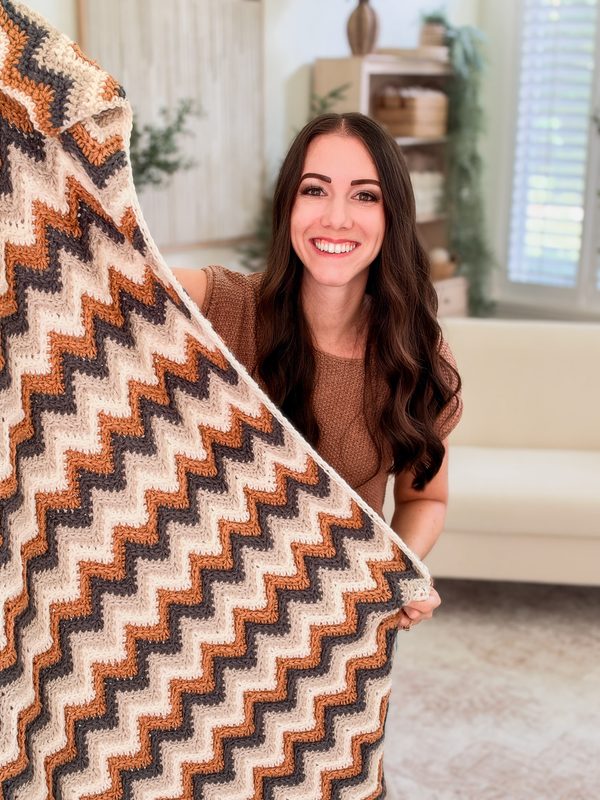
The pictured blanket uses four colors of Herrschners Worsted 8: Aran, Dark Grey, Pecan, and Sleet. Mixing a light neutral, a deep dark, and a warm accent is what makes every zigzag stand out.
Any colors you love will work. A few things that help as you plan:
- Four colors give you the eight-row stripe in the photos. Each color shows up for two rows, then waits while the other three take their turn.
- Three colors or two colors work just as well. They also change how you handle your yarn, which the next section covers.
- Contrast shows off the texture. The raised ridge catches the light, so it stands out more when the colors next to each other are clearly different.
- One color is lovely too. Without stripes, the ridged texture becomes the whole show.
If you’d like more help with color in general, Tips for Successful Colorwork in Crochet is a good place to start. The Briana K app also has a color plotter, so you can try out your colors before you buy the yarn.
How to Change Colors in a Ripple Blanket
Read this before you start, because it decides how you handle your yarn on every row.
Every row ends at the opposite edge from where it started. That means a color is only sitting where you need it again if it has waited an even number of rows. That rule tells you whether you can carry it or have to cut it.
- Four colors, two rows each: each color waits six rows. That’s even, so the yarn is at the right edge, but six rows is too long to carry neatly. Fasten off after every second row and join the next color at the beginning of the next row. That’s how the pictured blanket was made.
- Four colors, one row each: each color waits three rows, which is odd, so it’s stranded at the wrong edge every time. Fasten off at the end of each row, then join the next color at the beginning of the next row.
- Three colors, one row each: each color waits two rows, then comes back to the right edge so you can carry it up the side.
- Two colors, two rows each: each color waits two rows, so you can carry it up the side.
Carrying your yarn up the side
To carry a color, drop it at the edge rather than cutting it, and work the first stitch of each row over the waiting strand to trap it. Carry no more than about four rows. Past that, the float gets long and loose along the edge, and you’re better off fastening off and joining again.
Fastening off and joining a new color
Cut the old color, leaving a 6″ tail, then join the new color with a sl st in the first st and begin the row. Leave a 6″ tail at the join too.
If you’re carrying instead of cutting, change color on the last stitch of the row. Work the final stitch up to its last yarn over, then yarn over with the new color and pull through all the loops on the hook.
Taming all those tails
You’ll have a lot of tails on a four-color blanket. Weave them in along the wrong side as you go rather than saving them all for the end, and keep them within the outer stitch or two so the border covers them.
Getting Straight Edges on a Ripple Blanket
Ripples are known for wavy sides, and this pattern keeps them straight in two ways. Every right side row starts with a stacked single crochet, which gives you a first stitch the same height as a half double crochet without the gap a turning chain leaves. Then the clean single crochet border runs right into the ripple, so the zigzag stays crisp along the top and bottom while the sides stay smooth.
Along the sides, work roughly one clean sc in the end of each row. If that’s too many and your edge starts to ruffle, skip a row end every few rows. Adjust as you go until you get the straight edge you want.
Ripple vs Chevron: What’s the Difference?
Crocheters use both words for the same family of zigzag stitches, and plenty of patterns call the same stitch a ripple in one place and a chevron in another. When people do draw a line, chevron usually means sharp, pointed V shapes, and ripple means softer, rounded waves.
Kirsten’s ripple has the crisp points of a chevron, but the raised third loop ridge on every row softens it, so the finished blanket looks like a classic ripple. If you love a sharper chevron, the Petal Loop Chevron Blanket is another textured take on the same idea.
Blocking and Caring for an Acrylic Ripple Blanket
Blocking
Acrylic holds its shape well, so a light block is all this needs. It relaxes the fabric, evens out the stitches, and opens up the points along the ripple edges. Lay the blanket flat on blocking mats and pin it to shape with blocking pins, pinning each point along the top and bottom so the zigzag stays defined.
Mist it evenly with a spray bottle until it’s damp but not soaked, pat it smooth, and let it dry completely before you unpin. For a wet block instead, soak it in cool water with a little wool wash, press the water out in towels without wringing, and pin it the same way.
If you’d rather steam it, hold a fabric steamer a few inches above the surface and let the steam do the work. Don’t press the steamer onto acrylic, and don’t let an iron touch it. Too much direct heat will kill the fibers, permanently flatten the texture, and leave the fabric limp. Blocking relaxes the length a little, so expect the finished blanket to come out slightly longer than when you measured it off the hook. For more on each method, see How to Block Crochet.
Care and storage
Machine wash cold or warm on a gentle cycle and tumble dry low. Acrylic is hard-wearing, and this blanket is meant to be used, so it can go in with the regular wash. Skip fabric softener, which coats acrylic fibers and, over time, leaves the blanket looking dull and feeling slick rather than soft.
Wash a big blanket on its own, since crowding the machine is what stretches a blanket out of shape. Keep the dryer on low, because high heat will ruin it, and lay it flat to finish while it’s still barely damp. Store it folded or rolled rather than hung, out of direct sun so the darker colors don’t fade. If it pills with use, a fabric shaver makes it look new again.
Styling Your Ripple Blanket
A striped ripple blanket is the kind of piece that makes a room feel finished, whether it’s folded at the foot of a bed or tossed over a chair.
Drape it over a chair or sofa arm
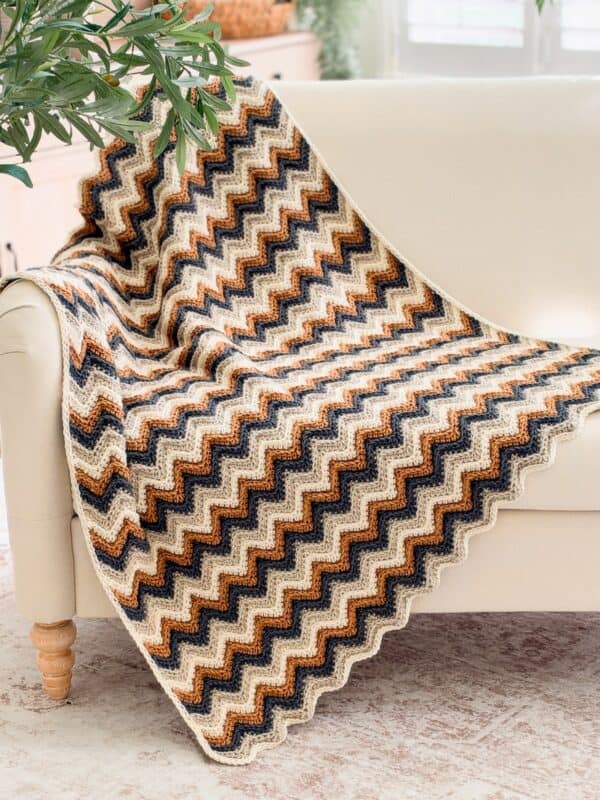
The pictured blanket lives on a cream armchair, where the zigzag shows off from every angle.
Fold it at the foot of a bed
Bed sizes from Twin to King look lovely folded in thirds across the foot of the bed.
Make a matching set
Use the same stitch for the free Ripple Crochet Washcloth and pair them as a gift for a new baby or a new home.
Ripple Crochet Blanket FAQs
Is the Ripple Crochet Blanket pattern free?
The Small Throw size (53″ x 60″) is free right here on the blog, with the full written pattern below. All fifteen sizes, from Lovey to King, are in the printable PDF along with the full size chart, the stitch chart, and the interactive version in the Briana K app.
How many chains do I need for a ripple blanket?
It depends on the size you’re making. The free Small Throw starts with a chain of 211. The printable PDF has the starting chain and row count for all fifteen sizes, so you don’t have to do any math.
Is a ripple blanket good for beginners?
Yes, if you’re comfortable with single crochet and half double crochet. The pattern is only two rows repeated, and the two new pieces, the decreases and the third loop, are shown step by step in the video. If you’d like to try it on something smaller first, the free Ripple Crochet Washcloth uses the exact same stitch.
How much yarn do I need for a ripple blanket?
The free Small Throw takes about 4,290 yards total, or about 1,073 yards of each of the four colors. The printable PDF has the yardage for all fifteen sizes.
Can I use a different hook or yarn?
Yes. Any smooth worsted weight yarn will work, and the substitutes above are all good choices. Gauge isn’t critical, so a different hook will just give you a slightly smaller or larger blanket. If you want to land close to the listed sizes, check your gauge first.
Ripple Crochet Blanket Video Tutorial
The video walks through the whole blanket step by step, from the first chain to the color changes and the border. Watch along as you work, or use it to check the third loop and the decreases. Watch it on YouTube.
Subscribe, Like & Watch on YouTube
Get All 15 Sizes in the Printable PDF and the Briana K App
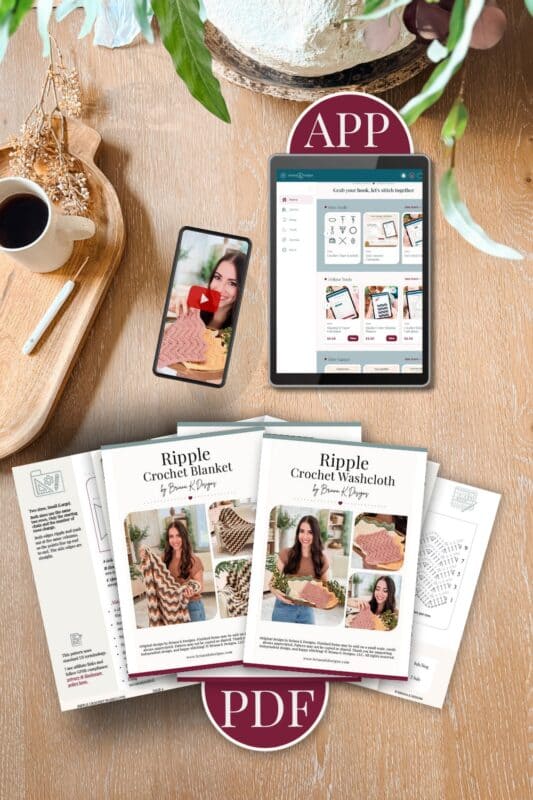
The printable PDF includes all fifteen blanket sizes, from Lovey to King, with the starting chain, row count, and yardage for each. It also comes with the matching Ripple Crochet Washcloth in two sizes, the stitch chart and schematic, and the interactive version in the Briana K app, where you can check off every row, never lose your place, and plan your colors before you buy the yarn.
Relax & Crochet with NO Ads
Upgrade to the Printable PDF
Beautifully formatted to print and take with you anywhere. The paid pattern includes:
Add your email in the box below to unlock this pattern to view on the blog for free. I’m thrilled to share this amazing crochet pattern with you! Please don’t copy, paste, or distribute this pattern. Prefer an ad-free experience? Purchase a digital PDF file for a small fee from one of my online stores. I appreciate your support and readership. You are why I can keep doing what I love and sharing it with others. Thank you from the bottom of my heart.
Printable Version
This pattern is free to read here on the blog. The ad-free printable PDF is available in the Briana K Designs shop on Etsy and Ravelry.
brianakdesigns.com
Ripple Crochet Blanket Written Pattern (Small Throw, 53″ x 60″)
More Crochet Blanket Patterns You’ll Love
When you’re ready for your next cozy blanket, these are a great mix of stitches to try.
🥂 Cheers, and happy crocheting!
Hook down? Not so fast…
I’d Love to See Yours!
You made something beautiful. Here’s how to keep it, show it off, and inspire the next maker.
Get the Ripple Crochet Blanket Pattern
- Etsy: Ripple Blanket and Washcloth Set on Etsy
- Ravelry: Ripple Blanket and Washcloth Set on Ravelry
- App: The Briana K app
- YouTube: Ripple Crochet Blanket video tutorial
What should you make next?
Keep the hook movingReaders Are Loving
 Wheat Stitch Acorns
 Wheat Stitch Reindeer
 Petal Loop Stocking
 Chevron Washcloth